

This first part of the walkthrough for Lost Lands 8 – Sand Captivity is following the story of Susan again. It offers you all the clues you need to advance in the story.
I’ll provide you with all the puzzle solutions with videos and how to do them from beginning to end. They might prove to be tricky, so make sure you follow this walkthrough closely.
You can unlock achievements by solving puzzles fast, so if you get yourself familiar with them beforehand, you might have a chance to unlock those achievements.
If you don’t find what you’re looking for here, you can check out Lost Lands 8 Sand Captivity walkthrough part 2. This article was getting too long for my liking.
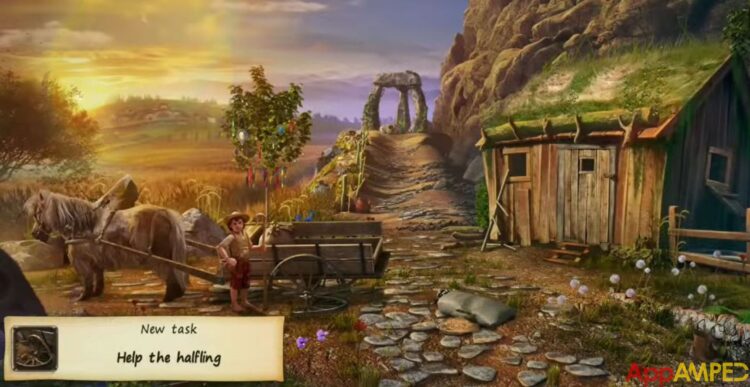
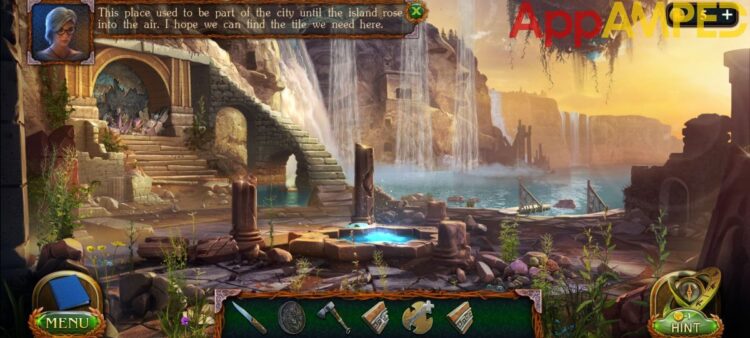
Lost Lands 8 First Task – Find Maaron
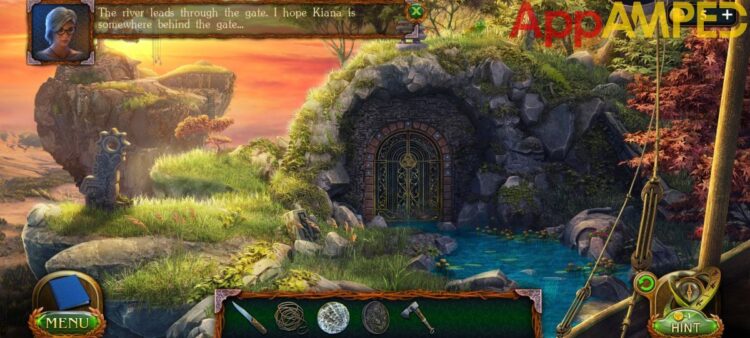
“We will find a cure faster together with Maaron. I hope he’s at home.”
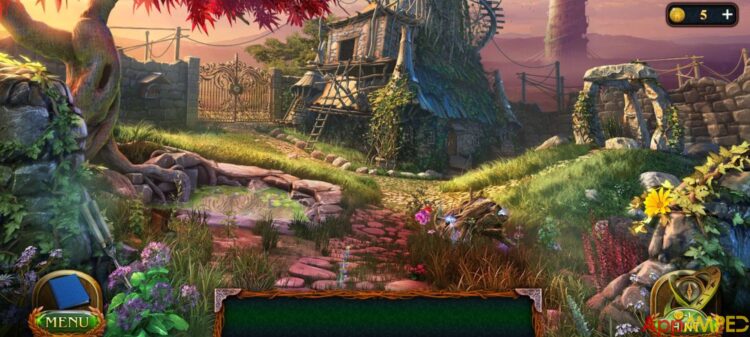
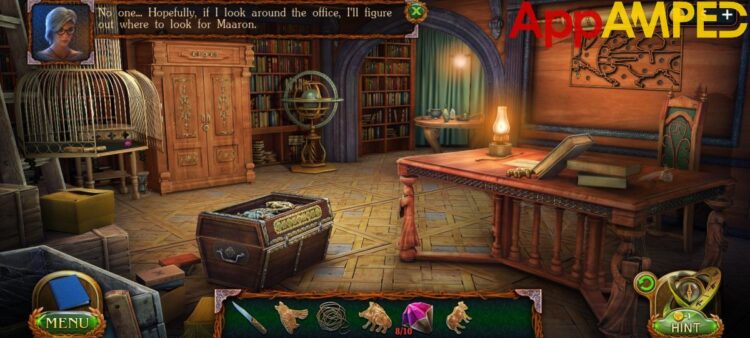
- Start gathering up items you can find in this first scene:
- Gardening scissors on the rock to your left.
- A boot in the grass next to it (collectible 1/8)
- Click on the yellow butterfly on your right (morphing collectible 1/30)
- In the corner of the house there’s a pot covered by vines, use the gardening scissors to cut through.
- Tap the pot and it will tip over to reveal a key under it.
- Use the key to open the house door and enter it.
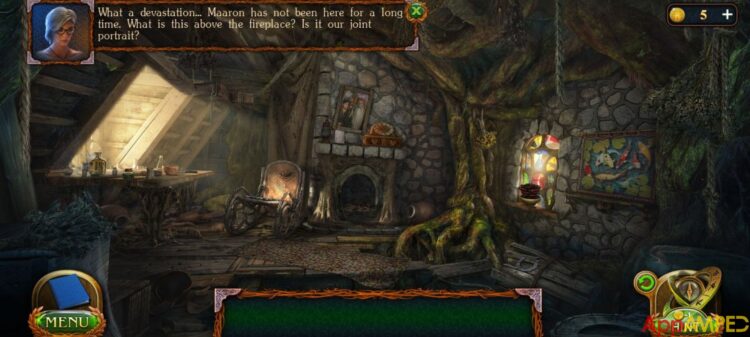
“What a devastation… Maaron has not been here for a long time. What is this above the fireplace? Is it our joint portrait?”
- Clicking on the portrait you’ll be able to read a note next to it.
- It says you need to find a rune.
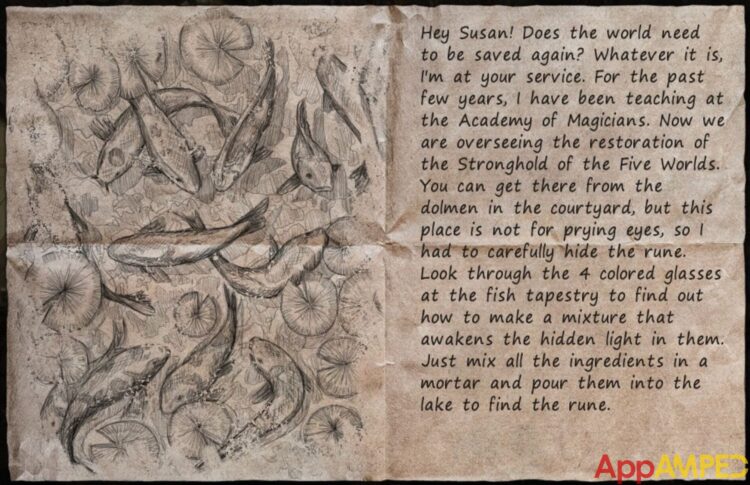
“Look through the 4 colored glasses at the fish tapestry to find out how to make a mixture that awakens the hidden light in them. Just mix all the ingredients in a mortar and pour them into the lake to find the rune.”
- From behind the note you can pick up the little gear piece (1/2)
- From the table on the left, take the knife.
- Check the rocking chair, and move the seat cover to get the little owl.
- Click on the fireplace and use the tool to look through the coals to get a coin with a wire.
- Click it and get the wire from it. You’ll get your first Kyoll (1/6)
- Tap the carpet on the floor to move it to the side. Use the wire in that little hole next to the lock.
- You’ll find a small item “Detail”
- On the bundle of wood next to the tree, there’s a horseshoe (collectible 1/7)
- And on your far right, it’s what looks like a piece of rope (morphing collectible 2/30).
- Tap on the window and move the incense pot to the side. You’ll find a Kyoll (2/6)
- Tap on the stained glass and it will shatter giving you colored glass.
- Now you can check out the fish tapestry through the colored glass. Click on each piece.
- The blue one says “I need to find the pearl.”
- The yellow one tells you “It looks like poppy seeds.”
- And the red one says “I need a snakeskin.”
- Go outside to the tree trunk in the center with flowers around and gather the 2 poppy seed bulbs.
- Next to the gate, there’s a small box on the wall. Use the item named Detail to open it and read the letter inside.
- There’s another gear piece under it (2/2) and a star.
- Go to the gate next to the house and use the knife to pry open the keyhole.
- Use the two gear pieces on the mechanical part of the gate.
- Two of the plates should move to the left and two to the right, like in this video:
- Now the gate is open you can talk with the halfling.
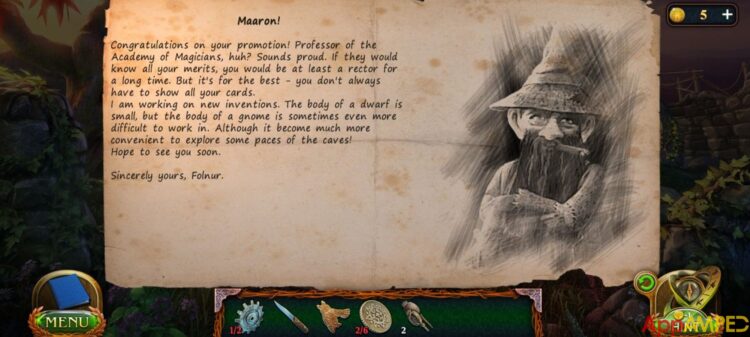
- Help him out with the wheel of his cart after he tells you where the Academy of Magicians is.
- Collect the collectible boot to the right under the fence (2/8)
- Click the bag of grain and take some grain into your inventory.
- Tap the piece of wood on the coop, and collect a few steps.
- Look into the tree filled with ornaments, and use the knife to cut out another Kyoll hanging from the ribbon (3/6)
- And another Kyoll in the middle of all those decorations (4/6) and a little white pearl you can take.
- On the fence to the left, there’s a feather, but actually another morphing collectible (3/30)
- On the alley up, next to the bucket, use the knife to cut off some rope.
- Click the door of the coop and the lock to open the door to get to the chickens.
- Give them some grain, they will go outside so you can check it without worrying about them.
- You will find a wheel they were sitting on and a piece of collectible from a manuscript (1/10)
- Fix the cart with the new wheel and add the nut and the little wood piece, bang it with the rock to hold the wheel in place.
- Return to the house, and use the stairs to fix the ladder up the attic.
- Then use the rope to fix the stairs in place so you can go up and solve this hidden objects mini-game.
- After you find all items, you’ll get a needle and thread in your inventory.
- Use them to sew the grain bag that fell out of the halfling’s cart, and put it back into his cart.
- To repay your kindness he’ll give you a nice tile.
- Take the stick that is leaning on the chickens’ coop.
- After the halfling is gone you can see some rocks behind where he stood.
- Use the stick to move the big rock out of the way.
- There’s your snakeskin you’ve been looking for and a bottle with 2 Kyoll (6/6)
- Take the broken bottom of the bottle. You need it for the fish tapestry.
- Going inside and using the green glass on the fish tapestry it will say “Eggshell is one of the ingredients.”
- So go back to the chicken coop and take some eggshells from there.
- Now you can go back inside, to the table on the left, and prepare the mixture for the fish.
Fish Food Recipe:
- Poppy seeds
- Snakeskin
- Eggshell
- Pearl
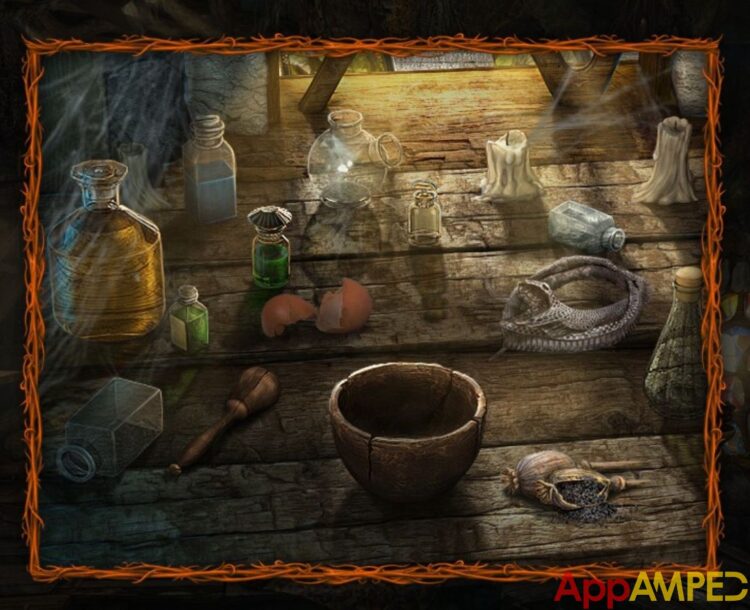
- First, put them all on the table, then in the bowl, then mix them together with the tool next to the bowl.
- Take the content of the bowl “Mixture of the hidden light” when it is done.
- Go to the pond outside with this and throw it in the water.
- It will tell you the chest can be hooked with something.
- Go to the bucket where the halfling was and take the hook from it.
- Attach the rope to the hook and go back to the pond.
- Throw this in the water so you can drag the chest out.
- Use the Star ornament on the lock of the chest.
- It will open up an area where you should put all your Kyolls.
- For this new puzzle, you opened you need to “Arrange the chips so that the chips in each column and row would not have the same colors or numbers.” Here’s how I did it:
Note: A complete walkthrough for this puzzle you can find in my article for Lost Lands 8 Chips Puzzle.
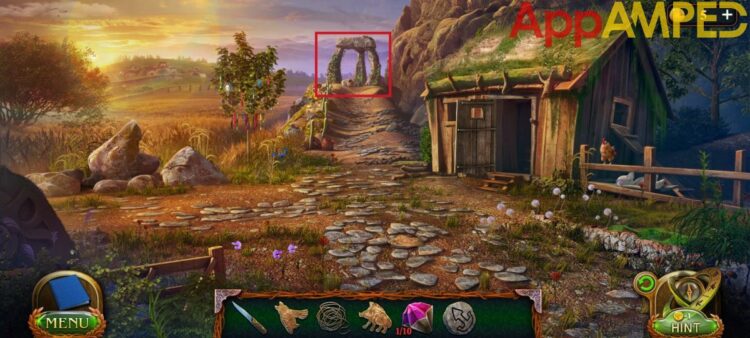
- This will open the chest and give you information about Stronghold of the Five Worlds, a boar, and a rune.
- Use the rune at the rock formation to the right.
- Go through the new portal that appears there.
Lost Lands 8 Sand Captivity Through the First Portal
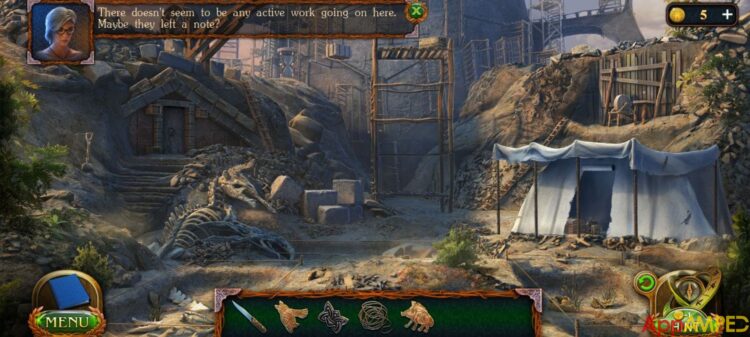
- Start looking for clues at the new location.
- On the hill in front of you, there’s an hourglass for your collection (1/8)
- Click the skeleton head on the left, remove the dirt from it, and take the little skull above.
- Shake the scaffolding and another tile will fall. You’ll need to fix it to get up there.
- Enter the tent. Another tile is on the table, and another manuscript (3/10)
- Now go to the door on the left. You can put the tiles in the right spots, and the skull in the middle so the door opens.
Go Through the Maze
Follow this video to see how to go through the maze so to make sure you don’t get lost, or read the instructions below.
- First, you take a Left.
- Then you take a Right and pick up the spear in the chamber you are.
- Exit once and take a Left.
- Reach with the spear to the Mask hanging on the wall.
- Exit twice to the start and take Right.
- Put the mask in the middle of the door and a new area of the maze will open up.
- Take a Left and click the torch on the right wall inside the new room.
- Once the wall in front opens up, go through and take a sword from inside.
- Go back Twice, where you started after opening the door, and make a Right.
- Put the sword in the statue’s hands.
- Another part of the maze will show behind the door.
- Clean the spiderweb and go through the Left door.
- Take the crystal on the right wall closest to you and go back.
- Go through the right door and put the crystal on the left wall, to light up the room.
- Now you can go through the door ahead, and you’ll find another forked road.
- Take a Left. Click the rock on top of the stone formation, and take the lever arm.
- Go back once and turn Right.
- Put the lever arm on your left inside that mechanical item so it opens up a set of steps.
- Go up the stairs to Exit the maze.
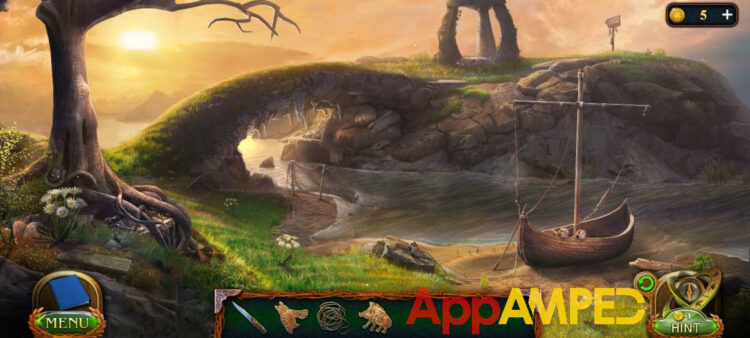
- At the base of the tree, there’s a horseshoe you can pick up for your collection, and in front of it, there’s a wooden plank (1/10).
- Check the roots, there’s a chest you’ll come back to later, but also another plank (2/10)
- By the rock in front there’s a plank of wood you’ll need (3/10)
- The net in the water has a gem you can take (1/10) and another plank (4/10)
- Another morphing object can be found under the stone bridge, one of the spikes.
- The troll under the bridge is holding two other planks (6/10)
- Go onto the other side of the bridge, right at the base there’s another plank (7/10)
- Click on the sign on the other side and take the plank from under the skeleton head (8/10)
- The boat has two more planks for you to collect (10/10)
- Now go back to the archaeological site.
- Use the planks to repair the scaffolding. This is a video to help you with the puzzle.
- Pick up the hacksaw from the toolbox on top of the scaffoldings.
- Go to the tent and cut the lock on the chest with the hacksaw.
- You’ll find a rune inside.
- Go back to Maaron house, the Rock formation on the hill is where you can put the rune.
- Now you can go through another portal that just opened, which will lead you to the Academy and you can find Maaron here.
Lost Lands 8 Sand Captivity Through the Second Portal
- A horseshoe for your collection is right next to the centerpiece decoration, at the base.
- Another manuscript piece is at the announcement post on the right.
- Next to it, there’s a small building. Next to the door, there’s the post box in which you can look inside. The note talks about a portal tree.
- Next to the note, there’s another gem (2/10).
- You can now go inside the Academy.
- Above the statue heads there’s an hourglass that you can add to your collection.
- And a morphing object on one of the red flags, second from left to right.
- The wooden box to the right, has another gem inside, pry the gate open with that crowbar stuck there (3/10)
- Put the handle that sits next to the box back on it.
- Now enter the room next to it.
- One of the stacked books on the table to the right is a morphing object you can collect.
- And there’s a boot to add to your collectibles next to that table.
- Tap on the table in the middle of the room.
- Move the piles of books to find another gem in that box under them (4/10)
- And crayons in the box under the pile of books above the skull (1/3)
- You can go back to the main entrance hall, where the statues are and go down the hallway ahead.
- Right ahead at the end of the hallway, there’s a knight suit.
- Remove his helmet and you’ll find a gem, and use the knife to take out another gem from its shield (6/10)
- Take his halberd as well and go back to the main area.
- Use the halberd on the piece of cloth above the statues and read the sign it reveals.
- And the gem under the sign (7/10)
- Now you can go down the long hallway and check out door number 3.
- There’s a piece of crayons under the door number (2/3)
- Now I’m going to need you to press the compass on the right lower corner of your screen and jump right to the Archaeological site – in the Plains menu.
- Above the tent there’s a sharpener stone, click on it because next to it you can find more crayons (3/3)
- Now compass again – Academy of Magicians, main outside area, and go to the horse stable.
- Take your crayons and draw the signs again on the saddle of the horse’s back.
- Take the gem out (8/10), the bull piece, and the cloth with the key drawing.
- Go inside the academy and to the locked door next to the hallway entrance.
- Use the cloth of the key drawing to figure out how to unlock the door.
- You can leave the third part as it is. There’s no change to it.
- Once you open the door, you’ll find a hidden object mini-game inside.
- Follow the video below to find all the objects inside the room.
- You can get the key to Maaron’s door, no. 3
- Now go to the hallway with the rooms and fit the key in the no. 3 door and open it.
- You can notice in the bird cage to your left, another gem you’ll need (9/10) and a raven figurine.
- With this in mind check out the chest in the middle of the room.
- Move the swords and spin the crystals around to make the same model as on the drawing. Follow this video to see how I did it.
Note: For a complete walkthrough you can check my article for Lost Lands 8 Swords puzzle here.
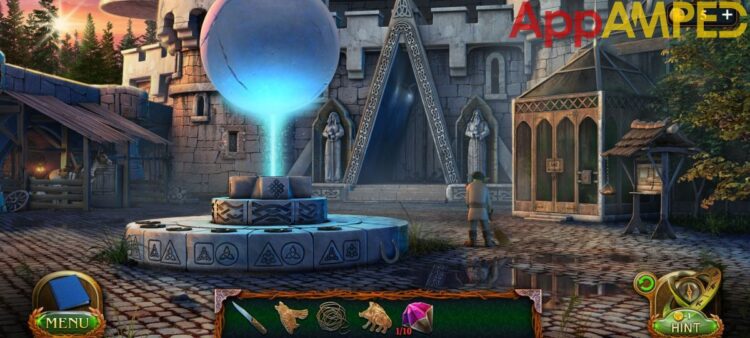
- Now that the chest is open, you need to put the pink gems on the round container, it’ll open to reveal a sphere.
- Take it and you’ll follow a projection of Maaron all the way to the library.
- You’ll need to enter the same wall he did by drawing the pattern with the wand you’ll find on his desk.
- Take the wand from his room and go to the library. (You won’t be able to take the wand before this happens)
- Form the pattern he did, exactly like in the video below.
- Here you’ll find Maaron and he will tell you how to help Jim, Susan’s son.
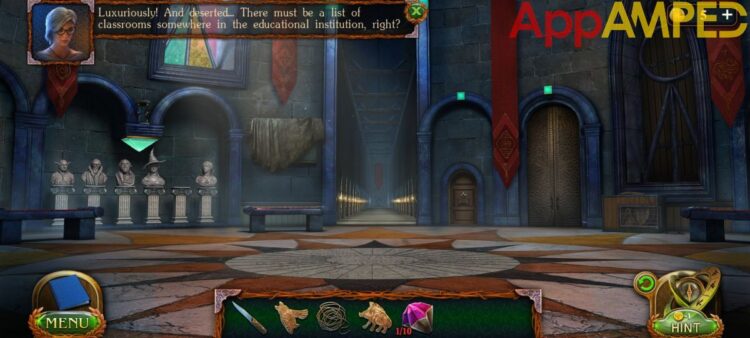
- Enter the hallway next to the magic wall.
- Check out the scroll at the entrance to know how to move around the library.
- Move forward till you find the twirly star sign above that section, then check the scroll to the left.
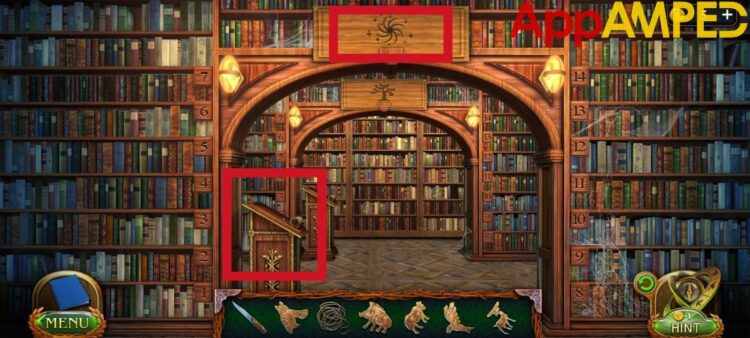
- Above the scroll, there’s a hairpin you can take.
- You’re looking for the Dolmen Runes of the Lost Lands that’s on row 12.
- Click on that row and you can find information about how to make a rune for a Dolmen,
- Now you can move away from the library.
- Go outside of the Academy to the locked drawer next to the horse.
- Pick the lock with the hairpin.
- Take the pickaxe and the statue bust.
- Go back inside to put the bust back in its place next to the other statues in the entrance hallway.
- Arrange the statues in the correct order as shown below.
- Click on the light that moves down on the statues and open that panel.
- Now you need to move all the way back to Maaron’s house and take the portal right next to it that takes you to the archeology site.
- Go through the maze and to the troll under the bridge.
- Use the pickaxe to take a piece of stone from him.
- Take the stone to the archaeology site and use the grindstone to sharpen the troll stone.
- Go back to the Academy of Magicians and take the paper and pencil from the announcement board in the yard at the entrance.
- Go back to the troll bridge with this and copy the rune from the rock on the other side of the bridge, with your paper and pencil.
- Take this rune drawing and go to the grindstone to put it over the smooth troll stone.
- Go to the Academy and put the drop in the lock to the greenhouse in the yard.
- Solve the puzzle as I did below.
Note: You can check the step-by-step tutorial on how to solve the butterfly puzzle in my article Lost Lands 8 Butterfly puzzle walkthrough.
- Find out what is killing the plants in the greenhouse.
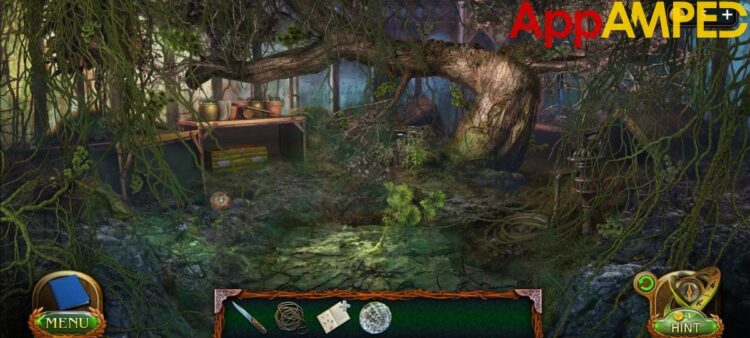
- There’s a boot right at the base of the tree trunk for your collection.
- Check the table on the left. There’s a paper with information about the flowers, that’s another manuscript for your collection.
- Another morphing object is the pot right next to the table.
- Click on the plant right in the middle. This is where the source of infection is starting.
- Take the little leaf green from there.
- Go back outside and take the gloves from the announcement board.
- Use them to take out the infected branches. You need to find 15 more that look the same.
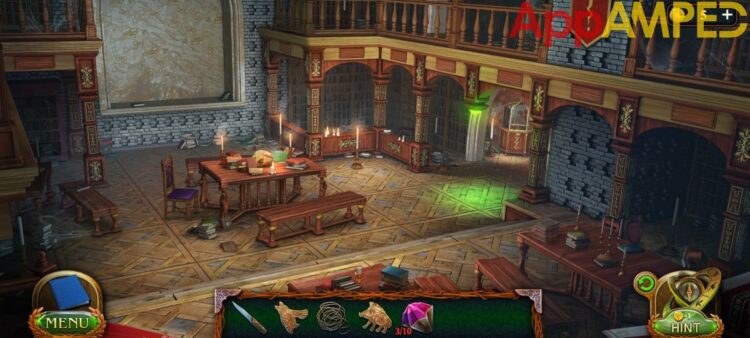
- After you find all these plants, take the one you have to Maaron’s office.
- There’s a microscope, or what one looks like in that fantasy land, on the table where he does his experiments.
- Put the plan you have on the device to the left.
- There are 4 magnifying glasses. Move the first, 3rd, and 4th to zoom in on the plant.
- The bug is what is causing the infection.
- Go to the library to find out more about that bug.
- Go all the way to the back to the Department of Biology.
- Check the scroll to find the row of books you need to look at. It’s 4, Garden Pests of the Lost Lands.
- Click on row 4 and you’ll find the information you need about the Crack-winged aphid and how to make the right insecticide for them.
- Go to Maaron’s garden.
- Move pieces of the tree trunk in the middle of the road to find mystical mushrooms. (9/10) and a piece of leaf.
- The last mushroom is under the rock near the trunk. (10/10)
- Go inside the house to look at the red hot petals in the window. But you need tongs to grab them.
- Go back to the Archaeology site, check the toolbox on top of the scaffolding, and get the tongs.
- From inside the tent, there’s a bottle of alcohol you can take.
- Now go back and take 2 volcanic petals from inside Maaron’s house.
- Go back to the Academy, in the greenhouse, and open the chest from under the table with the two petals you found.
- This is how to solve the puzzle inside.
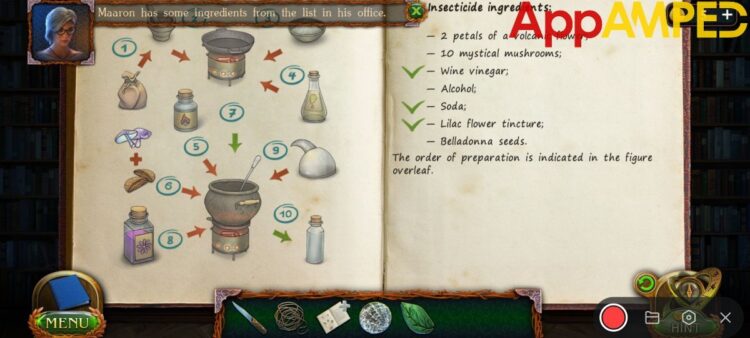
- You can look at the content of the chest, and see that Belladonna seeds are in spot no.2
- Take one bag of them and go back to Maaron’s office to cook up this insecticide.
- Putting all the ingredients into the recipe, until all are ticked, you’ll get the insecticide recipe.
- Put it on the table and follow the instructions in the correct order like in the video below.
- Go to the greenhouse with this insecticide and put it inside the sprayer.
- Use it around the greenhouse. Everything will heal instantly and you will be able to get a portal fruit from the tree.
- Go inside the Academy to the device you opened with a crowbar to your right and take the crowbar.
- Use it inside the greenhouse to open the grate on the ground.
- You’ll find a pommel in the water.
- Move the grass from the tree roots and you can find another pommel.
- Bring them to the statues at the entrance of the Academy and put them on their weapons.
- The red one on the girl’s sword, the blue one on the man’s staff.
- The stairs to the Academy will reveal a hidden spot under them, where you’ll find the last animal figurine (the bear figurine) and an Archaeologist set.
- Go inside Maaron’s home and open the door on the floor with the animal figurine you found.
- You’ll find an emblem inside.
- Go now to the Archaeology site and use the set to clean up the skeleton head.
- Take the dragon tooth and go with it to the grindstone to finish making the rune.
- Use the tooth to draw the pattern and the portal fruit to make it magical.
- Take the rune to the other side of the bridge to open a new portal.
- Before you go to the other side, move the boat, and you’ll find a bottle with a message in it and a key.
- Use the key on the chest in the boat, under the bench.
- Take the battle ax and use it on the roots around the chest at the base of the tree.
- Besides freeing the chest, the tree will also reveal a hollow part.
- You can take a green boat and some oars (paddles) for the boat.
- Use the boat on the chest you freed.
- Take a look at how I managed to solve the boat puzzle in the video below.
- You’ll find a sail inside.
- Use it on the boat and put the paddles inside.
- Tie the sail with the loosened ropes on the floor of the boat.
- Cut the boat free using the knife on the rope that is tied to the rock and sail away over to Fugo Island.
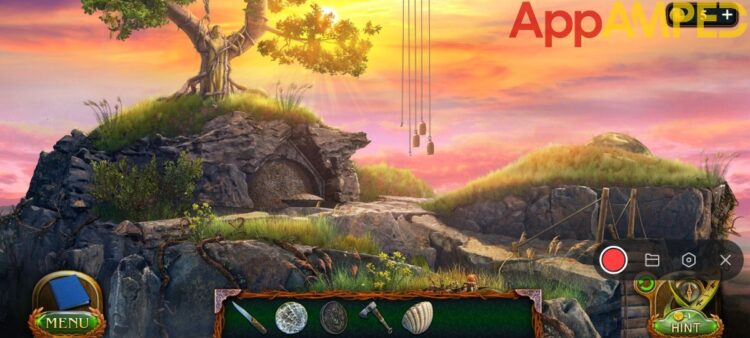
Lost Lands 8 Sand Captivity Through the Third Portal
- Right on top of the hill, there’s a collectible turtle.
- Click the water in front of the door and find all the shells. Here is where I found them.
- Go to the little tree with the berries and use the rope to pull some roots closer so you can go on the other floating island.
- A horseshoe for your collectibles a little to your left.
- And a morphing object on the left of the tree, a windchime.
- Cut the branch that is obscuring the sun with your battle ax.
- Now go back to the first part and use the branch to reach the shell on top of the hill that you couldn’t reach before.
- A bird figurine will also fall.
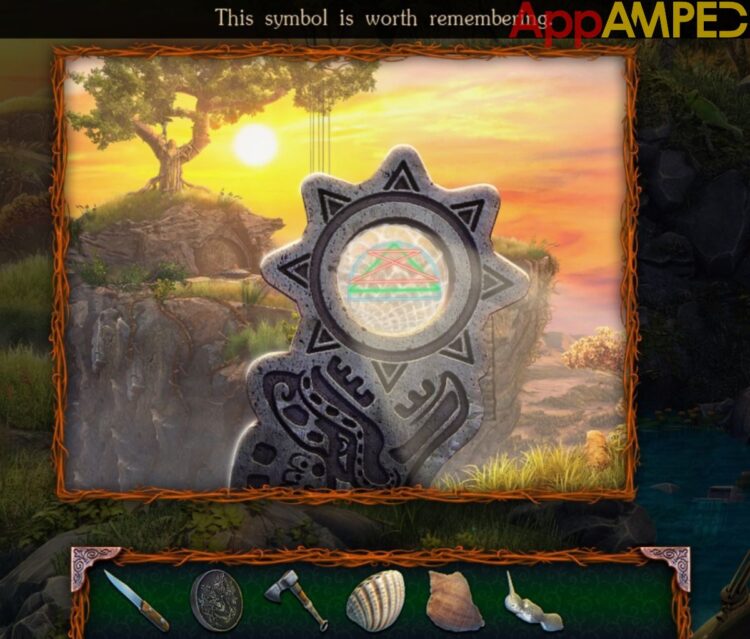
- In the sun statue decoration to the left, insert the scales and remember this symbol.
- Go back to the other island and insert the bird figurine in the backpack hidden on the left, after clearing the bush from it.
- Take the 3rd shell you need to open the door on the first island.
- Insert the three shells into the door lock.
- To solve the puzzle go back to your symbol if you need or follow this video.
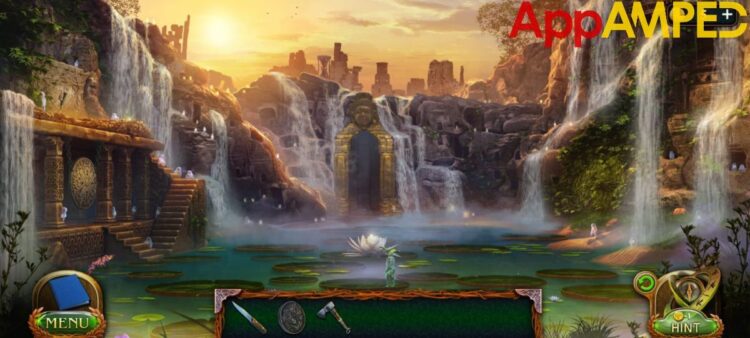
- You can now enter and find Kiana.
- You need to find a way of entering the temple.
- Click on the rocks above the gong.
- You can break it with the ax and get one tile for the well.
- Go to the Fugo island with the tree and check out the rock on the left.
- It’ll tell you you you need a shovel.
- Go back to the archaeology site and try getting the shovel.
- If you can’t take it you probably missed a step. Make sure you check the rock till it says you need a shovel.
- You’ll find another piece of tile and an amulet you can take.
- After you talk to the water creature you can take the stamens from the big waterlily on the water.
- Go with it to the turtle and feed them to it.
- You’ll get a ride to another part of the city where you might find the last tile.
- There’s a morphing object barrel right next to the stairs.
- And a pink turtle mixed with the stones next to the well.
- Go up the stairs to the ruins and take the tiara to the bottom right corner.
- Above the stairs and entrance, there’s a door you’ll need to open.
- Go back to the tree on the Fugo island, with the statue of a lady by clicking the bottom of the island that you can see in this area.
- Put the tiara on the statue’s head and take the staff.
- Use the staff on the door above the ruined entrance you saw earlier.
- You’ll find a wolf skull here and a new manuscript.
- Take the beater to the right and go back to the gong.
- After you beat the gong some statues will rise from the water.
- Take the book from one of them and the bells from another.
- Tap the other ones til they tell you that you need to find the correct position of their hands.
- Now go to the island with the tree and put the bells in the place where they were missing before.
- Right after the big shell will open and you can get the eagle skull.
- Go with the book you found inside the room where the ritual pedestal was missing a book.
- That’ll open the pedestal and give you a chest with a set of figures.
- Now you can move to the ruined entry and look through for the mini game.
- You need to find pairs for each item as I did in the video below.
- Now that you know how the statues should be placed, go to the water and position their hands right.
- Click the spot the beam of light is pointing at, to your right.
- Cut your way through with your knife.
- Find all the hidden objects that fit the shadows. You can see where everything was hidden in my video.
- You’ll get the missing tile from the well from the aquarium.
- Now you can go to the well with all the missing tiles and put them in their place.
- Each one has its own place, so try them out in different places till you get it right.
- Tap the well to go down the stairs that just popped out of the walls.
To be continued…
As it was getting a bit long I decided to split the walkthrough to avoid getting annoying for you. I will update you soon with the Lost Lands 8 Sand Captivity walkthrough part 2. Stay tuned and I’ll come back with all the clues you need to move forward in the game.

Aylin is a content creator and co-founder of App Amped. She was a huge Tomb Raider fan before moving on to more casual titles. She spent way too much time tending for her FarmVille farm as well as playing text-based browser games. Now she plays and writes about mobile games, creating in-depth walkthroughs and useful guides.
Is anyone else having a problem with getting the battle ax to cut the branch in the third portal? I have tried and tried and cannot get it to happen.
Have you found the bottle under the boat? It has a key you need to open up the chest in the boat. That’s where the battle ax is.
Great walkthrough! It really helped me navigate through the tricky parts of Lost Lands 8. Looking forward to part 2!
In case you missed the link to Part 2, here it is: https://www.appamped.com/lost-lands-8-sand-captivity-walkthrough-part-2/
Thank you for reading!
Thanks for the detailed walkthrough! I was really stuck on the first few puzzles, and your tips made all the difference. Can’t wait to see the next part!
Great walkthrough! The tips you provided for navigating the Sand Captivity puzzles were incredibly helpful. Looking forward to part 2!
Thank you for the detailed walkthrough! The tips on navigating the sand traps were super helpful. Can’t wait to see what’s next in Part 2!