

Adventure Escape Mysteries: Canine Cases 2 returns with Detective Nitro and the team for another round of high-stakes investigations and intricate brain-teasers.
In this guide, I provide a step-by-step walkthrough for every chapter of the game. From opening complex locks to solving the most difficult mini-games, my walkthrough is designed to help you progress through the story smoothly.
Canine Cases – Wild Escape Chapter 1 Walkthrough
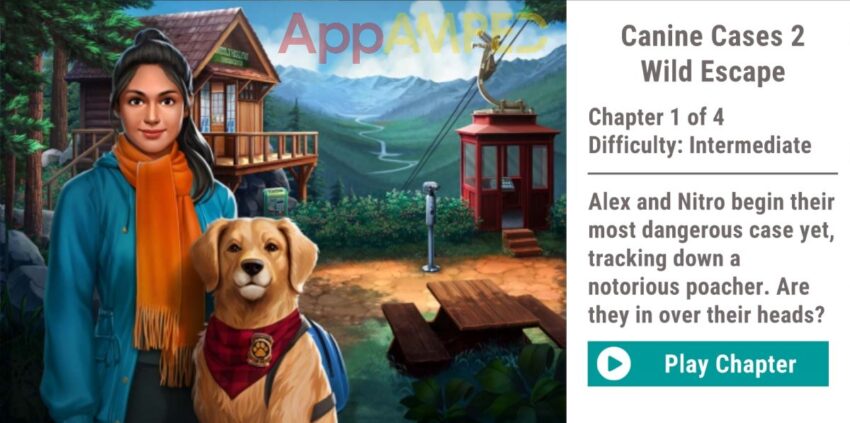
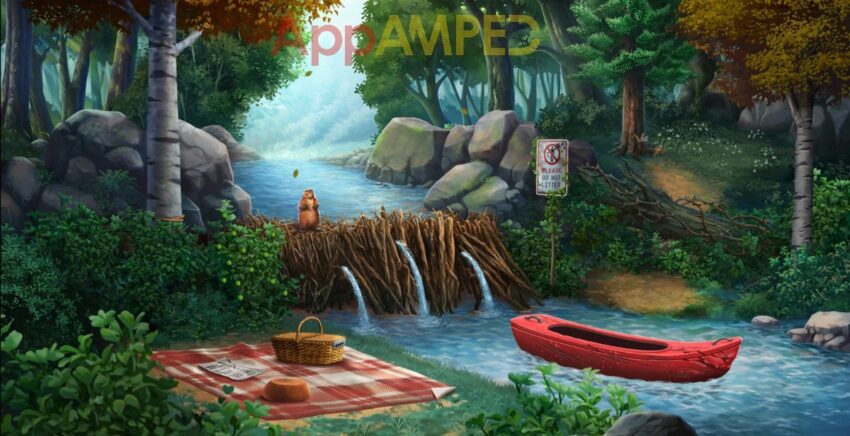
Alex and Nitro begin their most dangerous case yet, tracking down a notorious poacher. Are they in over their heads?

Take the key from the table and use them to unlock the red bag on the bike. Take the ID badge and remember the initials PCFR. Look at the token dispenser next to Patty and use the code 7237 to get a token.
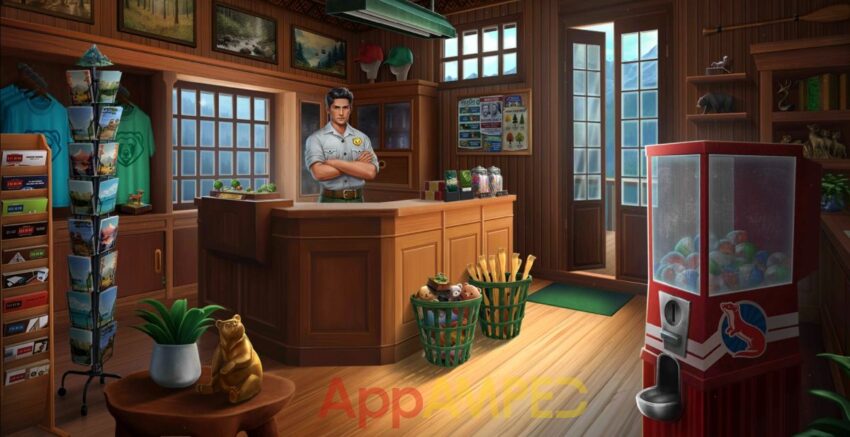
Use the token on the binoculars and look through. You now need to find the name of the location where you can see the smoke. Go inside the cabin and talk to the man at the counter.
Take the diorama from the bin with stuffed toys and back scratcher from the other bin. There’s another diorama under the green shirt, and one other on the shelf to the right.
One more behind the bear on the table. Use the back scratcher to open the door under the green shirt and take the gloves. Look at the puzzle on the counter and put the dioramas here.

You’ll get a token that you can use on the gift machine and get a weasel charm. Go outside and use the gloves to look through the poison ivy and ask Patty to help you trim it.
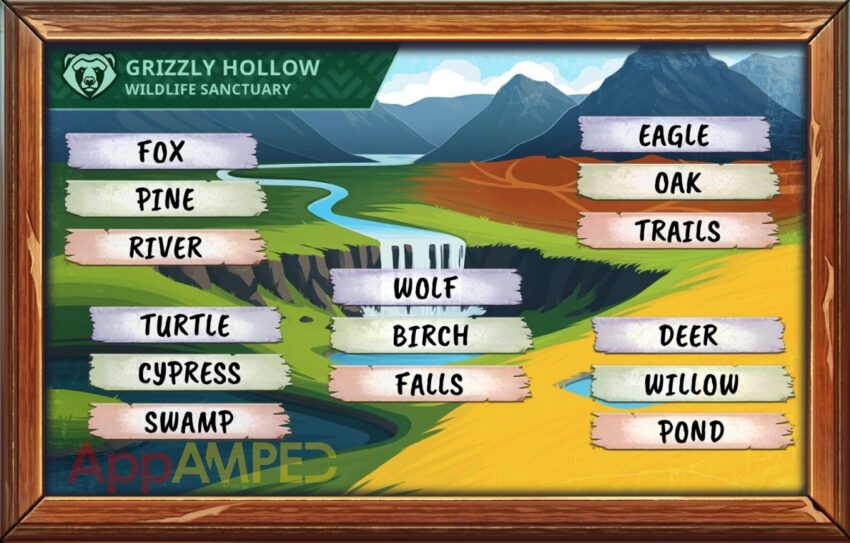
Take the token and look at the map. Based on the panel inside and what you’ve seen through the binoculars, put the names in order:
The little weasel is holding a knob you need, give him the weasel charm and take the knob. Use the token on the snack machine and get some potato chips.
Go inside the cabin and give him the chips to make him leave. Use the knob to open the drawer in the back. Eat the sandwich and look at the file there.
According to the location of the smoke, the foxes, the pine trees near the river the code is: 274232. You’ll go down there with the cabin car to find the poachers camp.

Open the silver case and take the banana, then give it to the turtle in the water to get the fish emblem on its back. Gather the litter around the camp and look under the tap inside the boat to get another fish emblem. Use them to open the red box.
Take the hook and look at the cage to get the string from the owl. Use the string on the fishing rod next to the tent and the hook, then get the rod and use it to get the box from the water.
Rotate the discs to match up the six pairs of arrows that point at each other. Press the buttons on the left disc or right disc to rotate them, and the center disc will rotate the opposite way.
Look on the map you get after opening the box and note down the location of the animals marked with Z = X:
- Z (mirror) – IV 1
- // – VI 8
- X – V 4
After the poachers catch the girls and Nitro runs away the Chapter is complete and you can get ready for the next one.
Canine Cases – Wild Escape Chapter 2 Walkthrough
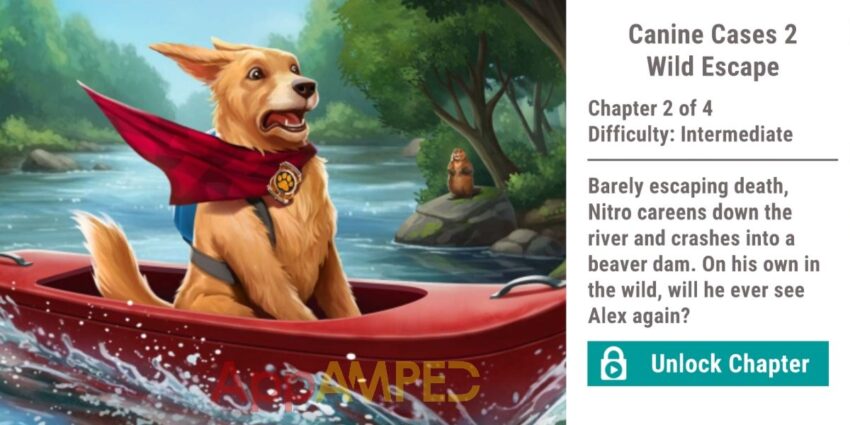
Barely escaping death, Nitro careens down the river and crashes into a beaver dam. On his own in the wild, will he ever see Alex again?
Look under the bowl on the picnic blanket and take the blueberry, under the corner of the blanket there’s a knife handle. In the bush to the left of the damn there’s another berry. Look at the sign and get the raspberry.
Go to the bush on the other side of the river to find a porcupine. Give him the 3 berries to be able to pass over the fence and go to the tree in the back. Take the knife blade by putting the handle in it.
Go to the moving bush to the left to reveal a deer and use the knife to cut the rope. Look at the tree where the deer was tangled and note the hearts and each date with the letters, then check the sign:
- 2014 – S+N: red-black
- 2017 – T+R: black-black
- 2019 – D+A: black-red
- 2025 – P+I: red-black
Go to the picnic basket and match the hearts to the clues, get the mug and the muffin. Read the note on the picnic blanket then go to the tree where the blade was stuck.
Give the muffin to the ants and take the straw, put the cup at the base and the straw in the cut of the tree. Take the resin and use it to cover the holes in the dam, and the beaver will give you an oar. Use it to take the boat and find your way to the tree house:
- up – top right x 2 – top left x 2 – up – top right – bottom right – down – bottom right – down x 3 – bottom right – top right x 2 – bottom right – down – bottom right – up x 2 – top right x 2
When you reach land talk to Patty and she’ll give you the car key. Use it to close the car and make the thug move from his place.
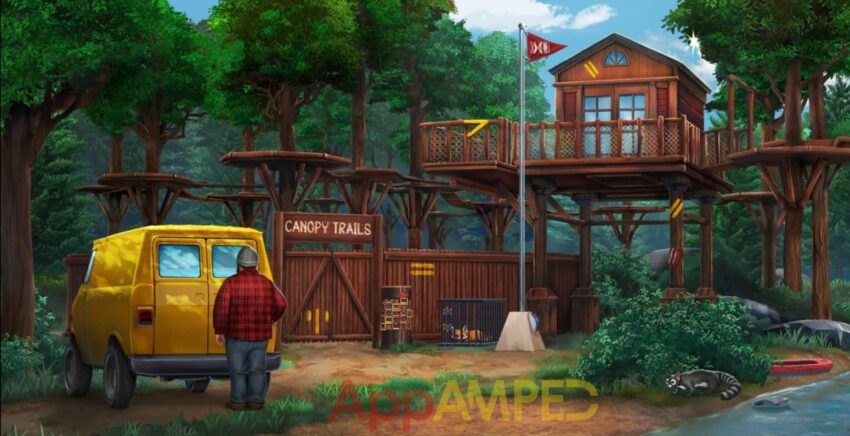
Under the tree house there’s a red triangle and a lever, remember the symbols. Use the lever for the flag mechanism and take the flag. Give it a closer look and take a note of the lines order:
- small smile
- V smile
- sad mouth
- greeted teeth
- line
Take note of the red triangle on the pole and the symbols there and also the yellow symbols around the tree house and where they are located, then go to the totem next to the gate:
- 1st symbol = small smile -> 4th yellow square
- 2nd symbol ‘|’ V smile -> 5th yellow square
- 3rd symbol \\ sad mouth -> 1st yellow square
- 4th symbol > greeted teeth -> 2nd yellow square
- 5th symbol \\ line – > 3rd yellow square
Go to Ringtail on the platforms and use the map to reach the tree house. Talk to Ringtail before you start.
- muddy prints – NO West
- Gazebo platforms trapped – except one
- 2 ropes – North is trouble
- 3 ropes – NO South
- scratch tree + bad platform – East trap
Now follow this instructions to reach your destination:
- W – W – S – W – W – N – W – N – N – E – E – N – N – E – E – E – S – S – W

Move the pot plant to the side to find a hammer and take the rope next to the door. use the hammer to fix the ladder to go up and down freely. Go down the ladder and use the rope on the flag pole to catch the thug in a trap.
Open the van to let Patty out and take the key from the door of the van. Go up the ladder to the tree house and take the note from the thug’s pants. Use the key to open the doors and take the notebook.
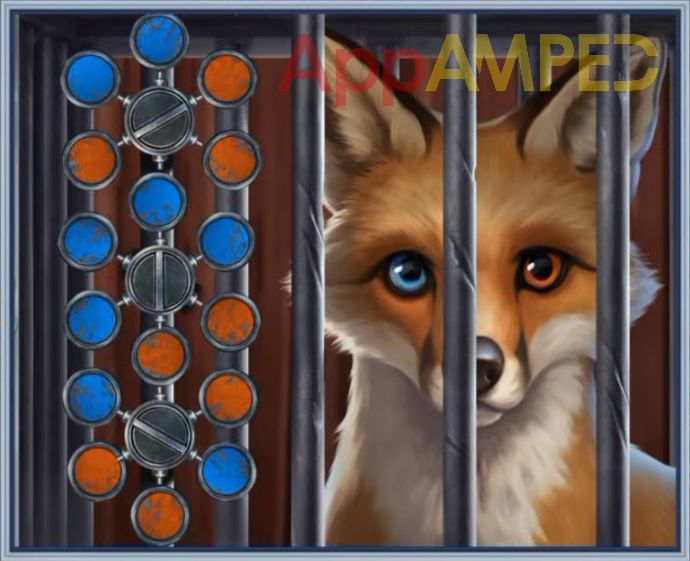
Look through the notebook, take the disc and go to the fox in the cage on the ground. Put the disc in and match the symbols drawn in the notebook – blue is triangle and red is star – to open the cage.
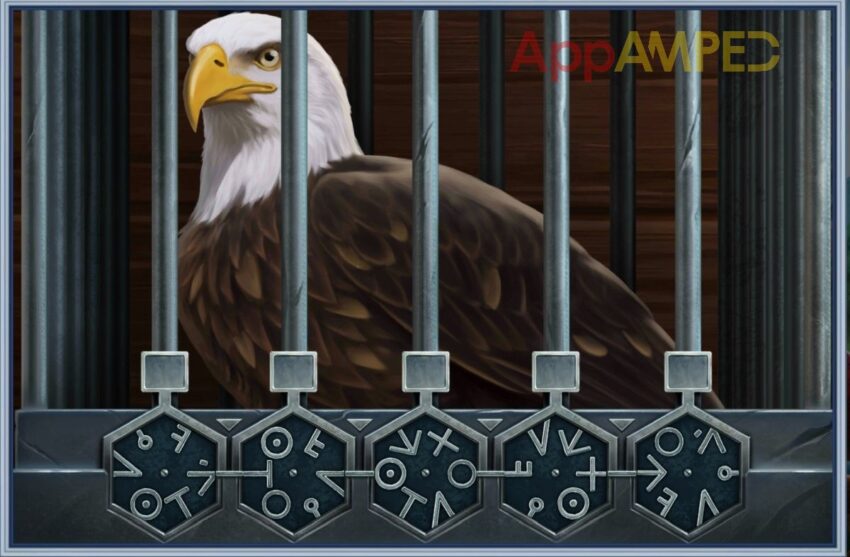
You’ll find a dial in the cage. Go up the stairs to the cage where the eagle is kept and put the dial in. The symbols on the back of the note will help you open the cage.
There’s a 1 symbol that doesn’t match any other (1st code), then 2 identical symbols (2nd symbol) then 3, and finally 4.
Take the talon and go down to use it to cut the ropes from Patty’s hands and complete the chapter after the eagle comes back.
Canine Cases – Wild Escape Chapter 3 Walkthrough
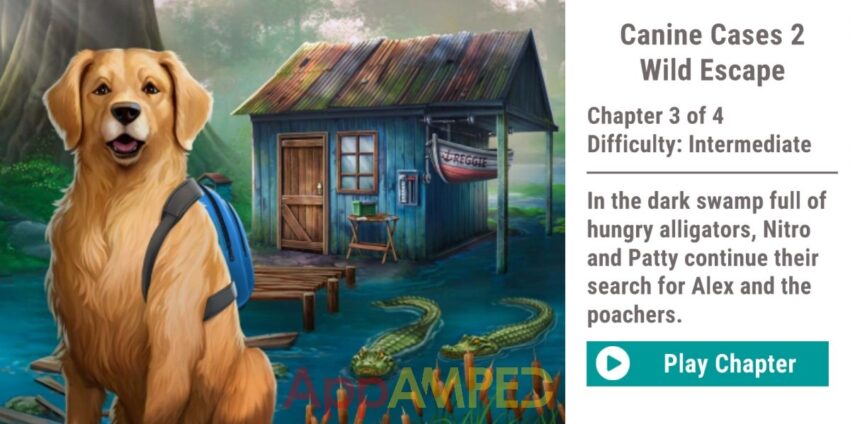
In the dark swamp full of hungry alligators, Nitro and Patty continue their search for Alex and the poachers.
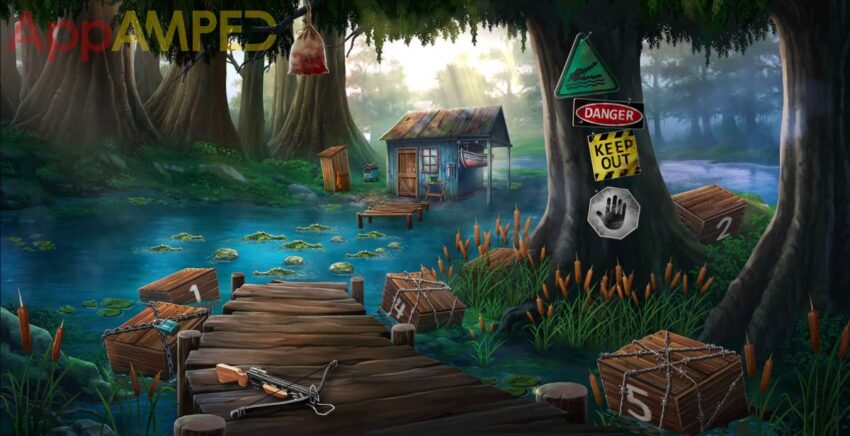
At the base of the tree with the signs, where a crate is hidden in the grass, there’s a crowbar. Use it to open crate number 3, 2 and 1 to find wire cutters, then use them and the crowbar to open the crate number 4 and 5.
Looking at all the objects in the crates, based on the colors of the signs, we can see a connection that will help us open the lock on the last crate:
- 1st line – Green triangle – 3
- 2nd line – Red oval – 4
- 2nd line – Black rectangle – 2
- 3rd line – Yellow square – 1
- 4th line – Silver hexagon – 5
Use the crowbar to open the crate and get the medicine. Look in the grass at the base of the tree to find a turtle with a stuck arrow. Give her the medicine to be able to get the arrow out.
Put the arrow in the crossbow and use that to shoot the meat bag down from the tree. Throw the bag in the water to the alligators and organize them to make a bridge.
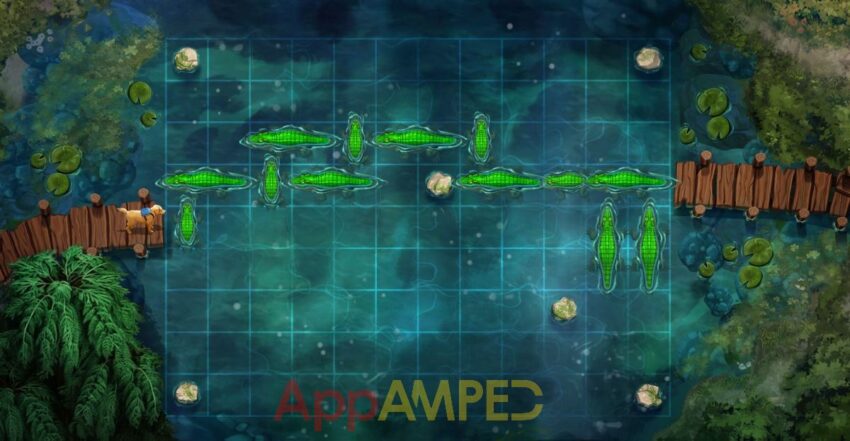
On the other side you’ll find Alex’s scarf and more clues to help you find her.
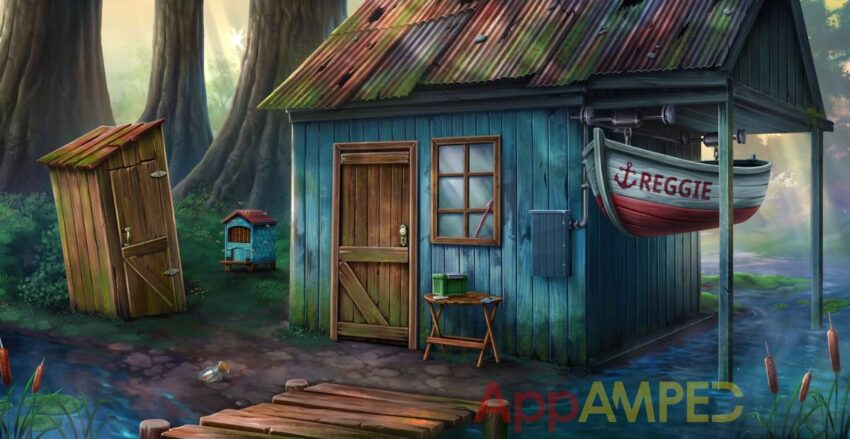
Open the door of the of the outside toilet and get the key. Take the toothbrush from the window of the shack. Use the key to get inside and take a look around. Speak with the chipmunk then find more clues.
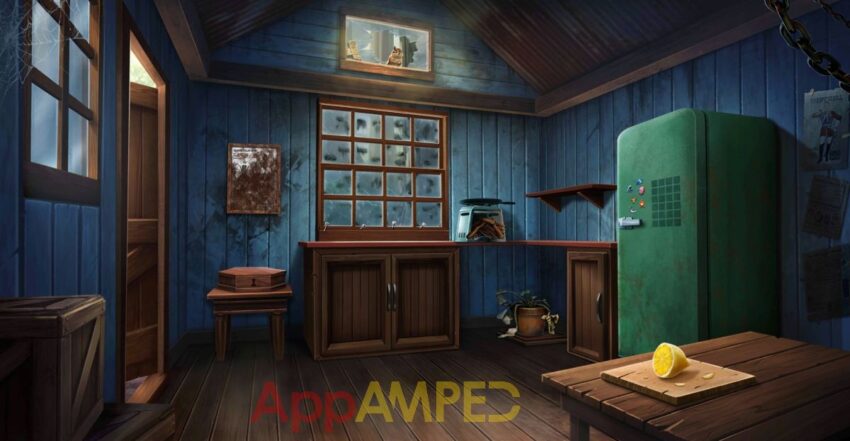
Take the lemon then look in the cupboard next to the fridge to get a nut jar. Inside the other cupboards, you’ll find a corkscrew and a bee keeper suit.
Use the lemon and the toothbrush to clean the framed picture on the wall and learn more about bees. Look under the paper, in the bottom left corner to find a chess emblem.
Use that on the box under the frame to find a fire starter, and a map piece. Pay attention to the chess pieces and numbers: white I (queen) – grey II (worker bee) – black III (drone bee).
Look at the pan on the counter, take the skull ring on the side. Go outside, use the corkscrew on the bottle in the dirt to take out another map piece. Use the skull ring on the green box on the table to find the photos.
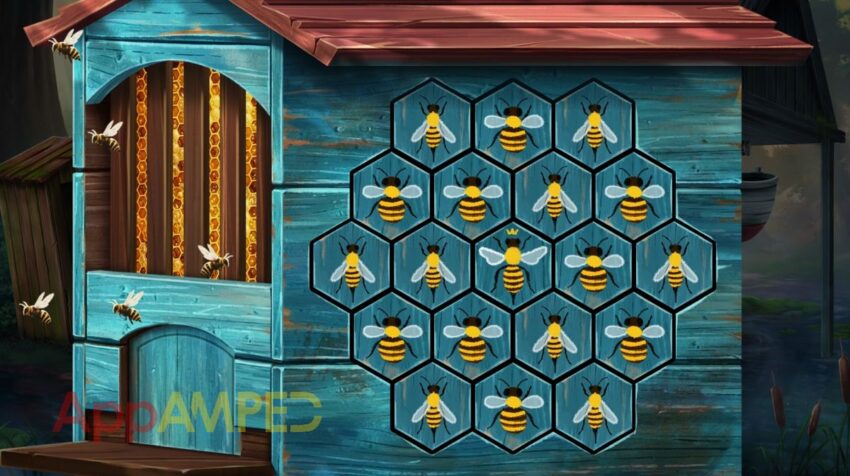
You can turn each photo to see the notes on the back and the symbols. Go to the beehive and arrange the cells in the same pattern the you can see on the chess board.
Take the honey and go inside. Use the fire starter to start the fire under the pan, put the nuts in the pan and honey on top. Take the roasted nuts and the key. Give the nuts to the chipmunk to get the map piece.
Use the key to open the hidden trap door under the potted plant and get the letter. You’ll find another map piece on the letter and you need to pay attention to the tattoo on the man’s neck.
Those symbols and the photos you found in the green box, will tell you how to arrange the magnets on the fridge, pay attention to the position each symbol has on the photo (each photo has 4 squares):
- duck top left – bottom left catfish
- target bottom left – trap bottom right
- deer top right – camp fire bottom left
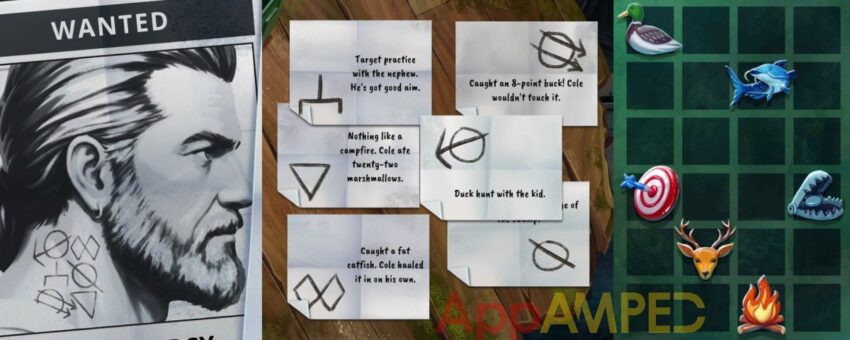
Take the pliers and the map piece. Use the pliers on the window to open it remember the markings and go outside. Again use the pliers to open the electric panel. Now the numbers on the windows and the name on the boat will give you the code:
- R – 8
- E – 5
- G – 6
- G – 6
- I – 2
- E – 5
Pull the boat down and take the last map piece then go assemble the map in the toilet with the map pieces you have.

Take the map and go inside to the fire and put it there to find the cave clue. Now you can get in the boat and go to Patty to give her the map. Run from the thug and complete the chapter.
Canine Cases – Wild Escape Chapter 4 Walkthrough
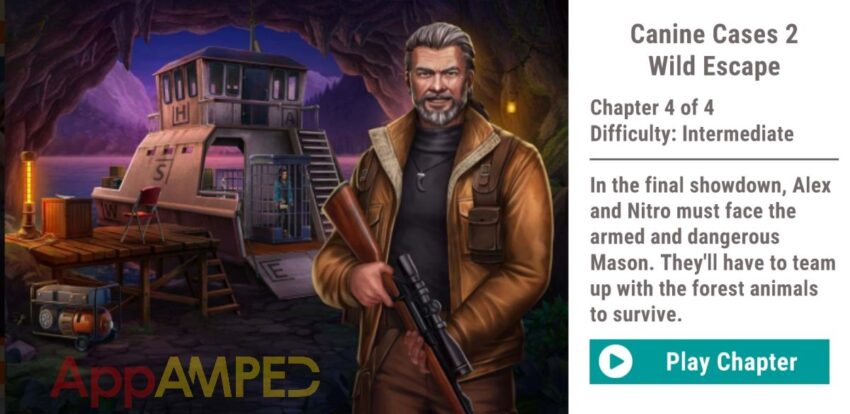
In the final showdown, Alex and Nitro must face the armed and dangerous Mason. They’ll have to team up with the forest animals to survive.

Take the oar from the boat, the dry twigs from the ground, the boat and the tree branch. Another dry twig is in the bushes under the tree.
Put all 4 twigs on the fire pit to get more light. Take the empty lantern from the hut. In the bushes to the right there’s a box with siphon and dog tags. Take the cap off from the motor boat and use the siphon and lamp to get some fuel and light the lantern.
Look at the base of the tree and use the lantern to see better. Use the oar to remove the web and take the lizard tail, then give that to the hawk. Open the grate to the big fan and use the dog tags to unscrew it and get the blade.
Go to the hut’s door and use the blade to open the door and get the lizard unstuck. You can get inside through the tunnels:
- Nitro left – up – left – down – left – down – left
- Patty left – up – right – up – left – down – left – up
- Nitro up – right
- Patty down – right – down – right
- Nitro up – left – right
- Patty left – right
- Nitro up
- Patty left – right – left – up – left – up – left
Patty catches Nitro too and he is taken in a cage with the other animals. He has to find his way out of here and save everyone.

Ask the white mink to push on the lever by its cage. Then ask the woodpecker to get the bolt in front of him and the deer will give it to you.
Throw the bolt into the red toolbox, the hawk can open it, the goose can take the hook and drop it on the floor, then the crane can give it to you. Use it to open the lock on your cage.
Look at the birds (blue) and mammals (red). The bolt of the padlock has 6 lines, imagine each line in front of you and find the code by looking at the animals:
- 2 reds
- 1 blue – 2 reds
- 1 blue – 1 red
- 2 reds
- 1 blue – 1 red
- 2 blues

Before you go out there, take the piece of tape then you can go down through the trap door to find Cole. Explore the storage room to find more items to help you.
Take the wrench from the monitor on the right. Look in Cole’s pocket and take the pocket knife then go back up the stairs and outside to talk to Alex and help her escape.

Take the compass next to the rifle, then take some poison ivy from the bush. Give the ivy to the lizard to put on Patty’s shirt. Now use the wrench to drain the fuel from the generator so the heat stops and Patty puts on her poisoned shirt.
Take the key from Patty’s back and use it to open the lock on Alex’s cage, then take a look at the note on the crate where Patty was sitting.
The numbers on the key, the clue on the note (set to 13), the coordinates around the boat and the compass will help you find the right code. Push them in the right order.
- 16 is E – 6th button
- 9 is W – 3rd button
- 12 is N – 4th button
- 1 is S – 7th button
Go to the heater and open it, then use the knife to take a wire. Go up to the cabin and ask the lizard to spill Mason’s coffee. Once he leaves take the key and the tape. Go down where Cole is, then use the wire and the tapes to fix the device.
Use the key to open the utility box and take the marine grease. Go up to the cabin and use the grease to open the cabinet and take to get the manual. Go back to Cole and solve the transponder puzzle using the manual instructions.

Go up to stop the boat. You need to keep all the levers down at once by pushing the crates onto them:
You’ll be able to defeat Mason and finish the last chapter like a hero, with a bit of help from Cole and the bear.
Wrapping up
That brings us to the end of our complete guide for Adventure Escape Mysteries: Canine Cases 2. From uncovering hidden tracks in Chapter 1 to cracking the final codes, you’ve successfully guided Alex and Nitro through the wild and brought a notorious poacher to justice.
Make sure to check out our other Adventure Escape Mysteries walkthroughs here on App Amped, and stay tuned for more mobile game guides, codes, and tips. Until the next case you can check out Living Legends: Voice of the Sea or Artifact Seekers – Dragon’s Castle.

Aylin is a content creator and co-founder of App Amped. She was a huge Tomb Raider fan before moving on to more casual titles. She spent way too much time tending for her FarmVille farm as well as playing text-based browser games. Now she plays and writes about mobile games, creating in-depth walkthroughs and useful guides.