
Come with me on a chilling journey to solve the mystery in Icebound Secrets 4: House of Memories, where hidden objects gameplay meets the haunting power of lost recollections.
This walkthrough will help you with difficult puzzles and mini-game you encounter on this adventure so you can reach the end of each chapter and reveal the full story of the House of Memories.
House of Memories – Chapter 1 Walkthrough
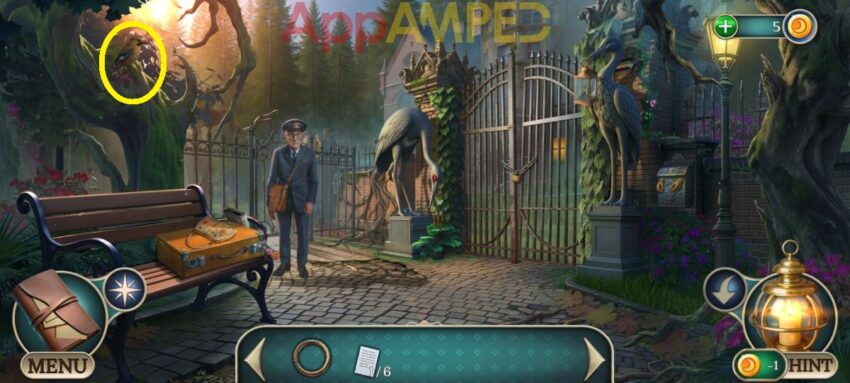
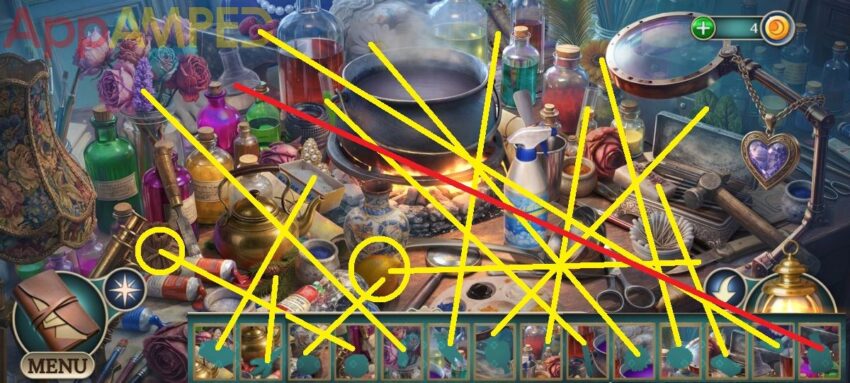
Note for collectibles: I circled the morphing object in this scene for you.
After you take the letter from the postman, read it and take the ring and the note (1/6). Use the ring to open the mail box on the right and take the elephant. Look at the crane statue by the gate and take the latch near its leg.
Look at the suitcase, take the purse, read the newspaper to find the code 513. Take the colored shard (1/8) next to the suitcase and use the latch to open it. Take the brooch, the panel piece (1/4) from under the shirt, and the bolt cutter.
Go to the gate and use the bolt cutter to open it and go through into the garden. Look around to find more clues and a way to get inside the mansion.
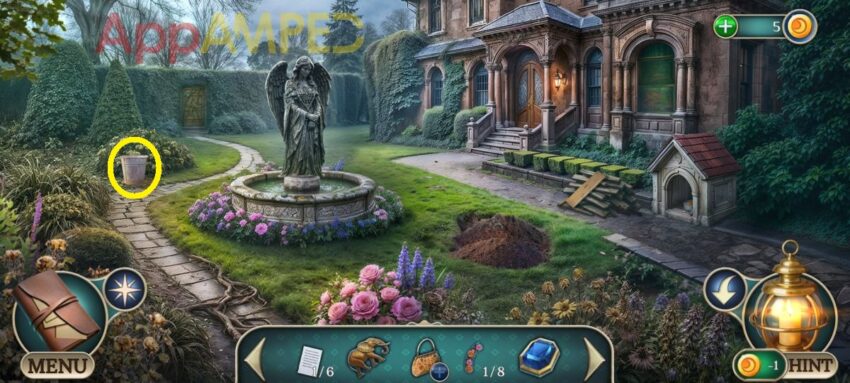
Note for collectibles: I circled the morphing object in this scene for you. Another morphing object is inside the dog house, a bone behind the corner.
Look at the fountain, take the note (2/6) and the medallion. Look at the dirt pile and take the green gear. Check out the dog house and take the comb. Go back to the gate, use the medallion to open the box inside the mail box and take the gnome.
Go to the garden and then to the window behind the dog house. Put the gnome on the window sill and use the comb to pry open the window.
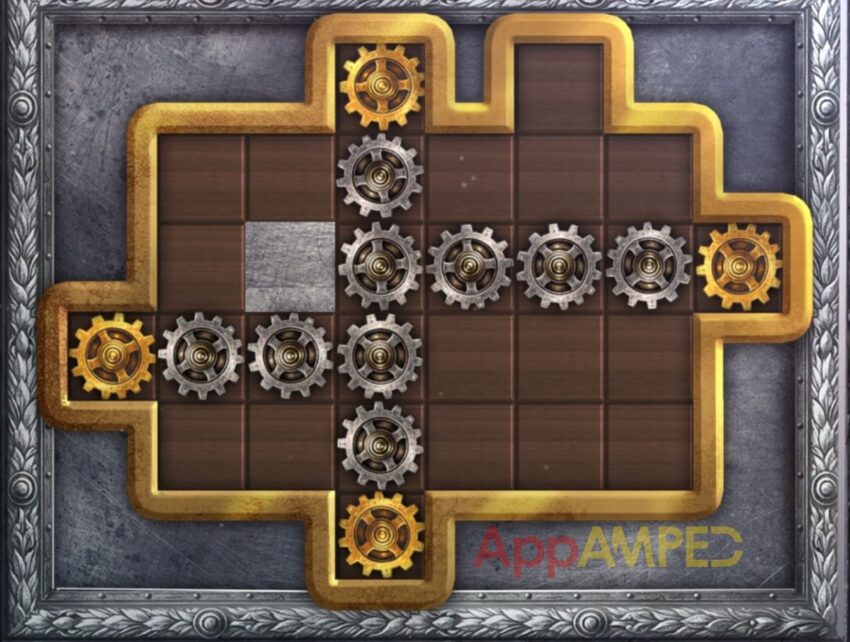
Take the garden shovel and the ID. Use the shovel to dig in the dirt to find a red gear and go give the ID to the postman and he’ll give you a blue gear. Use al 3 gears on the fountain edge and solve the puzzle.
Take the flower and the key. You can use the key to enter the mansion and find a way to enter the secret room to follow the girl.
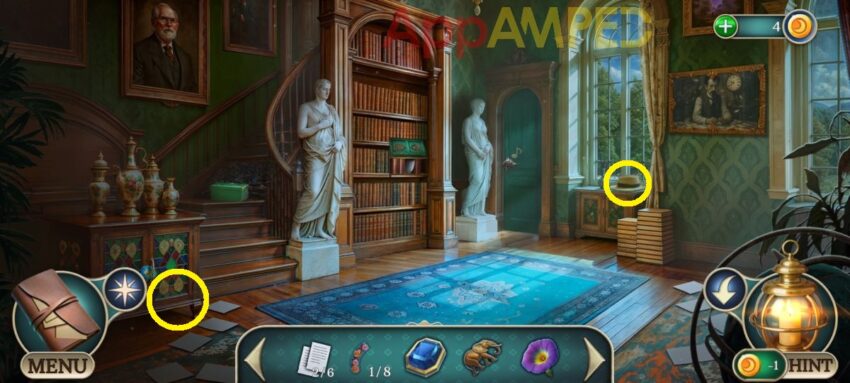
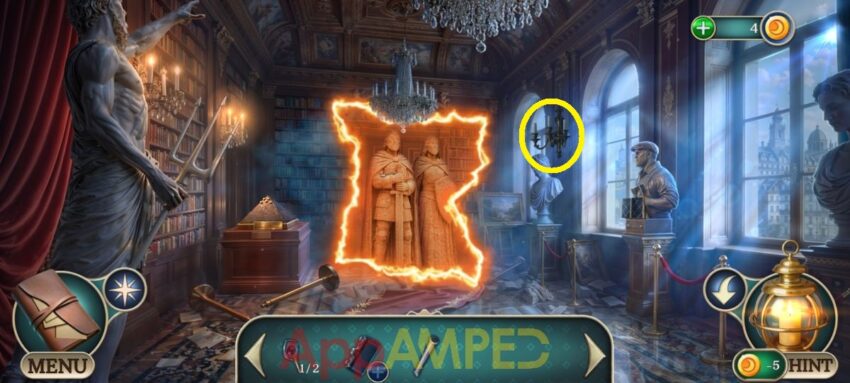
Note for collectibles: I circled the morphing objects in this scene for you.
Go to the green box and take the panel piece (2/4) and the scissors. Look at the bookshelf and take the note (3/6). Use the scissors on the purse to find a winged medallion and an iron bell.
Check out the cupboard on the left to find another flower. Go to the gate at the crane and use the winged medallion to find another flower.
Go to the garden, at the door in the fence and use the flowers to open it and go through to find all hidden objects.
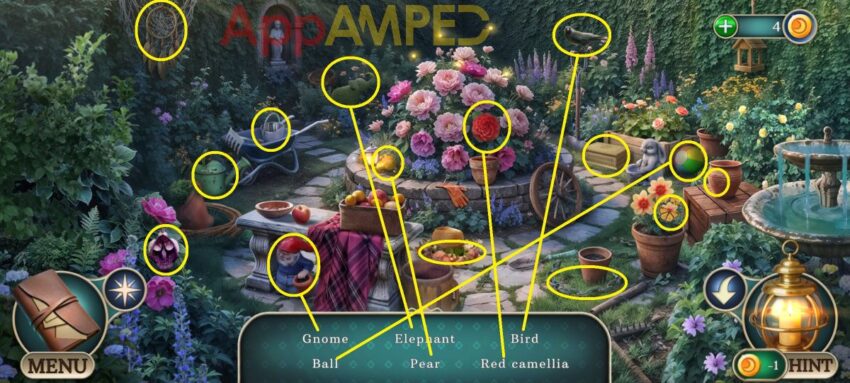
You’ll find another bronze elephant. Go inside the mansion and use the 2 elephants to open the book shelf case and take the urn lid handle and frame piece. Use the frame piece on the painting on the right to find a nail and another note (4/6).
Go to the garden and use the handle on the urn in the ground to open it and get the panel piece (3/4). Use the nail to take another panel piece (4/4) from the dog house. Go inside and use the panel pieces on the game above the painting.
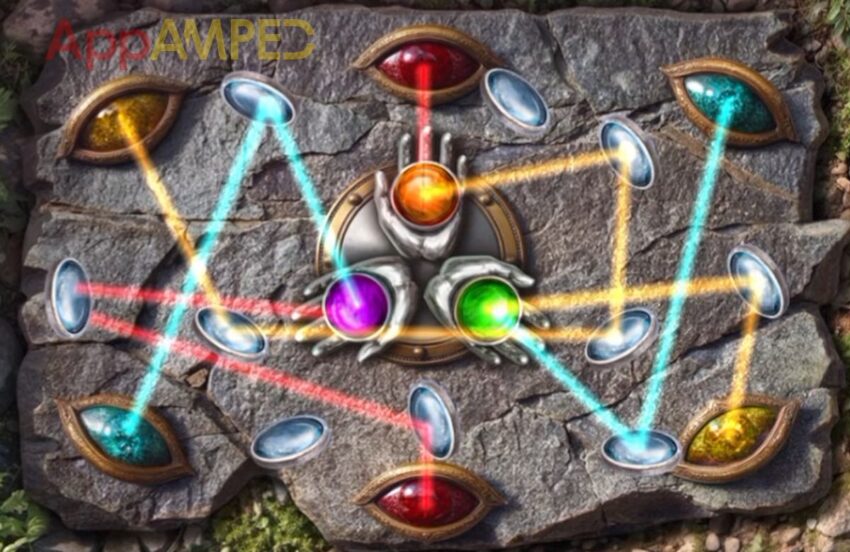
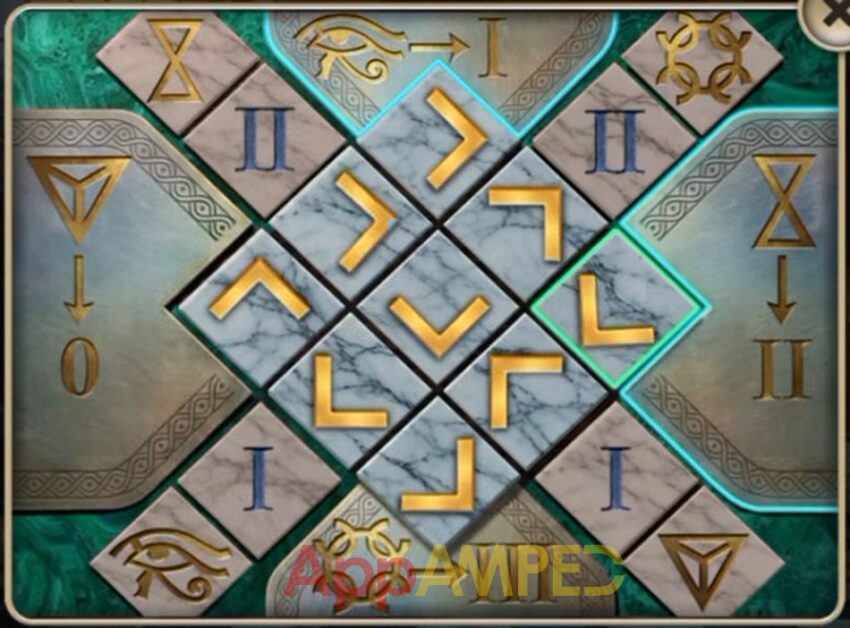
Place the hand tiles on the outside and the eye tiles on the inside. The tiles move along the tracks beneath them. Move a tile one step by pressing the arrow in the desired direction.
This will open the the bookshelf to the secret room where you can find the woman and talk to her. Take the diary from her and find a way to enter the music hall.
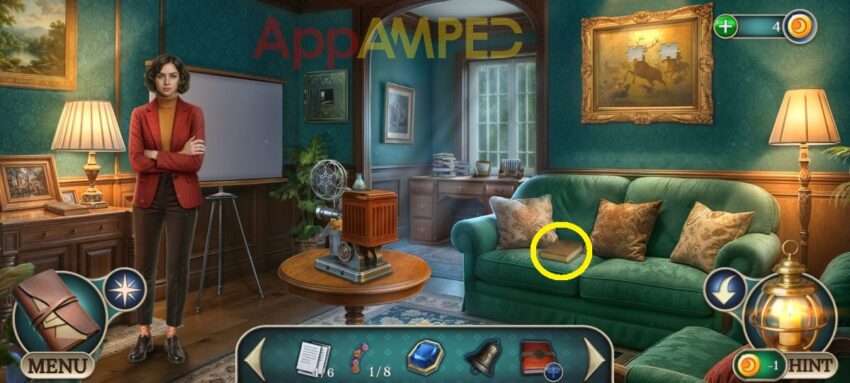
Note for collectibles: I circled the morphing object in this scene for you.
Look at the camera, take the hunter image and the acid jar. Go to the safe in the wall, take the handle and go to the desk in the back to get the shard (2/8) and read the note to know what you need to look for.
Go back to the lobby, use the handle on the cupboard on the left and take the chemical reagent, the deer image, and the note (5/6). Go back to the secret room and put the puzzle pieces in their place in the picture.
Take the hammer amulet and go back to the lobby at the toolbox on the stairs to use that to open it and find a real hammer. Go outside to the doghouse, use the hammer to remove the wooden bar and take the chemical glass.
Use the wooden bar at the window where the gnome is to hold the window up, and use the hammer to smash the gnome and take the lab powder. Now go to the secret room at the desk to put all the chemical instruments and powder that you found.
Mix the solvent according to the instructions. Select two flasks, then select the central beaker to combine them. Once you have the solvent you can take it to the music hall door and use it on the doorknob and enter.
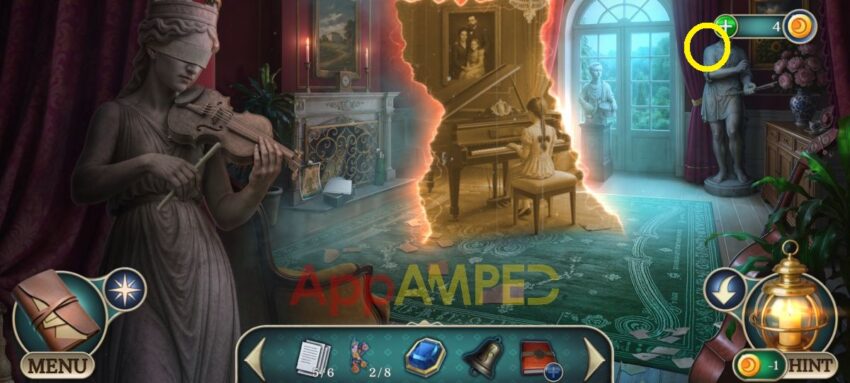
Note for collectibles: I circled the morphing object in this scene for you.
Take the drum stick from the statue on the left, then check out the fireplace and take the sculptor kit, the last note (6/6) and look at the photo there. Go to the statue in front of the window and use the kit to reshape his hand then give it the drum stick.
Take the harp and give it to the statue on the right to get the violin bow, then go and give that to the lady statue on the left to get a camera lens.
Go to the fireplace and use the lens to replace the broken on on the camera and take it, then take a photo of the room. Go look at the piano now that the anomaly dissipated, take the golden bell and ornament.
Look at the bells behind the piano, take the other ornament. Go into the lobby, at the cupboard on the left, use the ornaments on the box to open it and find a projector part.
Go to the secret room at the camera and put the projector part on it to find a bell string. Go to the music hall at the bells, put the bells here and the bell string. Tap the bells in the order written on the piano:

- 2 – 4 – 7
- 3 – 5 – 1 – 4 – 9
- 8 – 1 – 2 – 6 – 10 – 3 – 7
Take the diary decoration and use it to open it, then put the notes in the diary. Take the photo and the safe disk (1/2). Go to the woman in the secret room and give back her diary and the photo, take the last safe disk (2/2) from her and go to the safe in the wall.
Use the disks on the safe and write the code on the newspaper you found at the gate 513. Take the lantern, hair pin and matches. Go to the lobby and use the matches to burn the spider web on the stairs and take the pliers. Use them on the hair pin.
You’ll get a ruby and a lockpick. Go to the gate and put the lantern in the crane’s beak, it will give you a ruby and you can take the gold plate behind it.
Go to the Music hall, put the two rubies on the crown of the statue on the right to get a raven brooch. Use the lockpick on the drum to get a plate fragment.
Go to the piano and put the golden plate, plate fragment, and raven brooch to open it and find a film reel. Go to the secret room and use the film on the projector then solve the puzzle to finish the chapter.
House of Memories – Chapter 2 Walkthrough
Take the gate lever and go to the garden. You can take a board (1/4) from the pile. Now go to the gate and check out the other gate on the left, take the two boards (3/4) and the screwdriver.
Put the lever in the gate lock and go inside in the music hall. Use the screwdriver on the fireplace grill and take the last board (4/4). Go into the lobby and use the boards to fix the stairs and go to the bedroom.
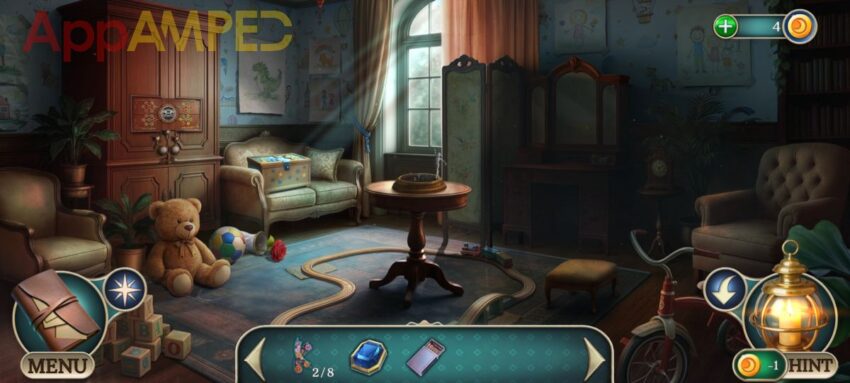
Note for collectibles: The morphing object is the jacket hanging there. I clicked it by accident before I did the screenshot.
Look on the table and take the wax knife, then check out the chest on the sofa and take the crane key. Look at the closet and take the candlestick. Go to the Music hall and use the knife to cut a candle (1/3) off the statue’s head.
Another candle (2/3) is inside the green box on the bookshelf in the lobby. Go to the gate and use the key to open the lamp in the crane’s beak and find the last candle (3/3). Put all 3 candles on the candlestick and light them up using the matches.
Go with the lit candlestick to the bedroom and use it on the right to look in the dark spot. Take the triangle and Vol. III book. Put the triangle on the chest to open it and read the note inside.
Take the paint tube and look at the bear to find the oiler. Go to the gate leading to the city, use the oiler to pull down the lever.
Select pages to move across the map to the destination in the bottom right corner. Each page shows the movement direction, forward or background, and the number of steps. Visit all markers on green tiles and avoid red obstacles.
- 3🡆 – 2🡄 – 5🡆 1🡄 – 4🡆 – 7🡆 – 5🡆 – 5🡆 – 2🡄 – 7🡆 – 2🡄 – 4🡆 – 3🡆 – 2🡄 – 5🡆
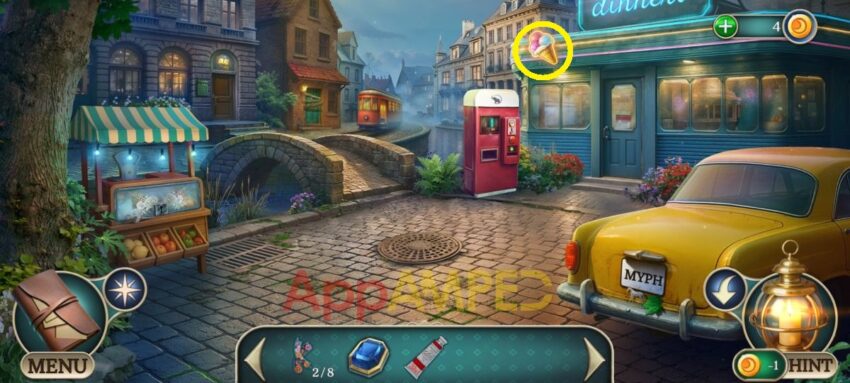
Note for collectibles: I circled the morphing object in this scene for you.
Look at the fruit stall on the left and take the dancer, then at the trunk of the taxi car to get a horse. Go to the first door on the left and take the ice tongs then read the note. Go to the vending machine, use the tongs to get the token.
Go back to that door and use the token in the mailbox to get vol. IV book. Inside the book you’ll find a left part. Go to the next door on the left and take the broken key.
Go to the bedroom in the mansion and to the desk to use the horse to open the drawer and get a protractor and a dancer (1/3). Put the ballet dancer on the device on the table to get vol. VI book.
Go to the lobby and put the 3 books on the shelf to get a music sheet. Go to the music hall at the piano, put the broken key and music sheet here and tap the notes in the same order. Take the car key and go to the city center to use it on the trunk of the taxi.
Get the cloth and the pin. Go to the garden, at the open window and put some water on the cloth. Go to the bedroom and look at the bear, use the pin to open the zipper and get the right part.
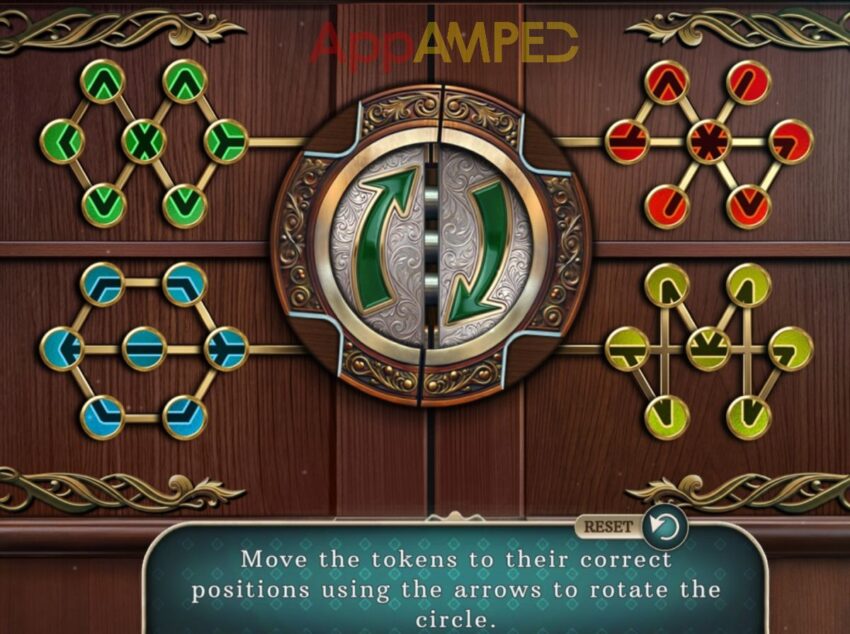
Put both part on the closet door. Move the tokens to their correct position using the arrows to rotate the circle.
Take the dirty photo and use the wet cloth to clean the it, then use the protractor to open the frame, look at the family photo and take it. Go to the secret room and give the photo to the lady.
She’ll give you a coaster. Go to the city center and use the coaster on the diner, and you can go inside and talk to John. He’ll give you a lighter.
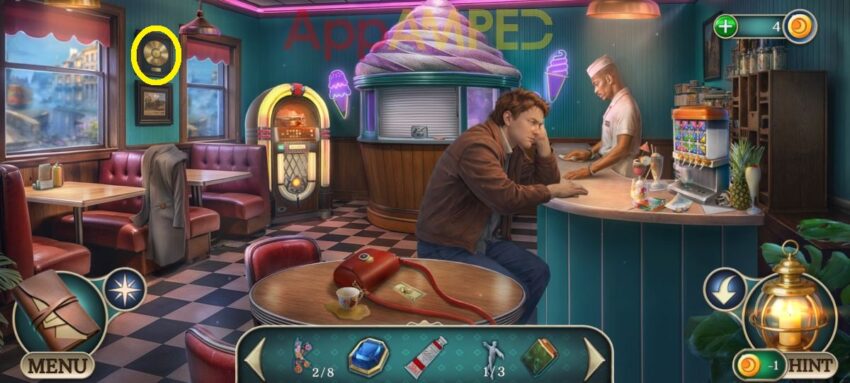
Note for collectibles: I circled the morphing object in this scene for you.
Take the dollar on the table, then put the sapphire brooch on the purse, you’ll find a dancer (2/3) and an incomplete pendant. Check out the coat hanging from the chair, take the vending button (1/5) from the pocket and the needle.
There’s another dollar on the music box. On the bar there’s another colored shard (3/8) and the recipe for the cocktail you need. Go to the ice cream booth and take the firecracker.
Go outside to the vending machine and use the 2 dollars to buy a soda. There’s also a button (1/2) next to the glass here. Look at the fruit stand, put the firecracker in the keyhole and light it with the lighter.
Take the fragment and a lemon, then go inside the diner and to the ice cream booth to put the fragment on the unicorn’s head. Now find all the items needed for this hidden object game.
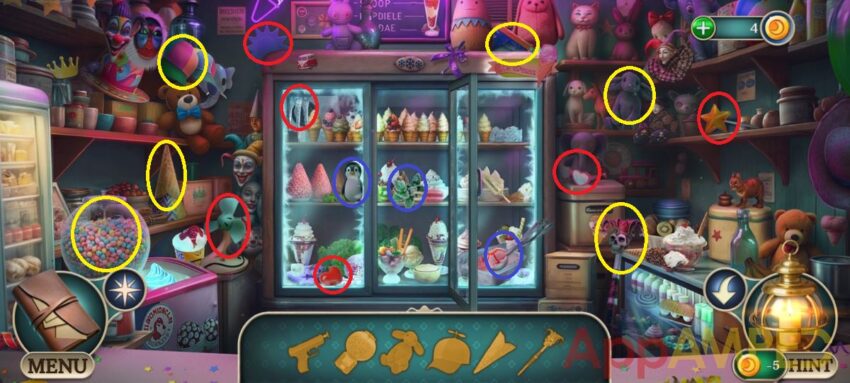
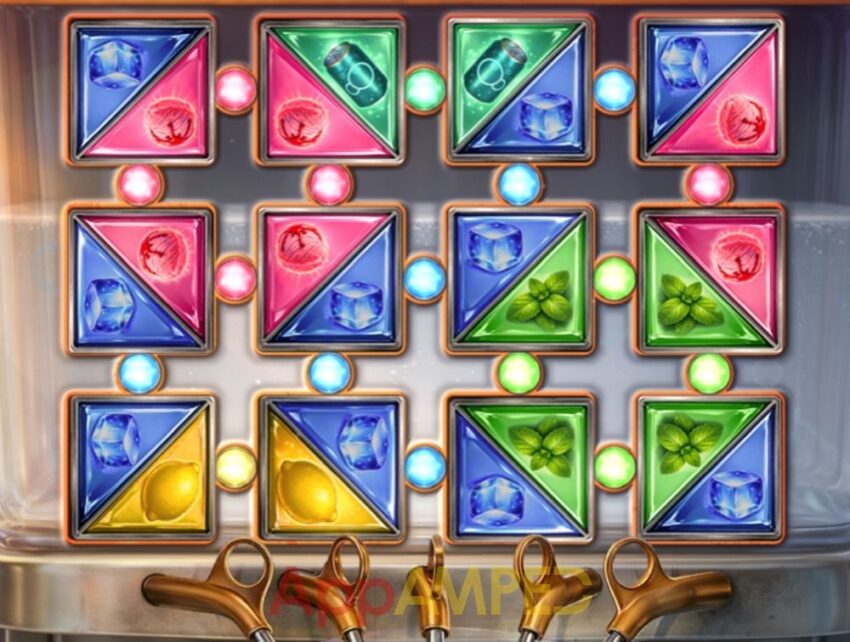
You’ll find the strawberry ice cream you need for the cocktail. Put everything on the counter next to the recipe. Arrange the cards so that all neighboring ingredients match. Tap a card twice to rotate it. Tap one card, then another, to swap them.
Give the energized cocktail to the man sitting at the bar. He’ll give you a vending machine button (2/5) and the bartender will give you the last dancer (3/3). Go to the bedroom in the mansion, put all 3 dancer on the music box to find the library key.
Go out to the city center and use the key on the door to the left, where the library is. Go inside to find an apparition. Look at the spiritual memory and take the razor. Fix the memory before you explore.
Look at the desk on the left, look at the picture to figure out what is missing from the spiritual memory. Take the chain and put it on the pendant. Go to the bear and take the sewing spool, then put it through the needle.
Go at the fallen book shelf and take the fabric scrap. Go to the diner, use the razor to cut off the second button (2/2) from the coat. Go outside the mansion, at the gate, use the patch and needle to fix the hat and take it.
Go up to the bedroom and take the rose. Look at the crate on the sofa, use the buttons and the needle to give the teddy bear some eyes, close the zipper and take it with you. Go back to the library and put the 4 items in their place to restore the reality.
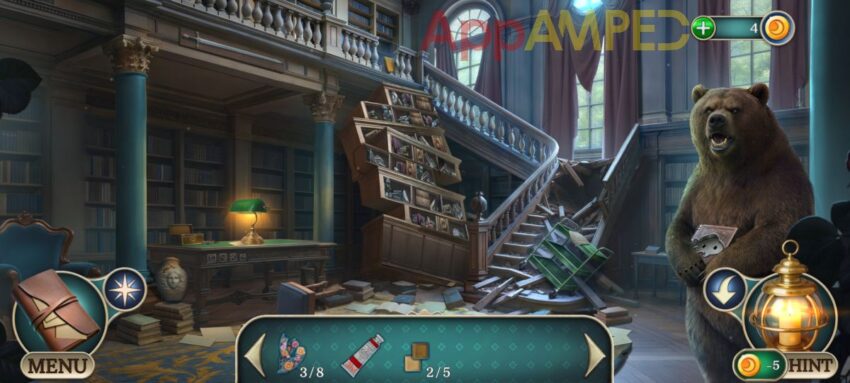
Note for collectibles: I circled the morphing object in this scene for you.
Check out the green trolley, and take it after you read the note. Put the trolley on the bookshelf and climb up. But be careful because some supports might break.
- middle – ring drawer
- right – 2 drawers
- left – 2 drawers
- middle – 2 drawers
- left – statue
- middle – ring statue
- middle – books
- left – animal statue
- right – books
You’ll reach and get Charlene notes. Go to the hidden room in the mansion and give the folder to her. She’ll give you a hanging chain and a half heart.
Go to the city, in front of the diner and use the chain to open the tool box and take the axe. Go to the barricaded door next to the library and use the axe to cut of the wooden boards and be able to get in.
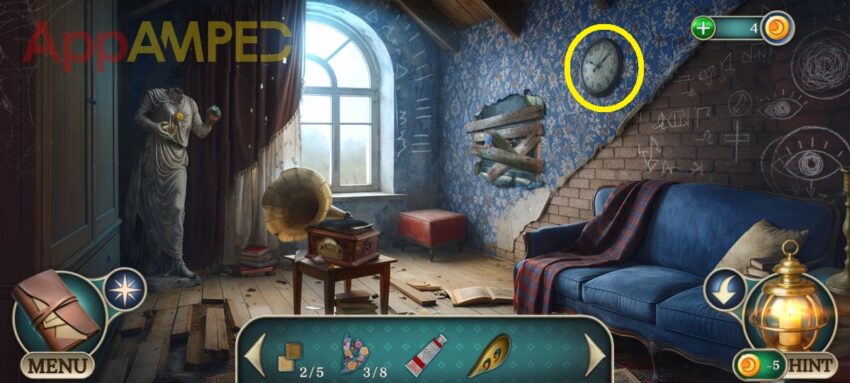
Note for collectibles: I circled the morphing object in this scene for you.
Look at the statue and take the other half heart, then check out the table and take the little golden hand and the fish emblem. The note on the table is a code for the jukebox in the diner.
Go to the barricaded wall, take the colored shard (4/8). Now go to the library, put the fish emblem on the box in the bear’s hands and take the book box with you and the copper octagon as well.
Look at the box on the left on top of the desk and put the half hearts here. Take the wrench and vending button (3/5). Go back to the abandoned house, use the wrench to break the wooden boards on the wall and take the button (4/5) and and other doll hand.
Go to the bedroom inside the mansion, check out the box next to the candles, use the doll hands to open it and take the last button (5/5). Now go to the jukebox inside the diner and put the buttons here.
Press the buttons like the note in the abandoned house said:
- 1st row – 5th button
- 2nd row – 2nd button
- 2nd row – 3rd button
- 3rd row – 1st button
- 3rd row – 5th button
Take the vinyl record and go to the abandoned house to put it on the gramophone there. Take the bracelet and put it on the statue here to get a copper octagon and play the mini game.
Rotate the parts of the mechanism and make the cylinders end up on the rods outside of the polygons.
Now go to Charlene and give her the film reel you found. She’ll give you a nail file. Go to the city center ans talk to Charlene.
Look in the trunk of the taxi and take the tram valve. Use the nail file to open the drawer of the vending machine and take the speedometer.
Go to the abandoned house, use the nail file in the gramophone to get the brake handle. Go inside the tram and read the note to know what you need. Put the valve, the handle and speedometer, to start the tram. Now you can follow the tram to find the artist.
House of Memories – Chapter 3 Walkthrough
Take the colored chalk from the artist and find his things.
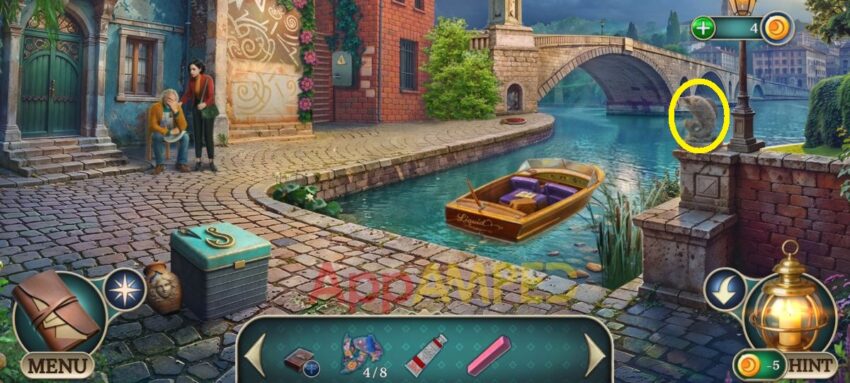
Note for collectibles: I circled the morphing object in this scene for you.
There’s a bear claw (1/5) on that blue box to your left. Inside the boat there’s a fish key. Look at the wall behind Charlene and use the chalk to draw over it. Take the toy tower from inside the wall.
Go to the sewer cap in the back, take the iron dishes from the ground. Go to the secret room in the mansion and look at the painting with the monkey. Put the iron dishes in its hands to find another bear claw (2/5) and a toy tower.
Go upstairs to the bedroom, use the fish key to open the box in your inventory and get another toy tower and a leather strap. Look inside the toy box on the sofa and put all 3 towers there, then rebuild the structures by rearranging their parts.
You’ll find a golden hook. Go to the abandoned house in the city center, use the leather strap on the ring of the object that the statue is holding to get a broken cryptex and a yellow wire.
Go to the bridge and use the hook on the box to open it and take the harpoon tip and colored shard (5/8). Go to the boat and put the tip on the harpoon stick and take it.
Go to the sewer cap and use the harpoon to move the fish statue away, read the note and take the red wire. There’s an electric panel on the wall, open it and put the two wires here. Remove the bars to open the passage:
- 1 vertical
- 4 horizontal
- 4 vertical
- 3 horizontal
- 6 vertical
- 5 horizontal
- 5 vertical
- 2 horizontal
- 2 vertical
- 1 horizontal
- 3 vertical
- 6 horizontal
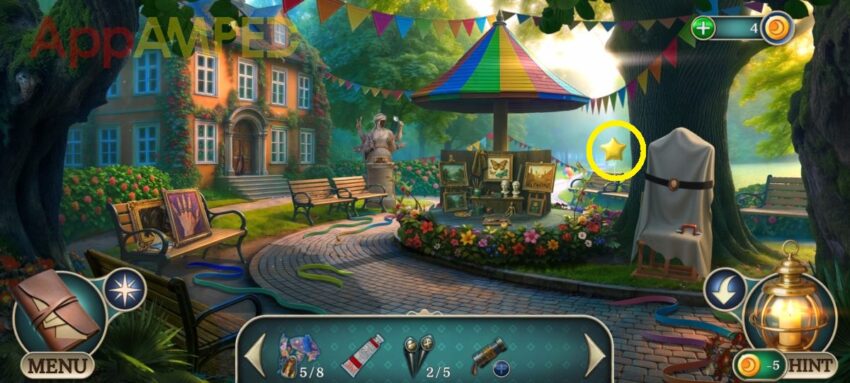
Note for collectibles: I circled the morphing object in this scene for you.
If you look at the door of the workshop, you’ll find an artist item (1/3). Check out the paintings on the bench and take the butterfly, then look at the note. Go to the statue and take the bear claw (3/5) from her hand.
Look under the pavilion and take the fake apple. Check the covered painting and get the hatch handle. Go to the bridge, use the handle on the sewer cap. You’ll find turpentine, glue solvent and fake grapes.
Use the butterfly on the blue box inside the wall, you’ll find a bear claw (4/5), and a pocket knife. Go to the diner and use the glue solvent on the cup on the table to take it.
Go back to the artists’ garden and put all the items in the statue’s hand: grape, apple, cup to get another artist item (2/3). Use the turpentine on the painting on the bench, use the pocket knife to cut the canvas and take the platform switch.
Check out the hatch under the pavilion and put the switch there to open it and find all the hidden objects here, move from one scene to another using the arrows.
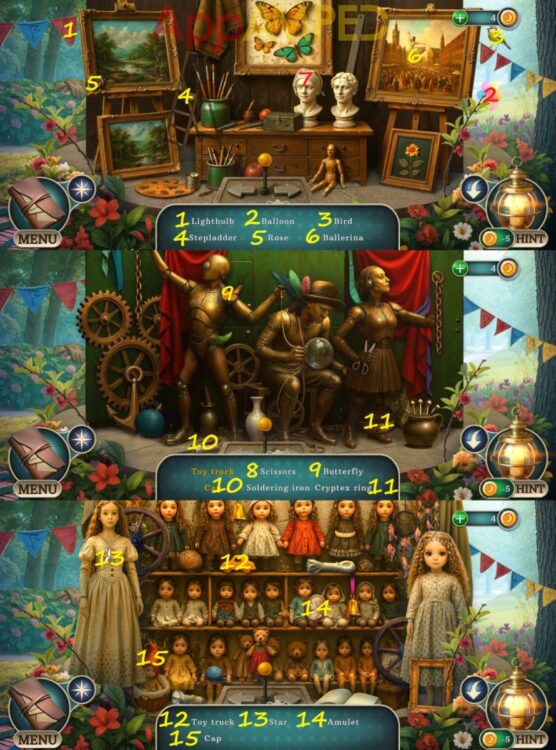
You’ll get a muse amulet and a cryptex ring. Put the muse amulet on the wrap around the hidden painting to uncover it and get the last artist item (3/3). Now go and give the artist all his items. Charlene will give you another cryptex ring.
Now use both rings on the broken cryptex. Rotate the cryptex discs to connect the energy of the left and right stones.
- 1st ring – 2 taps
- 2nd ring – 4 taps
- 3rd ring – 3 taps
- 4th ring – 1 tap
- 5th ring – 2 taps
Take the scratched film and the police master key. Go to the artists’ workshop and use the key to open the door. Select the gemstones with the image that form the rune in the center. You can rotate the selected gemstone using the buttons around it.
Note for collectibles: The morphing object in this scene is the cat poster on the wall.
Before you see the entire studio as is, you need to get rid of the anomaly. Look at the memory picture, take the fishing lure. Look on the armchair and take the Polaroid. Look at the drawing on the left to find a colored shard (6/8).
There’s a blue tube paint on the desk that you can take, and a note about how to clean a film. If you look in the bookshelf you’ll see a box with paints. Put the 2 paints you have here to get a brush.
Go down the stairs to the iron door and take the lens. Go to the bridge and check out the fishing lures on the shore, then put yours here to find a memory landscape. Go to the workshop’s garden, put the memory landscape on the easel.
You’ll find a bear claw (5/5) and red button. Go to the library and put the 5 claws on the bear, then use the clue on the painting in the workshop’s garden to put the claws in the right order.
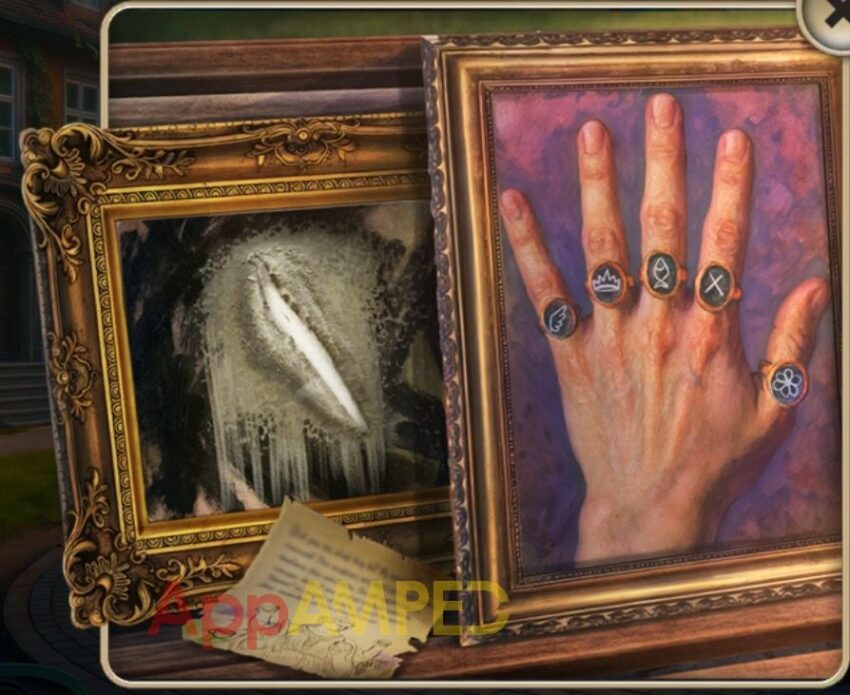
- wing – crown – fish – X – flower
Take the dirty photo cartridge and go to the workshop, at the desk there. Put the cartridge then clean it with the brush. Put the cartridge and lens on the Polaroid, then fix it with the red button.
Use the Polaroid on the memory anomaly here, take a look at the photo and search for the items that appeared here. Take the dessert spatula from the anomaly before you leave.
Go to the bridge, at the hole in the wall and take the red flowers. Go to the bedroom in the mansion and look at the cake on the desk. Use the spatula to cut a piece of cake. Go to the taxi in the city center and use the spatula on the box in the back to get the medallion.
Now go to the anomaly in the workshop and put the 3 items here. Take the mechanism token and go down to the basement at the iron door to use it. Complete the patterns shown above. Press the keys to toggle the squares on and off.
- 1st pattern: 1 – 9 – 14
- 2nd pattern: 2 – 3 – 7 – 8 – 11
- 3rd pattern: 7 – 8 – 10
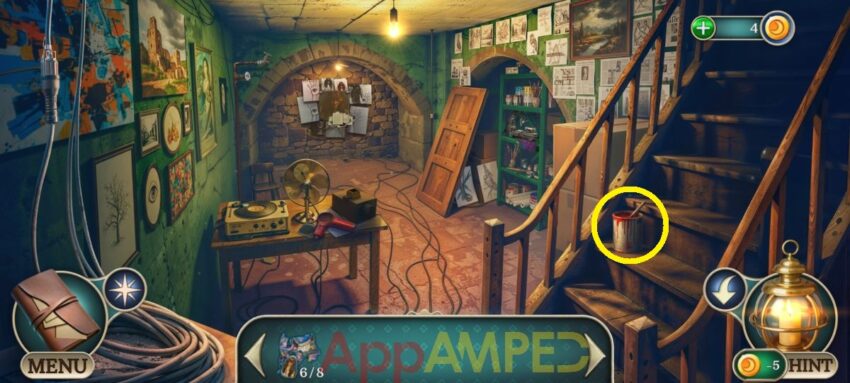
Note for collectibles: I circled the morphing object in this scene for you.
Look on the table and take the winding key. Check out the shelves on the right and take the tweezers. Go to the wall in the back and read the note then take the flower photo.
Go back up into the workshop, use the tweezers to pull out the rabbit from under the armchair. Use the winding key on the red box in the bookshelf and take the spatula, then read the note and take the polish.
Go into the garden at the statue and put the rabbit on the box in front to open it and take the spiral heater. Go back to the basement at the shelf on the right and use the spatula to clean the paint and take the fork and cloth.
In the workshop under the armchair, after pulling the seat up, you’ll find a hairdryer cap. Use the fork to pull the pin and take the city photo. Go to the canvas on the left and put the flower photo and the city photo here.
Go to the basement and put the spiral heater in the hairdryer on the table then put the cap on and take it. Go back to the workshop, put the film, polish, cloth, and hairdryer on the desk to fix the film and take it.
Go to the basement and put the film in the portable projector then take it to the artist at the bridge to show it to him. He’ll give you a palette knife and a talisman. Go to the basement of the workshop, use the knife to remove the portrait on the wall.
Take the girl photo and go upstairs to put it on the canvas. Paint the girl in the right colors. Now take the muse to the artist and you have to save Owen from the evil spirit.
Find all the items and use them to fix the anomalies and get more items with them. You’ll get closer and closer to the evil spirit and Owen. You’ll get a camera and toggle switch. Owen will give you an artist’s talisman.
Go to the basement and use the artist’s talisman on the safe on the back wall, read the note, take the steering wheel and emerald eye. Go to the bridge, look at the rubble next to it and take the ruby eye.
Go to the workshop, look under the armchair, put the emerald and ruby eyes on the skull and take the toggle switch inside. Put the switches on the boat and the steering wheel to get on .
House of Memories – Chapter 4 Walkthrough
Use the camera to record the anomaly and find a way into the theatre by looking around.
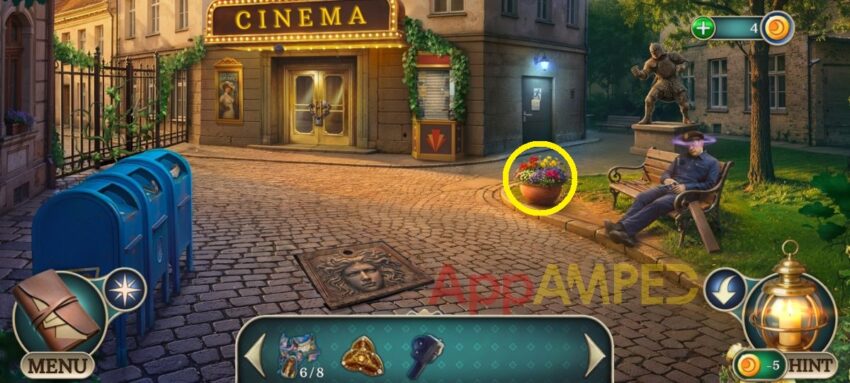
Note for collectibles: I circled the morphing object in this scene for you.
Look at the blue mail boxes on the left and take the tiara, then go to the police officer and take the broken revolver and the flashlight.
Go to the doors of the cinema and take the cloakroom tag. Go to the blue mail boxes and use the tag to open the screws to find a mechanism belt. Check out the ticket booth and put the belt here to open it.
Use the flashlight to see inside and you’ll find an earring on the cash register. Go to the officer and use the earring to open his chest pocket and get the blank key. Go to owen and show him the key.
Now go to the workshop and take a blank paper from the desk and a pencil from the shelves in the corner. Go give them to the artist to get a key diagram.
Now go to the workshop’s basement and put the blank key on the device sitting on the green shelves, and the diagram next to it.
- change to square and pull the lever once
- tap left arrow once and down arrow once, then pick the sharp tool
- tap left arrow once, up arrow once, pick the 2 sharp edges
- tap left arrow once, pick the square tool
- left arrow once, down arrow twice, round tool
- left arrow once, down arrow once, square tool
Take the service entrance key and go to the streets in front of the cinema. Use it on the door to the right and go inside.
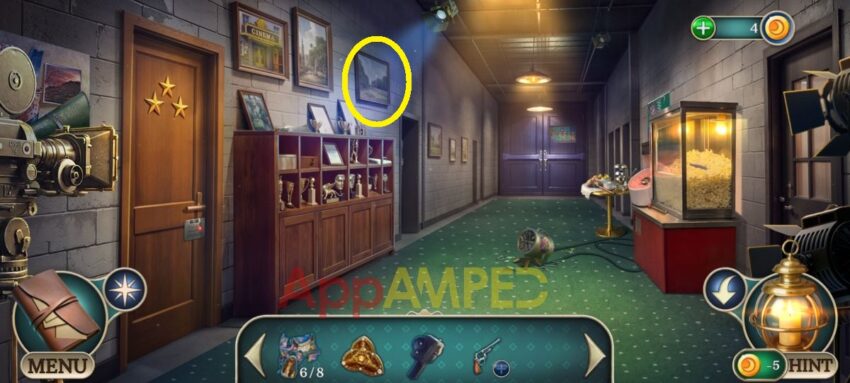
Note for collectibles: I circled the morphing object in this scene for you.
Look at the fallen light and take the colored shard (7/8). Check out the popcorn machine and take the cash register button. Go to the shelves on the left, take the chisel and read the note that seems to point at the code 2541.
Check out the portrait of the lady and go to the first door on the left. Take the trigger and go outside to the ticket booth. Use the button to open the cash register and take the rubber gloves.
Go to the fallen bridge where the artist is and use the chisel on the broken rocks to get the metal ornament. Go to the blue mail boxes and use the ornament to open the box inside and take the medical clamp.
Go inside the theater to the fallen light. Use the rubber gloves to remove the shards and electricity and use the clamp to get the fuse.
Go to the first door on the left, replace the fuse with the good one and put in the code 2541 to open it and go inside. Take a crane head from Sylvia and go search for her things.
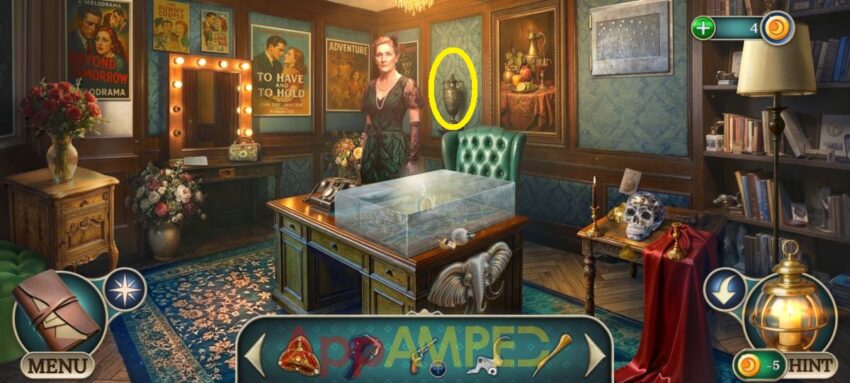
Note for collectibles: I circled the morphing object in this scene for you.
Look on the table with the skull, take the wooden boy and put the talisman in its place under the skull. Go look at the glass case in the middle and take the police whistle and lightbulb (1/2).
Go to the mirror, read the note and take the bag (1/4). Go into the hallway, and to the shelf on the left, put the wooden boy on the second box and take the pearls (2/4). Go outside to the bench where the officer is and blow the whistle.
Take the hook and cord, then go to look above the doors of the theater and use them to get the stone mask. Go to the workshop’s garden, at the statue, put the tiara on her, and the mask, then arrange the hands like the clue on the bench.
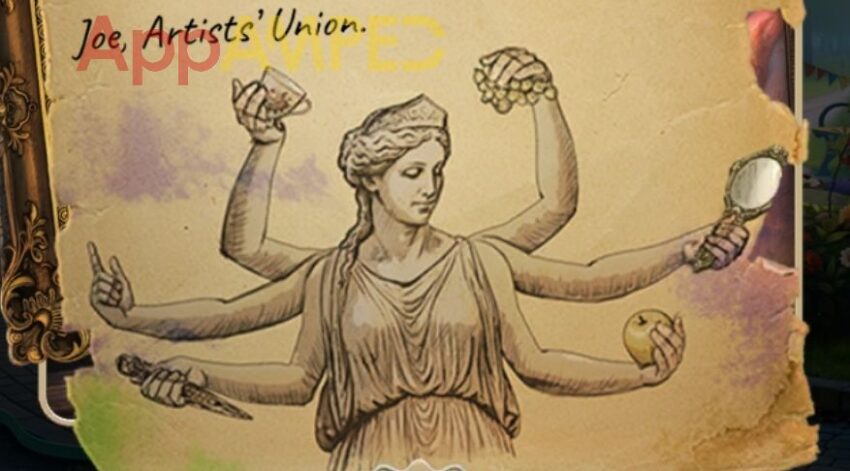
You’ll get the ritual dagger and the mirror (3/4). Go to the actress’ room, put the dagger in the skull and take the decorative tusk and velvet scarf.
Go into the hallway, at the doors in the back, use the velvet scarf to unscrew the lightbulb (2/2) and take it. Go to her room at the mirror, and put the two lightbulbs in the missing spots.
Take the crane body from behind the cracked mirror and Sylvia’s bracelet (4/4). Give her back her 4 items and take the other tusk. Use both tusks on the elephant on the table and look under the glass case, and arrange the parts in their correct spots.
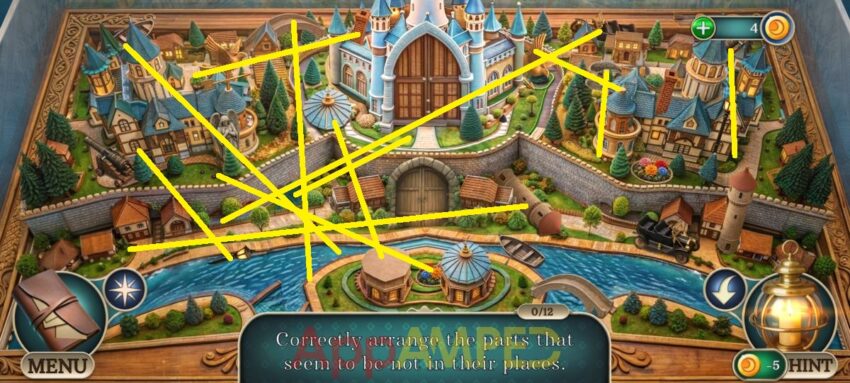
You’ll find a crane wing and bullets. Go into the hallway and put all 3 crane parts on the box in the shelves to the left to get the flower plate. Go put it on the doors at the end of the hallway and restore the image.
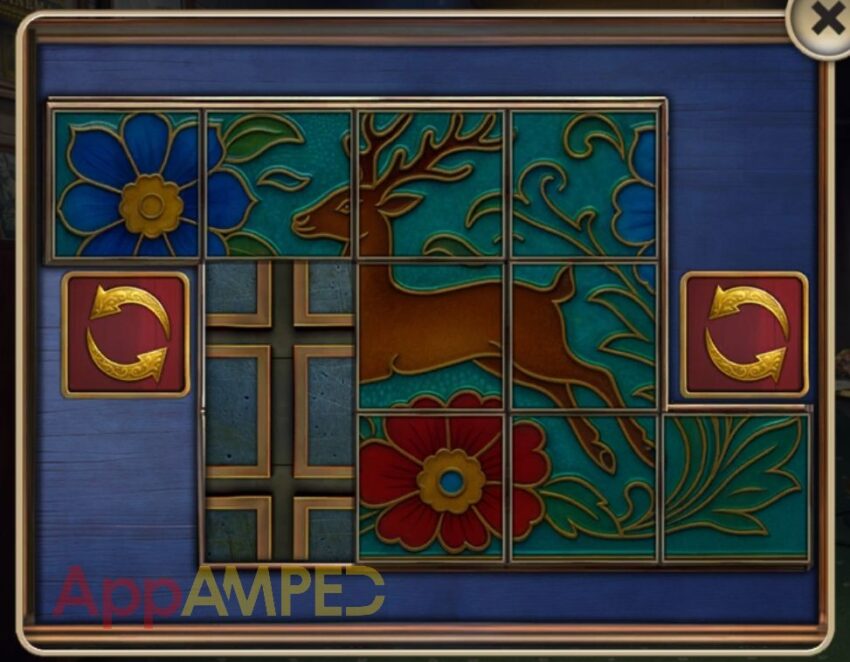
You can enter the theatre room and explore it to find another anomaly, and here you need to find the film with Sylvia’s memories.
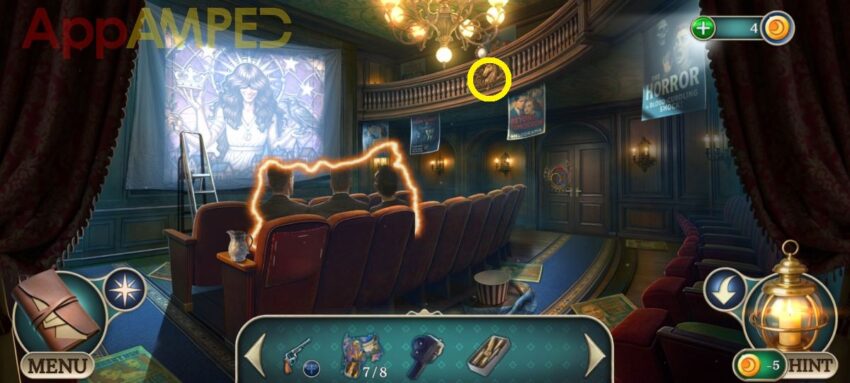
Note for collectibles: I circled the morphing object in this scene for you.
Take the ladder from the screen, the empty bucket from the floor and revolver drum. Look at the anomaly and take the cone. And hanging by the candelabrum there’s a pearl earring you can reach by putting the ladder there.
Go to the hallway, and fill the bucket with popcorn and the corn with candy cane, then take the black candle from the popcorn machine. Go to the anomaly in the theater and put the bucket, cone and pearl earring to the picture on the people there.
You’ll find an old poster, then use the camera on the entity that shows up, and take the broken camera back. Put the trigger, barrel, bullets on the broken gun, then use the loaded revolver to shoot at the candelabrum.
You can now go to her room at the safe in the wall and put the poster here to get the hint you need. Push the golden stars only. Take the film, then put the candle next to the skull to get a spare gear, then use it and the film on the broken camera.
Show the camera to Sylvia and she’ll give you a sealing amulet. Go to the theatre hall, and use the amulet on the red symbol on the floor to get a red energy (1/2).
Go outside the theater and use the amulet on the front door on that symbol to get the blue energy (1/2). Go to the bridge where Owen is and use the amulet on the symbol by the rocks to get a last blue energy (2/2).
Now inside the workshop, use it to get a yellow energy (1/2). Go to the library to get the last yellow energy (2/2), and then to the music room inside the mansion to get the last red energy (2/2).
With these you go to the theatre hall and put all 3 energies on the door in the back. Move the tentacles so they don’t intersect. Select and drag a tentacle to reposition it.
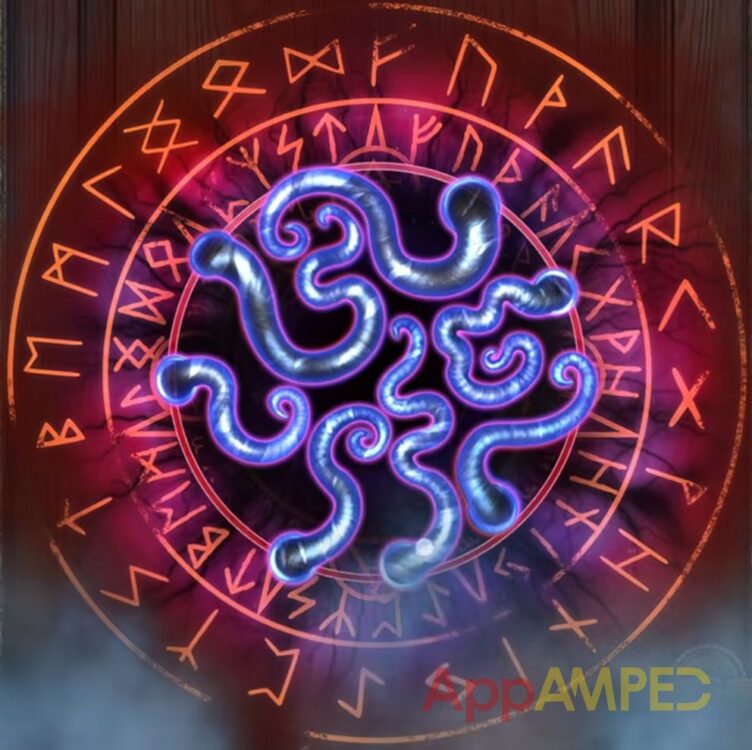
Look behind the yellow energy statue and take the letter from the control panel, then go give it to Sylvia, she’ll give you a door knob.
Go to the theatre hall and use the knob on the secret door in the floor under the rug and you’ll find 3 crystals. Go use them in the editing room on the 3 statues, each with its own color.
Shoot all 3 with the revolver to be able to look around the editing room and find all memory films.
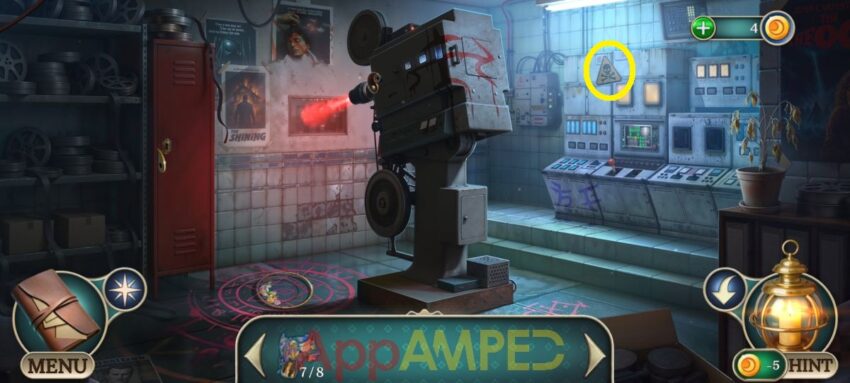
Note for collectibles: I circled the morphing object in this scene for you.
Look at the red cabinet and take Yin sign, then at the camera to find the Yang sign. Go to Sylvia’s room and put the two signs on the desk under the broken mirror to open it and find the ritual film and silver owl.
Go outside the theatre to the blue mail boxes and put the owl on the mailbox to find a blowtorch and a panel switch. Go to the editing room at the control panel and add the switch.
Slide the mixer faders in the correct direction while holding them to align with the matching symbol slot. You can move only an entire row or column of faders.
You’ll find a shelf key that you can use to open the red cabinet here. Take the last colored shard (8/8) and handle piece.
On the floor there’s a broken stained glass, you can fix it using the shards, and complete the ritual stained glass. Go to the theatre hall at the screen in front and put the ritual stained glass next to it. Select all mosaic pieces that differ from the stained glass image.
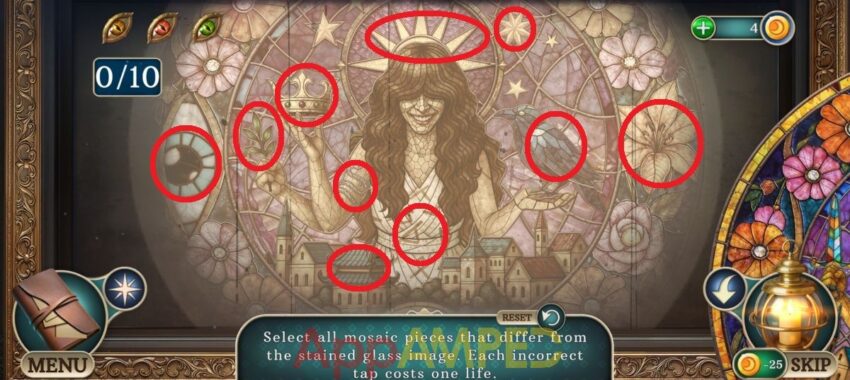
You’ll get a half handle and a ritual film. Go to the editing room and use the handle piece and the half handle on the camera to open and get the ritual film.
Put all 3 ritual films in the pentagram on the floor and use the blowtorch to set them on fire. Take the coin (1/3) from Sylvia and the metal eye from the floor. Go to the theatre hall and take the oil jug next to the chair.
Go to the hallway and take the duster next to the popcorn machine, put the jug under the fruit presser. Now go to the streets in front of the theatre and look at the gates on the left, take the scissors and check out the mailboxes to get a hook.
Use the hook on the plate in the ground with the woman head to remove it, use the duster to clean it and take the helm crest, then put the eye here. Take the coin (2/3) the look at the statue on the right.
Put the helm crest on its head and get the golden bird and olive branch. Go to the hallway and put the olives in the presser, squeeze to get some oil and use it on the scissors. Go outside and use the shears on the weeds that keep the gates closed.
House of Memories – Chapter 4 Walkthrough
Now you can go through the gates and help the person here as well.
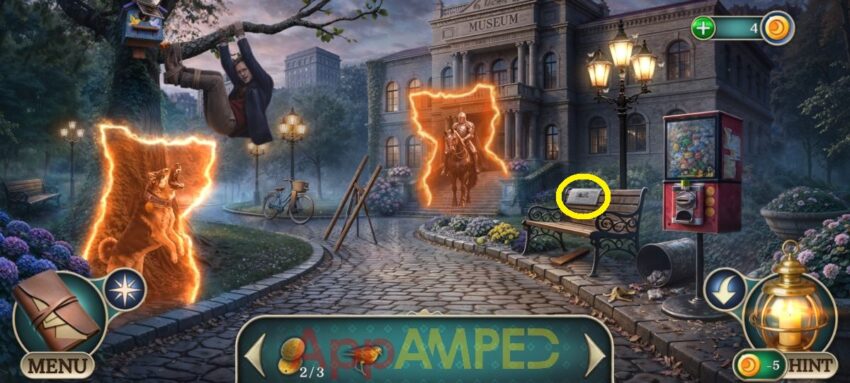
Note for collectibles: I circled the morphing object in this scene for you.
Look on the pavement under the horseman and take the ball and the seashell. Throw the ball at the dog anomaly to distract him and get the collar. Look at the tripod and get the broken ladder.
Take the plank (1/4) under the bench, and the other plank (2/4) next to the bike. Take the third coin (3/3) from the collar, then use the coins on the toy machine on the right. Press the button to get a suction dart and a clay.
Go back to the cinema, right in front and take the plank (3/4) next to the bench. Use the clay to fix the eye on the pavement then use the mirrors to direct the colored rays to the hand brushes in the center.
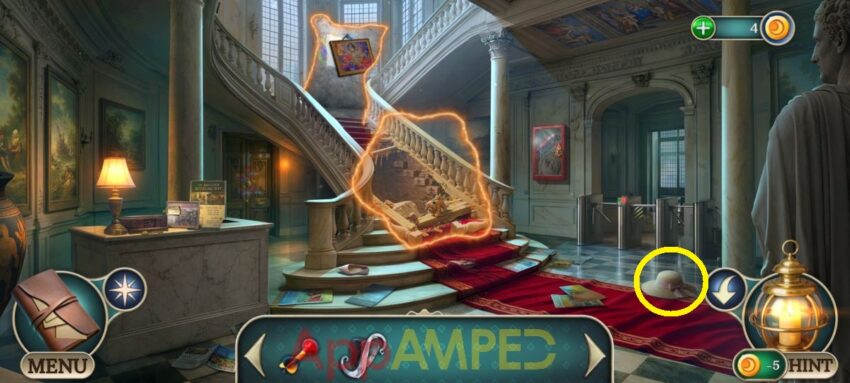
Take the snake skull and the fire symbol. Go to the theatre hall and use the skull to take out the staples in the chair. Take the shoe brush and billiard ball, then take the last plank (4/4). Go outside to the statue and use the brush to clean the chest plate.
Put the fire symbol there to get the flint and the ancient nails. Use the planks, nails and billiard ball to fix the ladder. Go to the museum and use the ladder to get up to the tree, then use the seashell to cut the ropes and get the man down.
He’ll give you a lock code, that goes on the bike’s basket and you’ll find a photo of the man inside, and offer letter, a vintage camera, and a compact mirror. Go up on the tree to the bird house, put the golden bird here and take the flash tray.
Give the letter to the man to help him remember. Then find the items highlighted in his memories and take the flash powder from him. Look at the flash tray, remove the glass, use the flash powder and compact mirror to fix it.
Put the camera on the tripod, then add the flash tray and use the flint. Guide the striker to the flash, then to the camera, without stepping on the locked tiles.
- down x 3 – left wheel – right – up – left wheel
- right wheel – down – left – right wheel – up x 2 – left wheel – up x 2 – right wheel – down – right wheel x 2 – right – left wheel – left – down – right wheel x 2 – up x 2
Now you can enter the museum and find Mnemosyne and other anomalies.
Note for collectibles: I circled the morphing object in this scene for you.
Check out the turnstile to find a tile (1/4), then look at the desk to get a key and a museum ticket, then read the note on the desk. Look at the anomaly and take the toy then go to the emergency case on the wall and use the key on it.
You’ll get a fire emblem. Go to the turnstile and use the ticket to get through to another anomaly at the fireplace.
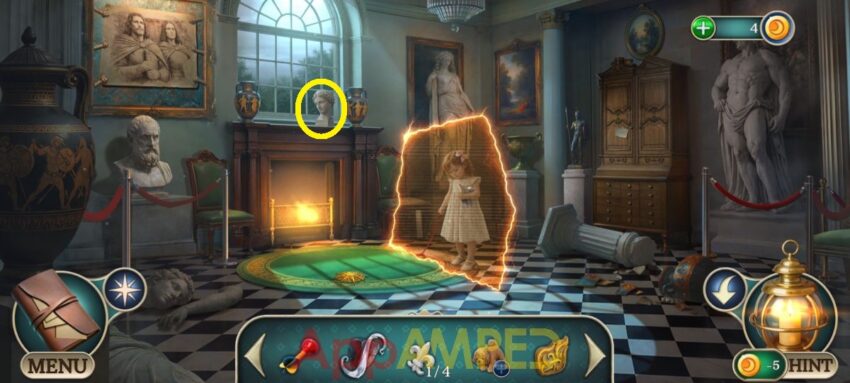
Note for collectibles: I circled the morphing object in this scene for you.
Take the compass rose from the carpet, look at the girl anomaly and take the ruler next to the chair. Look at the cabinet on the right and read the note then use the ruler to open it. Take the thread and needle, the tile (2/4), and the glass cutter.
Go back to the staircase and use the glass cutter on the emergency case, then the suction dart to get the glass out. Take the fire extinguisher and go to the fireplace to put the fire out with it.
Take the tile (3/4) and the silver bird. Go outside and put the silver bird next to the golden bird in the bird house. Take the plush ear and find your way to the theatre hall where the chair is and get some synthetic fiber from there.
Look at the toy, use the fiber to stuff it, then put the ear back on and use the thread to fix it. Go five the toy dog to the girl anomaly in the fireplace room. Take the mute figurine and the scoop then go outside.
Look in the gravel next to the flowers and use the scoop to look under and find a last tile (4/4) and a Mnemosyne key (1/2). Put the 4 tiles at the staircase anomaly in the museum to get some steps. Move the steps so all symbols light up.
Look at the higher anomaly and take the stained painting. Go to the painter at the bridge (Chapter 3) and give him the painting. Take the ingredient list, and the workshop key inside.
Go to the workshop door, behind the staircase and use the key to go inside.
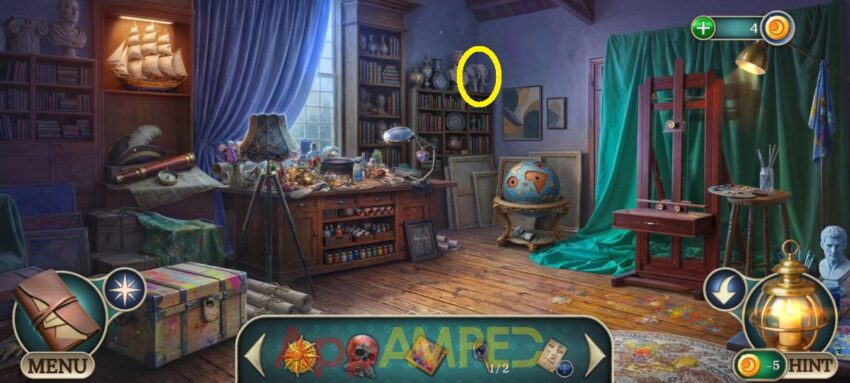
Note for collectibles: I circled the morphing object in this scene for you.
Look at the easel and open the drawer to take the sailor, then put the painting here. Look at the globe and take the glove from under it. Look at the boat on the left and put the sailor here to find a blind figurine and liquid nitrogen.
Use the nitrogen on the lock of the chest, and the glove to brake it. Take the deaf figurine and protective lacquer. Go to the staircase and to the desk on the left to put the 3 figurines on the box in their place.
You’ll find cotton pads and a box decoration. Go to the fireplace room and put the decoration on the box behind the girl. Arrange the stone pointers so that each rune is pointed to as many pointers as scratched in the hint.
Take the continent from inside and the empty film camera. Go to the workshop under the stairs, at the globe in the workshop you can put the continent, the compass and the fire emblem to open it.
Take the recipe book and sculptor chisel. Put the recipe book on the desk to the left, use the flint to turn the fire on and find all the hidden objects missing from the clues.
Lastly, use the ladle to get some cleaning fluid and put it on the ingredient list with the cotton pads and the protective lacquer. Use the restoration kit on the painting to fix it and take it to the staircase to clear the anomaly. Now you can go upstairs to look for Ethan.
Note for collectibles: I circled the morphing object in this scene for you.
Look inside the anomaly and take the silver spoon, then to the pyramid on the left there’s a name plate next to it. Go to the first statue on the right and take the stone book then put the name plate here and take the scalpel and mallet.
Go to the fireplace room, use the scalpel to cut the image of the statues to your left. Then go back and up the stairs and use the chisel on the statues inside the anomaly, the mallet and scalpel, and put the founders image here to start sculpting.
Look at the door after the anomaly vanishes and take the clothespin. Go outside the museum, to the bird house and use the spoon to get some resin from the tree. Use the clothespin to get the Mnemosyne key (2/2) from the straws in the bird house.
Go back to the second floor and use the two keys to open the doors. Connect the silver gears in a chain so they turn the golden ones.
Find a way to weaken her powers using the flash of a camera.
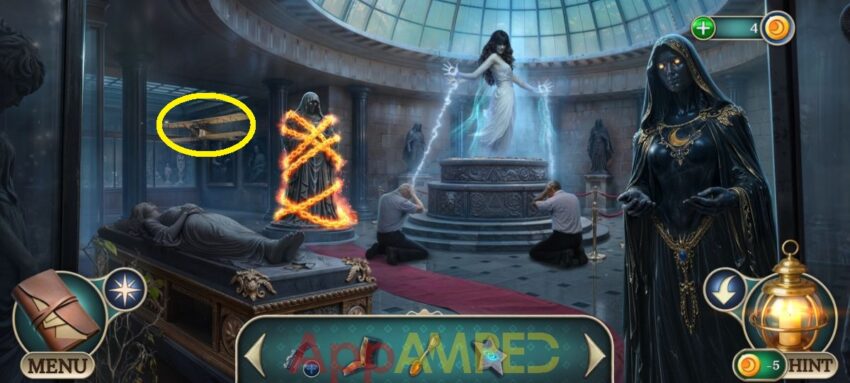
Note for collectibles: I circled the morphing object in this scene for you.
Take the rune eye from the ground, look at the sarcophagus and put the rune eye here to open it. Read the note and take the moon symbol, dented lid, and open amphora.
Look at the statue on the right and put the moon symbol on her chest and the book in her hands. After her face opens, take the film and put it in the camera. Use the camera on Mnemosyne.
Use the camera buttons to rotate the plates in the central ring so their colors match the inner and outer rings:
You’ll take the spirit photo. Now look at the table under her and read the notes about amphoras. Take the M monogram and the bronze hammer. Go back one room and put the M on the pyramid to find a amphora (1/5).
Go to the workshop behind the stairs and put the lid on the anvil in the chest, then use the hammer to straighten it. Put the resin and lid on the amphora (2/5) to take it.
Go look for the other ones around the places you visited in the previous chapters. One amphora (3/5) is at the bridge in chapter 3 next to the lures, use the hammer to get it out.
Another amphora (4/5) is in the library next to the desk, again you need the hammer to get it. And last amphora (5/5) is in the garden of the mansion in the ground. Go to Mnemosyne room and put the amphoras under her then add the spirit photo.
Arrange them in their places then Move all pieces from the left side to the right to restore the ruined altar and defeat Mnemosyne.
Wrapping up
And that completes our full walkthrough for Icebound Secrets 4: House of Memories. From uncovering hidden rooms and solving complex musical mechanisms to piecing together the haunting mystery step-by-step, you finally finished the game.
If you ran into any tricky mini-games or missed a morphing object along the way, let me know in the comments below, I’ll be happy to help.
Don’t forget to check out our other hidden object and room escape walkthroughs here like Artifact Seekers – Witch Wood or Adventure Escape Mysteries: Canine Cases 2.

Aylin is a content creator and co-founder of App Amped. She was a huge Tomb Raider fan before moving on to more casual titles. She spent way too much time tending for her FarmVille farm as well as playing text-based browser games. Now she plays and writes about mobile games, creating in-depth walkthroughs and useful guides.
Will you be finishing this?
When I started it there wasn’t much engagement with the article, so I saw no point in continuing it. Now, however, I’ll try to finish the game for the few that seem to need it. I’m sorry about the long wait!
This is super useful. Your style is the best one out there, so helpful thank you
Thank you for reading! ❤️
where is the next part of the walkthrough? after john gives you the lighter? i have to have more walkthrough help please and thank you !
I’m sorry for the long wait! I’ll do my best to continue the walkthrough. At the beginning there weren’t many views and I had to drop it for a bit.
Thank you for your excellent walkthrough so far. I’m looking forward to following the rest of it when you have time to post 🙂
Thank you for reading! I’m as slow as a turtle with this one, but I’m gonna try to do my best for all my readers!
Thoroughly enjoying the help your walkthrough gives us. I can’t wait for the rest
Thank you for reading! ❤️