
Join me on a new adventure as we discover the mysteries of these Restless Waters. If you are an adventure seeker too, then this walkthrough will help you reach the end of the story by helping you with all the puzzles and mini-games you encounter.
Guided by old legends, ruined records, and the uneasy testimony of Captain Esteban Ruiz, Raphael and Inara follow the hidden journey from abandoned docks and forgotten chapels to a battered lighthouse island and wrecked merchant ships.
Restless Waters – Chapter 1 Walkthrough
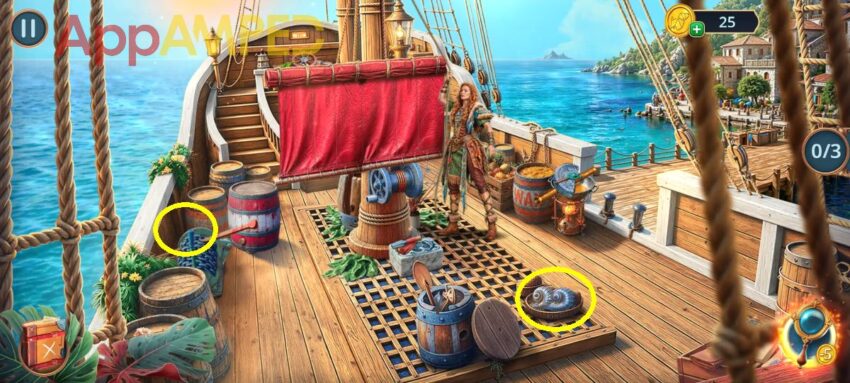
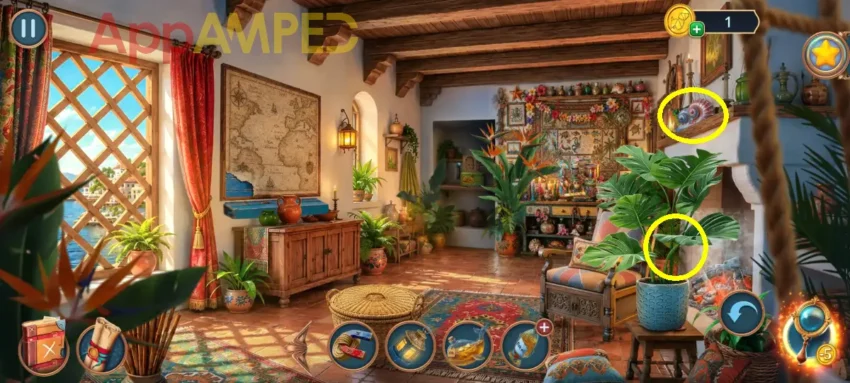
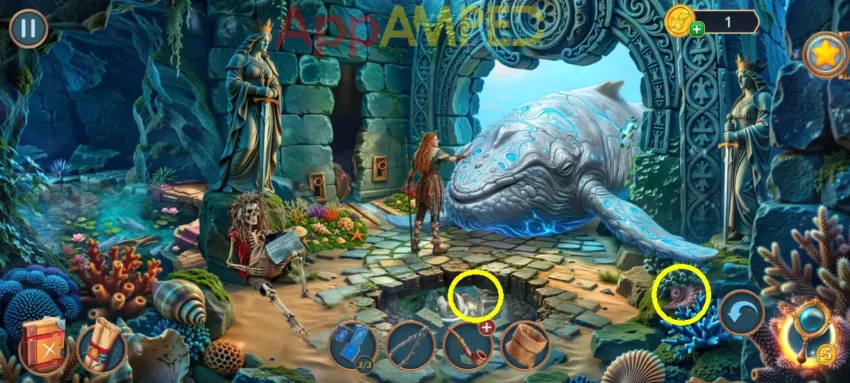
Note for collectibles: There are some shells on this scene that I’ve circled for you.
Check out the ground at her feet to get a spear and use it as a lever to roll the rope and get a ladle. On the right, next to the wax barrel, are a hand rake, a calendar part, and a support (1/2).
Use the ladle to get some wax and melt it. Look on the left at the chain and barrel, and use the wax on the lever to get the oar. Go up the stairs to the wheel and read the journal, then take the rope, the boards, and the bucket.
Take the oar, then use the boards and rope to make a ladder. You can put it over the ship to get down into the port.
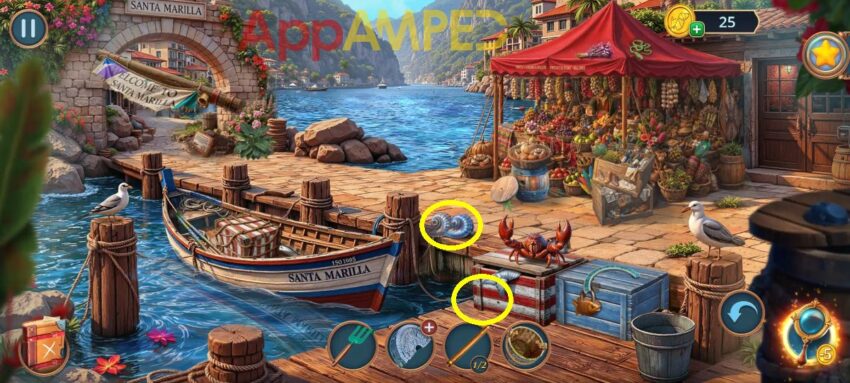
Note for collectibles: There are some shells on this scene that I’ve circled for you.
Look at the fallen welcome sign and read the note, then use the rake on the dirt pile to find a coin purse. Go to the market tent and give some coins to the seller, then find all the items.
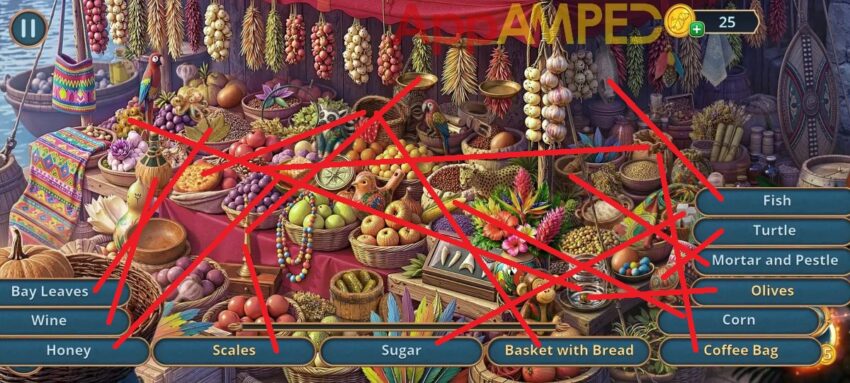
You’ll find a shark tooth that you can use to cut the rope of the chest in the boat. Take the honey and support (2/2). Go to the fallen sign and use the supports to get it up so you can pass. Collect all keys:
Go and explore the city center to look for more clues.
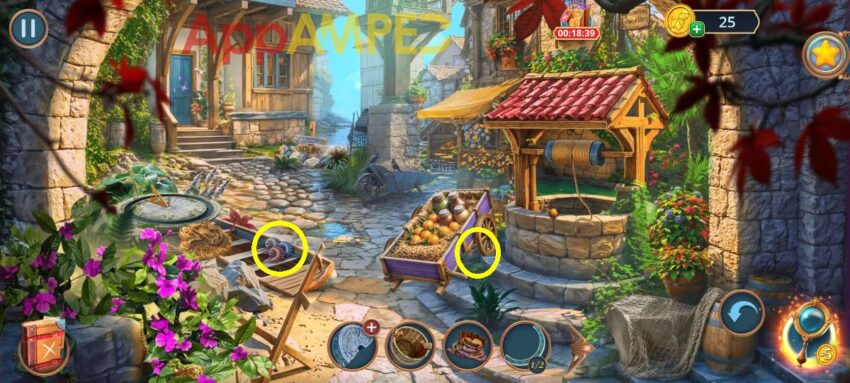
Note for collectibles: There are some shells on this scene that I’ve circled for you.
Go to the door and read the note, then take the hook. Check out the well, take the orange, and put the bucket and the hook in to get the sign. Put the sign on the signpost near the house. Find all the flowers around the fountain chaos.
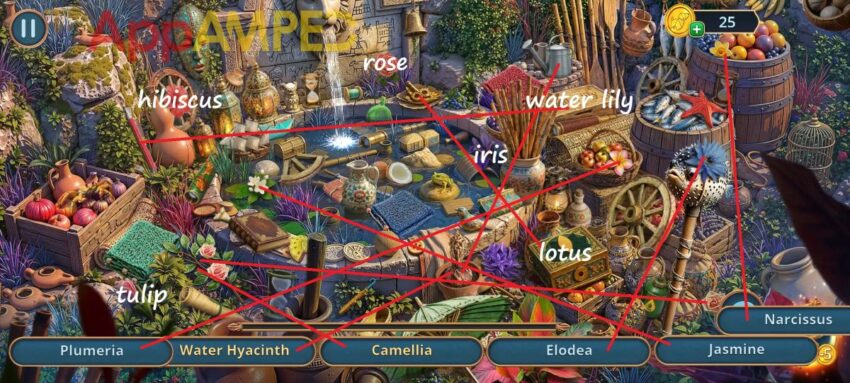
Take the drill bit. Go to the boat and use the drill on the barrel on the left to open the cork and empty the water. Take the rings and use them to open the hatch in the floor under the wheel.
Take the willow vine, the map, and the sundial part (2/2). Go to the city center and use the sundial parts to fix the sundial.
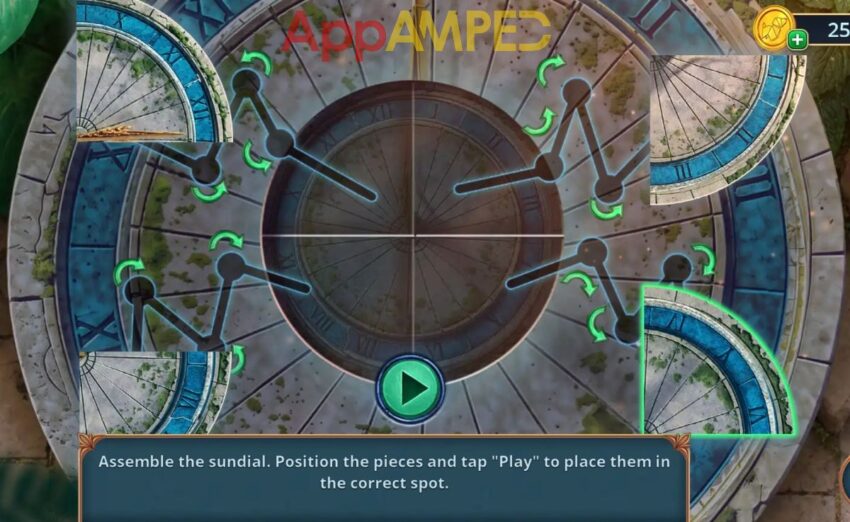
You’ll find a chisel and a calendar part. Open the first calendar part, use the vine and the second calendar part to make a stone wheel. Check out the cart and use the wheel to move it and get the shackles and the bell.
Go to the door and put the bell next to the other. Arrange the bells in the desired order drawn for you on the right side. Now you can go inside the bar and talk to the man.
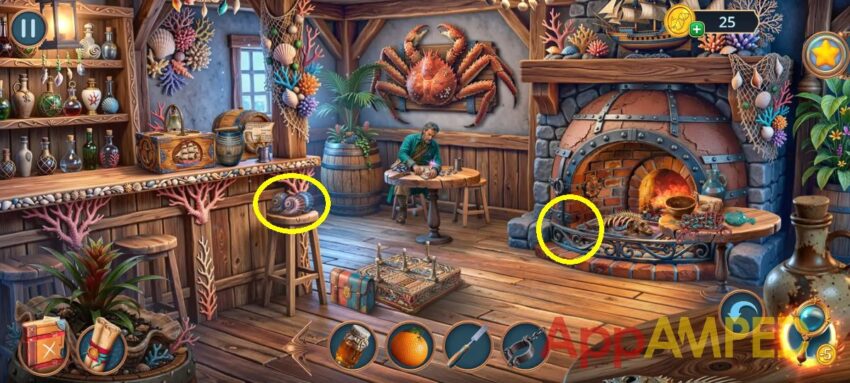
Note for collectibles: There are some shells on this scene that I’ve circled for you.
Look at the bar, read the note, take the barrel of tar and the sailor figurine. Check the fireplace, use the shackles on the fish bones to get the magnet. Check the bag on the floor and use the magnet to open it.
Get the dominoes inside and the spur. Go to the pier and find the items hinted by the shadows.
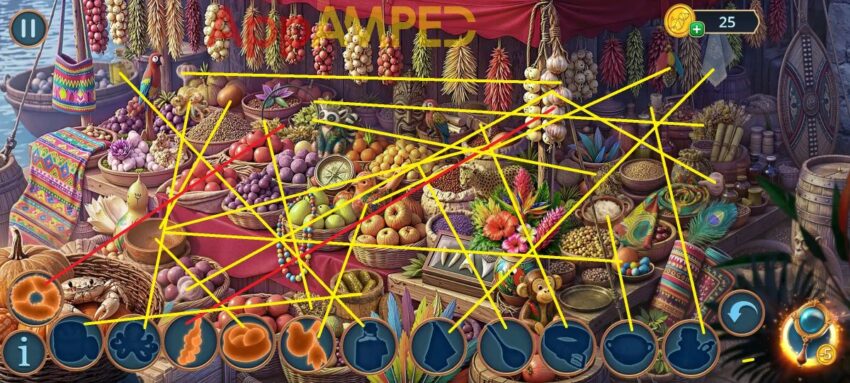
You’ll find a bottle of spices. Go to the pub at the bar, and put the spices, the orange, the honey, and the money together to make a rum drink. Go to the man at the table, offer him the drink and dominoes and play with him.
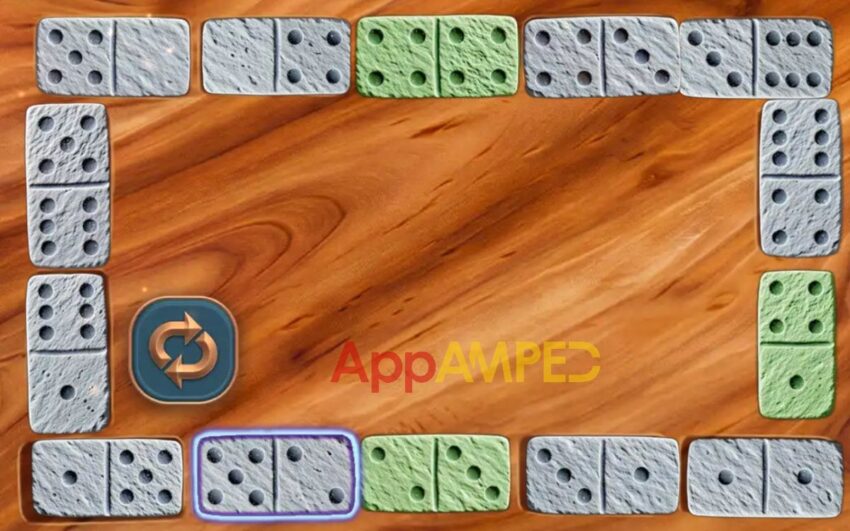
After the game, he gives you some mussels, and you are sent to the pier to save the captain. Give the mussels to the crab on the crates, take the sea salt, and the captain figurine.
Go back to the pub and put both figurines on the box on the bar, take the ring (1/3), and the feather. Look at the fireplace and use the feather to swipe the glass shards and take the net.
Go to the pier and use the net to help the captain in the water. You’ll find a fork after you talk to him. Go to the city center and use the fork in the tangled mess next to the sundial.
Take the bow, the matches, and the flax. Go to the pier and use the flax, the chisel, and the tar to cover the holes in the boat. Swim across by passing through all the points.
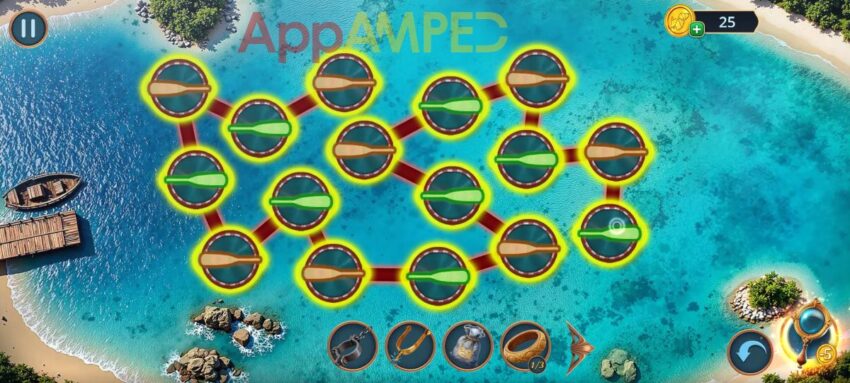
You reach the Elder’s house and are able to explore the area to find a way to talk to him.
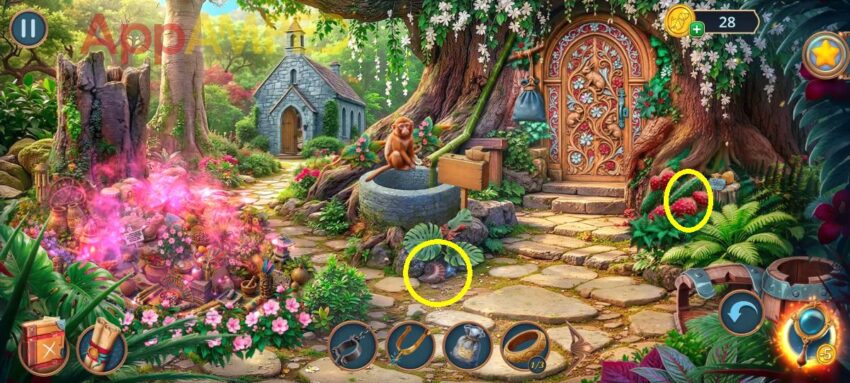
Note for collectibles: There are some shells on this scene that I’ve circled for you.
Look at the tree stump on the right, read the note, and take the yeast and the ring. Check out the door and use the spur to cut the bag, and take the flower figurine.
Use the flower figurine on the pink mist next to the turtle. Then look for the images shown below in the hidden objects game. You’ll find the bananas that you can give to the monkey. Take the arrow and the ring (3/3).
Go back to the pub, put the 3 rings on the game on the floor then play the game. You’ll get a hand puppet when you win the game. Now you can go explore the abandoned chapel.
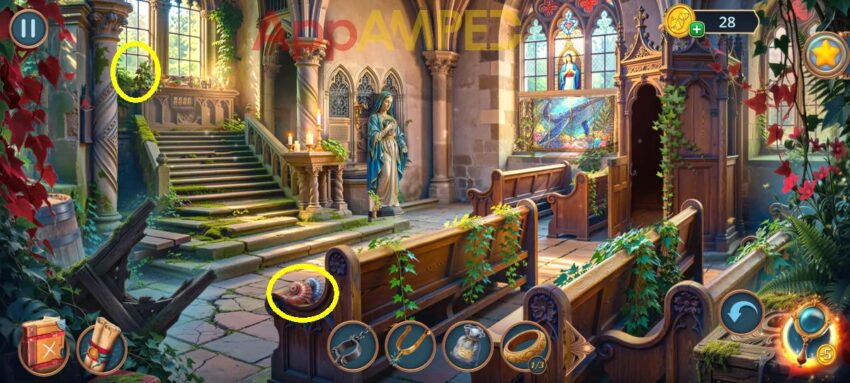
Note for collectibles: There are some shells on this scene that I’ve circled for you.
Look at the confessional and take the brush, then go up the stairs at the altar, take the oil lamp, palm leaf, and censer. Go put the censer on the hook next to the statue, you’ll find figurines, wick, and ink.
Use the palm leaf, the brush, and the ink, at the stained glass window to copy the shape of the missing part. Put the figurines on the altar to get the code for the safe. You’ll find kerosene inside.
Take the oil lamp and put the flick, the kerosene, and the matches to make it work. Hang that in the confessional to find a glass carving chisel.
Go outside, at the cactus next to the house, and use the hand puppet to move the cactus and find some flour. Go to the pub, by the fireplace, put the flour, yeast, and salt on the table to make some bread.
Go to the Elder’s house and give him the bread so he will let you inside and you’ll be able to find more information and explore the inside of his house.
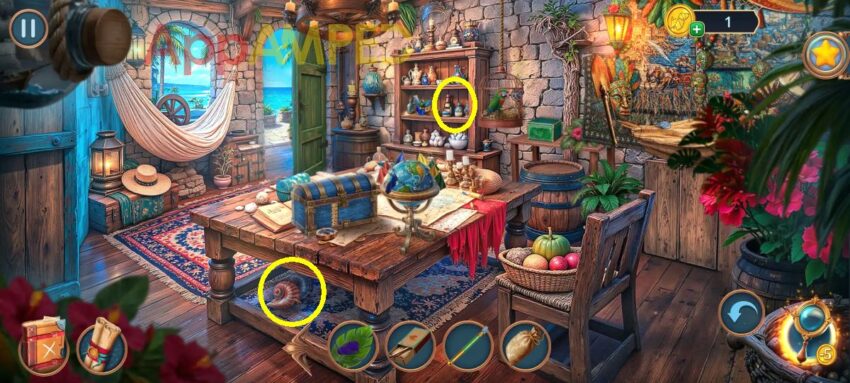
Note for collectibles: There are some shells on this scene that I’ve circled for you.
Look at the thread painting on the right and take the wing (1/2). Check out the shelves, take the flag (1/2) and the weaving shuttle. Go to the parrot cage and put the leaf on the green glass case, then use the glass chisel to cut a stained glass.
You can go out the back door to the lagoon’s shipyard.
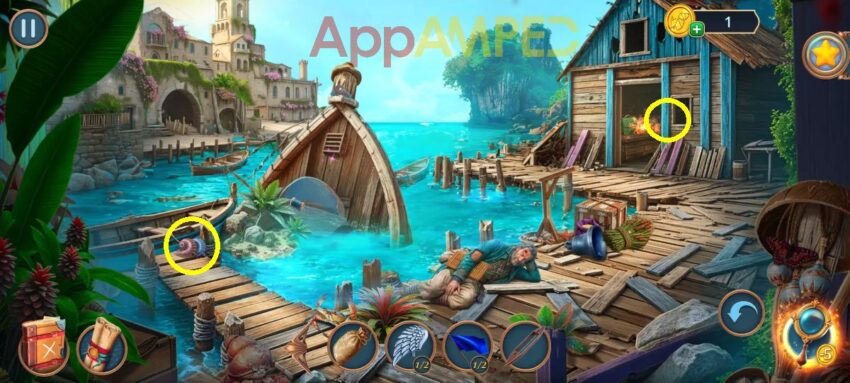
Note for collectibles: There are some shells on this scene that I’ve circled for you.
Check out the stones near the wrecked ship and take the thread and horsehair. Use the horsehair and arrow to fix the bow. Use the bow to aim at the chain holding the wreckage.
Take the chain and use it with the shackles on the crate behind the wounded man. You’ll find a sandbag under the bell. Go pour the sand on the fire in the back. Read the note and take the bandage.
Use the bandage on the wounded man to get the weaving reed. Go to the tapestry inside and use the weaving reed, the thread, and the shuttle to fix it. Find the images on the bottom and get the sapphire.
Go to the shelves at the parrot statue and put the sapphire here to find a flag (2/2). Use the flags on the globe, and you’ll find a belt and a jack-plane. Go to the chapel and put the stained glass on the window to find a broken wire cutters and a hand.
Put the hand on the statue, and you’ll get the stone sphere. Put that on the altar in the bowl to find a decoder and a crab claw. Go to the elder’s house at the globe and use the claw to get the coin stuck there.
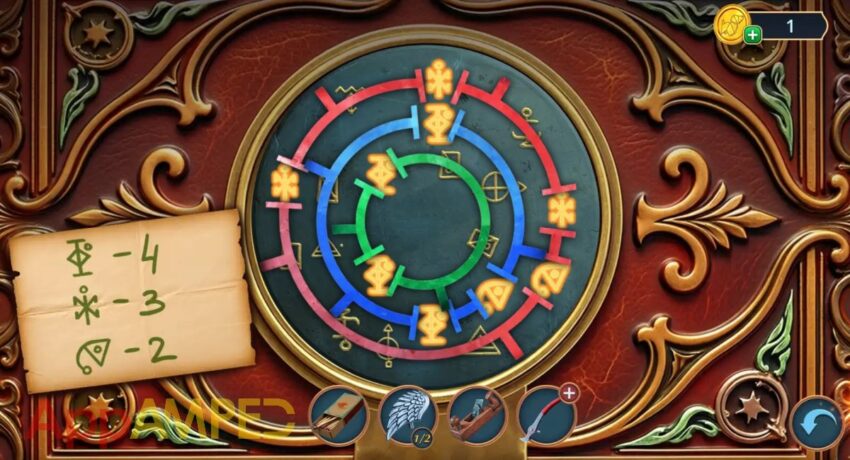
Go to the chapel and use the coin to open the bench of the confessional, then use the decoder on the book. Rotate the rings as the hint suggests and read the book.
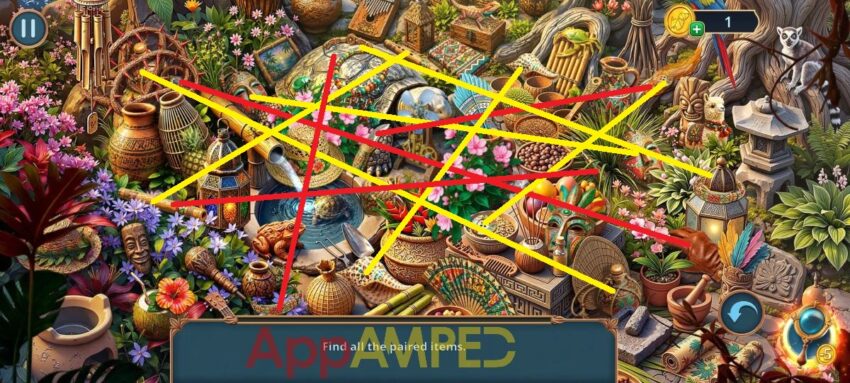
Go outside and check out the hidden object game in the bushes, then find all the paired items.
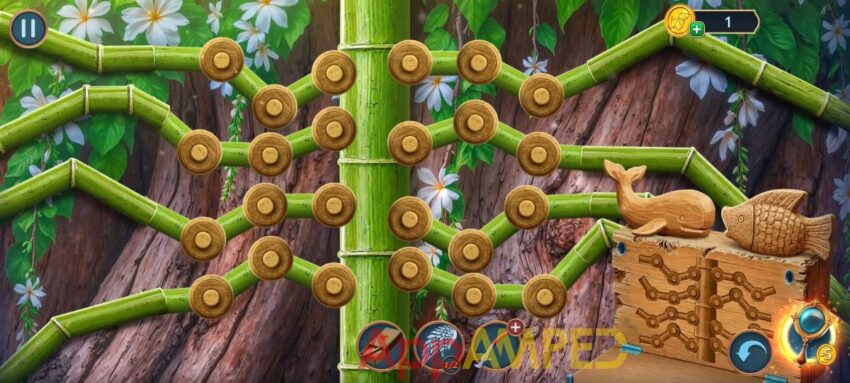
You’ll find a whale diagram. Go to the tree stump next to the door, put the diagram and jack-plane here to make a whale. Put it next to the fish on the wooden case in front of the house. Rotate the segments to direct the water.
Take the scissors and go to the lagoon. Check the crate above the wounded man and use the scissors to cut the rope around the cattails. Take the sailcloth and wing (2/2). Go inside the shed and use the 2 wings to open the bag and get the chess piece.
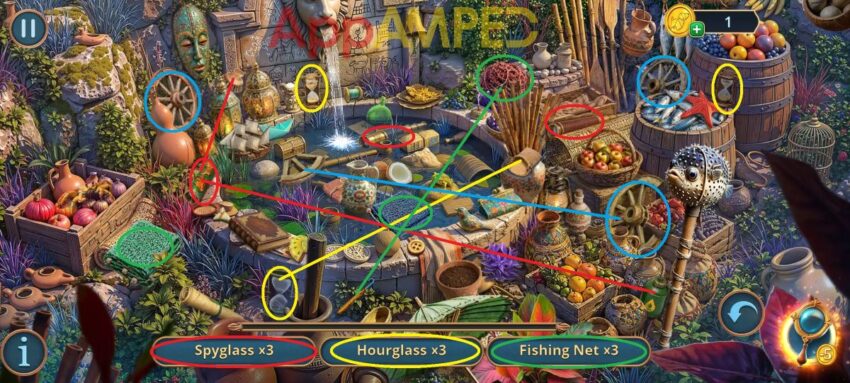
Now go to the city center and check out the hidden object game again. Find 3 of each.
Take the brush and go inside the Elder’s house to the shelf. Put the flour on the bottle and use the brush to find a code. Use the code on the chest on the table to open the lock. There are 8 buttons, I’ll count from top to bottom.
- 7 – 5 – 4 – 6 – 3 – 2 – 8 – 1
Take the crowbar and go to the pier and use it on the blue chest to get the branch and the mirror. Go to the Elder’s house at the parrot and use the mirror to get the pencil. Check out the tapestry to find all the differences.
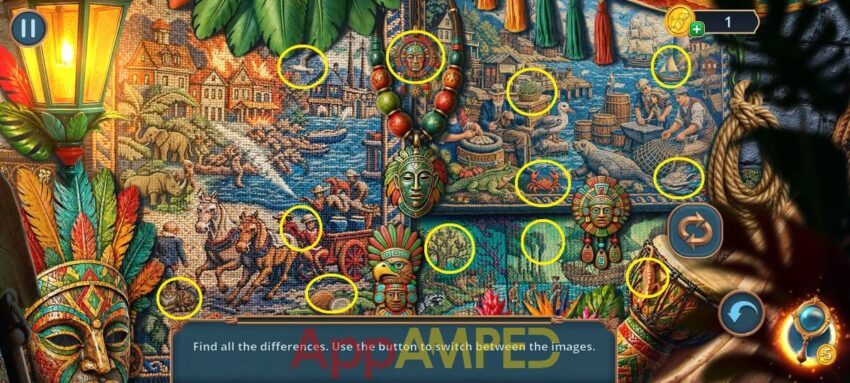
You’ll find a ship wheel part and go to the ship you started at, and put it on the wheel there. You’ll find an anchor amulet. Put the anchor amulet on the box under the sail. Make all the amulets identical.
- dolphin – anchor – fish – dolphin
Get the explosive and go to the lagoon, put them on the shipwreck and use the matches to blow it up. Take the rum and go to the wounded man. Put the belt, the branch, and the rum. Find the item after the shuffle.
- belts: first row 5th tile – second row 4th tile
- rum: first row 5th tile – second row 2nd tile
- branch: first row 5th tile – second row 1st tile
- leaf: first row 4th tile – second row 2nd tile
Restless Waters – Chapter 2 Walkthrough
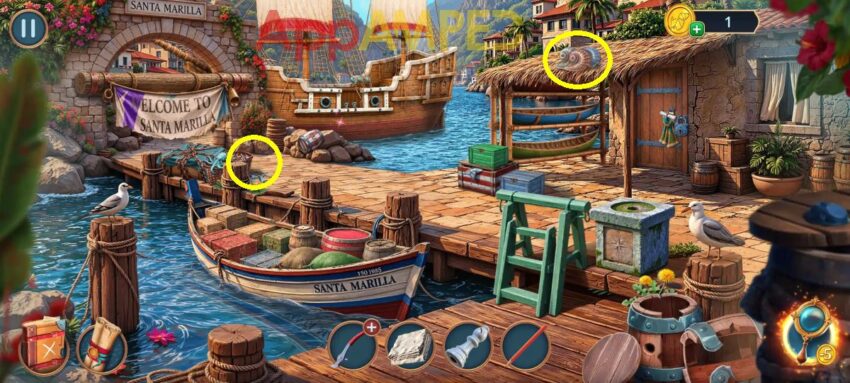
Note for collectibles: There are some shells on this scene that I’ve circled for you.
Go to the door of the house and read the note, then take the scarf, the paper, and the hook. Look at the stone next to the seagull and use the hook to get the palm leaf under the stone step.
Go to the blue crates next to the octopus, use the leaf to swipe the shards to find a hand drill. Check out the barrel next to the ship and use the drill to make a hole to find a cutter’s part. Fix the wire cutters with it.
Go back to the octopus and use the wire cutters to cut the chain to find a scheme and tackle. Go to the barrel and put the tackle to reach the ship and climb the ladder to the deck.
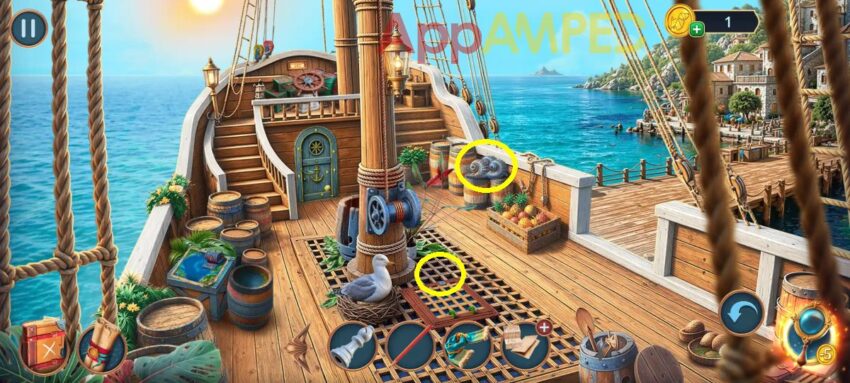
Note for collectibles: There are some shells on this scene that I’ve circled for you.
Look at the barrels on the left, take the piece of cloth, then go to the door and use the chess piece to open it. Read the note, take the oil lantern and the sail wheel. Go up the stairs to the front and put the wheel next to the other ones to get a ruler.
Use the ruler and the scheme on the piece of paper to make an origami bird. Use the bird on the seagull sitting in its nest. Take the large key and use it to open the door of the hut on the pier. Find all items needed.
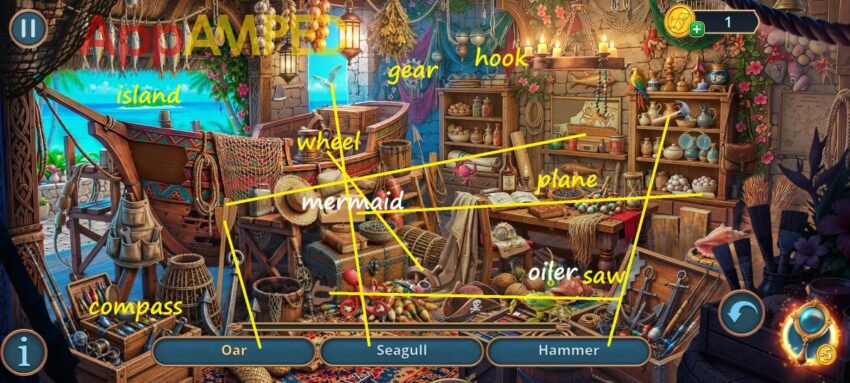
You’ll find fresh water that you can pour over the octopus to make it move and find dividers underneath. Go on the ship at the map on the barrels, put the pencil and dividers to find the route.
Go to the wheel and put the route on the crates, then guide the ship across the map.
The captain will give you a mirror, and you can now explore Lighthouse Island and find more clues.
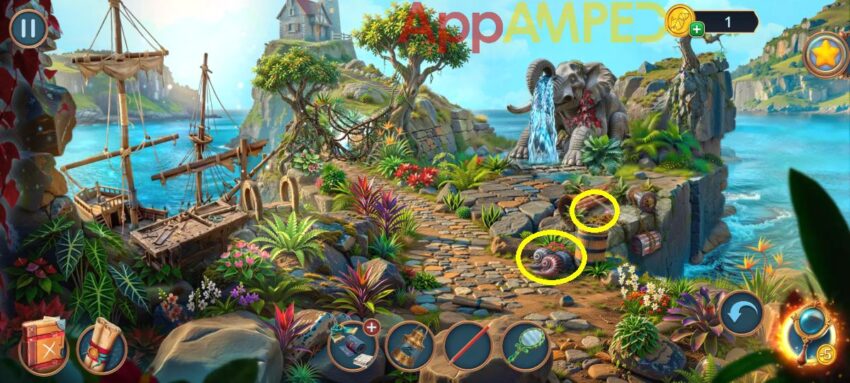
Note for collectibles: There are some shells on this scene that I’ve circled for you.
Check out the log on the right, read the note, and take the bamboo stick. Use the mirror to burn the weeds here, then take the bark. Look at the elephant and use the bark to move the stream and get the broken signpost and boards.
Put the boards on the crates to the left and assemble the rake. Go to the two trees and use the rake to move the thorns. Take the knife, then use it on the piece of cloth, together with sailcloth and scarf to make a rope ladder.
Use the rope ladder on the edge to the left to reach the sunken ship. Explore to find more clues.
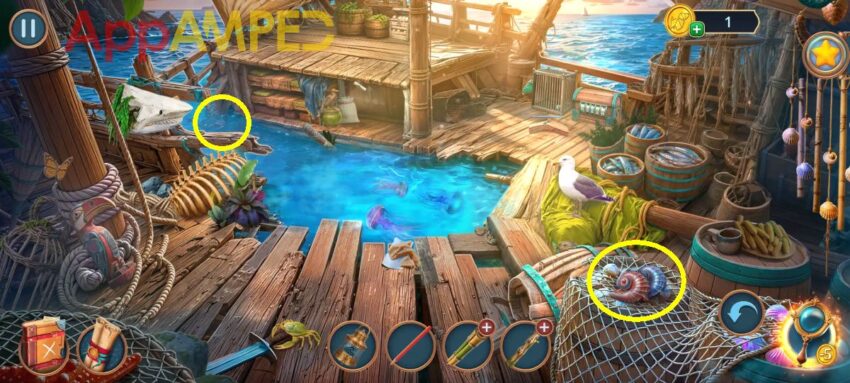
Note for collectibles: There are some shells on this scene that I’ve circled for you.
Look at the jellyfish and take the wax on the edge, then take the paper. Check out the bag, read the note, put the oil lamp on the hook, use the paper and the pencil to draw the code, then go to the crate and put the code to open the chest.
Take the torch and the helmet. Go to the bones on the left, use the helmet to open the jaws, and find some pointers and a bone. Go back to the island and use the bone on the chain device on the right, to get the chest up and find a wick and nails.
Check the signpost, put the pointers and nails to fix it. Go to the trees and put the signpost here. Move across the stones:
- right – up – right – up – right – up – right
You’ll reach the path near the lighthouse and need to find a way inside.
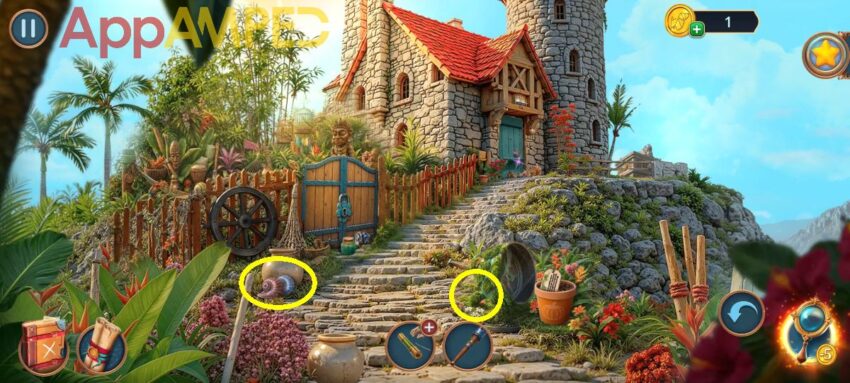
Note for collectibles: There are some shells on this scene that I’ve circled for you.
Check out the garden gate and take the jar. Look at the pot on the ground and read the note. Go up to the fence in the back, read the note, take the pumpkin seed (1/2), wooden block, and gun powder.
Look at the bamboo stick, put the wick, the wax, and the gun powder to make explosives. Go to the garden gate, put the explosive here and blow it up, then find the right items:
- Coconut drink = coconut + straw
- Fisherman = fish + fishing rod
- Sea route = compass + map
- Signal from the shore = SOS flag + campfire
- Carpenter = saw + hammer
- Healer = hearing tube + medicine symbol
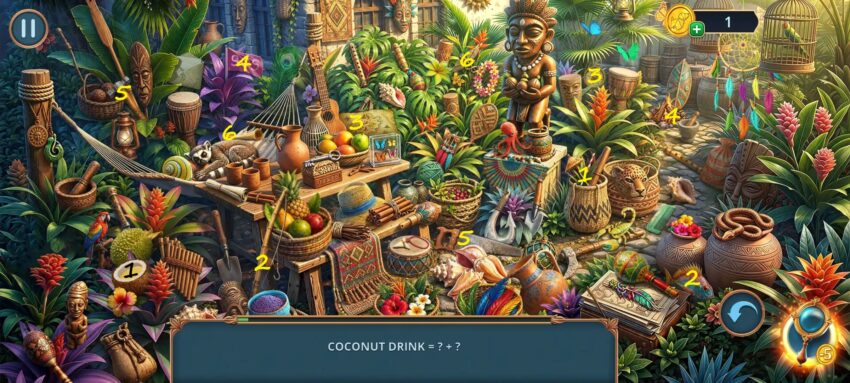
Take the Poseidon figurine and put it on the stone fence in the back, then take the pumpkin seed (2/2) and the gong.
Put the gong next to the mice in front of the lighthouse door and use the torch to make a loud noise to get to the nettle potion. Go to the pot and put the seeds inside, then use the potion. You’ll find a brush, a broken whale figurine, and a lighthouse.
Go to the lighthouse door and put the lighthouse figurine on the door next to the ship. Guide the ships through all the cells on the field to the final point.
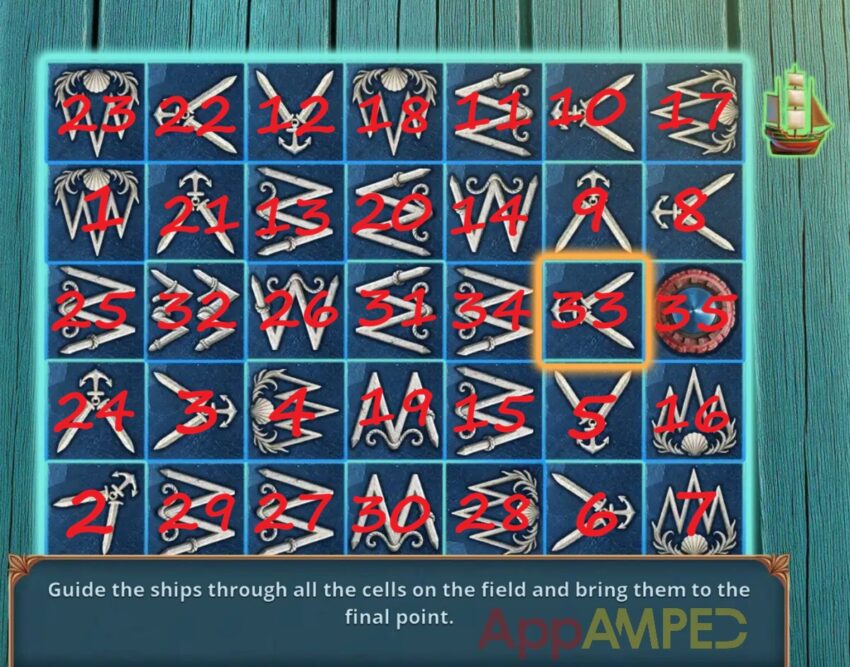
Now you can go inside the lighthouse and talk to Leah, then find more clues.
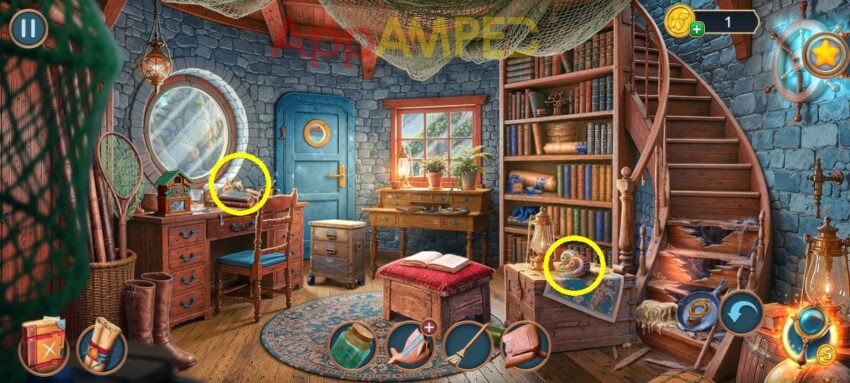
Note for collectibles: There are some shells on this scene that I’ve circled for you.
Check out the stairs, take the sling and the pan. Go to the desk and use the pan to remove the nail and open the drawer. Read the book and take the lighter. Go back to the stairs and use the lighter to melt the wax. Take the sail and the skull.
Look at the mobile drawers and use the skull to open the last drawer and get the pin and resin. Open the wooden block and put the whale block and resin to fix the wooden whale.
Go to the table by the square window and put the whale on the circle. Rotate the islands on the map using the clue. Take the shell and go outside to the pot to remove some moss. Use the jar to get some termites.
Go to the island part and use the termites on the wooden log to find a coconut. Go to the edge behind the elephant, looking at the crooked tree. Use the sling and the coconut to get down the whale oil.
Go back to the lighthouse’s garden to find all the pictures needed to find alcohol. Go back inside, use the alcohol on the ink on the shelf, and take the arrowhead.
Go to the sunken ship, look under the deck at the white bag, and use the arrowhead to open the bag to move it and get the lattice. Go inside the lighthouse and use the lattice on the broken stairs to go up to the top.
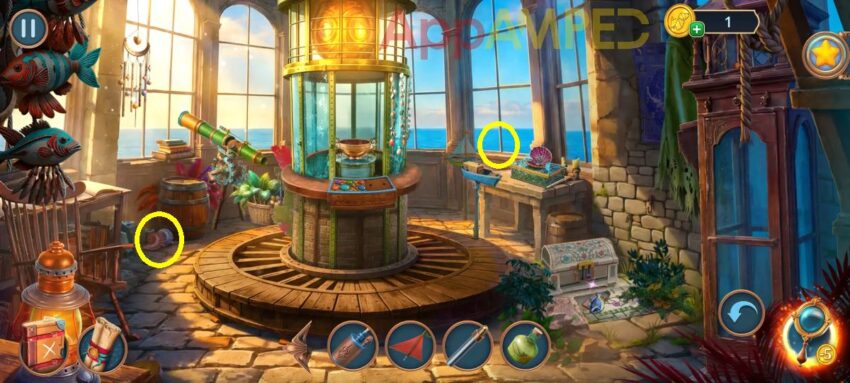
Note for collectibles: There are some shells on this scene that I’ve circled for you.
Check out the chest on the right and take the dried fish (1/2) and mouse trap. Go to the telescope, use the oil and brush to move the gears, and take the magnet and blades.
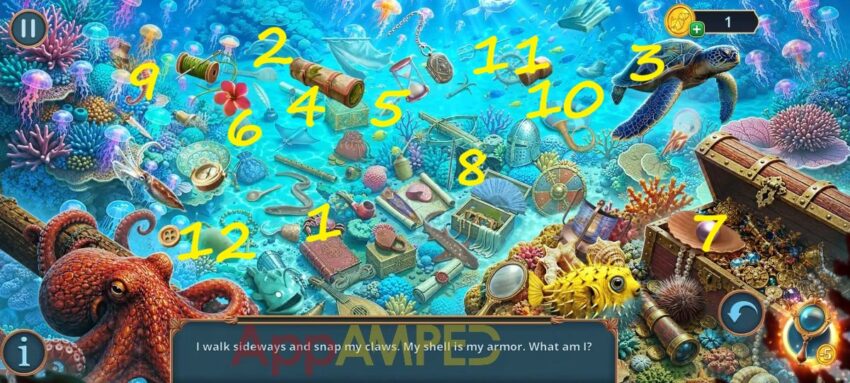
Look at the table and put the sail, the pin, and the blades on the ship to open it and get the fish figurine and caviar. Go to the sunken ship and use the caviar to distract the jellyfish, then find the objects that answer the riddles.
- I walk sideways and snap my claws. My shell is my armor. – crab
- I live in the sea, but I am not a fish. I am smart, fast, and love to leap out of the water. – dolphin
- I am a star, but not in the sky. I have no light, but I have rays. – star
- I fall into the depths and hold the ship in place. The stronger the waves, the more important my job. – anchor
- I float without oars and keep others’ words. – message in a bottle
- I am a small vessel for water, but not a glass. I am taken on a journey to quench thirst among the waves. – flask
- I am born in a shell and valued above gold. – pearl
- I flutter above the ship and frighten sailors. I often have bones and a skull on me. – flag
- I look like a horse but live underwater. I swim slowly and cling to seaweed. – seahorse
- I am round and bright. I am thrown into the water to help a person stay afloat. – life ring
- I am round, but not for the road, I am turned by hands so the ship can choose its path. – ship wheel
- I am an ancient vessel that slept under the water for centuries. Wine or oil was once stored in me, and now sand. – vase
You’ll find a lizard figurine and go to the top of the lighthouse. Use the lizard to open the chest, take the mosaic fragment and the star amulet. Go to the lighthouse path, at the stone with the Poseidon statue, and put the star here, then restore the amulet.
Take the pliers and use them to take the spring from the mousetrap. Go inside the lighthouse at the desk, and use the spring to fix the clock.
Take the ball and put it on the mobile drawers to move it away and be able to go through the back door on the Coastal Path.
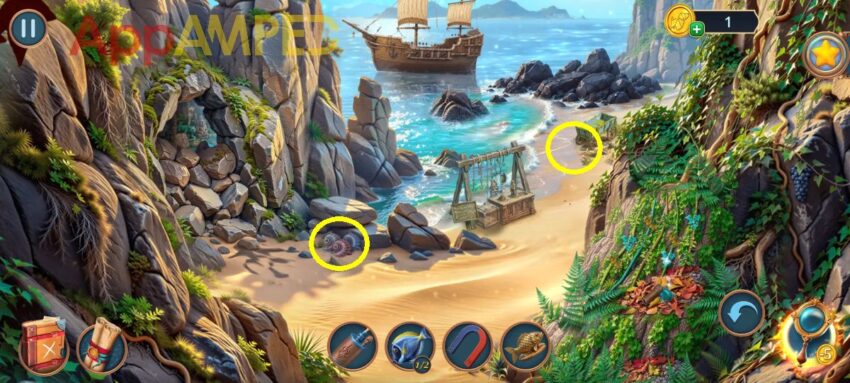
Note for collectibles: There are some shells on this scene that I’ve circled for you.
Look closer at the bushes on the right, take the harpoon handle and the beetle. Use the magnet in the leaves to find a crowbar. Look at the rocks on the left and use the crowbar to make the hole bigger, and look inside for the items needed.
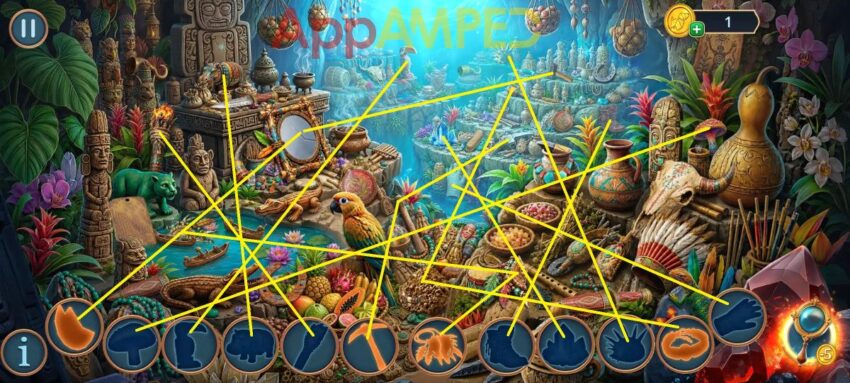
You’ll find a fly figurine and go to the cart. Put the fly and the beetle on the tongues of the frogs. Take the mask (1/2) and dried fish (2/2).
Look at the crates and put the fish figurine next to the other figurines, and the dried fish in the hooks. Arrange the fish according to the clue.
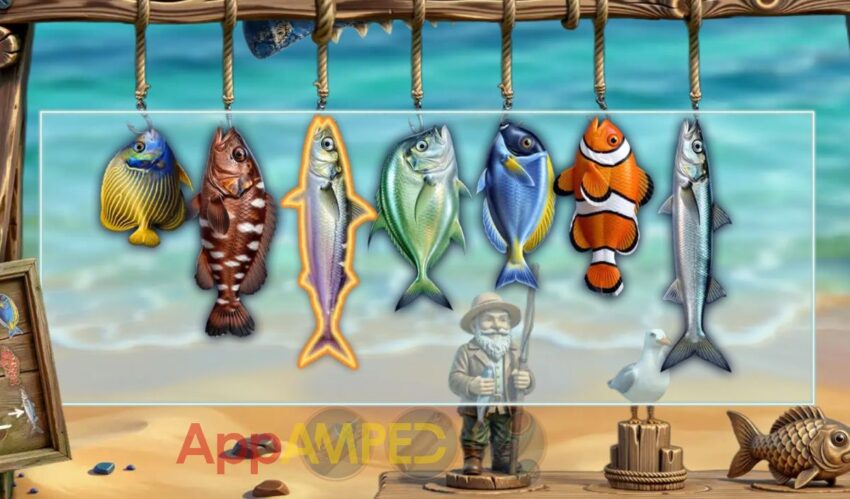
Take the sawfish nose and go to the sunken ship. Use the sawfish nose to cut the skeleton and get the belt. Use the belt on the cage under the deck to break it and take the lens. Look into the water again and find all the items.
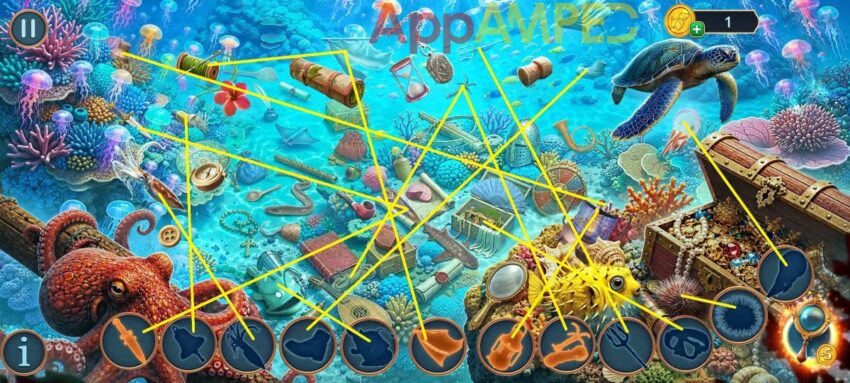
You’ll find a pearl and now you can go to the top of the lighthouse, then put the pearl on the shell next to the boat to find a wooden wing. Go to the sunken ship and put the wing on the wooden bird under the deck.
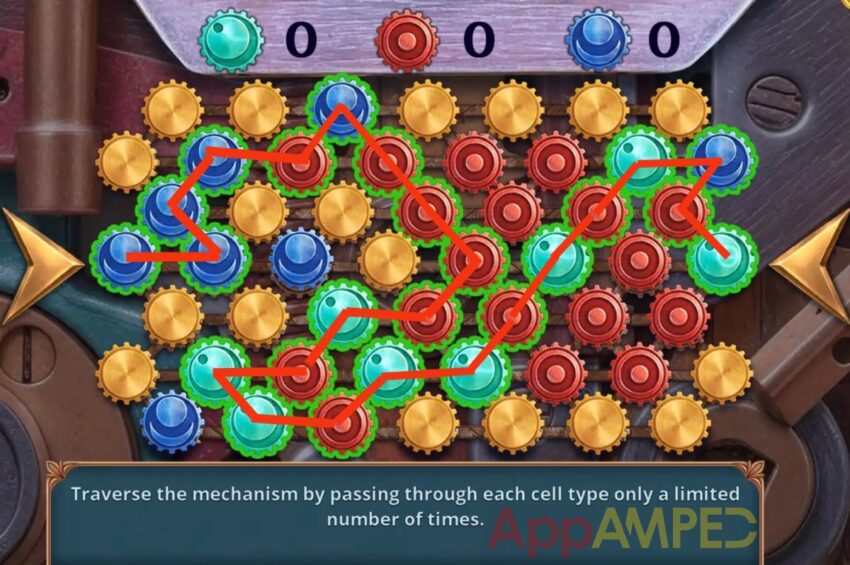
Adjust the mechanism by rotating and rearranging the components.
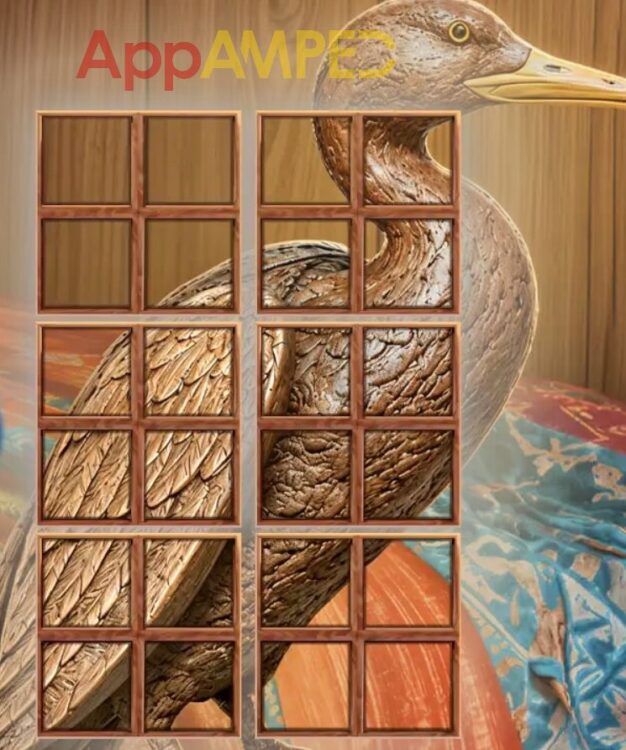
Take the glass with holes and go to the top of the lighthouse to the bowl in front. Put the mosaic fragment and the glass over it. You’ll find a weaving scheme and an adjustment ring.
Check out the telescope, put the lens on, and then add the adjustment ring, then adjust the focus to align with the hint. You’ll find a drawing lens.
Go to the coastal path to the fish display on the beach and put the drawing here to find a stone disc. Go to the cart on the beach, put the stone disc instead of the broken wheel to find a saber. Check out the cave and find all the pairs.
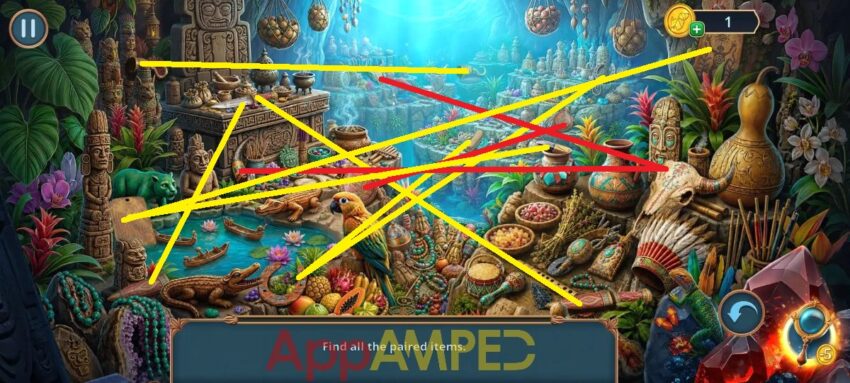
Take the tusk and go to the island to put it on the elephant to get the boot. Go to the ship at the barrel on the left next to the crate and use the boot to get the mask. Put the masks on the wall inside the cabin, then select the pieces in the correct order.
There are 8 masks, I’m going to count from left to right and tell you the order to select them: 5 – 2 – 7 – 4 – 6 – 8 – 3 – 1. You’ll find a horseshoe. Use it to open the trap door in the floor next to the nest and take the tile fragment.
Go to the top of the lighthouse on the right in front of the chest, put the tile on the floor and arrange the pattern pieces so that all the lines connect.
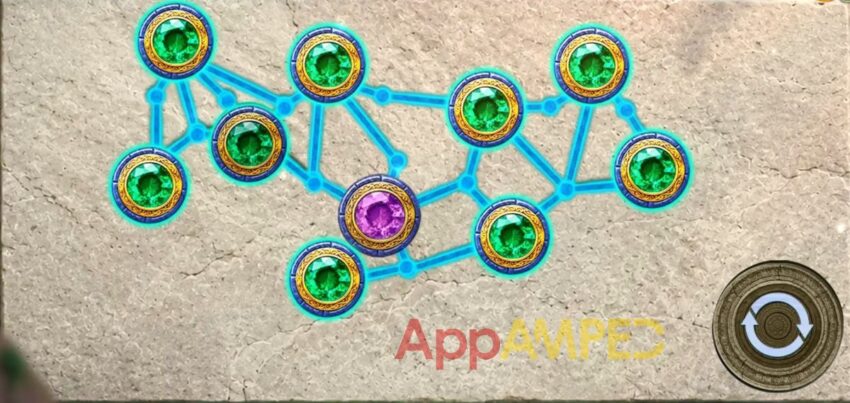
Take the firewood, read the note, and look at the tablet. Go back to the top of the lighthouse, put the firewood in the bowl, light it with the lighter to find a sextant.
Go to the pier and put the sextant on the stone block, and you’ll find a oar. Now you can check out the shed to find the location of all the items and get a coin. Go to the coastal path and use the coin to open the crate next to the fish display.
Take the nut key and crochet hook, then go to the weeds on the right, put the weaving scheme and crochet hook here, then assemble each vine of identical leaves using the clues to finish the chapter.
Restless Waters – Chapter 3 Walkthrough
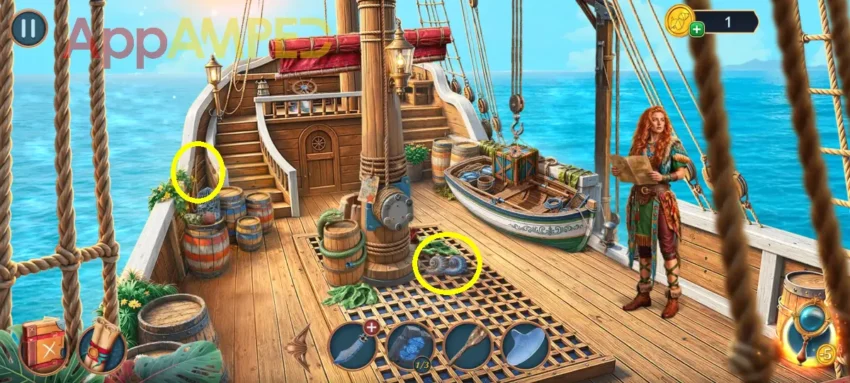
Note for collectibles: There are some shells on this scene that I’ve circled for you.
Look inside the small boat to get a coral disc (1/2) and copper rivets. Check the barrels on the left, take the coconut, and use the nut key to open the clam to find an awl.
Open the saber fragment, then use the harpoon handle, the rivets, and the awl to get a machete. Go to the boat and use the machete to cut the ropes of the crate, then get the rope, brush, and mallet.
Go to the ship wheel and use the mallet to break free the starfish. Look under the mast and put the starfish on the device there. Place the icons in the correct spots.
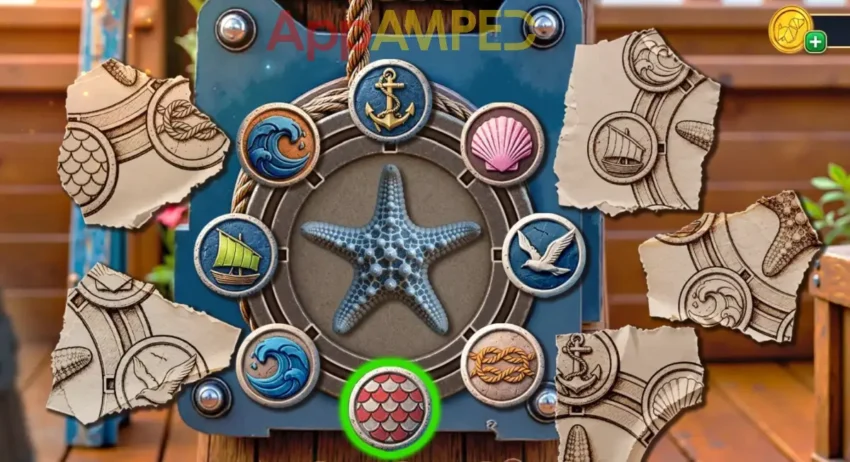
You’ll reach San Esteban Coast and you can find more clues inspecting the pier.
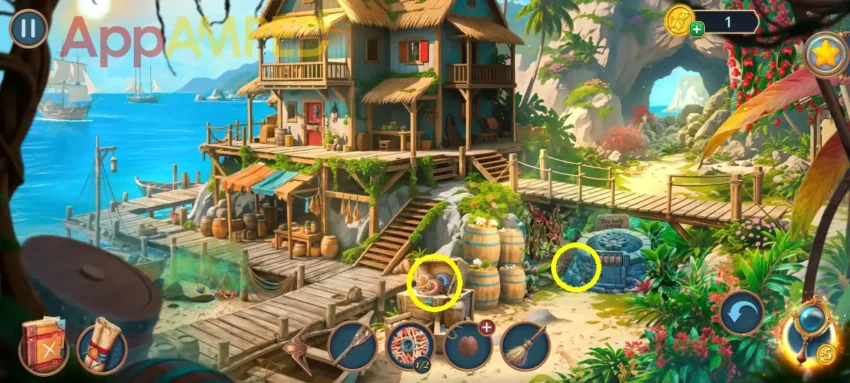
Note for collectibles: There are some shells on this scene that I’ve circled for you.
Look on the sand near the water, you’ll find some sulfur and a match. Use the oar to lift the stone to find another coral disc (2/2). Check out the red door of the house and take the sealed bottle. Use the coral discs on the door to get inside and find all the objects.
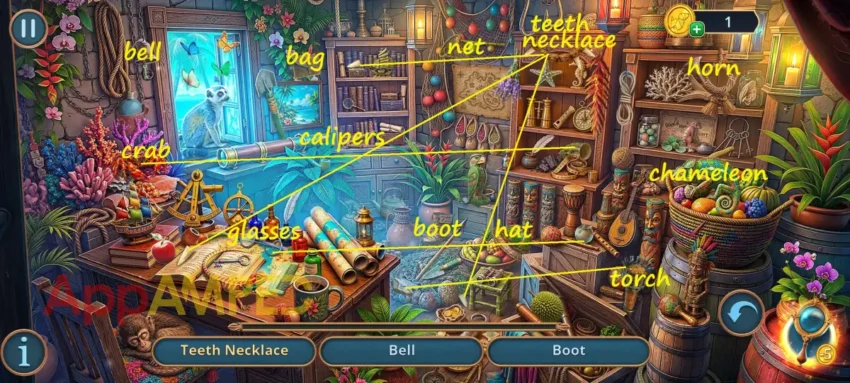
Take the shell scraper and go to the passage in the rock. Use it on the tree bark to get the symbols. Use them at the holy spring to open the drawer and find a harpoon tip, small springs, and gunpowder.
Look at the coconut in your inventory, use the rope, the sulfur, and the gunpowder to make a bomb. Use it on the rock passage with the match. Lead the bomb to the spark and don’t hit the steam cells.
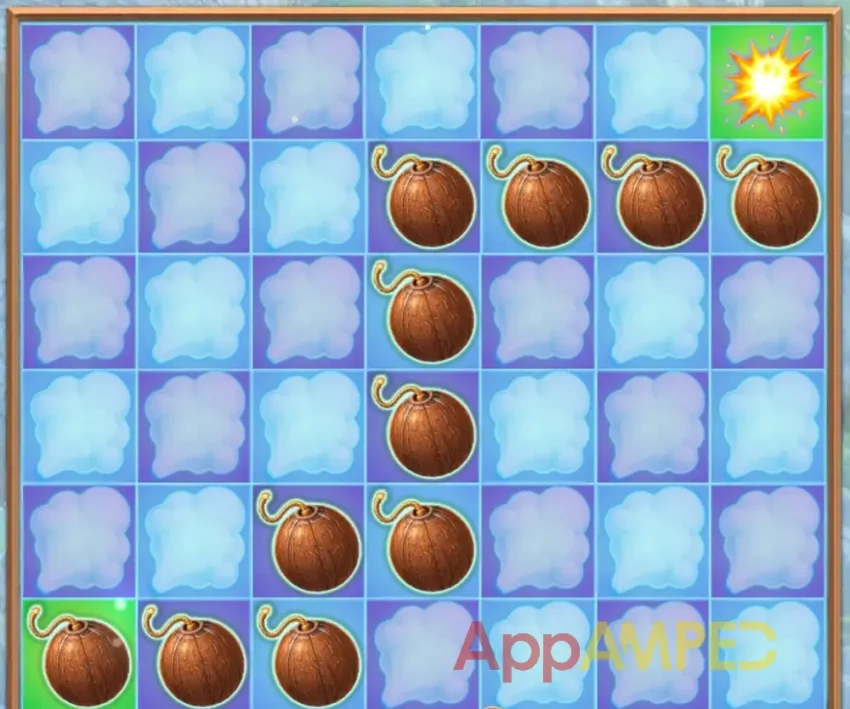
Go through to find San Esteban streets and explore them.
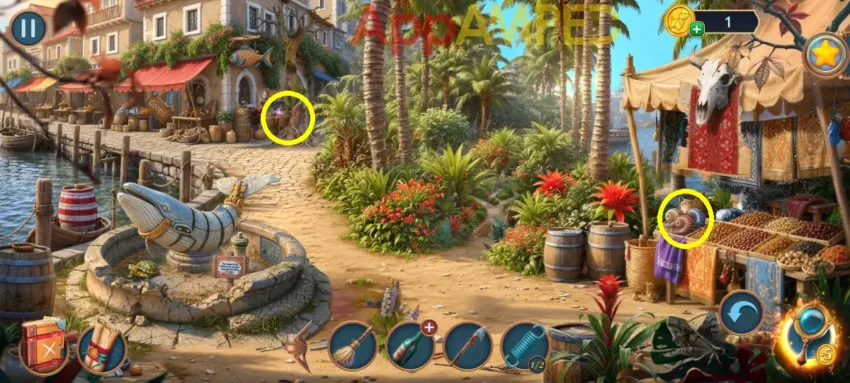
Note for collectibles: There are some shells on this scene that I’ve circled for you.
Look at the barrel next to the houses in front down the path. Use the shell scraper to reach a broken navigation device and the corkscrew. Use the corkscrew on the bottle to get a sailor’s bandana.
Go to the door under the red sunshade and take the screw and use the bandana to fix the sign then go inside and find all the patterns and get the fish trowel.
Look at the path between the palm trees and use the fish trowel to look through the sand and get the bottle cap and the whale fin. Check out the whale statue, read the sign and put the whale fin back.
Take the coins, the fish net, and the brass plate. Put the brass plate, screw, and bottle cap on the navigation device to fix it and get a compass. Use the compass on the path between the palm trees, then set a route.
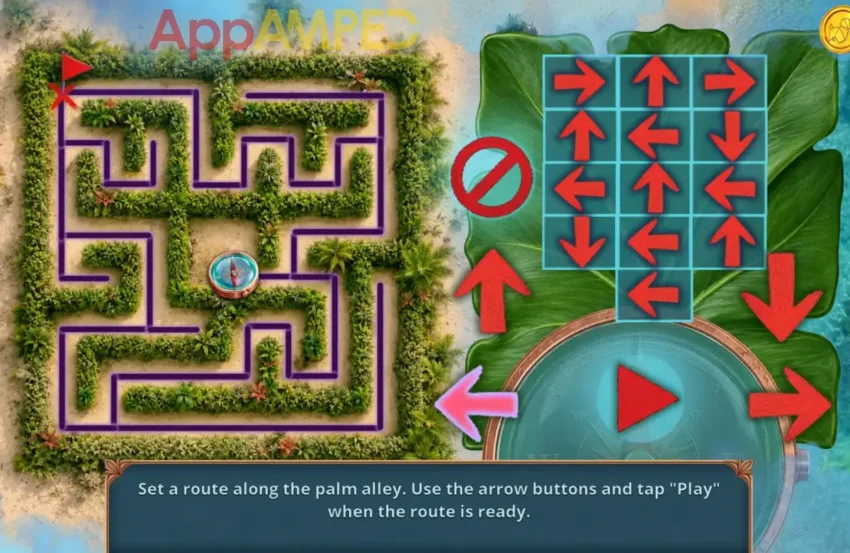
You’ll reach San Esteban’s Pier and you’ll need to inspect the location further.
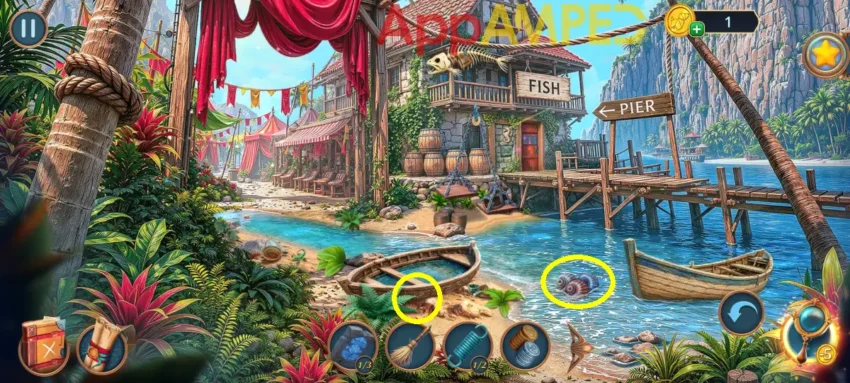
Note for collectibles: There are some shells on this scene that I’ve circled for you.
Get the mortar and pestle from the sand next to the boat on land. Go to the bushes near the lizard to get a basket, then use the brush to find a pearl in the ashes.
Go to the door under the fish sign and put the pearl in the seahorse eye. Take the slingshot, then go to the boat on land and use the basket to sieve the gold, then take it. Use the slingshot to shoot down the fish skeleton.
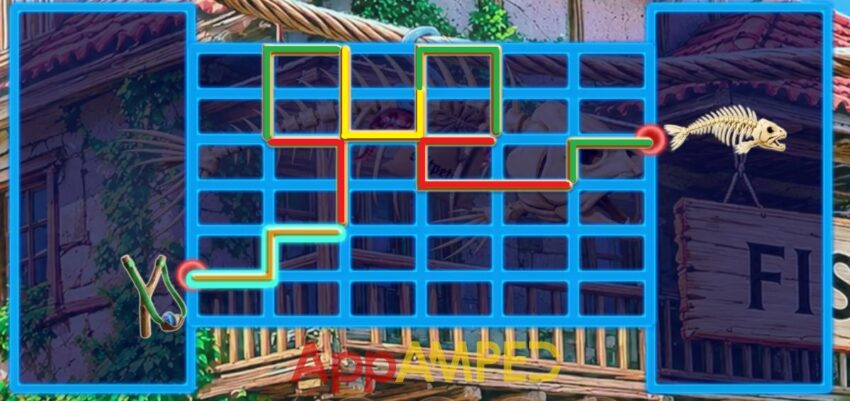
You’ll shoot it down in the water, you can use the net to get it out of the water, take the saltpeter and octopus tentacle. Go to the ship’s deck, to the wheel, then use the tentacle to open the lid and get the shark teeth.
Look at the cage on the left, on top of the barrel, then put the shark teeth on the lock. Collect chips and fill the scales. You’ll need a bit of luck to finish this random mini-game, but you’ll find rattle tail.
Put the rattle tail on the snake on the barrel in front of you, and you’ll find a shell in its mouth. Go to the Coast, at the crab by the water, and give him the shell to find an hourglass. Check out the house to find the differences between the images.
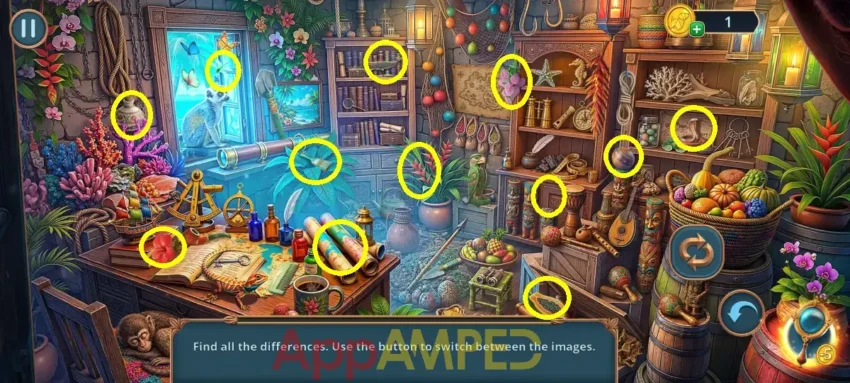
You’ll find a barrel of rum. Go to the pier, put the rum on the big scale to lift it, and take the vinegar and the boot. Check out the boat and use the boot to empty the water and get the wooden shield.
Go to the lizard and put the shield over the puddle to be able to get to the other side and reach the Fish Market.
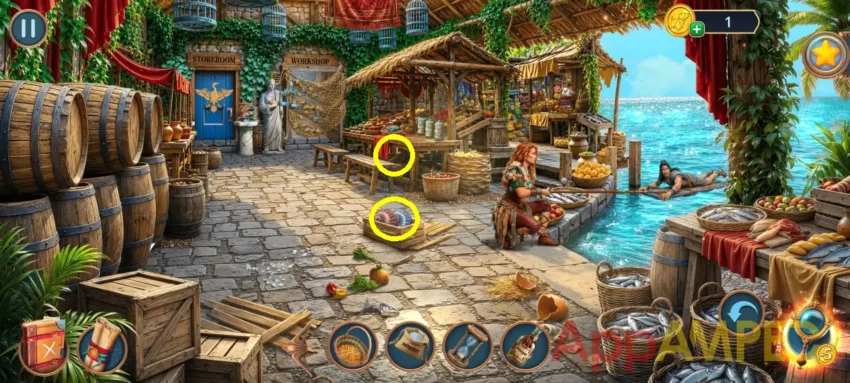
Note for collectibles: There are some shells on this scene that I’ve circled for you.
Go to the statue, put the coins on one scale and the hourglass on the other, then take the shrimp and the tribal drum. Check out the second row of market stands and use the drum to scare the seagull then solve the problems:
- Fire = Flint + Kindling
- Pirate = Hat + Sable
- Builder = Hammer + Saw
- Artist = Palette + Brush
- Gardener = Watering Can + Flower
- Night = Moon + Star
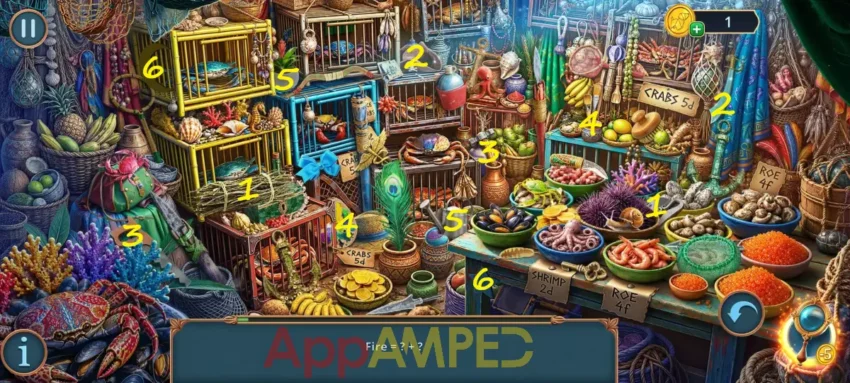
You’ll find a crab claw that you can use to get the spring (2/2) out of the fish’s mouth on the first row of market stands. Go to the door with the bird and use the springs on its wings.
Take the mango and the instructions. Go to the statue and use the instructions for the hooks here. Adjust the position of the net to get all hooks out safely.
Now you can enter the workshop and explore.
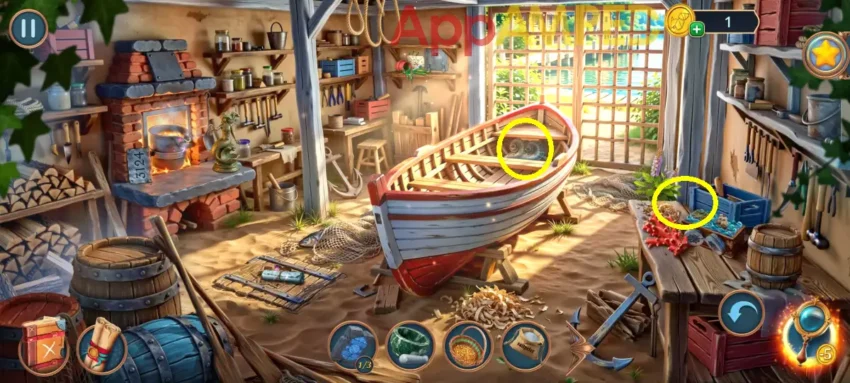
Note for collectibles: There are some shells on this scene that I’ve circled for you.
Check the workbench on the right and take the lotus mold. Go to the oven, put the mold, the gold, and the saltpeter here. Adjust the casting according to the hint. The controls should be at: 13142
Take the golden lotus and look at the trapdoor on the floor, then read the note. Open the hatch, take the fish bone and the pumice. Go to the metal door in the wall next to the glass door, pour the rum over the paint, and use the pumice to scrape.
Take the gloves and go to San Esteban Streets to check the shop for more objects. Take the jug and look at the barrels under the fish ornament. Put the jug here to get a steering wheel.
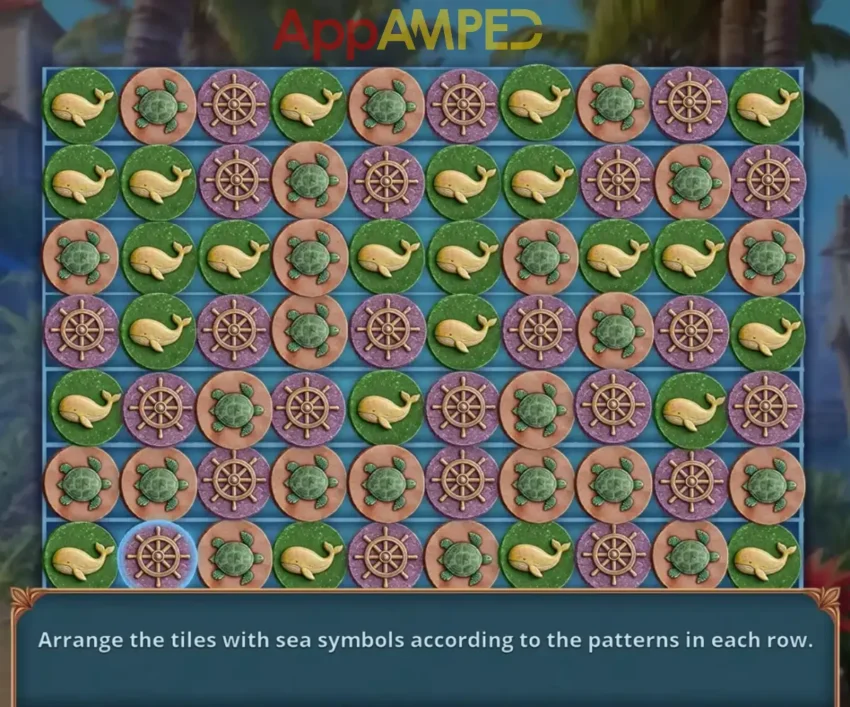
Get a closer look at the whale, put the steering wheel on the pillar next to it. Arrange the tiles according to the pattern.
Take the lighthouse figurine and go to the boat workshop, and put the lighthouse on the workbench on the right. Take the rope, then go outside and use the rope to help Yari out of the water.
Check the market stand again to find 3 of each object needed.
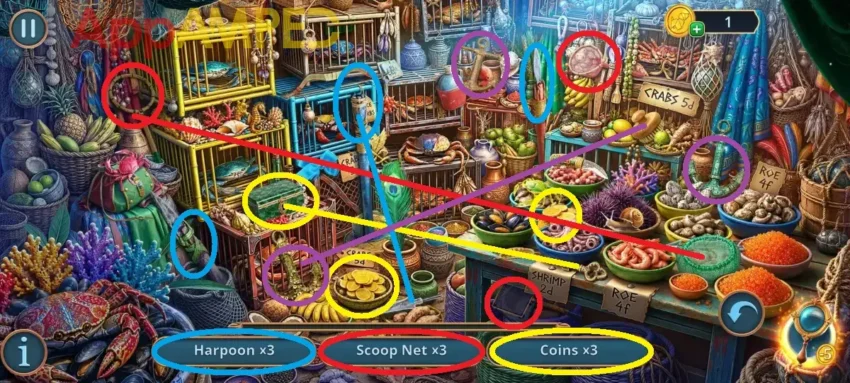
You’ll find a jar with jellyfish. Go to the first row of market stands and put the jellyfish on the table to find a shark’s head. Go to the blue door and put the shark’s head here to remake the sculptures and enter the flooded warehouse.
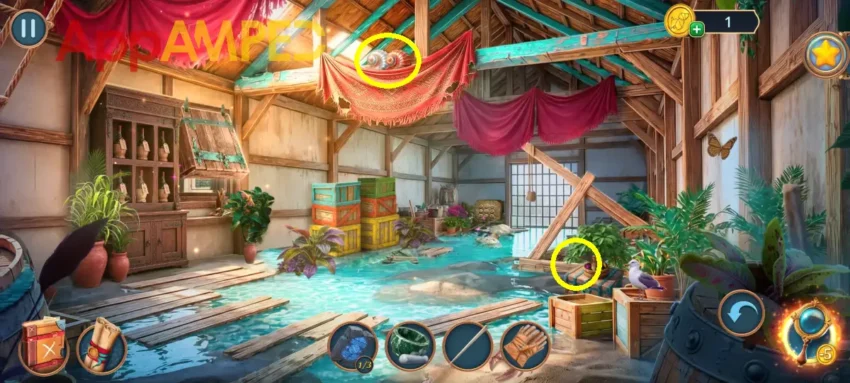
Note for collectibles: There are some shells on this scene that I’ve circled for you.
Look at the colored crates and take the palm brush and sugar, Go next to the door in the back, use the gloves to get the fish, and take the map piece and wine list. Go to the wines on the left and put the wine list here to find a hairpin.
Look at the potted plants on the right, use the fish bone and hairpin to pick the lock and get the magnet on the rope, ship lantern, and seaweed.
Go to the fish market at the stands in front, put the shrimp, the mango, and the seaweed in the jar to make turtle food. Go to San Esteban streets, use the turtle food on the turtle next to the whale to get the turtle.
Go to the flooded warehouse and use the turtle to reach between the colored crates. Arrange the boxes by color to find whale oil, a pin (1/2), wooden support, and a brush.
Go to the plate next to the door in the back, put the sugar down and use the brush to find the code and get the cuffs inside. Go to the wine shelves and use the wooden support and cuffs to hold the cupboard.
You’ll find clippers. Go to the Pier at the barrels, use the clippers to cut the wire on the barrel to find fish oil and a pin (2/2).
Go to the door under the Fish sign and put the pins on. Arrange the pins to separate the tiles by color and shape to get inside the Pier House.
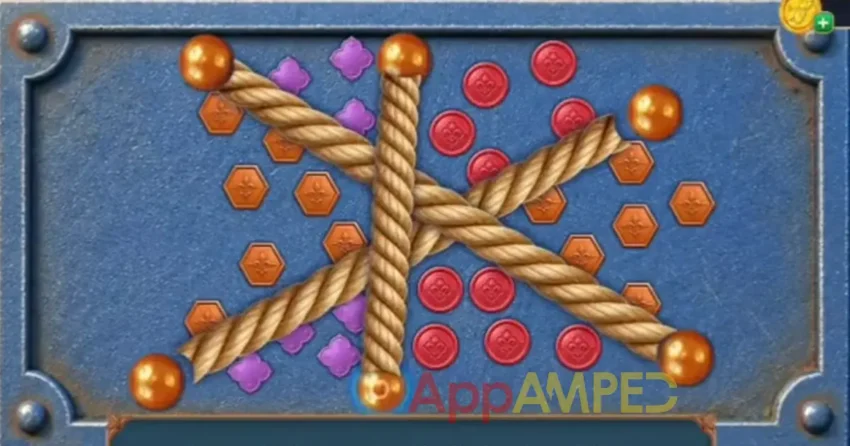
Note for collectibles: There are some shells on this scene that I’ve circled for you.
Go to the shelf in the dark corner, put the lamp here, take the sleeve, and the mechanism part (1/2). Look at the map on the left, put the map piece in the corner, then use the magnet to get the mechanism part (2/2) and old oil lamp.
Check the armchair by the fireplace, put the mechanism parts on the side of the chair, then take the decanter and stone hammer.
Go to the Boat Workshop at the workbench, then use the hammer on the coral, then use the mortar and pestle to make coral dust. Put whale oil over it to make dye.
Go to the Pier House, at the tapestry in the back, use the brush and dye to make the colors brighter. Now find the place for all the items presented to you. Take the chain and go to the ship at the boat to use the chain to lift it and get the hat.
Go to San Esteban Coast, at the smelly flowers near the crab, use the hat to vent and get the jagged coral. Go to the fountain and use the coral to cut the weeds and take the mask and tongs.
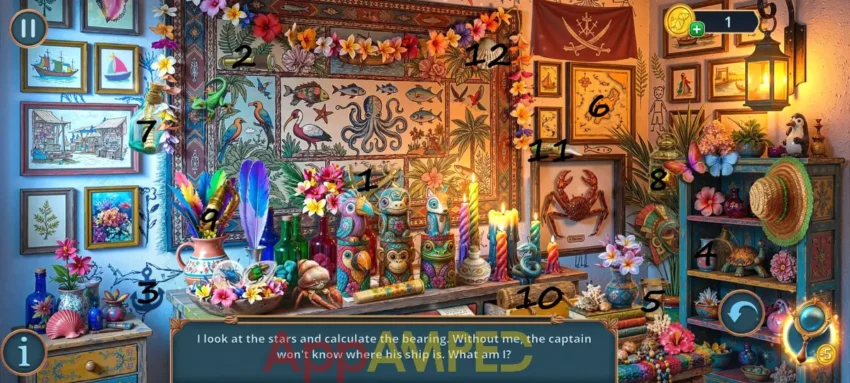
Go to the pier house at the fireplace, use the tongs to get the spur from the fire, then look at the tapestry once more and find the answers to the riddles:
- I look at the stars and calculate the bearing. Without me, the captain won’t know where his ship is. – astronavigator
- I’m long and shiny. I look into the distance and bring ships closer. – telescope
- I’m falling into the depths and keeping the ship steady. The stronger the waves, the more important my job becomes. – anchor
- I’m a water vessel, but not a glass. People take me along on their journey to quench their thirst amidst the waves. – water flask
- The sand inside me flows endlessly. I measure time, but I don’t tick. – hourglass
- I’m marked by shores, islands, and winds. Without me, every path is a mystery. – map
- I float without oars and hold onto other people’s words. I’m washed ashore so the secret won’t drown. – message in a bottle
- I glow in the dark so others will know I’m here. My light can be seen far out at sea. – oil lamp
- I can’t speak, but I can call out to the team from a mile away. If you’re near me, even the seagulls will hear. – whistle
- They throw me overboard to see how fast the ship is going. I swim and count the knots. – wood log
- I’m short and sharp, and I’m always on a fisherman’s belt. I’m used to cut ropes and gut fish. – knife
- I live at the bottom of the sea, but you can hear my song from the shore. Hold your ear close – I’ll whisper to you. – seashell
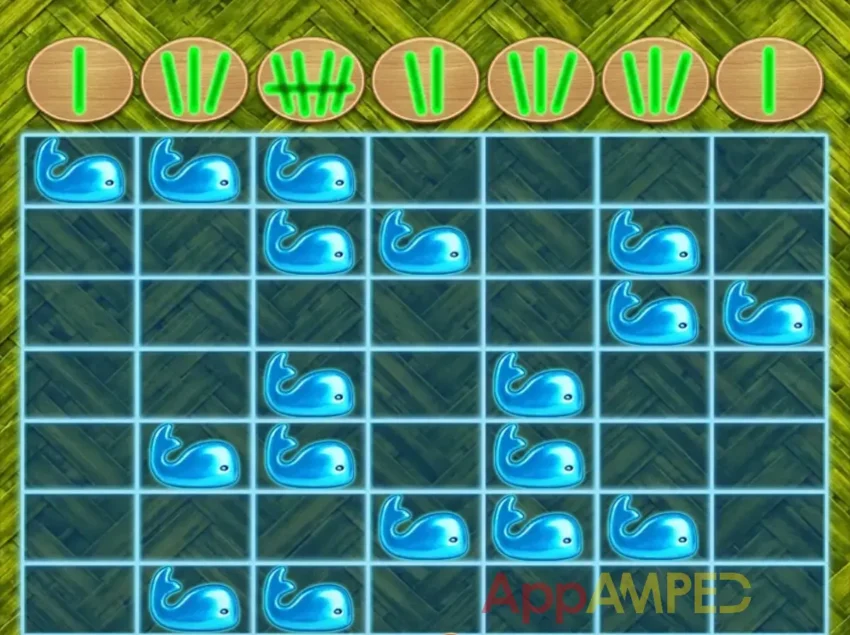
Get the whale figurine and use it on the box on the shelf next to the tapestry. Arrange the whales to match the numbers above.
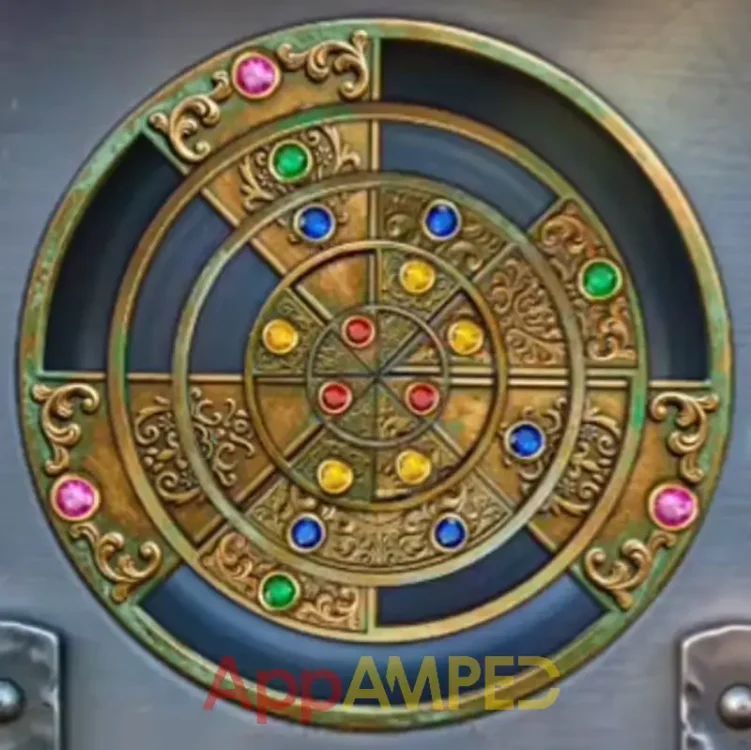
Take the shell and go to the boat workshop at the fireplace, put the shell on the mermaid statue to get the captain’s earring. Put the earring on the metal door near the glass door to open it. Arrange the parts like the clue suggests.
Take the leaf and the screwdriver. Use the screwdriver on the old lamp to get the oil. Go to the pier house and to the shelf in the back, put the mask here and put the oil over the button to find a knife.
Go to the flooded warehouse at the potted plants on the right, use the leaf and knife to get some resin. Go to the pier house, put the map piece on the corner of the map, add the resin. Find the symbols on the map that make up the compound symbol.
- stingray + snake + otter
- seagull + ship + lighthouse
- octopus + dolphin + wheel
- life buoy + veil ship + turtle
- map + telescope + crab
This will take you to the next chapter.
Restless Waters – Chapter 4 Walkthrough
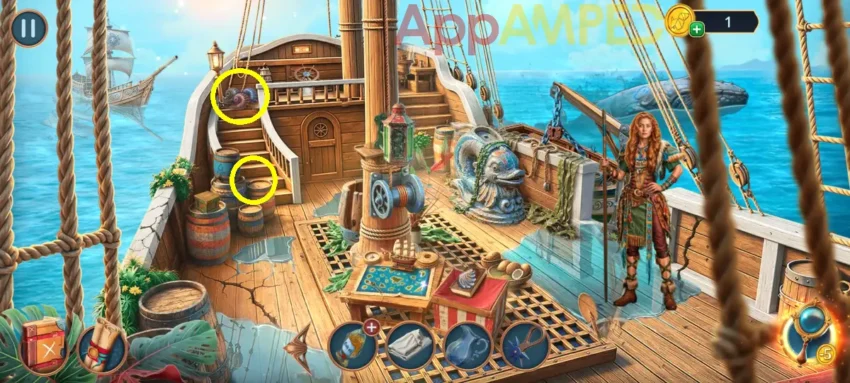
Note for collectibles: There are some shells on this scene that I’ve circled for you.
Look at the crates in front, take the fin and read the Captain’s journal. Use the spur to cut the red fabric and take the hat and wooden spoke (1/2). Go to the fish statue and put the fin on its back to get the tide chart.
Put the tide chart next to the map on the crates, then navigate the boat along the route.
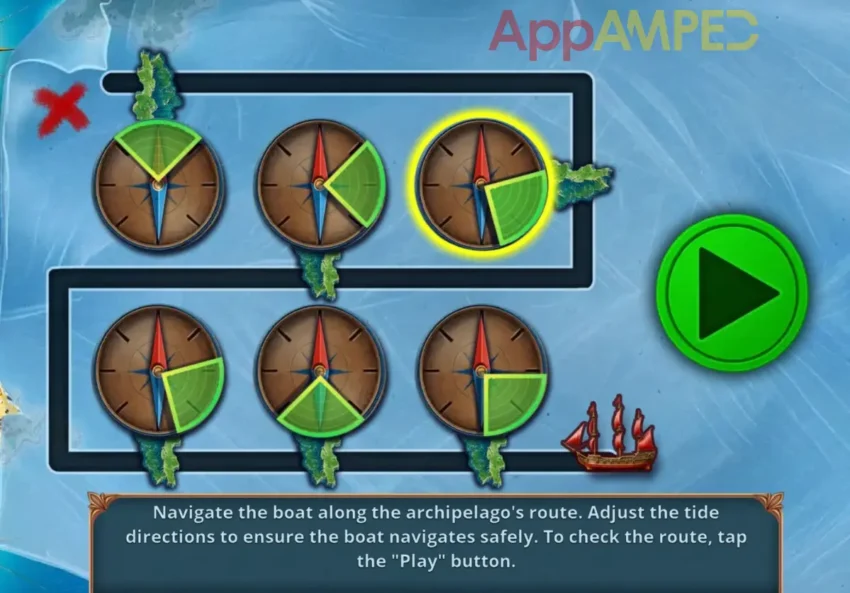
You’ll find a tap handle. Check out the barrels on the left, use the tap on the water barrel, and fill the decanter with water. Go to the mast, where the lamp is, put the cloth and water next to it to clean it, and get the crab claw and fish hook.
Use the claw to grab the obsidian eye from behind the lamp. Look at the lock above the fish statue and use the hook to open it. Now put the arrows on the board to get the ships together.
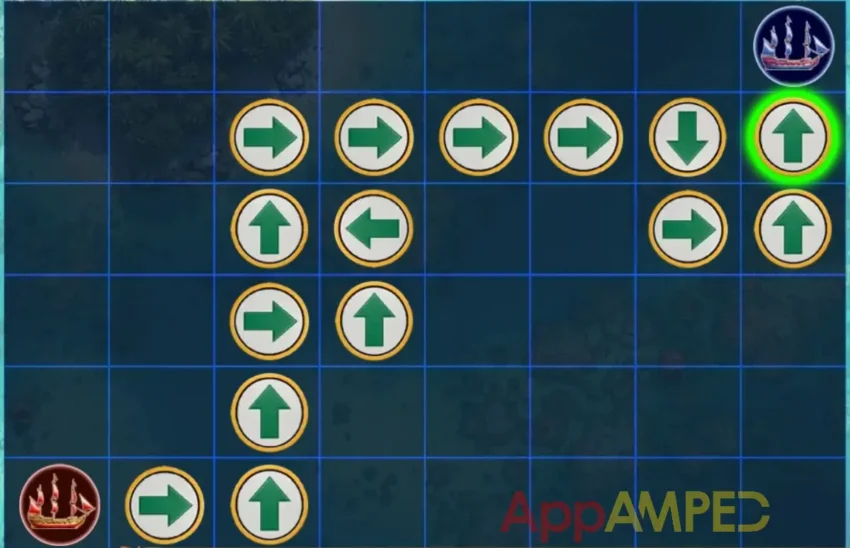
Now that you’re on Esteban’s Ship and have another tablet fragment (2/3) you can find a way to get to the bay.
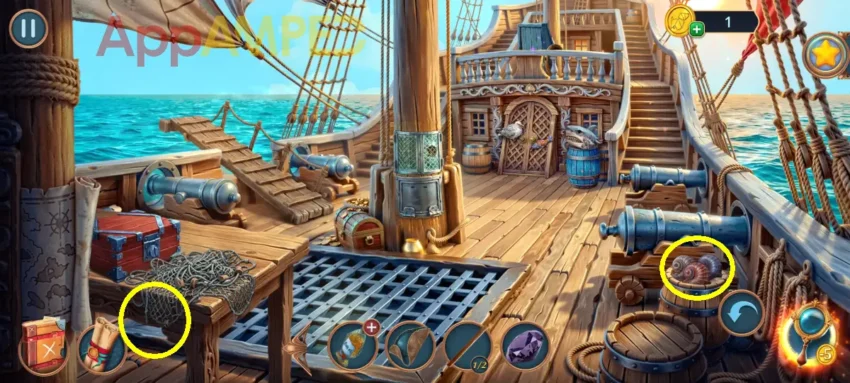
Note for collectibles: There are some shells on this scene that I’ve circled for you.
Go to the steering wheel and read the note, take the captain’s ring, then go back down to the doors, put the obsidian eye on the shark to get a belt. Check out the mast, use the belt to open the glass doors, and find the matching bells.
Look at the red chest on the left, use the matches to burn the net and get the gauntlet and anchor fragment. Go to your ship and use the anchor to open the crate next to the water barrel to find a corkscrew. Use it to open the bottle of oil.
Go to Esteban’s ship, pour oil over the fish in front of the seagull to get inside the Captain’s cabin and explore.
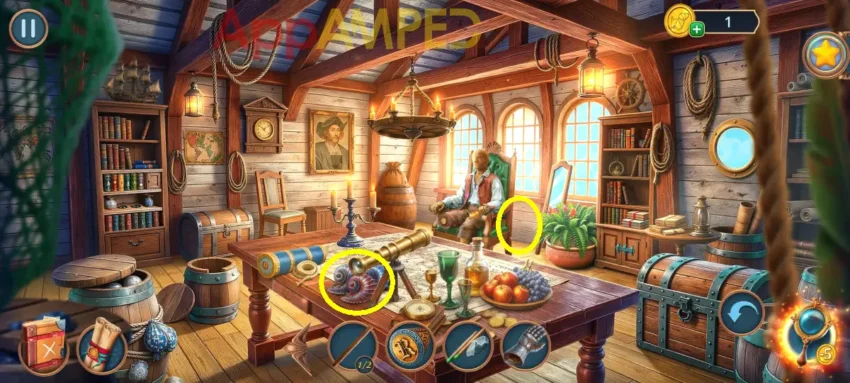
Note for collectibles: There are some shells on this scene that I’ve circled for you.
Look at the table, take the rope, use the ring to open the tube, read the note, then take the hint. Put it on the left bookshelf next to the books, look through the yellow book to find the captain’s medallion.
Go to the mannequin on the chair and put the hat and medallion on it. Take the gunpowder and trowel. Check out the potted plant, move the fern, and use the trowel to dig in the dirt. Place the amulets in their place.
Take the hooked ring and go up to the deck. Use the ring to open the door on the mast under the bells. Take the pearl (1/2) and wooden spoke (2/2). Go to the steering wheel and use the spokes to fix it. Arrange the gears in a continuous chain.
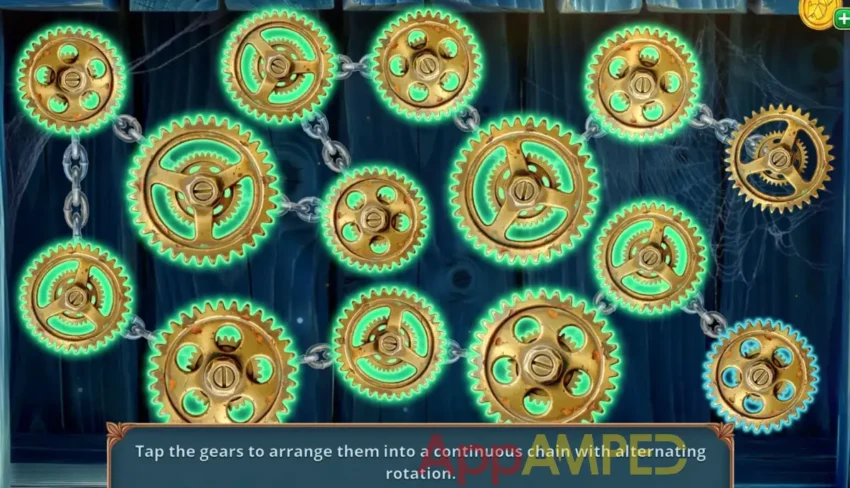
Get out of the boat to the Cove among the rocks and examine the wrecked ship.
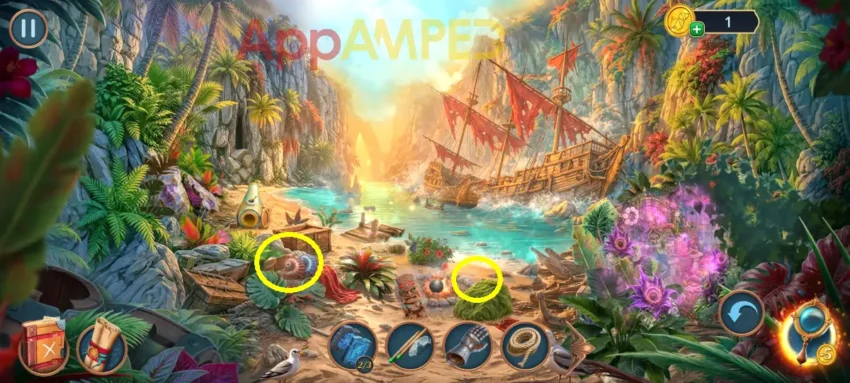
Note for collectibles: There are some shells on this scene that I’ve circled for you.
Look at the cannon, take the pin, use the gauntlet to look behind the purple spikes to find a scraper. Go to the firepit and use the scraper on the mossy rock . Read the note and take the mallet.
Go at the bridge, use the rope, the pin and the mallet to fix it, and get the brick, the jug (1/2), and the leaf. Go check the purple mist flower, then use the leaf to remove the poison and find all items.
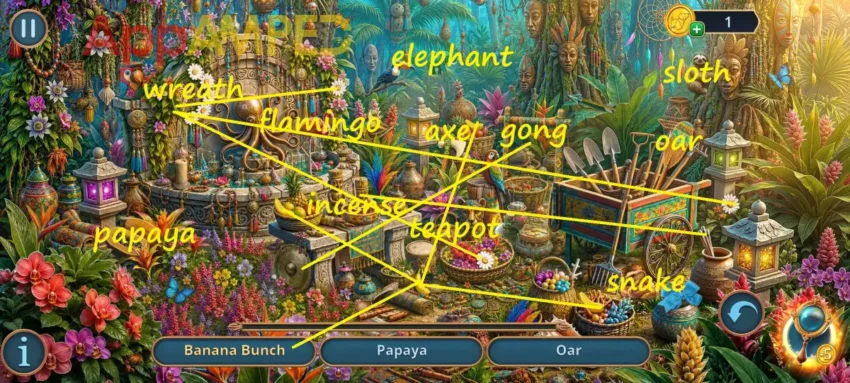
You’ll find a gangplank that you can use on the bridge to reach the wrecked ship.
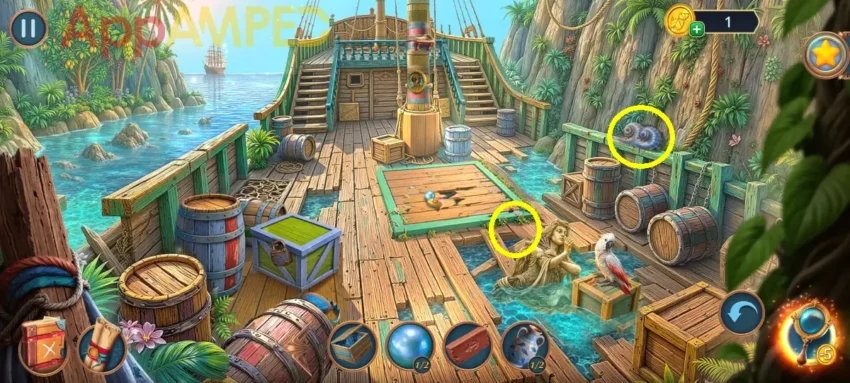
Note for collectibles: There are some shells on this scene that I’ve circled for you.
Look at the green square on the ground, take the pendant and the pearl (2/2). Use the brick to smash the wooden boards, take the slingshot, and read the book. Look at the mast and use the slingshot to get the shell down.
Go to the lady statue in the water and give her the shell, she’ll release the hand. Go to the green crate and put the hand on the bear trap, then assemble the tablet fragment (3/3) to get the wet sail.
Go to the cove, get closer to the firepit, use the wet sail to get the cannonball. Go to the cannon, put the ball in, then add the gunpowder to fire it. Aim at the same symbols you see on the balls. You can go through to reach the cave in the rocks.
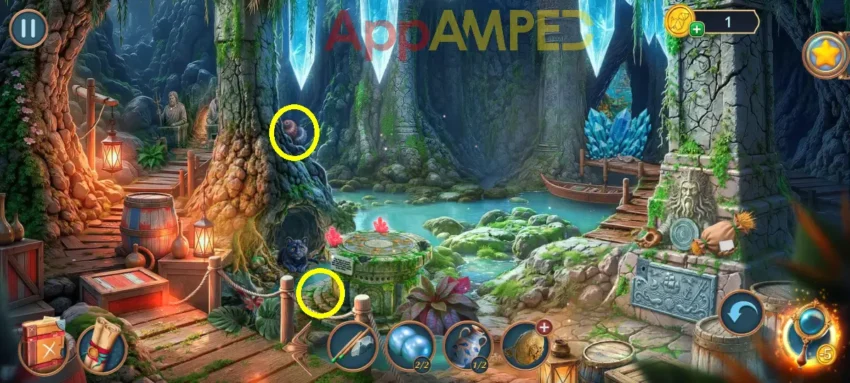
Note for collectibles: There are some shells on this scene that I’ve circled for you.
Look at the sculpted figure in the column, read the note, take the straw bag (1/2), and the totem sketch. Put the pearls in the hands and take the corals. Check out the stone altar in front of the panther, put the corals on the altar to complete the ritual.
Take the hook paw and the pearl necklace. Go up the path to the guarding statues and put the necklace on the missing one. Take the pickaxe, go to the crystals to use it to clear a path, and look for the answers to the math problems.
- Flame + stick = torch
- Sail + helm = boat
- Metal + ringing = bell
- Sole + straps = slippers
- Arrows + bag = quiver
- Board + shield = wooden shield
- Strings + melody = harp
- Wood + treasure = chest
- Dreams + feathers = dream catcher
- Pages + cover = book
- Lockpick + lock = key
- Crescent + knife = sickle
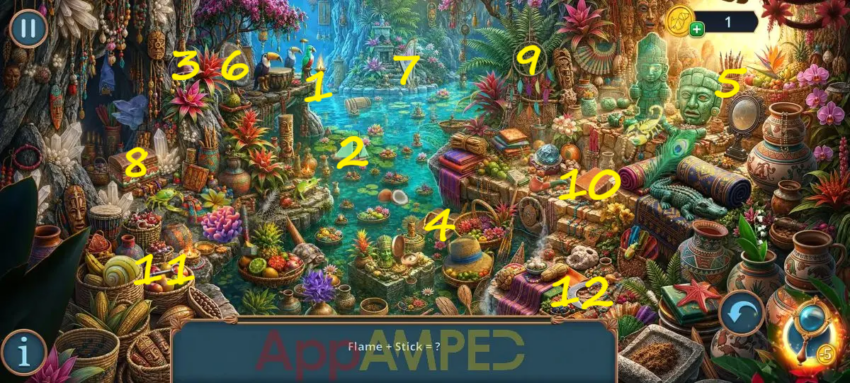
You’ll find a tar plug. Go to the captain’s cabin and check the table, then use the tar plug and matches to open the drawer. Take the wooden leg and clay jug (2/2). Look at the shelves and put the clay jugs on the shelf. Arrange the fragments to form a sea pattern.
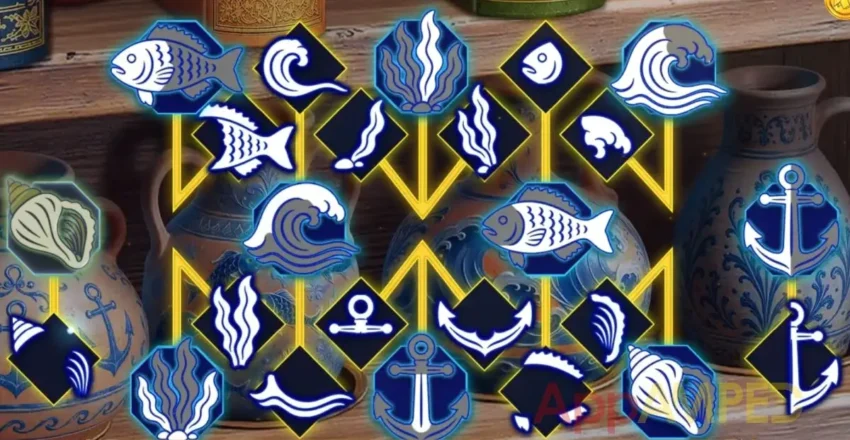
Take the crossbow and go to the wrecked ship, point it at the hole in the deck to get the key. Use it to open the pendant to find a portrait part. Look at the mast and put the portrait part on the picture there.
Take the feather and skull. Open the totem sketch and put the hook paw, the skull, and the wooden leg to make a totem. Go to the cave and give the totem to the panther, then take the stick and stone tile.
Put the tile under the stone figure on the column, then assemble the image. Take the resin and the straw bag (2/2). Go the stone guardians on the left, put the straw bags on the ground to jump on and reach the hidden lagoon.
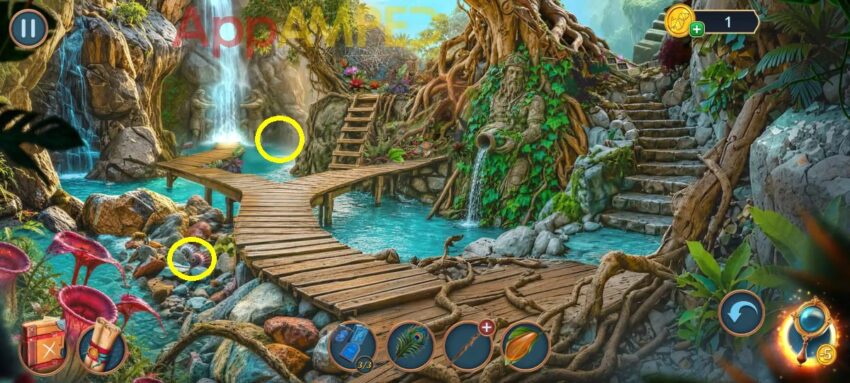
Note for collectibles: There are some shells on this scene that I’ve circled for you.
You can clean the cobweb at the top of the wooden ladder with the feather and then find all the paired items.
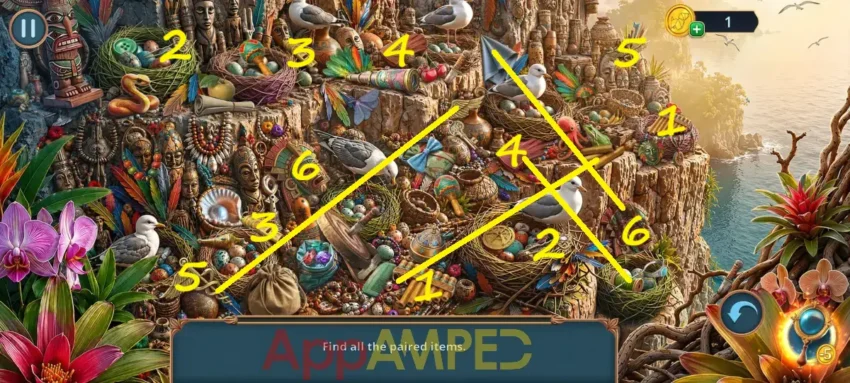
Take the shield then look at the roots between the ladder and the statue, read the note, take the barrel and the tow. Go to the waterfall and put the shield in the statues’ hands, then take the musket base and necklace.
Go to the cove by the firepit, put the necklace on the little totem man and take the toy mouse. Check the purple flowers and find all the differences.
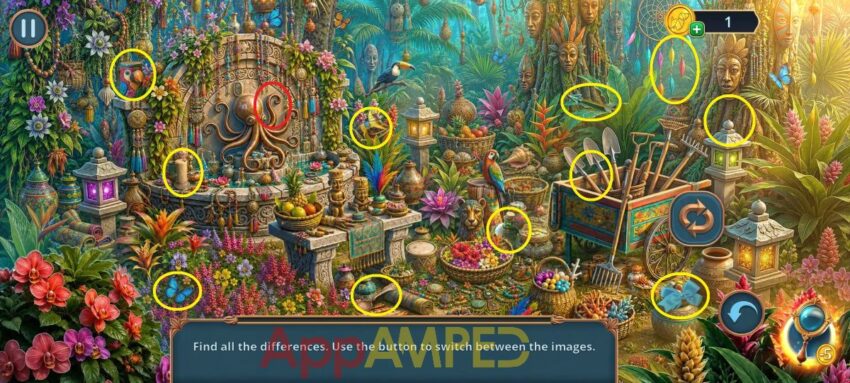
Take the candied fruit and go on the wrecked ship to give them to the parrot and get the wire cutters, pipe, and musket ball. Go to the hidden lagoon, at the roots next to the ladder, put the toy mouse in the trap, then guide the squirrel to the toy.
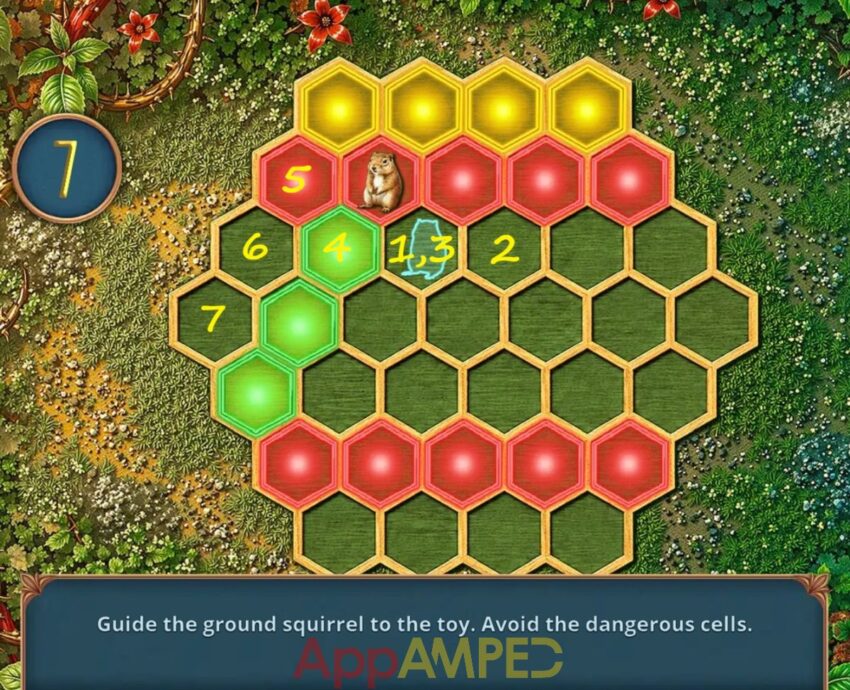
Take the stone tile (1/2) and the flint. Look at the stick in your inventory, add the flint, the resin, and the tow to make a torch. Go up the stone stairs, use the torch to burn the roots and get the musket trigger.
Open the barrel in your inventory, add the musket base, the ball, and the trigger, to make a musket. Go to the wrecked ship and use the musket to blow up the lock on the green chest. Take the boat handle and use it at the mast on the edge to get the hook.
Go to the hidden lagoon, use the hook to get the red chest near the waterfall. Take the bag and the stone tile (2/2) from inside. Go up the stone stairs and put the tiles here to get more stairs and find the sanctuary.
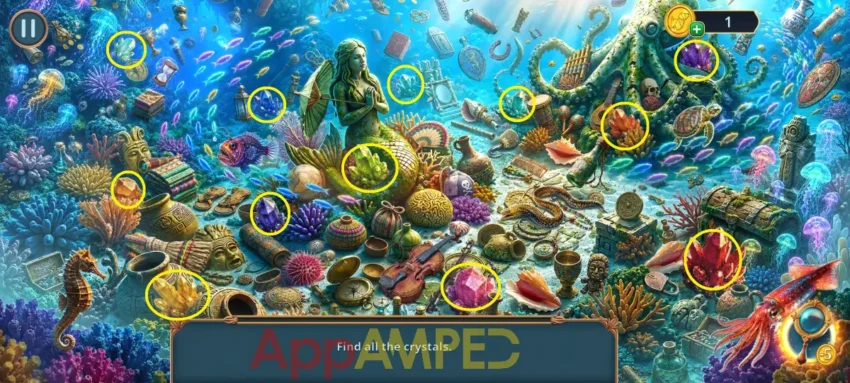
Note for collectibles: There are some shells on this scene that I’ve circled for you.
Look at the skeleton, read the note, and take the instructions and the pressure screw. Use the wire cutters to open the bag and take the net. Go to the pond on the left and use the net to catch the fish, then find all the crystals.
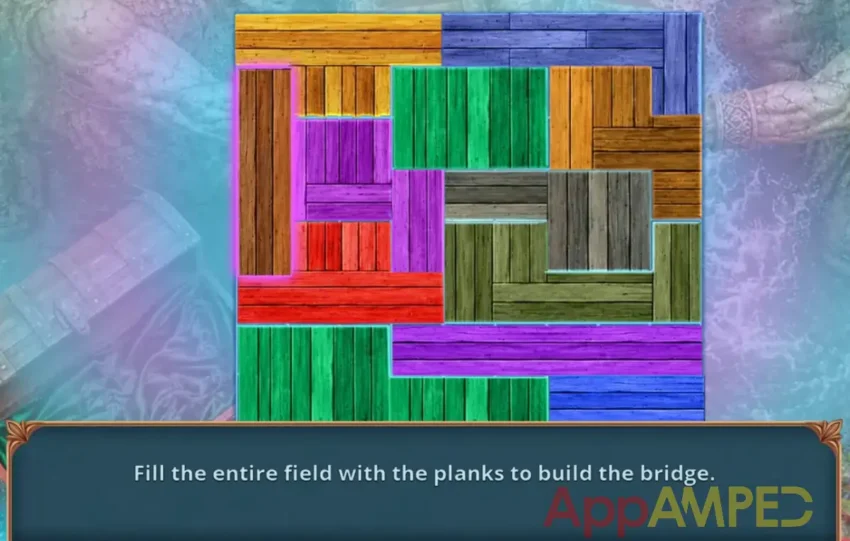
Get the glowing fish and check out the hole in the wall, then put it there to get the fire disc. Look at the hole in the ground, put the fire disc in the statue’s hands to get a screw.
Go to the captain’s cabin at the mannequin on the chair, use the screw on the leg to get the handle, then use the handle on the cupboard to the right to get the poisonous plant inside.
Go to the cave and check the crystals to find all the images and take the coin. Go to Esteban’s ship, at the red chest on the left, and use the coin to open it. Take the dried seaweed and put it in your pipe.
Go to the cave and put the pipe next to the altar to open the hidden door and get the empty vial and the planks. Go to the hidden lagoon at the waterfall and use the planks to get past the hole.
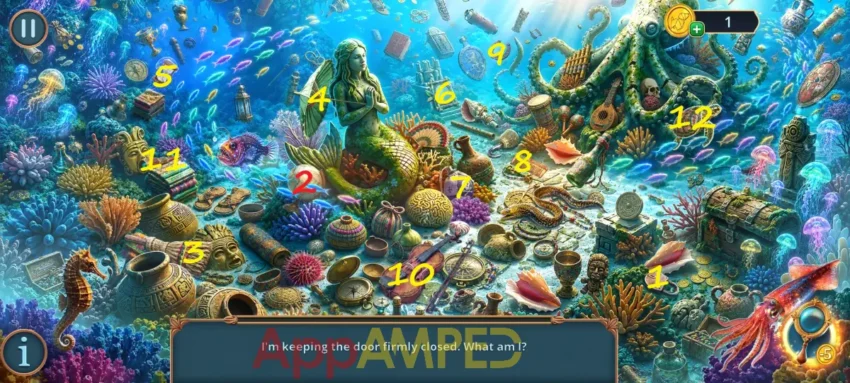
Take the reagent and go to the sanctuary to check the pond for the answers to the riddles.
- I’m keeping the door firmly closed. – padlock
- I’m like a miniature Earth. You can spin me around and look for faraway countries on me. – globe
- I have a long handle and a fluffy bottom. I run across the floor and collect dust. – broom
- I open up overhead when water pours down from the sky. – umbrella
- The sand inside me doesn’t just sit there; it slowly falls downward and counts the time. – hourglass
- I’m silent, but I point to the person looking at me. – mirror
- I’m round and black, and people on deck are afraid of me because I might explode. – bomb
- I have lots of little teeth, but I don’t bite. I help keep hair smooth. – comb
- I look like an iron smile. They nail me to a hoof to make the path stronger. – horseshoe
- I’m made of wood and I sing. Just run a stick across me, and I’ll sing in a high-pitched voice. – violin
- You bring me up to your eye so you can see what’s hidden far away on the horizon. – telescope
- I’m carrying a house on my back and slowly swimming through warm waters. – turtle
Take the coral and go into the hole in the ground. Use the coral, the bag, and the pressure screw here to make coral dust. Open the instructions and add the plant, the reagent, the coral dust, and the empty vial to make weed killer.
Go to the hidden lagoon and use the weed killer on the weeds next to the ladder to find a stone lever (1/2), then go find more items at the top of the ladder. Take the goblet, go to the sanctuary, and cover the scorpion in the hole with the goblet to get the brush.
Use the brush on the skeleton to get another stone lever (2/2). Use them at the hole in the wall, then put the tablet fragments here. Arrange the nodes to complete the pattern to finish the game.
Wrapping up
You found your way to the finish line, ending the story of the scary whale attacks with a happy end. Now that you’re done with this Adventure Seekers: Restless Waters story might be time for you to find a new game to play.
I recommend you try the Artifact Seekers storylines. Give Artifact Seekers – Poltergeist House a try, or maybe you might like Icebound Secrets 4: House of Memories. See you on my next walkthrough.

Aylin is a content creator and co-founder of App Amped. She was a huge Tomb Raider fan before moving on to more casual titles. She spent way too much time tending for her FarmVille farm as well as playing text-based browser games. Now she plays and writes about mobile games, creating in-depth walkthroughs and useful guides.