
Follow my steps to discover the mysteries in Dark City: Barcelona and you’ll find help within this walkthrough to finish the game.
Investigate a world of secrets, dangers and dark logic. Explore scenes with hidden objects, escape room challenges and twisted mini-games while discovering the truth.
Dark City: Barcelona Walkthrough
Talk to the lady that hires you for the job. After the worker falls, you need to find a way to lower the elevator and get him down from there.
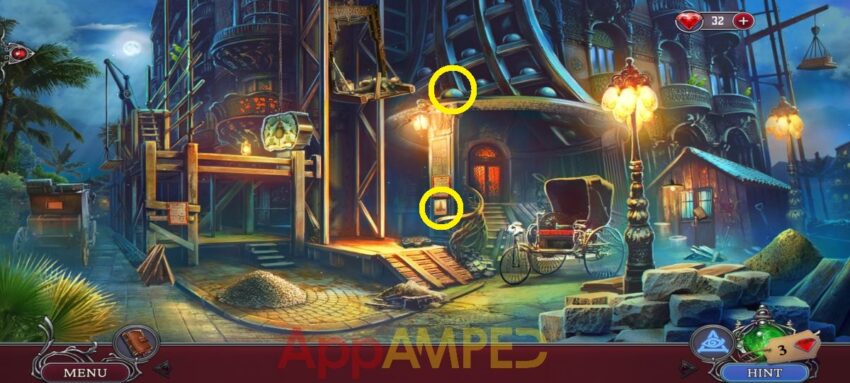
Note for collectibles: I circled the morphing object and the image you need.
Next to the carriage, on the platform there’s a box and inside Riba’s logo. Next to the elevator there’s a box, that will open with the logo you found and you’ll get a bolt and a glass cutter.
Check inside the carriage and open the purse, using the arrows find the 3 symbols and press them in the same order shown. Read the paper and take the scissors after you put the bolt in. You’ll also find a mirror.
Go to the hut on the right and read the note, then use the glass cutter to cut a hole. Put the mirror through to look at the lock. Use the arrows to guide both balls through the two mazes to reach the empty slots at the same time:
- down x2 – up – left x6 – up x2 – left x2 – down x3
Read the paper on the desk and look at the map, take the salt (1/2) and the gear. Go to the elevator box, put the gear in and use the scissors to cut the rope. Go check on the worker. Put the mirror in front of his face to see if he’s alive, then find the items:
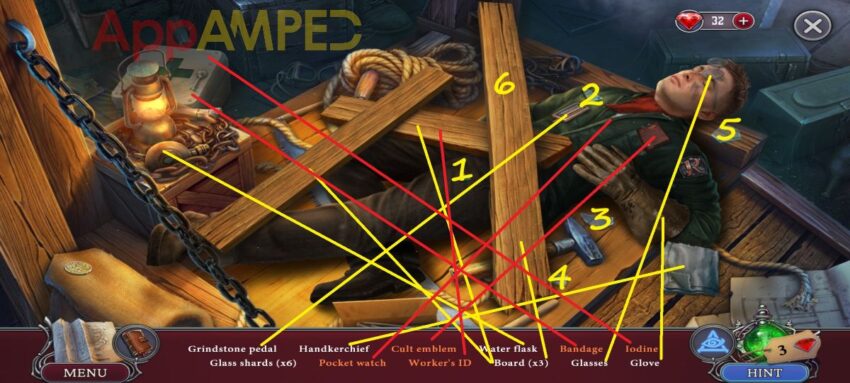
Use the watch to check his pulse, the glasses to look at the wound closer, take the glass pieces out, use iodine and the bandage on the wound, then the handkerchief and water to wake him up.
You’ll find a grindstone pedal. Talk with the architect and the lady will give you a car token. Look inside the carriage and use the car token on the bench, then read the police report and take the key.
Use it to open the hotel door and go inside, then look for all the details in the location that will help the investigation.
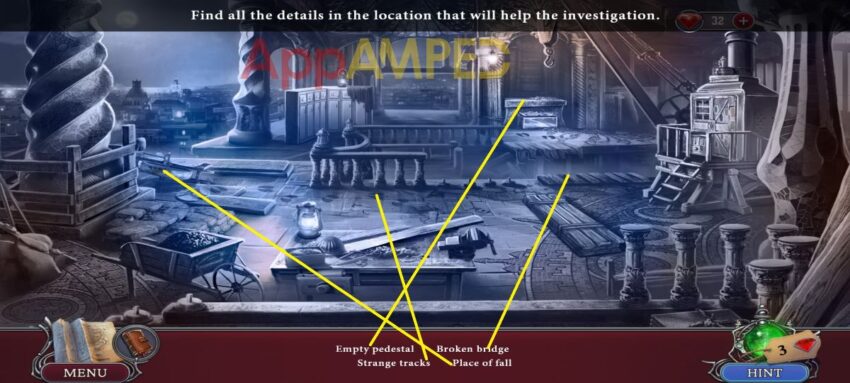
You should investigate where the worker fell from, on the left side at the edge of the floor. Look for the highlighted words.
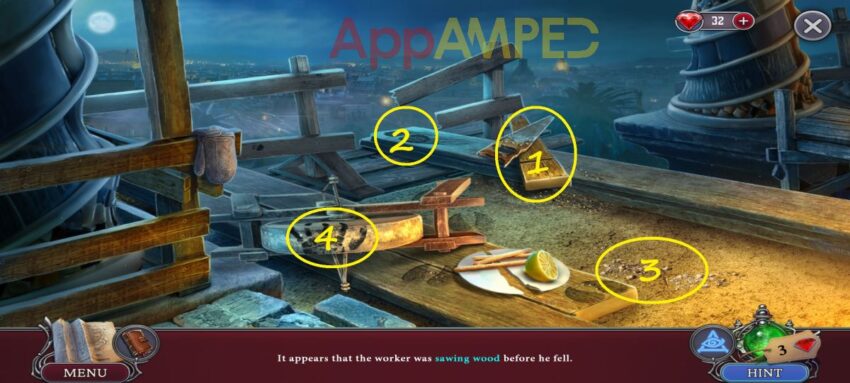
Take the mitt from the wooden beam and the lemon (2/2). Move the grindstone to find a note with the symbol. Put the pedal on the grindstone and go back to look at the construction site.
Talk to Alicia and take the dossier then look through to find a door part. Look around to find a way to get on the other side.
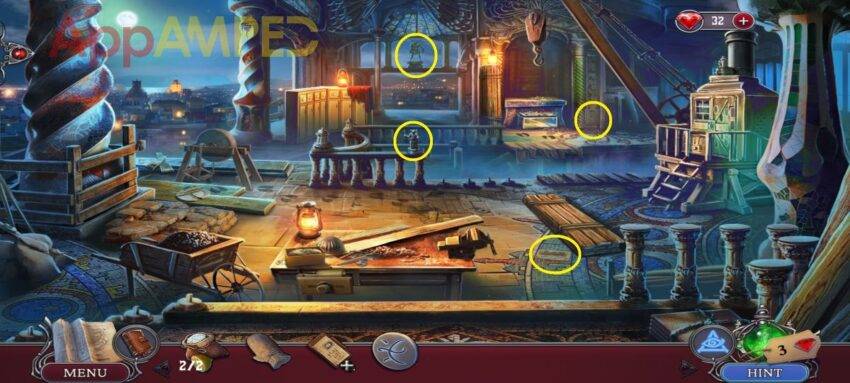
Note for collectibles: I circled the 2 morphing objects and the 2 images you need.
Look at the work bench in front, take the gypsum powder, and look under the helmet. Go to the furnace on the right, put the door part here. Select pairs to match the square buttons. They highlight at the beginning.
Look inside, take the bucket, the lighter cap and the seeds. Fill the bucket with coal from the cart next to the workbench and go to the bird and give it the seeds to get the dull chisel.
Go to the grindstone and start it to get the chisel sharpened. Go to the workbench and use the chisel on the wooden item to make a trowel. Go to the furnace, use the mitt to open the door and use the trowel to get the ashes out and look at the note.
Take the bull token and put the coals inside. Use the salt and lemon on the levers then pull the first down, second up and last down to make the crane work.
Build a sturdy bridge by selecting a block and using arrows to roll it. You can place blocks on their sides to adjust their position. Ensure each end rests securely on the loor edge without hanging over. Don’t drop the block.
Now you can get over to the other side, clean the dirt on the block where the statue was, read the note, take the flint and go check out the cupboards. Remove the red cloth to find a screwdriver.
Go use it at the block where the statue was to find a cultist token and a compass. Now use the compass on the cabinet, look through to find more information. Look through your clues to draw some conclusions.
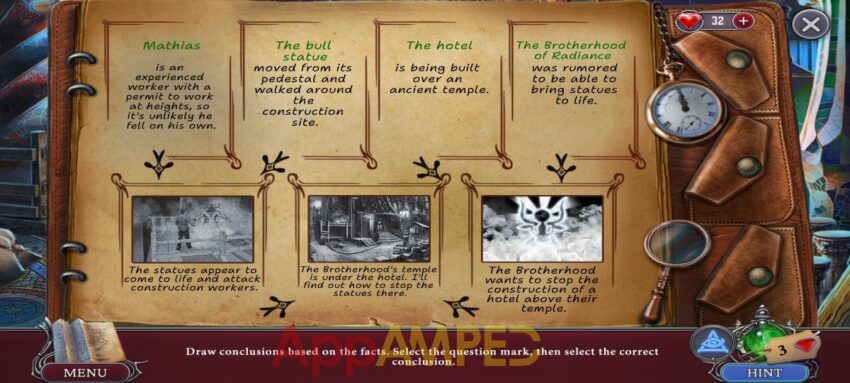
Take the brush and go back into the street to find a way to reach the temple under the hotel. Remove the gravel near the hotel and use the brush to clean the sewer cap. Put the 2 tokens here to open it and go down the ladder.
Take the lighter on the right and fix it with the 2 pieces you have, then use it to light the torches around the room to make it easier to explore.
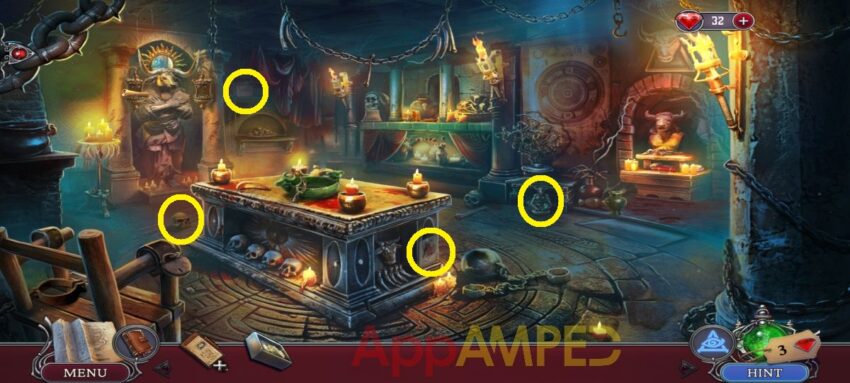
Note for collectibles: I circled the 2 morphing objects and the 2 images you need.
Look at the table and take the curved blade. At the altar on the right, there are some foot prints and a water jar. Look at the other counter top and take the resin, read the note and take the Riba badge (1/8).
Use the blade to cut the rope for the tool bag, take the tweezers, and the pestle, use the knife inside the bag to cut the triangle candle, and take the key (2/8). Go to the statue and read the note.
Go to the table, put the gypsum powder in the bowl, add the water and stir with the pestle. Take the plaster and the ticket (3/8). Use the tweezers to get the hairs (4/8). Go pour the plaster in the footprint (5/8) and take it.
Also take the cigarette (6/8) and look at the red book, then take the pentagon candle. Go to the statue and put the two candles on each side in their places. Take the pencil (7/8) and read the paper (8/8).
Put all the evidence you found in the file in your inventory. Compare the clues to the information about each suspect in the dossier. Place all clues into the slots representing matches, mismatches, or undetermined. Then select the Consider button to check.
Your suspect is the last one, Bernard. You’ll go and question him at his home. Check out his apartment and look for more information after you find the clues of Bernard’s hide-out.
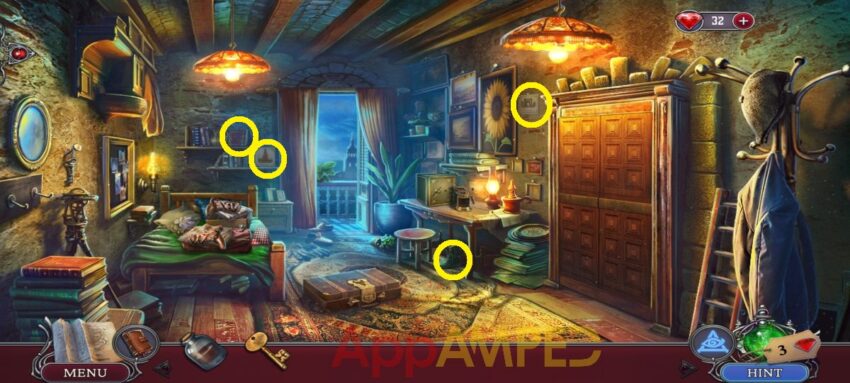
Note for collectibles: I circled the 2 morphing objects and the 2 images you need.
Go to the desk and take the blowtorch, then to the closet and use the key to open it. Find the 5 brotherhood symbols:
- hook on the left door
- lamp
- boot on the floor
- bottle under the clothes
- book on the right
Next up, find all the 12 parts of the picture scattered around, then assemble the image. Push the nub down and take the control panel. Open it and take the suitcase token (1/2) then go out into the balcony.
The shadow in the bushes is a cat. Take the can opener on the left, look over to the bed and pair up the items there. Use the can opener to open the sardine can and take one.
Go give it to the cat on the balcony and take the suitcase token (2/2) from her belly fur. Use the tokens to open the suitcase on the ground. Take the horn, read the journal and take the zipper pull here.
Go to the bed and use the zipper pull to open the bag, take the stethoscope, read the ID and the note, to find a button then use it on the suitcase. The most used buttons are 245 and that’s the code to open the box inside.
Take the safe dial and read the soldering instructions. Put the dial on the safe on the desk and use the stethoscope to open it: 15 right – 45 left – 20 right. Read the note, take the ring, then the fuel and the tin.
Go out to the balcony and make the cat leave so you can find a book and matches.
Put the soldering instructions on the broken control panel, add the blowtorch, put fuel on it, light it with the matches, then put the tin and resin.
Put the resin on the device, then use the blowtorch to melt the entire tin on all 3 parts. Swipe it across from one end to another. Now that it is fixed, put it back in the closet to open the secret door and talk to the man there. You’ll go together in the plaza.
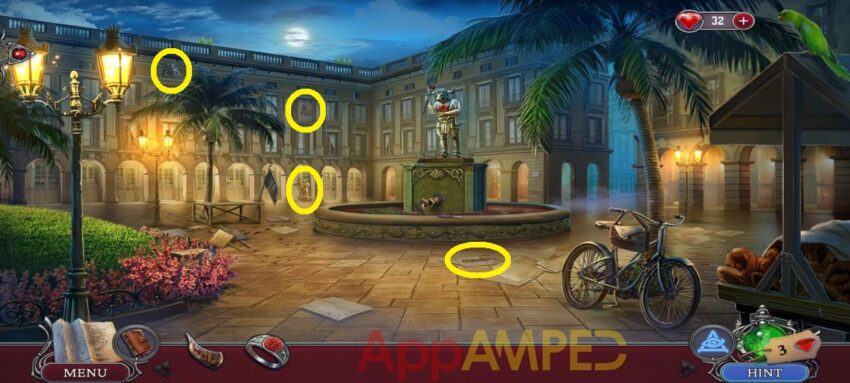
Note for collectibles: I circled the 2 morphing objects and the 2 images you need.
To be continued…

Aylin is a content creator and co-founder of App Amped. She was a huge Tomb Raider fan before moving on to more casual titles. She spent way too much time tending for her FarmVille farm as well as playing text-based browser games. Now she plays and writes about mobile games, creating in-depth walkthroughs and useful guides.