You made it this far and you’re back for more. And I’m here to give you the next walkthrough for Tricky Doors Locked Apartment, level 3.
Follo my lead as I guide you through this new adventure and how to escape this locked apartment. This full walkthrough for episode 3 of Tricky Doors Locked Apartment has every clue you need to get out.
Like I did in my previous article for level 2 of Tricky Doors – Secluded Island walkthrough, you’ll be handed every detail for every step you need to take.

Get ready and pay attention, because no step can be skipped. Here’s my Tricky Doors level 3 Locked Apartment full walkthrough below.
Tricky Doors – Level 3: Locked Apartment Full Walkthrough
Your starting point is a bit dark. Literally, you need to turn on the lights, but in order to do so, here’s what you have to do:
- On the shelf on the wall, to your left, there’s a broom you’ll need. Start with that.
- Next to it there’s a switch, full of spiderwebs and falling apart.
- Broom it, pick up the chip (1/5), put back the plastic cover and switch it on.
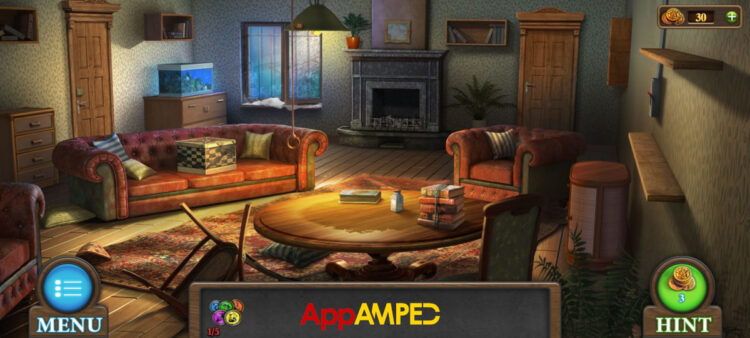
Now that everything is nice and visible, you can start picking stuff up. I’ll tell you everything I did, step-by-step.
- There’s another chip (2/5) on the green lamp hanging from the ceiling.
- On the table, there’s a bottle of sleeping pills that you can pick up.
- Also take the rope from around the book stack on the table.
- The armchair to the right of the room holds another chip (3/5) and they are also a bit weird looking.
- Take the leg of the broken chair in front of you, you’ll need it for later.
- Under the carpet, under the lifted corner, you’ll find another chip (4/5) and a match.
- Now go to the fireplace on the other side of the room, dug in the ashes with the leg of the chair and you’ll find: a handle and a Queen chess piece.
- The box on the couch has a perfect hole for the Queen piece you found.
- Time to play! Make sure there is only one queen per row, column, and diagonally. Two of them can’t be moved. Follow this if you need help.
- That’s where you’ll find the last chip (5/5)
- You will use the handle you just found on the open window, and close it.
- The snow in front of the window will melt to reveal a box with room for 5 chips.
- They will open up a box to a new puzzle.
- There’s a color under each chip, you need to move them around so each chip is on its color. Check this out if you’re not sure how to.
- The box will open further and reveal a magnet.
- Take it and tie the rope you got from the books to it.
- Go to the aquarium in the left corner and lower the magnet with the rope to the key on the bottom.
- This key fits the door in the back behind the armchair.
Kitchen area
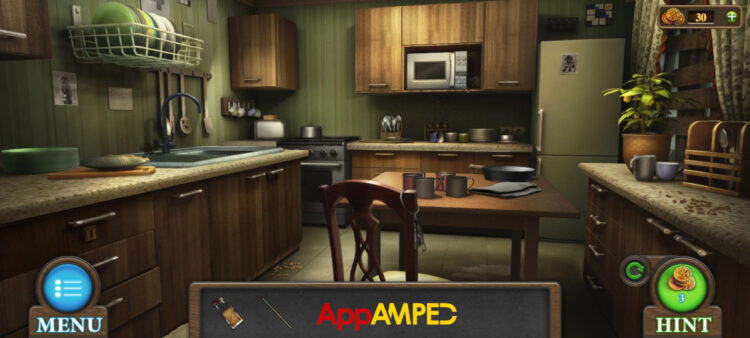
- A set of keys is right in front of you hanging from the chair.
- You can’t just take them, but you can click on them and the drawer on the left. They’ll open it right away.
- You’ll find a knife that you will need.
- Take a look at the table and take the newspaper with you.
- The cupboard under the sink opens too, look inside and take the rubber gloves.
- Tip over the garbage bin and remove the trash inside. Take the fuse that is left behind.
- Now check out the fridge, the refrigerator drawer, and take the frozen meat inside.
- Now put the frozen meat in the microwave, you won’t be able to turn it on just yet.
- Go back to the front room and use the knife on the striped pillow on the armchair to the right.
- Take the key that falls out of it.
- This key works on the door to the left of this room. The lock will open up another puzzle. Here is how to solve it:
- It will open the door and lead you to an electric panel with a broken fuse.
- Good thing you have one from the garbage bin.
- Take the fuse to the panel and put on the rubber gloves for safety.
- That will fix it and turn the lights on in that room.
Side room

- Check out the case on the left, open it, and pick up the screwdriver.
- Use your rubber gloves to unplug the washing machine.
- Use the knife to cut the wire, you’ll need it to fix the microwave.
- Open up the washing machine and check out the clothes that fall out.
- The pocket has a screwdriver part that you’ll need, and a color sequence in the MICROWAVE letters, that you need to remember.
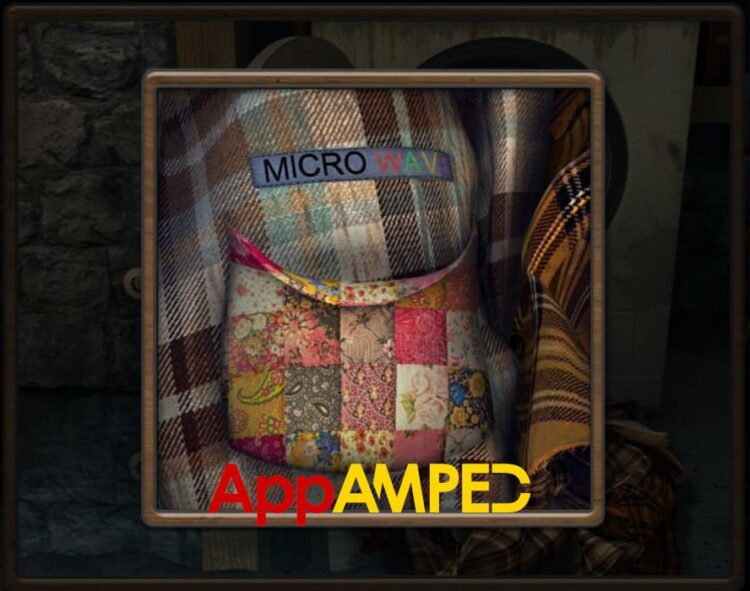
- You can put that part on the screwdriver, but it’s not yet ready to use.
Dealing with the dog
- To fix the microwave and make it work you first need to put the washing machine wire and the microwave wire together. Then plug it in.
- Then take a look at the cups on the table.
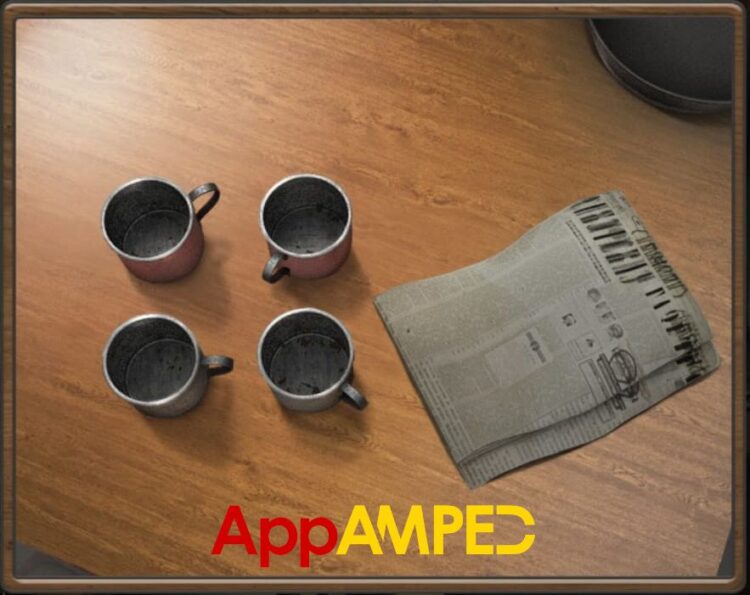
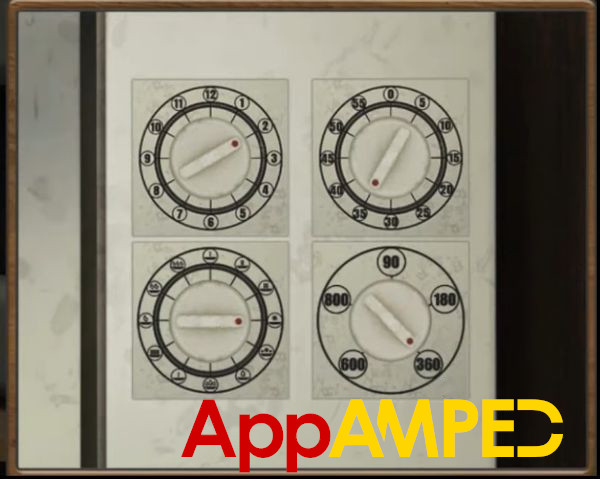
- The 4 rotating buttons need to follow the handles of the mugs:
- Drag the first button to number 2.
- The next to 35.
- Next button drag it to where 3 o’clock would be.
- And last one to 360.
- Now use the colors in the WAVE letters, from the pocket, and light them up on the microwave color lights: Red, green, yellow, and purple.
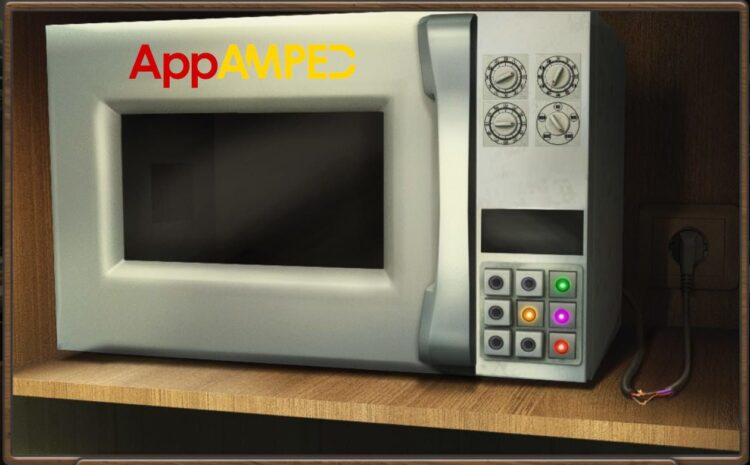
- Now the meat will defrost and you can put the sleeping pills on the stake and take it with you.
- You’ll use it to feed it to the dog in the other room.
- Now that the dog is sleeping you can take a better look at this room.
Opening the seif
- Pick up the pile of wood next to the dog.
- And the red kettle from the top shelf.
- Take a look at the painting on the wall.

- Move to the front room, put the newspaper in the fireplace, wood over it, and the match to light the fire.
- The painting from above the fireplace will become more clear.

- Now with those two paintings in mind look at the seif and put the symbols in the right order, after you count how many of each appear in the two paintings:
- Cowboy hat: 5
- Horse: 8
- Eagle: 7
- Snake: 2
- The seif is now open. Take the valve and battery from inside.
Making hot water
- Put the battery into the screwdriver.
- Use the knife on the tiny frozen window to remove the ice.
- Move to the kitchen, and under the sink.
- Look at the panel in the back and put the new valve you found inside.
- Now all you need is to rotate the pipes so that the water pipes are starting on one end and finish on the other.
- Rotate all valves to start the water.
- Bring the kettle to the sink and fill it up by tapping on the faucet.
- Put the kettle on the stove after you turn it on.
- Take it back when it’s boiling.
- Unscrew the grill in the kitchen’s ceiling with the electric screwdriver.
- Take the key there with you.
Finishing up Level 3 of Tricky Doors – Locked Apartment
You’re almost there. Move to the back room with the boiling water and the key. Pour the water over the lock so it’s not frozen anymore. Now you can use the key you found to escape this locked apartment.
I know it wasn’t easy, but you made it. So congratulations on yet another victorious adventure you’ve faced in this episode 3 of Tricky Doors Locked Apartment.
Don’t worry, the dog is fine! Someone feeds him regularly. But you should not worry about him, but about yourself. The next journey will take us to mysterious islands.
Make sure you subscribe to the website to get the next Tricky Doors level 4 Floating Islands walkthrough, as soon as I’m done writing it.
See you next time!
