

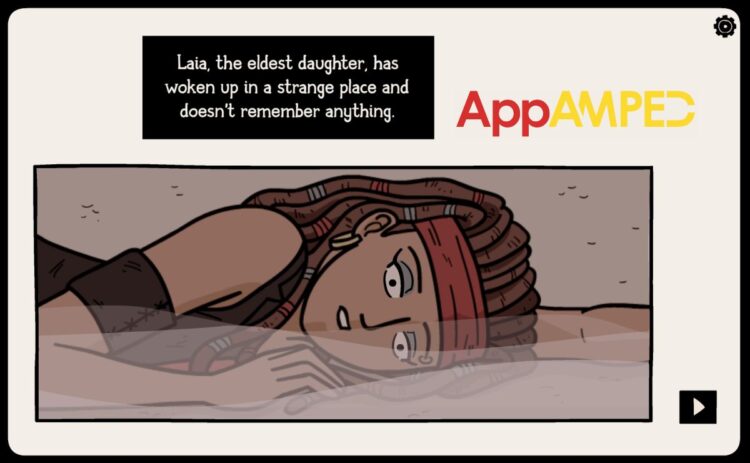
I know this Haunted Laia walkthrough is right what you need to finish yet another awesome escape room game. And I’m here to give it to you.
Like other escape room games before this, it’s not just a simple puzzle game, it has a story and it’s filled with mysteries you need to discover.
You might enjoy other games like this one, so I advise you to check out my last article for the Panel Room walkthrough.
Haunted Laia is a bit more edgy and you’ll find the story captivating if you like that kind of stuff. All you have to do is follow my full guide below to make sure you get everything you need.
Haunted Laia Walkthrough
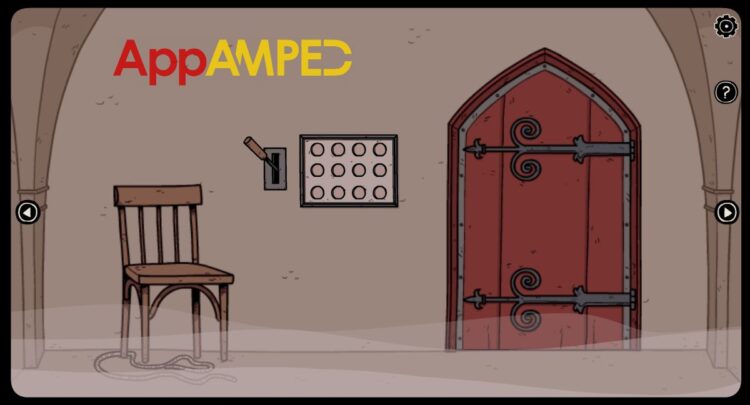
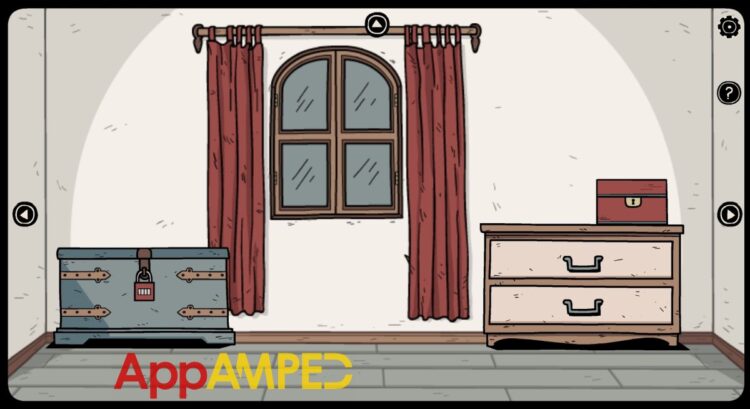
- From the first frame, you can take the rope lying on the floor.
- Move to the left into the next area with the mannequins’ heads.
- Take a better look at the red suit and take the note in its chest pocket.
- On the left arm (your right) the suit has something behind, tap the sleeve to see a chameleon.
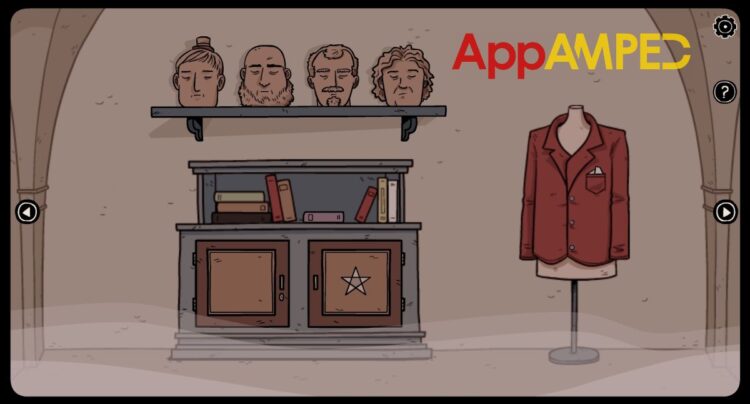
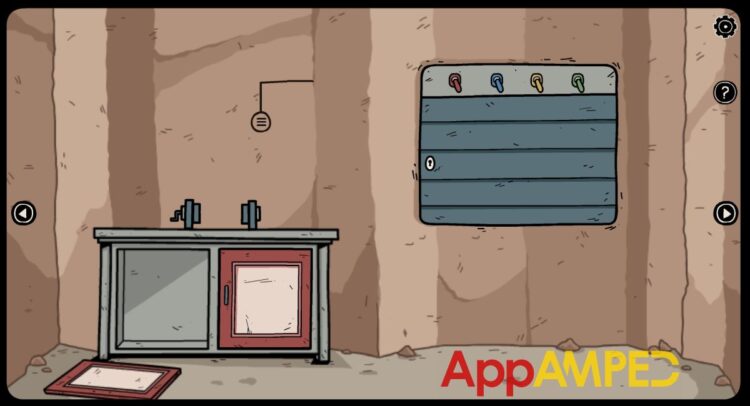
- Tap each head on the shelf.
- First: 3 sounds
- Second: 6 sounds
- Third: 4 sounds
- Fourth: 2 sounds
- Tap the books below and open the pink notebook.
- Take out a blank piece of paper from there.
- Now go to the next area to the left again.
- There’s nothing here to do for now, so left again to see what else is here.
- You can put the blank piece of paper into the typewriter, but that’s about it for now.
- But you’ll need to take a closer look at the painting with the mill.
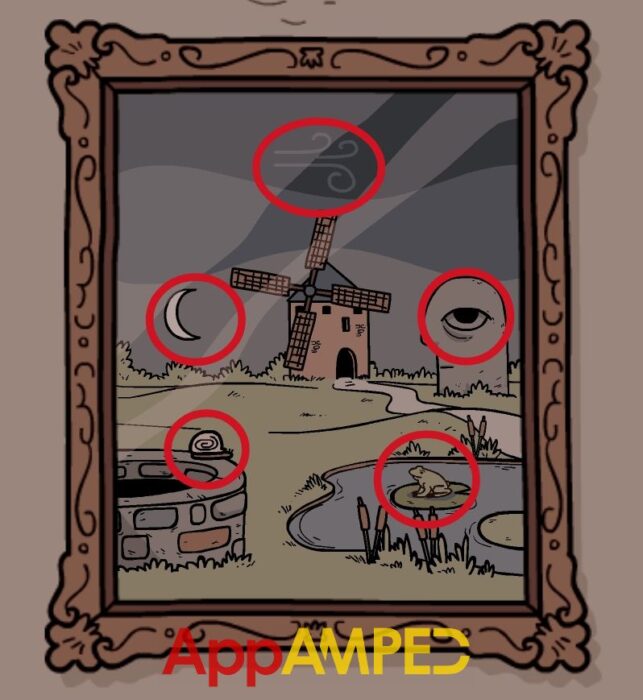
- Go to the heads area and look at the cupboard with a star.
- Enter the symbols as shown in the painting. For me it was:
- Head: wind
- Left arm: moon
- Right eye: eye
- Left leg: snail
- Right leg: frog
- That will open it and give you two gear pieces for a pulley and a blue key.
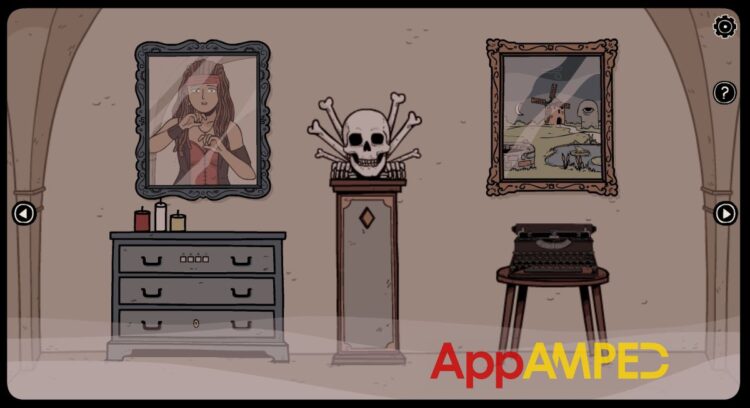
- Go to the area with the painting of Laia, and use the blue key on the bottom drawer.
- You’ll get a typewriter tint from inside.
- Go to the area with the typewriter and put the tint on.
- It will start writing by itself.
“The one with a little hat, the bald one, the one with long hair, the one with a little hat.”
- This is the order the heads’ sounds should be put in: 3 – 6 – 2 – 3
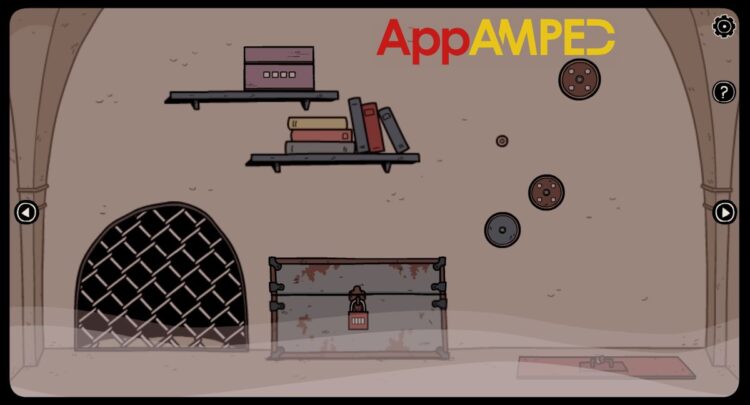
- Go to the area with the vent and big chest and check out the pink box on top of the shelf.
- Enter that code and take a look inside.
- You can pick up a small crank and just look at a note with colored Xs:
- First row: red
- Second row: yellow
- Third row: blue
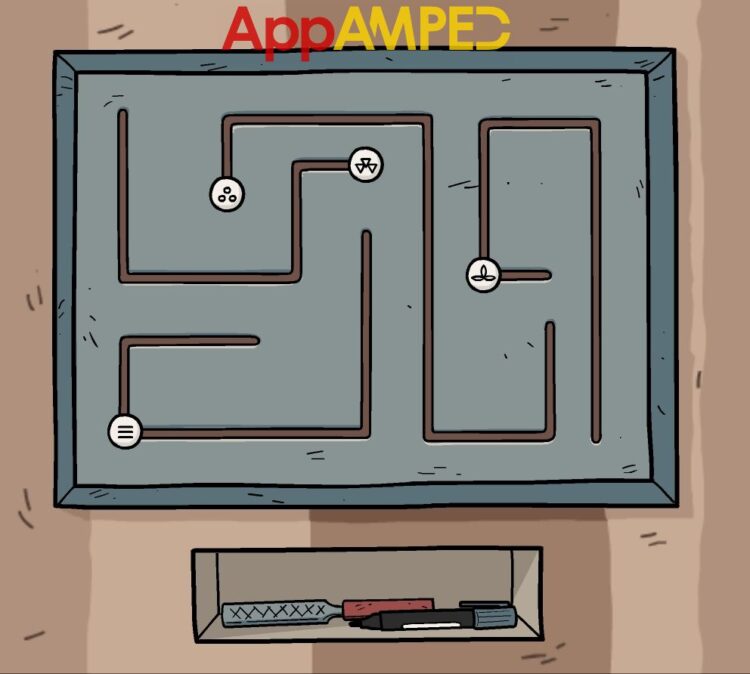
- Now put the pully gear, the rope, and the crank on the wall to open up the box on the floor.
- Enter the pattern shown on the note by moving the skeleton heads up and down using the arrows.
- You’ll find cutting pliers inside.
- Try to use them on the vent grid.
Now you’re going to get flashes of what happened to Laia and how did she end up here.
- The hole in the right wall has another chameleon.
- You can walk around a bit here. Go straight ahead.
- First thing first you can take a black book on the shelf in front of you.
- Look through it as it offers clues on what you will need to do next.
- Move to the left to the other area.
- Take the nail from inside the open cupboard, and the lettuce from the other one after you open it.
- The next area to the left doesn’t give you much either.
- You can go ahead and move further to the left but nothing to do here either.
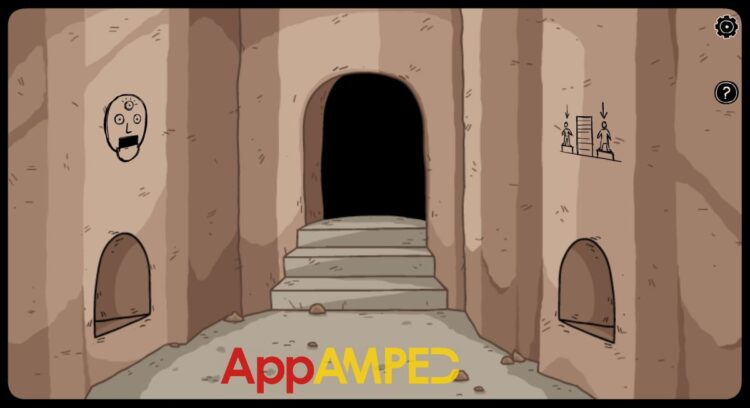
- What you can do is go back to the previous area, with the panel and new door, and go through it.
- On the rock to the right, there’s a new chameleon.
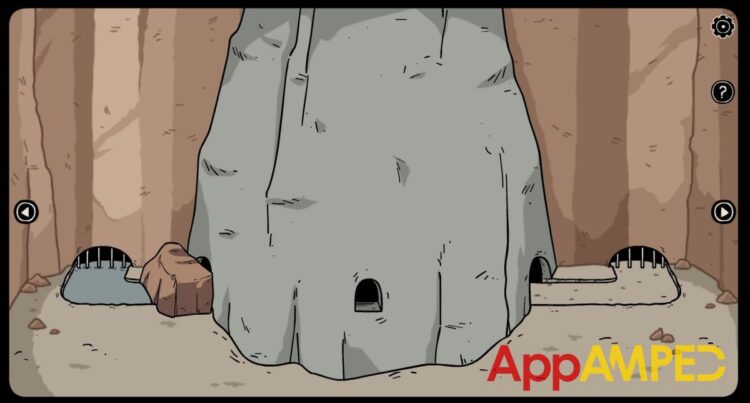
- You can pick up the rock in front of you, and go through the tunnel to the left.
- Take a look in the top cupboards and take the toy boat and the green key.
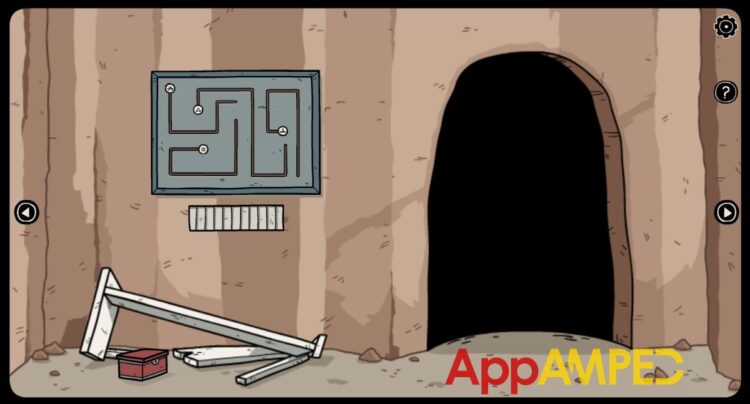
- Tap on the cupboard under the books. Enter the sequence: 8 – 3 – 6 – 1 – 7 – 4 – 5 – 2
- Take the fluorescent tube and the drill.
- Move to the area to the left, and drill a hole in the statue’s forehead.
- Go to the first area of the caves, where you found the nail and lettuce.
- Open the panel to the right with the green key.
- Put the fluorescent tube at the top and turn on the green switch.
- We will follow the pattern in the book:
- Green waves: symbol looking like a 9
- Blue dots: twirl
- Red Zigzags: another 9 symbol
- Yellow lines: a cut triangle
- Go back to the statue head where you drilled a hole and tap the chest under.
- Enter the symbols above for each color.
- It will open and give you a candle, a box, and a torn paper.
- Move two images to the right, or two to the left and look over the edge to find another chameleon.
- Go back up the stairs and back through the door to reach the pile of wood, box, and panel.
- You have there of the symbols you can move on the panel on the torn paper you found.
- The pattern might be different for each player, so you have to look at your own.
- Take the file and black marker.
- Go back to the turtle, put the lettuce on the pressure plate in front of her then try to open the grate with your file.
- She’ll go straight for the lettuce and press that plate.
- Tap on the other pressure plate to open the door.
- Take the hammer from where the turtle was sitting, and the iron bar.
- Now go all the way back to the big rock with a hole you can see the key through.
- Put the rock down and the iron bar to lift the big rock that’s holding the stream.
- Now you can put the toy boat on the left side of the stream and it will hook the yellow key and give it to you on the other side.
- Go to the area with a big rock chest and use the yellow key on the lock.
- Take the mirror ad the spoon.
- Put the nail in the wall between the two torches.
- Use the hammer on it and hang the mirror here.
- Take the black box and place it in front of the mirror.
- It will show it’s open.
- You can reach through the mirror and pick up the eyeball there.
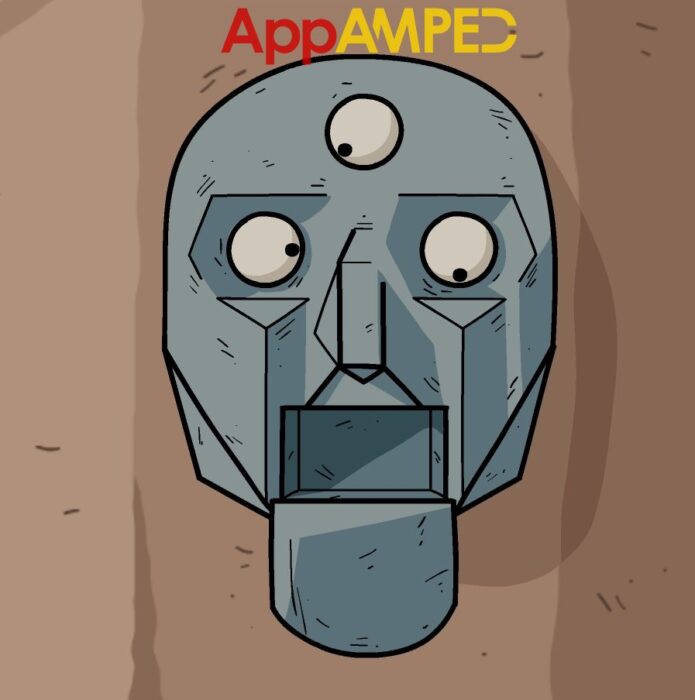
- Take it to the statue’s head and place it on its forehead.
- You can take the scissors and pink key from his mouth.
- Pay attention to its eyes.
- Top one faces 7 o’clock
- Left is 3 o’clock
- Right is 6 o’clock
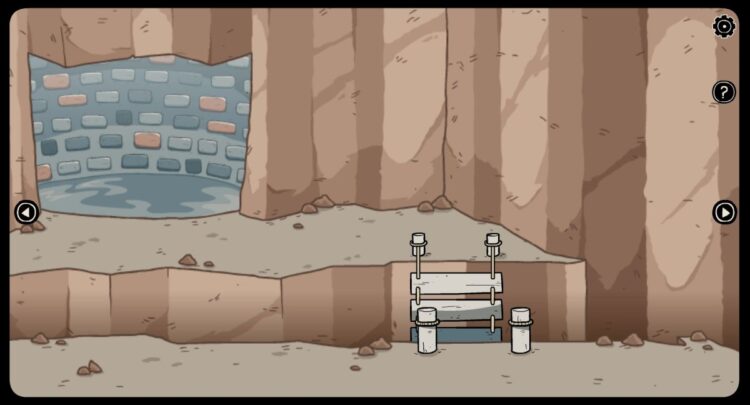
- Now go back up the stairs to the area with the fluorescent light.
- Put the candle between the two vise arms on the table.
- Open the black book, and use the scissors to cut the shape of the key.
- Put it over the candle, use the marker to draw a contour, and use the spoon to carve out the key.
- Use this wax key to open the little red box on the floor of the area to the left.
- Take the lever from inside and go to the device where the turtle is.
- Put the lever in and rotate the balls to match the eyes of the statue.
- Push the lever and the bridge will be up, taking you to a water tank.
- Your dad and brother will tell you not to touch the water.
- You need to find a way to help them and yourself.
- Check the little wooden horsey and tap on it.
- Remember the symbols behind it, that you can see when it moves.
- For me they were: snake – tree – skull – cloud
- Go to the right to see the tent made of sheets.
- Take the extension clamp from the first shelf.
- Look through the book on the desk to find out more about the ghosts.
- Enter the tent and tap on the chameleon under the blue pillow.
- Check under the white pillow and take the valve.
- Turn the cards inside the tent in the order you saw behind the toy horse:
- Snake – 2 Ts symbol
- Tree – 4-like symbol
- Skull – 2 Es back to back
- Cloud – A like symbol
- Go to the door area and check out the little box and enter the symbols you found.
- Inside you’ll find a ball of yarn and a small crank handle.
- Now you can go to the area on the right of the tent.
- You can look behind the right red drapes to find another chameleon.
- Open the first drawer and take the small rag.
- From the second drawer, you will take a screwdriver.
- If you look up you can see a red key you’ll need to get and a chameleon to the left.
- Move once again to the right, to the last area.

- Put the crank handle to the box on the desk.
- Make the music box play and it will give you a black key.
- In the right drawer, you’ll find a paper clip.
- Check the books above and look at the note between the pages.
- Remember the symbols. Mine were: toy duck, toy horse, window, plant.
- Go to the window area and use the black key to the red box.
- Take the paint thinner and ballon.
- Go to the door area, and put the valve and balloon on the helium.
- Blow up the balloon, take it, and use the yarn to tie it.
- Grab the paper clip and bend it. Tie it to the yarn of the ballon.
- Use the paint thinner on the rag, and then the rag on the painting.
- You’ll find a set of symbols you need to remember.
- Go to the right and enter the symbols in the lock of the panel on the wall.
- Once you open it press the arrow for the lift chamber to go up, twice.
- On the bottom, you’ll find a note with arrows: down – down – up – down – up – down.
- With the screwdriver check the plug under the desk and unscrew the screws.
- Remove it and you’ll find a pencil you can’t reach.
- Go to the tent area and put the switch in the right pattern: down – down – up – down – up – down
- You’ll find a large hook and the end of a gripper.
- Put the gripper on the extension clamp.
- Go to the pencil now and reach with the extension clamp.
- Put the hook on the bottom of the lift shaft.
- Lower the lift twice then up twice to retrieve the camera.
- Sharpen the pencil with the pencil sharpener.
- Take a photo of this room. There’s a ghost with 7 fingers up
- Take a photo of the door area. The ghost here shows only 1 finger.
- Go to the tent area. This ghost shows 8 fingers.
- And at the window are, the ghost shows 5 fingers:
- The note in the book, shows you the order of those photos with a hint for each are.
- Mine was: toy duck, toy horse, window, plant. So: 8 – 1 – 5 – 7
- Go to the chest by the window and enter that code 8157 which translates to VIII – I – V – VII in Roman letters.
- Take the bow from inside and look up above the window.
- Release the balloon with the bent paper clip. This will hook the key on the bean.
- Use the pencil and the bow to blow up the balloon and take their red key.
- Go to the door and open it with the key and go through to talk to Laia’s dad and brother.
- They will give you the idol statue you need for the door if you give them the pink key.
- Go to the door and put the idol in it. You’ll be back in the first part of the game with the strange man holding Laia hostage.
- Use the cutting pliers to cut the wire fence and go underground through the tunnel.
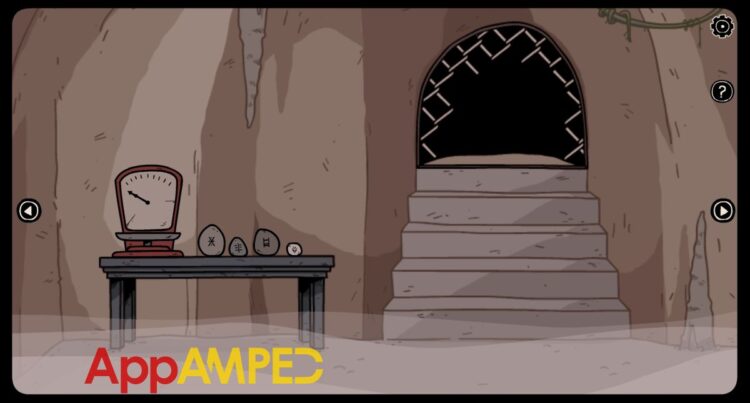
- Start by weighing each stone:
- First X shape: 8
- Second vertical line with lots of little lines on the side: 3
- Third ladder shape: 6 lines
- Fourth 3 Vs symbol: 2 lines
- Move to the right and pick up the white stone off the floor.

- Look at the panel on the wall and solve it.
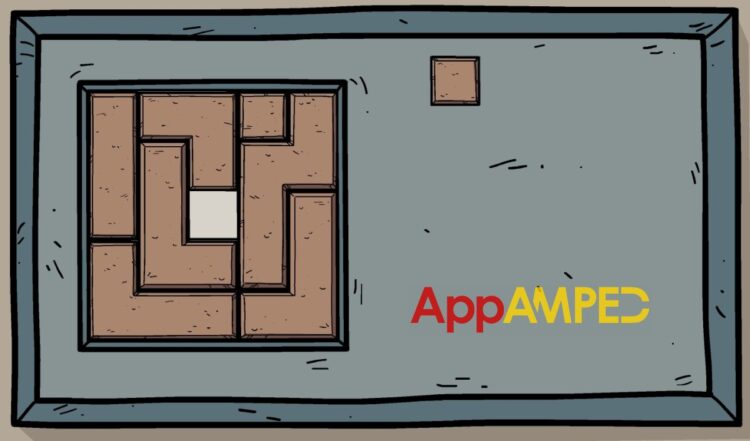
- The tomb will open when you’re done.
- The skeleton hand holds a white key and a token symbol.
- There’s also a chameleon inside.
- Moving to the right again, and look at the note in the skeleton’s hand.
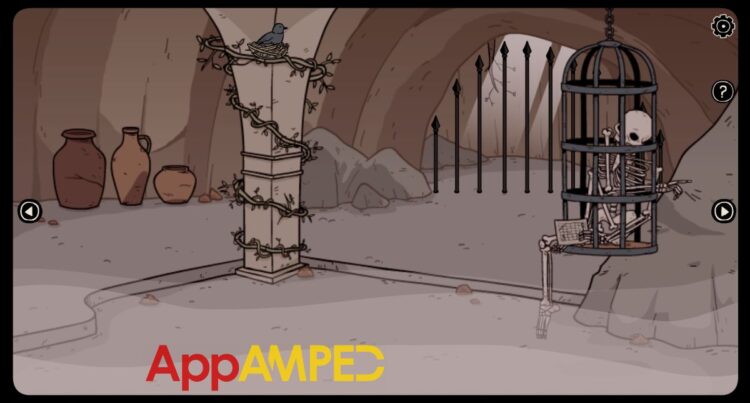
- It’s a clue about the next area.
- Look at the big pitchers, one has another chameleon the last one has another token.
- Now move to the right onto the last area.
- The street lamp has a chameleon at the base.
- And a second white rock you can take.
- Go up the stairs and inside the house again.
- Go to the area with the 4 heads and use the white key on the last cupboard.
- You’ll find a photo of a scarecrow and cleaning alcohol.
- Go back underground to the skeleton in the cage and show the photo to the pigeon there.
- Take the bird’s nest.
- Put the bird’s nest in the street lamp in the area to the right.
- Use the cleaning alcohol to pour over the nest and the two white rocks to light it up.
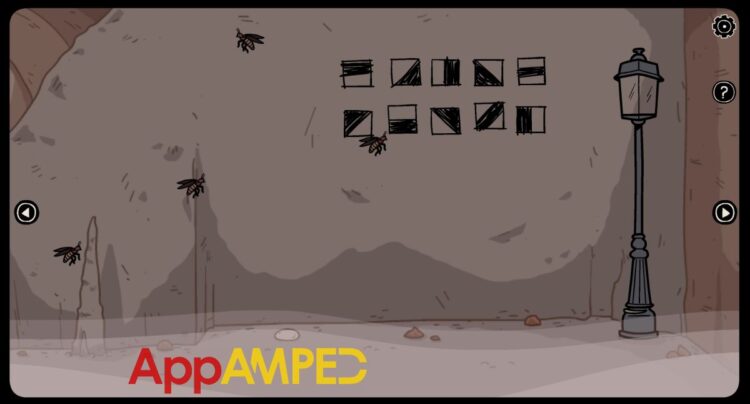
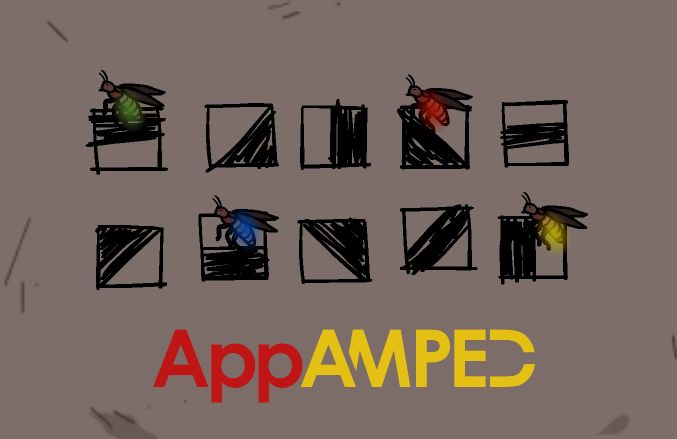
- The fireflies will go to the light, get a new color, and position on a certain symbol
- Green: square with a horizontal cut, up part black, lower part empty.
- Red: diagonal cut, half and half, from the top left corner to the lower right corner. The lower left corner is black, top right corner is empty.
- Blue: horizontal cut, up part empty, lower part black.
- Yellow: vertical cut on the middle, left is black, right is empty.
- Now go back to the house, to the area with Laia’s portrait, and to open the drawer enter that code
- You’ll find another token and a note with symbols.
- They are from the rocks you weighted so you just need to do some math.
- My code is: X shape = 8, stick (3) + Vs (2) = 5, Vs = 2, X (8) – stick (3) = 5 > 8525
- Enter that to the chest lock next to the underground hole.
- You’ll find a pickaxe and another rune drawing.
- Go to the Fireflies area and use the pickaxe where the X was marked on the skeleton’s note.
- You’ll find a red diamond.
- You put this under the skull statue upstairs.
- You can now go to the area with the skeleton cage and check where the metal spears used to be.
- The wall has another rune drawing you need to remember.
- There’s another token behind the big rock to the left.
- And you can pick up the three magic beans.
- Now go upstairs to the door.
- Put the runes where the notes suggest.
- It might be a bit tricky, you just need to make sure there are empty spaces where they say.
- It will be different than mine, so can’t help much.
- Now you can open the door and go to Laia’s father and brother to give them a bean each.
The End…
As much fun as I had playing this game, I’m not going to spoil the ending and I’ll let you see for yourself how intriguing it is.
Until I can find a new escape room to write about you can try playing other games as well. You might like to try my Rooms and Exits walkthrough in the meantime.
From the same developers you sure don’t want to miss my Escape from the Shadows wlakthrough. It looks like we’re going to see Laia there again.

Aylin is a content creator and co-founder of App Amped. She was a huge Tomb Raider fan before moving on to more casual titles. She spent way too much time tending for her FarmVille farm as well as playing text-based browser games. Now she plays and writes about mobile games, creating in-depth walkthroughs and useful guides.