

I’m here for another walkthrough on Escape Room: Grim of Legacy, giving you all the clues you need to finish level 2.
In my last walkthrough for Grim of Legacy Level 1, we managed to get the box. But things didn’t go so well after that.
Now it’s time for more mysteries and to find a way to save the little girl. Follow my walkthrough below to help you with level 2 Grim of Legacy.
Grim of Legacy Level 2 Walkthrough
- Take the rod off the ground.
- Look next to the mailbox and break that fence with your rod.
- A gate piece will fall and you can take it.
- Look through the hole you just made and take the hammer, tap on the fish to get a key, take a cloth from the grass, open the matchbox to get a battery, and move the toy car to get a lens.
- Use the key you found to open the box.
- Take the magnifier from the inside.
- Use the hammer to smash into the brick on the left.
- Take the glue and use it on the magnifier, then add the lens to fix it.
- Go back to the main area, check the panel above the fence, and turn on the power.
- Use the magnifier on the sign next to the streetlight and you’ll find these symbols.
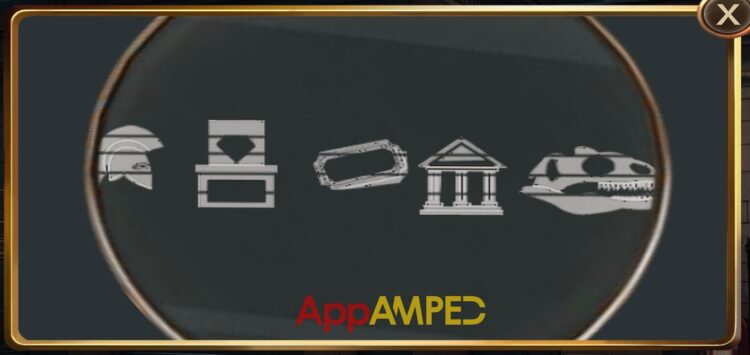
- Check the door next to the fence and enter the symbols on the lock.
- Helmet – diamond box – ticket – Greek building – skull
- Before you go inside use the gate piece to climb up to the streetlight.
- Take the lightbulb using the cloth.
- You can enter the dark building and click on the ceiling where the lights should be.
- Use the lightbulb so you can see your way around the room.
- There’s a torch on the table.
- Add the battery to it and use it to look under the desk.
- Get the tape and the weight lifter.
- On one of the papers on the wall in front of the desk, there are symbols you are going to need.
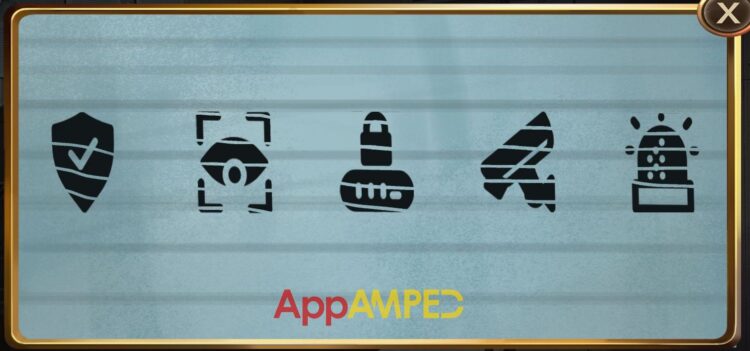
- Use the symbols there on the drawer above the closet.
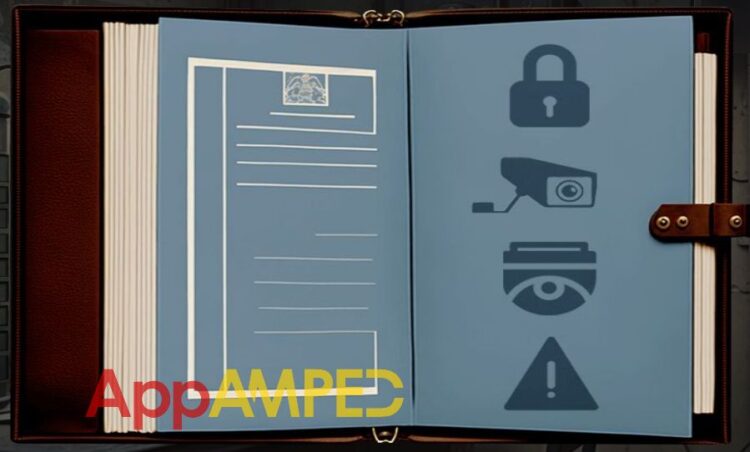
- Shield – eye – lock – camera – ring bell
- Take the diary from inside and open it to find another set of symbols.
- Lock – camera – something with an eye on – triangle warning sign
- Check out the device on the desk and fix the plug with the tape.
- Turn it on from the switch and check the working device now.
- Switch the symbols between themselves to put them in the same order.
- It will give you a paper with more symbols on it.

- Go outside and enter those symbols in the right order on the front door lock:
- 1. Helmet
- 2. Air symbol
- 3. Fire
- 4. Half a heart (or something)
- Now you can enter the building.
- Next to the pillars to the left, there’s a broom you can take.
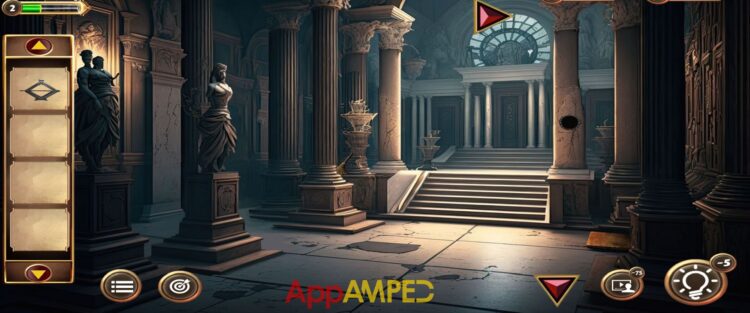
- Click on the red arrow to move on to another part of the building.

- You can find a spanner on the stairs.
- Take a closer look at the fallen rocks next to the stairs.
- Put all items into their right shade, and once you’re done you can gather some items from here.
- Take the hammer, book, and 4 wheels.
- Open the book and the name JAMES is written inside.
- Tap on the small vase at the top of the stairs and take the 2 stone pieces from it.
- Go to the main area and click on the box on the ground next to the pillar on the right.
- Write JAMES with the letters to get another wheel.
- Break the tiles on the floor with your hammer.
- Then use the broom to clean so you can get to the wheels.
- Put the wheels in your inventory on the floor next to the others.
- The wheels will start spinning and you’ll find a steel piece and a book.
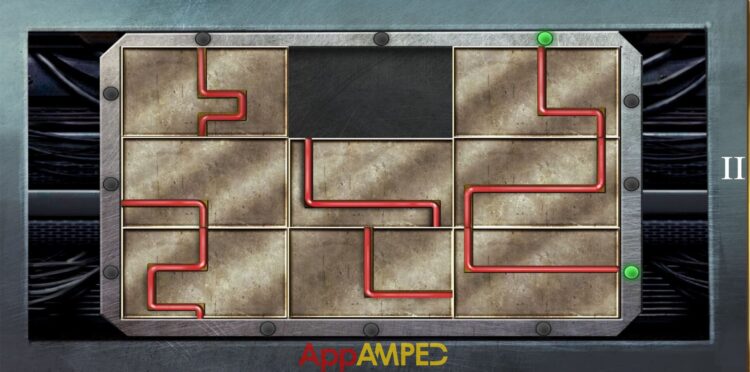
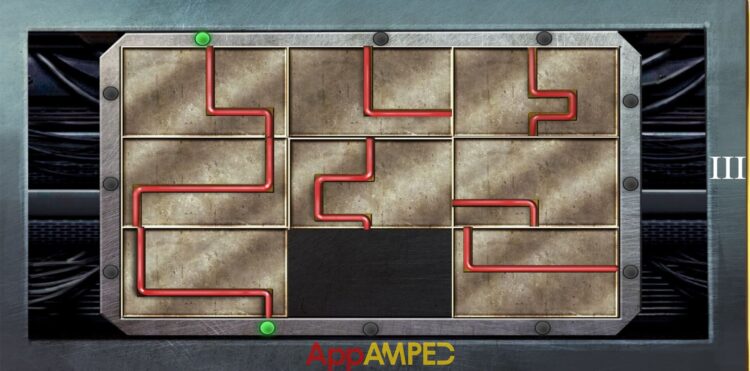
- Go to the other room and put the steel piece into the puzzle on the pillar.
- Now you can try and solve it by moving the pieces so the red string is connected from one green light to another.
- There are three levels to this puzzle.

- You can take the pendant that you can put in the stone under the statue to the right.
- Now you can put the weight lifter in the crack that opened.
- Use the spanner to open the door up and go inside.

- Take the crowbar off the floor.
- Check the green vase with flowers to get two more stone pieces.
- Check the crate under the candles and open it with the crowbar.
- You’ll find a pendant gem inside.
- Inside the vase to your right, next to the pillar, there’s a key you can take.
- Open the black panel on the left wall and take the fantasy liquid.
- There’s a puzzle under the centerpiece vase.
- Put all the stone pieces there to solve it.
- Go to the first room and put the book at the bottom of the pillar with a hole in it.
- Put the pendant gem in the hole above and you’ll find the clue to the puzzle under the vase.
- Now go solve the puzzle and then put the fantasy liquid inside the large vase.
- You will find a magical globe and finish this level.
Wrapping up
You’re on a mission to save the little girl, and there’s a lot more to discover. I’m here to give you all the information you need to pass all the levels.
I’m sure I’ll see you back soon for the next walkthrough of Escape Room: Grim Legacy level 3. If you need extra help, don’t hesitate to ask your questions in the comment section below.

Aylin is a content creator and co-founder of App Amped. She was a huge Tomb Raider fan before moving on to more casual titles. She spent way too much time tending for her FarmVille farm as well as playing text-based browser games. Now she plays and writes about mobile games, creating in-depth walkthroughs and useful guides.