

Welcome to the complete Edge of Reality: Lost Secrets of the Forest walkthrough – your step-by-step guide to uncovering every hidden clue, solving each puzzle, and rescuing the world from the mysterious corruption spreading through the woods.
It’s been 20 years since your last visit to Redwood National Park, but your love of nature has made you an expert in the field. So, when strange human-shaped plants start appearing across the park, it’s up to you to uncover their source.
This guide covers the entire main story, all hidden-object scenes, mini-games, and collectibles. Whether you’re stuck on a puzzle or trying to find that last collectible, you’ll find everything you need here to complete the adventure.
Lost Secrets of the Forest Walkthrough
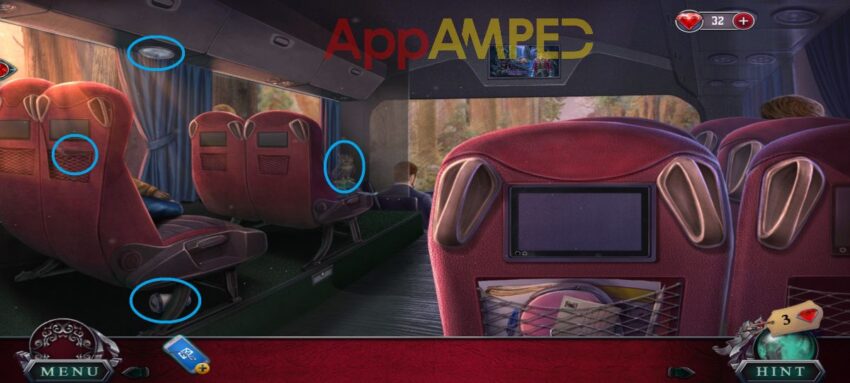
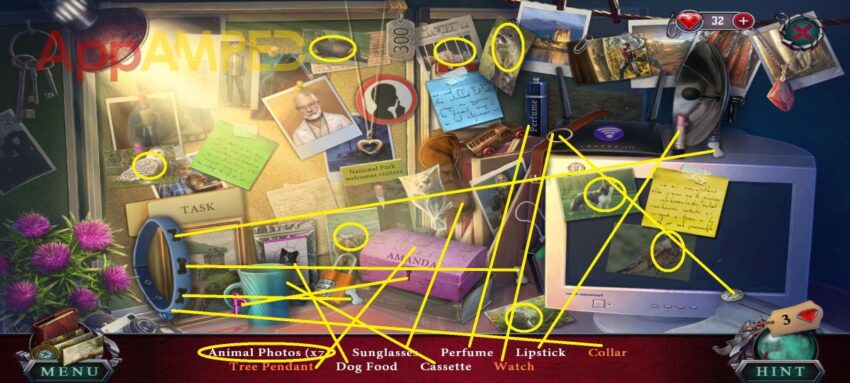
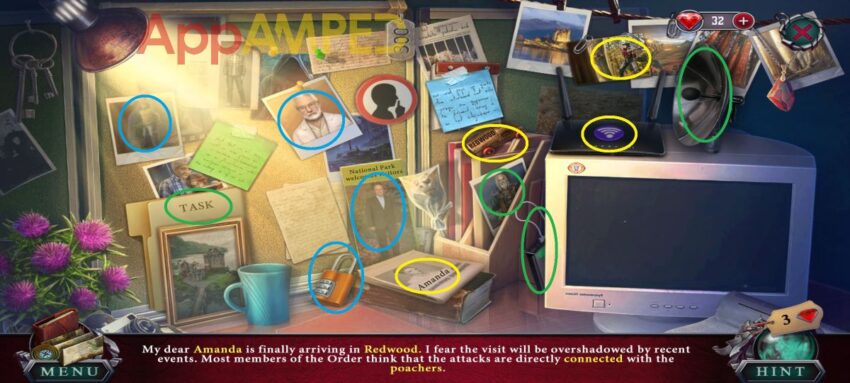
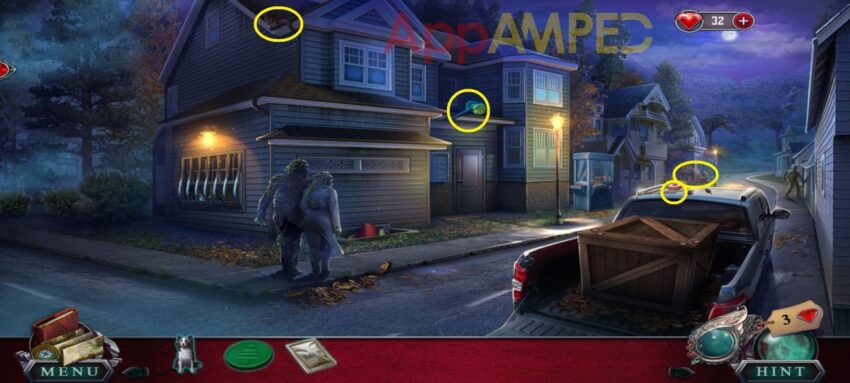
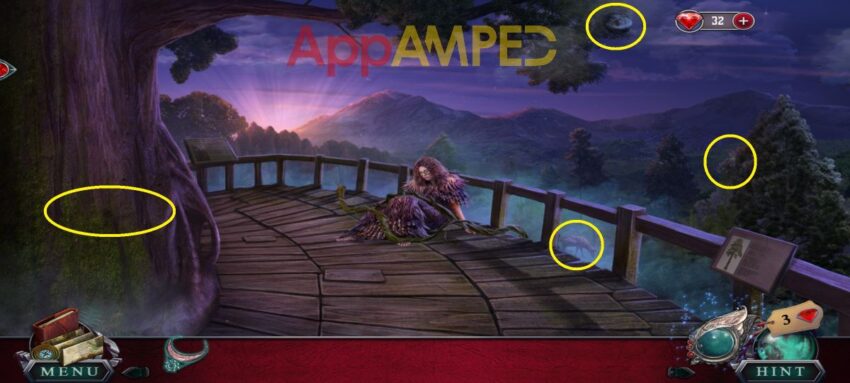
I’ll make sure to circle all collectibles in every photo. Make sure you gather all. Then look at the phone and take the musical clef token and check out the new message. Look in the pocket of the seat in front of you.
Take the letter, open it and read it, then take the paperclip. Use the musical note on the pink bag to open it. Look at the ID, the photo, take the headphones and use them to watch the movie at the little TV in front of your seat.
Take the warning badge and see if anyone needs help. But the clothes back in the luggage and look in the luggage compartment above the seats. Take the umbrella and use the left arrow then talk to the lady next to you.
Look in the bag on the seat next to her. Read the paper and take the nail clippers. Use the paperclip to open the zipper and get the cat toy (1/3). Use the nail clippers to cu the rope from the cat toy (2/3) in the cat cage.
Use the warning badge to get the emergency hammer from between windows. Go back to the front and use the hammer to break the lock on the suitcase in the luggage compartment.
Take the cat toy (3/3) there and use all 3 on the cat under the seat. Follow the toys under the cups and find all 3 to get the cat and give it to the lady. Take the treat from her and now you arrive you can talk to the scientist before he gets kidnapped.

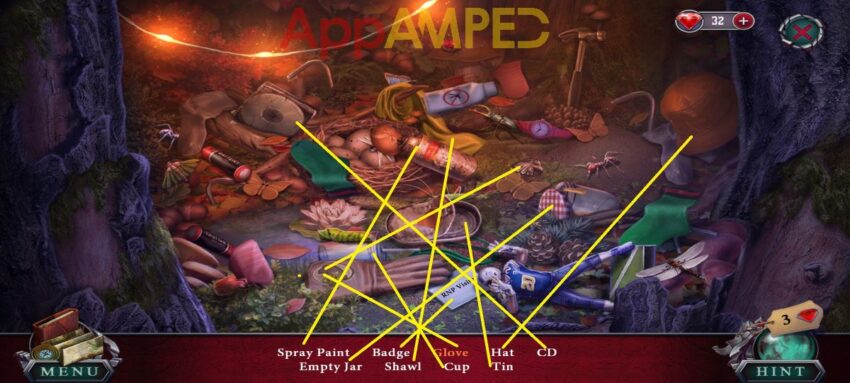
Look on the table near the trailer, take the map, read the note, take the tool kit, open it and get the stone seal. Go to the bush on the left and take the bicycle token using the umbrella.
Go to the bicycle and use the token to open the bag, take the gloves and the stone seal. Use the gloves on the bush to get the coat off and take the parcel, open it and read the note about the glasses.
Take the broken pieces and put them back together. Give the dog a treat then use the glasses to find all its thoughts and hear its story. Use dog’s scent to see the footprints.
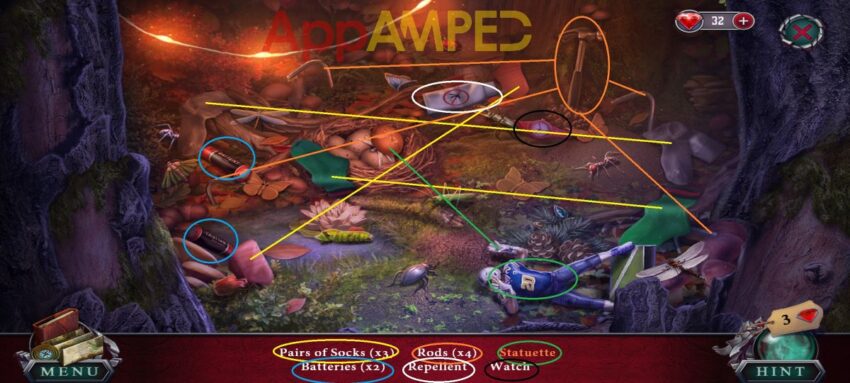
Look at the fire pit, take the empty jar and turn the stone around to put the stone seals there and get a key. Use it to open the trailer and go inside.
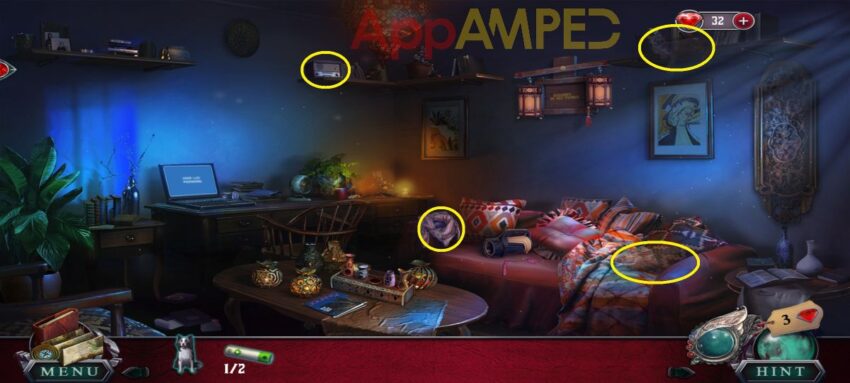
Take the tape player from the drawer on the right. Look inside the fridge, and put the pots on the right shelves. Ferns down and coniferous up. Take the acid bottle and use the empty jar to get some flies.
Go to the flytrap plant and use the flies on it to reach the scissors. Look on the bed, match the books of the same color to get to the last book and find a wooden box sequence inside.
Remove the sheets to find a charging cable and charge your phone. Take the phone to call 911 and talk to the police. Take the dog and look at the patch on the bed. Use the scissors to cut the fabric and get the deer (1/2).
Look at the moving bookcase and take the flower plate, then remove the broken totem pieces. Now go outside at the table near the trailer, use the flower there to get the deer (2/2).
Come back in and use the deer on the box to your right, inside the drawer. Use the box sequence to open it: 2 – 1 – 3. Read the note and take the tool badge, then use that on the tool kit to get the screwdriver.
Now use that on the tape player and get the audio cassette. Go to the table on the left and use the cassette on the player on the right and find the highlighted words. I’ll mark them in the order they are mentioned.
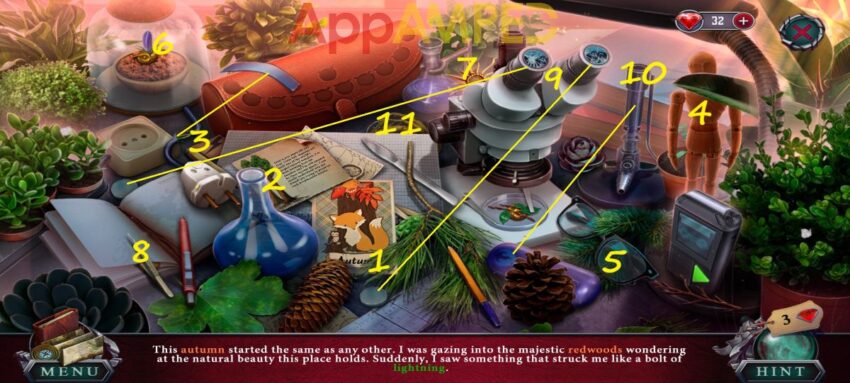
- Fix the cable with the tape to get the flower (6).
- Put the lenses on the microscope to get the DNA (9)
- Put the gas tank on the gas burner to get the flame (10)
- Find all 11 owls (12) to get the totem lever.
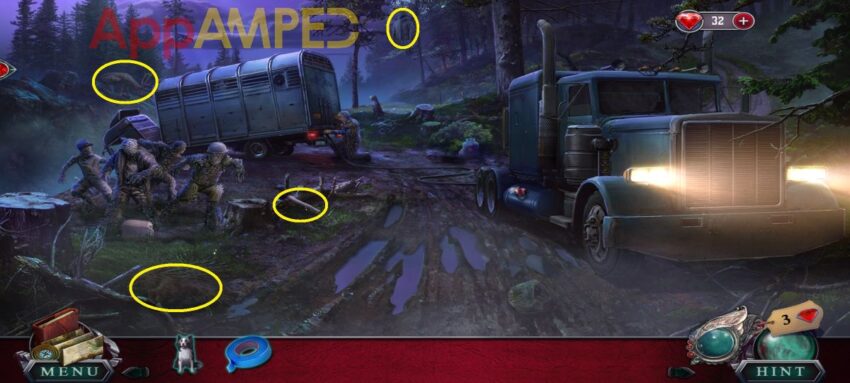
Use that on the bookcase to find Lizz behind it and take the map from her. Use the map in the forest behind the bush. Navigate through the forest using items and find your way out.
- Find the chainsaw to cut the fallen tree and move through that path.
- Find the rope by the river on the right.
- Find your way to the wooden boards to get those too.
- Use the rope and the boards to fix the bridge and pass.
- Move around the net to get to the stick then use it to fix the net.
- Go to the pond to the far bottom left corner and use the net to catch some fish.
- Give the fish to the mountain lion to get rid of it.
You reach the protesters and talk to the police officer. He gives you a trunk key and you need to disperse the people here.
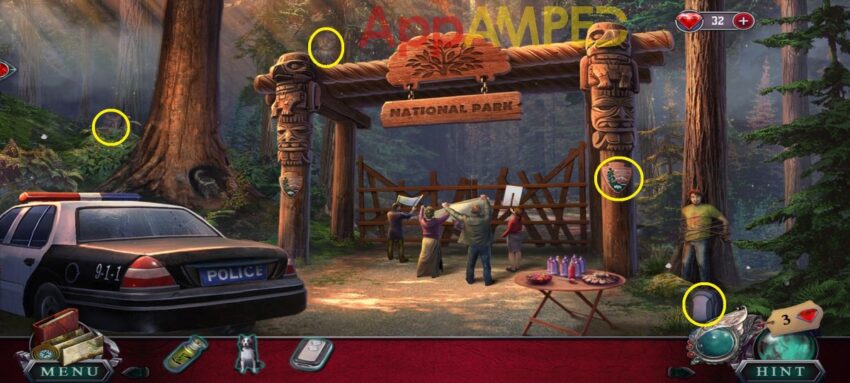
Look at the table and take the lollipop, move the bottles to find bandage instructions. Use the key to open the trunk of the police car. Put the tools back in the case, take the gate handle, read the files, and take the first aid kit when you close the tool case.
Look into the tree trunk at the wounded creature. Use the lollipop to lure the ants away and get the medical symbol. Use acid to clean the first aid kit, then put the medical symbol on the lid to open it. Arrange the tiles so all the vertical, horizontal, and diagonal equals 34.
16 2 3 13
5 11 10 8
9 7 6 12
4 14 15 1
Take the syringe, use the bandage instructions and follow the steps to make a bandage and use that on the wounded animal. Use the glasses to find all the parts of the prints and you’ll get the skunk smell.
Use that to disperse the protesters. Go to the tied man and use the dog to find the knife in the leaves next to him. Use that to cut off the rope and take the key (1/2) from him.
Talk to the officer and get the second key (2/2). Use the keys on the locks at the gate and enter the park.
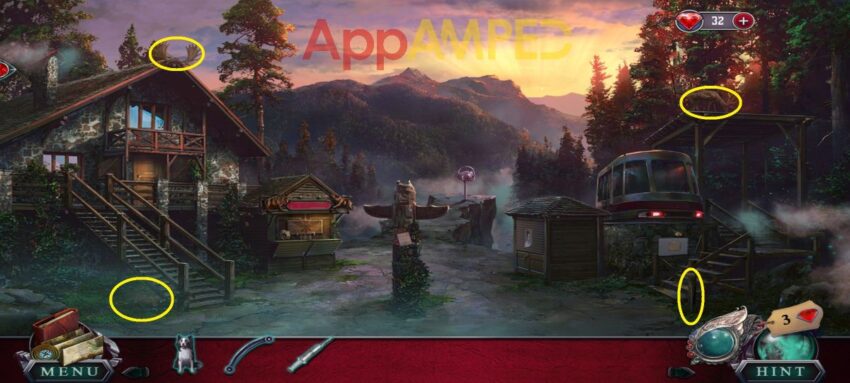
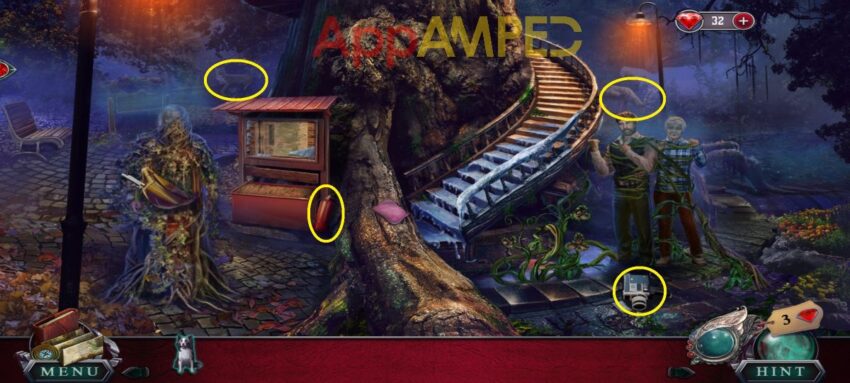
Look at the electric panel on the right, read the note, open it and take the oilcan. Go to the little board next to the electric panel, with the poster of your face, use the gate handle to open it and take the eye (1/2).
Go to the shop on the left, take the other eye (2/2), then go to the totem pole, read the note, and use both eyes on the statue. Take the coin then find the right code for the teeth to get to the owl.
Go back to the shop and use the owl on the doors. Fix the owl wings and tail to match the figure behind.
Arrange the puppets in their places:
- Fish over the pond, eagle hanging from the ceiling, wings on the deer, and flowers, after you move the bushes out of the way, put them in front of the rabbit.
- Forester – after you knock off the tree with the hammer in the cart, put him on top of the fallen tree, saw in the hands of the two men chopping the other tree trunk, wheel on the cart, and fire over the wooden logs.
- Window on the house on the left, then put the metal part under the window on the tall post and put the candle inside. The fox goes in the arms of the middle owl and the moon hanging from the top hook.
Take the fuse (1/2) and go to the binoculars at the end of the cliff. Take the bolt then use the coin to look around and take the spring after. Stretch it to get a lockpick.
Go to the souvenirs on the right. Use the syringe on the oilcan to get some oil from inside. Use the oil on the lock of the newspapers, then use the lockpick on the lock to open it and get a newspaper.
Give that to the man in the cabin and talk to him and he’ll give you a fuse (2/2). Use the fuses on the electric panel and connect them to match their tubes. I’ll write the top color first, then bottom, and if you need you can move a fuse over the 2 arrows to switch it upside-down:
- Orange-green
- Blue-red
- Orange-blue
- Red-green (but this doesn’t match, I don’t know why)
- Yellow-orange
- Purple-yellow
Now the lights are on on the cart, you can check out the area and find more clues.
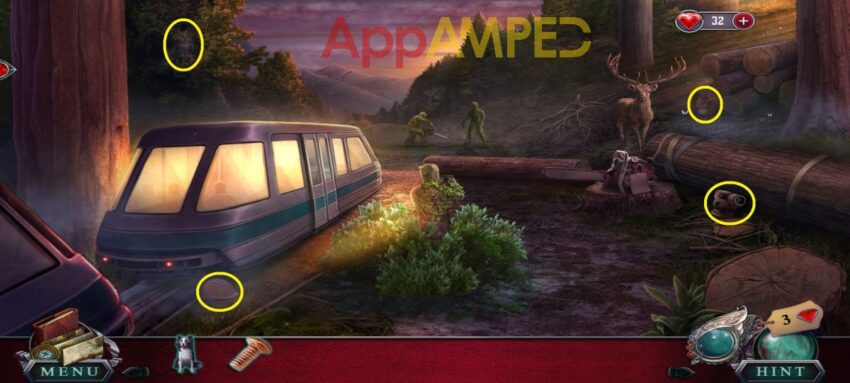
Take the phone from the bush in front of you, open the doors of the cable booth and read the note, then take the part of bolt cutter and the canister.
Go back and look at the chainsaw and read the note, put fuel from the canister into the chainsaw and take the box inlay. Use the dog to dig into the dirt here and take the other part of bolt cutter.
Put those together using the bolt to fix the bolt cutter. Go to the deer and use the bolt cutter to cut the chain on its feet. Form a line, from bottom to top, of broken chains, so both bolt cutters reach the bottom at the same time.
Use the glasses on the deer to find out its story. Take the wing then the pen from the ground and go inside the cable booth. Use the box inlay on the box to open it, look at the diary and use the pen to find the phone code on the last page.
Use that code on the phone to unlock it and watch the video. After you find aunt Tina, talk to her and go find the falcon glove.
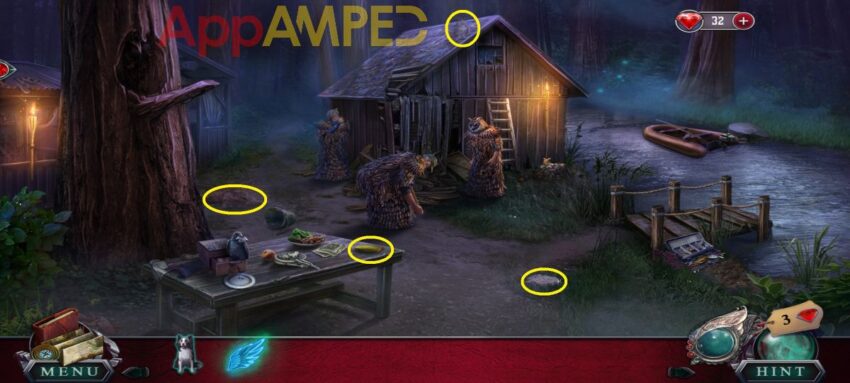
Check out the raven on the table until it flies away to the tree branch, then take the dirty brush, read the note inside the box and take the slingshot. Look at the fishing box on the ground and find matching lures, then take the tape. Wash the brush in the water.
Look at the pile of leaves next to the ladder, look at the photo and dig under the leaves to find the squirrel. Use the brush on its tail to read and take the paper. Use it on the slingshot and take the ladder as well.
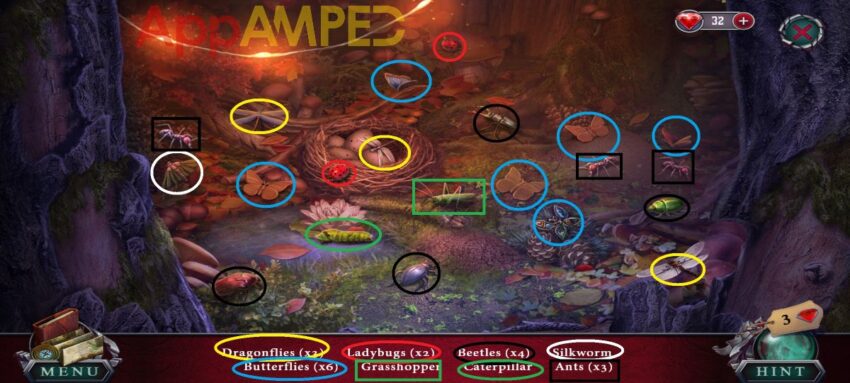
Use the ladder on the tree to reach the raven. Take the fishing hook, then use the slingshot to scare the raven away and look inside the hollow. Find all the items listed below.
Put the falcon inlay on the glove to be able to take it. Then find all the pairs listed below.
Use the hammer to take the rods out. Give your aunt the falcon glove and take the feather. Use the wing to fly across the river and get into the boat. Take the fishing rod, use the tape to fix it, add the hook and the feather.
Use the rod by the river to catch fish and give it to the falcon. Use the glasses to see where the poachers are. You are then given falcon vision and can now go further into the forest.
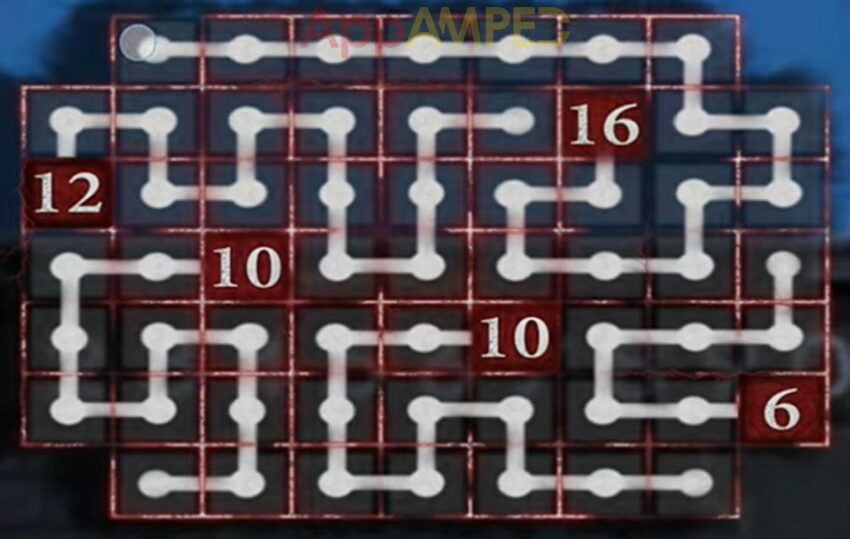
Use all numbered tiles to reach the end: 5> – <1 – 4> – <2 – 2> – <3 – 3> – 2> – 3>. Help the animals by fixing the van and pulling it out.
Look at the tank of the truck and take the toy and the screw. Look inside the truck and read the note:
- Fuel the truck
- Push the button
- Pull the lever
- Step on the pedal
Take the solvent and go out to the men statues to get the canister. Then go to the gas tank and take the bolt (1/3), use the solvent on the tap, use the dog to find you a hose under the leaves.
Then use tape to fix the canister, then the hose on the canister, and fill that from the gas tank. Use the fuel to fill in the the tank and follow the steps on the note to get the truck moving.
Talk to aunt Tina, check the bush statues and get the change. Go to the Order Settlement and give the squirrel the toy you found and get the bolt (2/3). Now check out the hollow again to find lots of bugs.
You’ll find the antlers inlay that goes into the board of the truck. You’ll find a flashlight inside and a last bolt (3/3). Go to the van and put the screw in the loose lock, then put all the bolts in and match the colors using the arrows.
Talk to Aunt Tina and find the keeper’s house. Take the road on the right to get to the village, use the flashlight to see better and reach the lever on the post to get some lights in the area.

Look at the chair in front of the house and take the ribbon, read the note, and take the coin (2/3) from under the rug. Go inside the cable booth, take the straw and headphones, read the flier.
Go to the Eco shop, use the ribbon and headphones to tie up the drapes. Take the plant food, then gloves, and read the newspaper. Look in front of the cable booth at the lights, take the coin (3/3) and the seedling tags (1/2).
Go inside the cable booth and to the vending machine. Press the buttons in this order: 3 – 1 – 2 – 4 to make it start, then insert all 3 coins to get 3 bottles of water. Use it to put off the fire and take the empty plant spray.
Use the gloves to get the owl key (1/3) from the burning wood. Use the plant food in the empty spray bottle, and put the straw on the cap to get plant spray. Use that on the orchid in front of the house on the right.
Take the seedling tag (2/2) and go to the house on the left and put both there. Arrange the tags to match the carvings. Go inside the Keeper’s home and look for clues.

On the ground there’s a pipe and a mountain lion figurine. Look at the fireplace and take the broom. Use the mountain lion on the board, slide it to open the drawer and get the owl key (2/3).
Look at the tree trunk, put the feathers in order to form an owl and take the fallen feather. Look at the shelves on the left and get the oil. Use that to open up the pipe and the feather to get out the note with the code 4132 for the guitar.
Go to the guitar by the tree and use that code to open it and get the slides. On the table to the right there’s a device to see the slides. Look for the hidden objects in every slide.
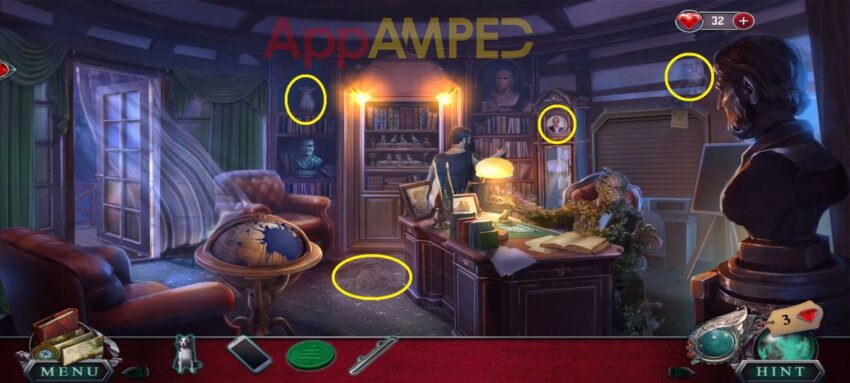
You’ll find the last owl key (3/3), so use all 3 to open the owl chest under the shelves. Read the note and look at the photos. Now go outside and talk to the police officer, then give him the photos.
Read the note on the ground and take the squirrel there. Then go inside the Keeper’s House and use the squirrel on the door to the left. Press the button on the device and reconnect the wires to be able to see inside.
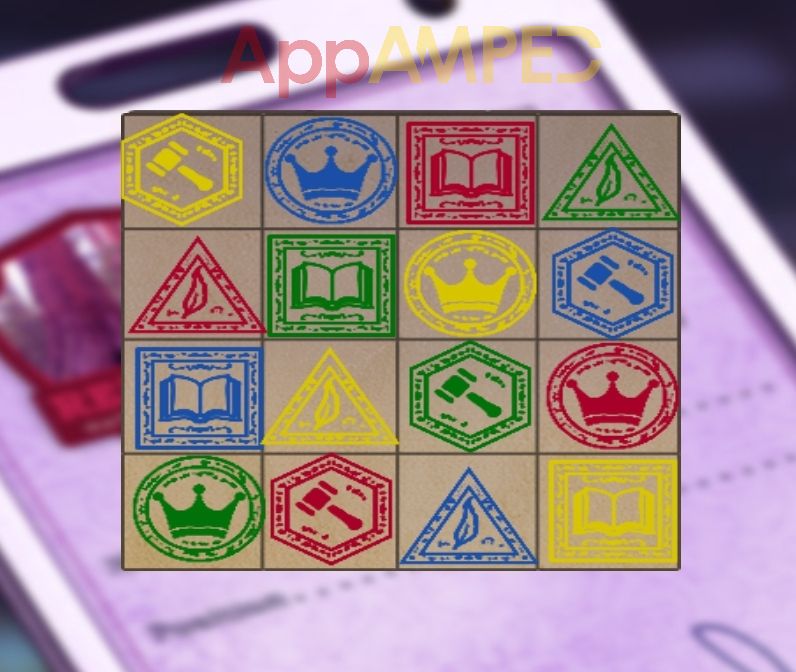
Look at the bags of grain on the floor and through the grain to find a safe knob. Use that on the chest on the left and solve the roses puzzle. You can see the solution in my video bellow.
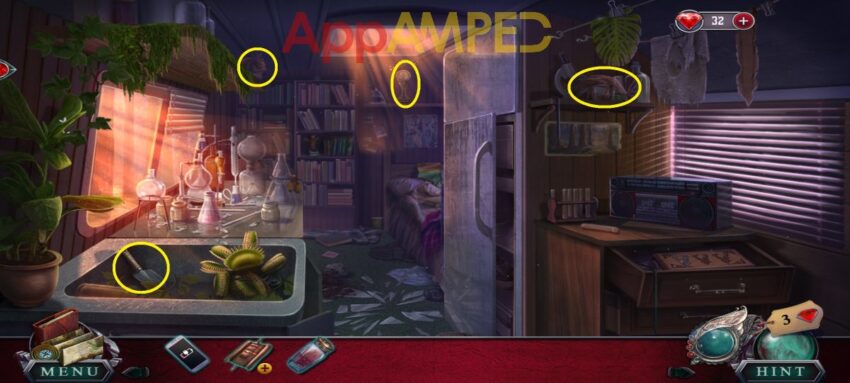
Take the test tube (1/2) from him, then look around the cellar more. Look at the brick wall and push the brick with a symbol to get the medicine box.
Check out the net on the left and open the zipper. Take the first aid symbol and put it on the medicine box to open it and read the note and take the other test tube (2/2).
Read the instructions and put the test tubes here. Sort the colors so each tube has just one color. Take the blue beaker and give it to the Keeper to wake him up and take the slides from him. Go watch the slides and find each highlighted word.
Take the cassette (1/4) and the key. Go outside and look at Tina’s house on the right, then use the key to get inside.
Look on the table and take the manicure set. Look in the closet on the right and put each clothing on the matching hanger by color. Take the key from the coat and use it to open the manicure set. You’ll find scissors and another cassette (2/4) in a little drawer.
Look at the dog house and read the note, use the brush to clean the webs and take the bowl. Use the dog to get the cassette (3/4) from inside the dog house. Go to the table and put the liquid from the bottle in the bowl.
Check out the audio setting on the left. read the note, and take the light bulb from the lamp. In the far right corner, you have another lamp with no light bulb, so use it here to see all the items and find everything.
Here you’ll find the last cassette (4/4), so go use all 4 on the tape reader and synchronize the waves then listen to the other cassette. Now you need to charge the phone, so look at that corner and look for the highlighted words.
- Yellow note items are circled with yellow
- Blue note items are circled with blue
- Green note items are circled with green
Take the charger and charge your phone to call the police. Before going further you need to help the hedgehog on the tracks by using the scissors to cut the cup, then use the bowl to get it to leave and take the cable booth to Redwood Park.

Look at the souvenir shop on the right and read the note about the knots. Check out the bag on the right, by the stairs, and take the rung (1/3), open the side pocket and read the message on the phone, then take the token and the knife.
You need to open the belts two by two to get them all to open:
- 1st Up + 3rd Down
- 2nd Up + 1st Down
- 3rd Up + 4th Down
- 4th Up + 2nd Down
Take the paddle then go to the wheelbarrow and use the knife to cut the tarp, then take the other rung (2/3) and a fire token (1/3). Look at the vines on the house and use the knife to cut them.
Go to the souvenir shop and use the paddle to get the last rung (3/3). Use all 3 and the vines, and the knots instructions to make a ladder. Use that to get up inside the house.

Look at the drawers on the right, read the note, take the notebook, then open the parcel post to get a led lamp and a aquarium handle.
Check out the desk on the left, take the stapler, look at the device with an electricity symbol and put the led here, to replace the broken one. Light up the right fuses:

Go upstairs and take the file, read the note, and get the measuring tape and another fire token (2/3). Go to the cage and pick up the 2 code pieces (2/4), then use the tape to get a 3rd code piece (3/4).
At the clock under the stairs there’s another code piece (4/4). Put all code pieces on the notebook, solve the puzzle to put them in order, and use the stapler to keep it together.
Go to the computer that is now working and use the code 5641 to open the gate. Check out the cage, take the clip. Use that to open the clock and take the fire token (3/3). Use the fire tokens on the cage, then turn them around to be upside up and open the cage.
Take the coyote pup with you, then go outside and take it to its mother by the souvenir shop. Use the glasses and find the clues, it will give you coyote breath which you can use inside on the door to melt it and enter Mallor’s Office.
Go outside on the balcony and take the salt and the cloth. Look at the door in the wall behind Mallor, take the pump, read the note and take the pin, and use the handle to open the aquarium.
Use the net to get objects from the bottom of the water, then find all the items to fit the shapes below. Do that 3 times and you’ll get a wrench.
Check out the desk and use the pin to open the box. Take the badge, then use the wrench to open the glass case and read the note and take the Africa part.
Look at the globe and wipe the ink with the cloth then put Africa back in its place. Read the note and take the stamp. Go to the spilled ink on the desk and put the stamp in ink.
Go to the grey statue of a man and put the badge on his chest. Read the instructions and take the card, then put the stamp on it.
Go out to the computer and scan the card. Use the phone to download the video, then go up and give it to the police officer. Go outside and notice the police car.
Now go back into Mallor’s Office and to the aquarium, and put all items in their place. At the end you’ll find a glue. Go to the car, use the glue on the wheel, then the pump and go with the the office to Treehill.
Go to the claw machine next to the street lamp, take the battery (1/2), read the note, and use the token to play the game.
Use the buttons in this order: 4 – 2 – 6 – 8 – 1 – 3 – 7 – 7 – 4 – 6 – 3 – 5 – 7 – 4 – 8 – 3 – 1 – 7 – 2 – 8 – 6 – 1 – 5 – 4
Take the magnet and go to the door. Use the magnet to get the coin. Put the 6 mail number back in place and get the packet. Take the vinegar and read the instructions.
Use the coin to open the screws of the crate inside the trunk. Take the sanitizer and the ladder. Look in the hole to the side of the house, take the boxes out to find a bear cub. Use the ladder to get the cub out of there, then use the glasses to find the clues.
With the bear strength you can go to the bars at the window on the side and use it there to break them and get the watering can. Put the instructions here, then add the ingredients as shown: vinegar + salt + sanitizer. Use that on the weeds to get inside.
Look on the couch and take the tassel (1/3). Check out the right side of the desk to find another tassel (2/3). Go to the computer and get the aroma diffuser.
Take that on the coffee table, then put them in the right order to match the numbers of holes under them: 2 – 4 – 5 – 1 – 3. Take the tassel (3/3) and the key. Look at the Chinese lamps on the wall and put all 3 tassels then balance them.
Take the second battery (2/2) and go to the book on the desk. Use the key to open it and fill in the blanks inside the book with objects on the table:
- Home: picture on the top left corner
- Childhood: picture of a little girl, on the left side
- Museum: green tiny museum piece on the table
- Planet: globe on the right
- Studying: graduation cap
- Guide: megaphone
- Plant: picture of a factory plant on the right
- Littering: paper cup on the table
- Rumors: paper on the table
- Children of the Forest: picture top right corner
- Spy: binoculars on the left behind the hat
- Magic: wand on the hat
Take the bookmark and use it on the laptop. Connect the fields with a line as long as the tiles say.
Take the lens, rad the note, and go to the couch. Use both batteries on the flashlight, then add the lens and take it. Use the flashlight on the book on the desk.
Find the pictures that relate to the highlighted words, by putting the puzzle pieces back together. Take the marked picture and go outside and give it to the police officer and aunt Tina to see.
Get into the police car to find your new destination – Hyperion.
Look at the bush on the left and use the dog to dig under the leaves and get the shovel handle. Get a closer look at the stairs and take the rag. Use it on the broken glass on the board.
Use the glass to cut the bag on the bush and take the shears. Use them to cut the carnivorous plant next to the police office and aunt Tina. Take the shovel blade and put the handle on it.
Use the shovel to get some sand, and go up the stairs using that. Take the crowbar and go to the board and take out the wooden board from there. Use it to make a bridge over the gap on the stairs.
Use the shears to cut the indicated branches. Talk to Lizz and get away from the vines.
Take the artifact part from her and put it on the glasses so everyone gets back to normal and finish the story.
Wrapping up
With this happy end we finish this story here and it’s time to find another mystery to solve. Let me know in the comment section below if you’re interested in a walkthrough for the Bonus Chapter.
Till next time you can enjoy more puzzle adventure games like Detective Club 2 – Gallery of Shadows or maybe Artifact Seekers – Pirate Bay.

Aylin is a content creator and co-founder of App Amped. She was a huge Tomb Raider fan before moving on to more casual titles. She spent way too much time tending for her FarmVille farm as well as playing text-based browser games. Now she plays and writes about mobile games, creating in-depth walkthroughs and useful guides.
Hi mate, so so good to see you still creating walktrough. I always look first at your page looking for a walktrough. Keep the good work going mate. Be blessed.
Thank you so much, my dude! Always happy to help and comments like yours keep me wired to keep going! Have a nice day!
Thank you thank you. Keep the awesome work going.