
Detective Club 2 – Gallery of Shadows has plenty of puzzles and mysteries that I’m here to help you solve and together we’ll discover every secret in the game.
When a legendary Renaissance painting is exposed as a fake, three teenagers set out on a dangerous journey to uncover secrets that lead to a buried treasure.
Follow my lead and get all the answers you need for the puzzles so you can finish the game and see how the story ends.
Gallery of Shadows Walkthrough
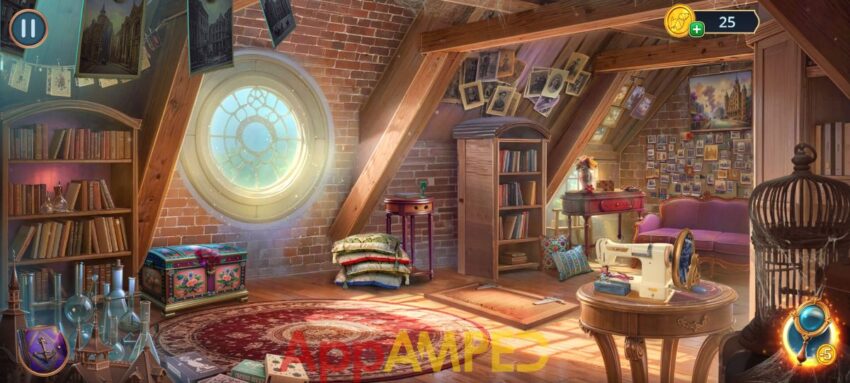
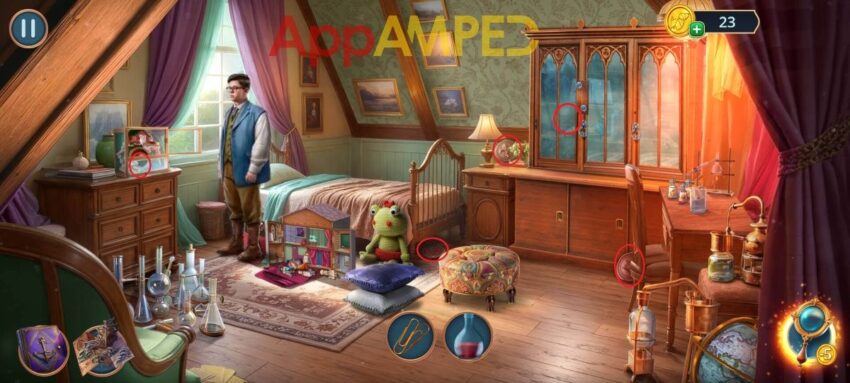
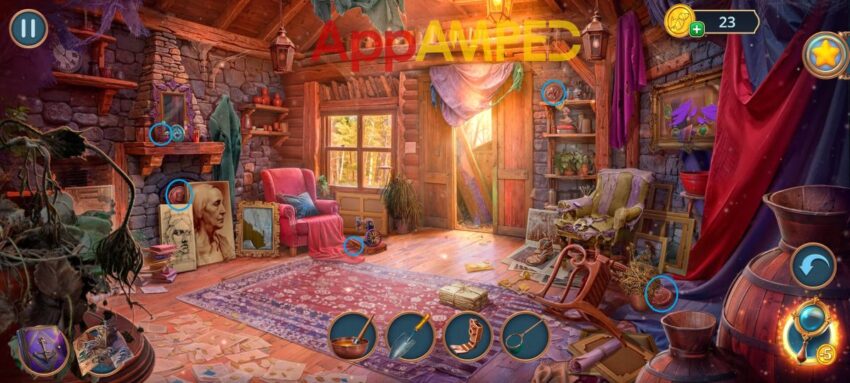
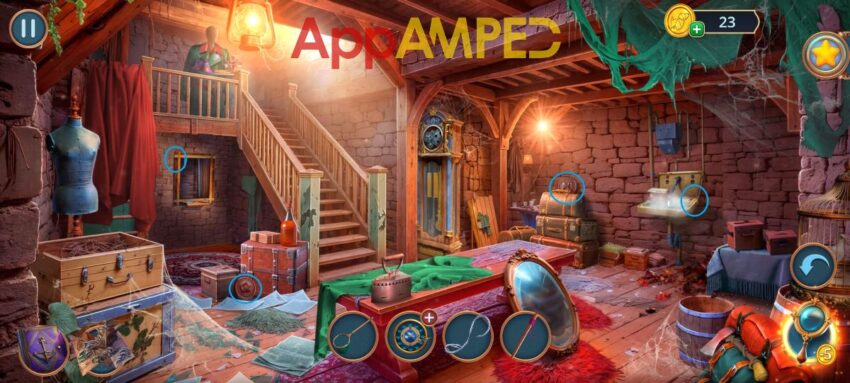
Look at the sewing machine and take the lever and the pamphlet. Put the lever back on the sewing machine and take the ribbon.
Use the ribbon on the drawer of the table next to the stack of pillows to open it and get the gloves. The attic door will open and you can go downstairs.
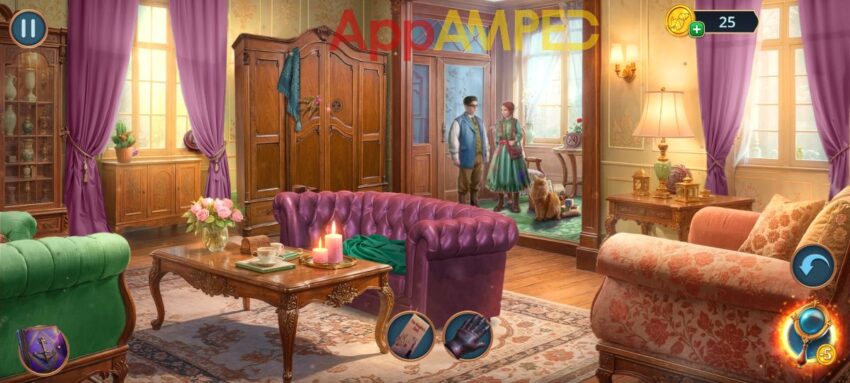
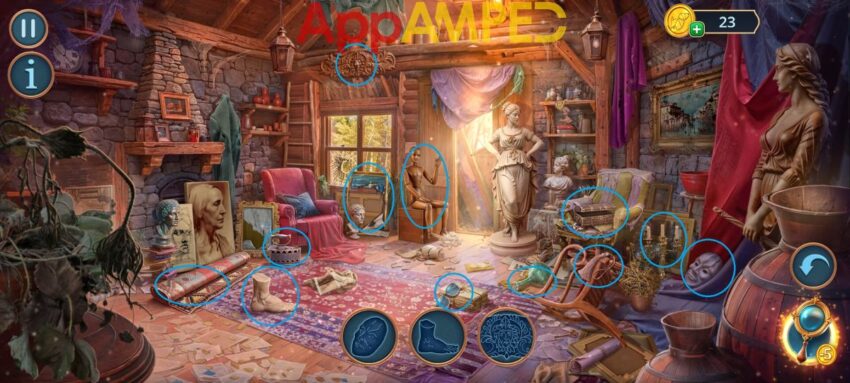
Look at the window to your left and use the glove to get the golden bird from the cactus and the needle from the pot. There’s a seal behind the pot, and another seal behind the drapes here.
One seal is on the table by the window on your right., and one more seal is on the table behind the girl. Look by the couch and get another seal.
Look at the closet to the left and use the golden bird to open it and hind all the objects needed.
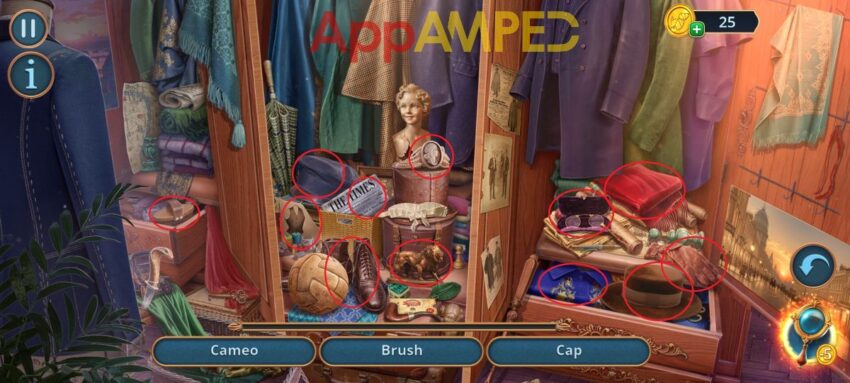
You’ll find a scarf and can now go outside and help the injured man.
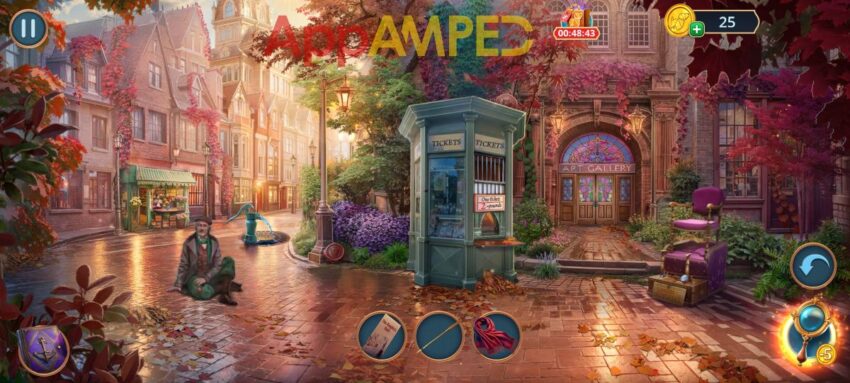
Give the man your scarf and talk to him. You need to find some work to get money for the tickets. He’ll give you a silver bottle. One seal is at the foot of the lamp, and another seal on top of the ticket booth.
Look at the water pump, take the seal and fill the bottle with water. At the ticket booth there’s another seal. Look at the chair on the right and take the shoe polish and brush. Another seal is on the chair.
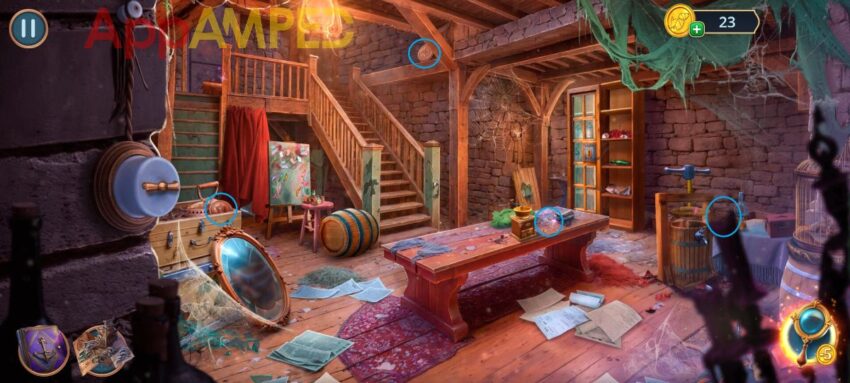
Go back to the attic, use the water on the glue stuck to the chest, use the brush to get that cleaned and open the chest. Take the books and the puzzle pieces. Go to the table in the back and use the puzzle pieces to solve the cube.
Inside you’ll find a soap and a beetle. Go down to the living room, use the books to get the couch up and take the flour. Go back to the chair on the street, use the beetle to take the screw out.
Go to the water pump and use the screw to fix it so you can reach the rat toy. Go in the living room and check out the closet again to find all hidden objects.
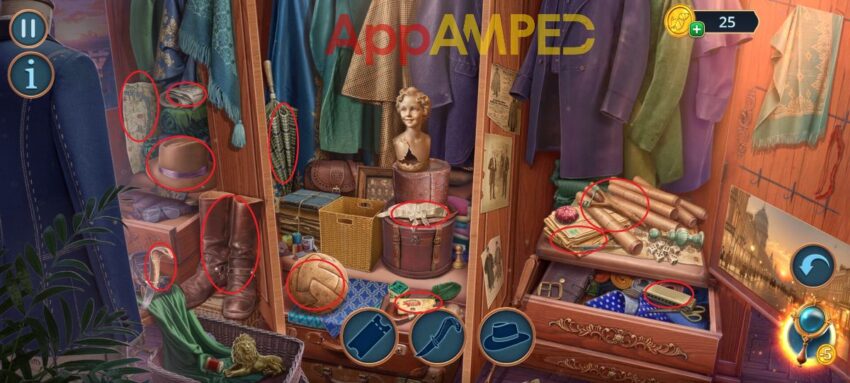
You’ll get a cane and you should use that to get the magnet from under the couch here. Go up to the attic, use the magnet in the chest to get scissors and thread. Go to the sewing machine, use the needle, thread, and put the toy rat here to fix it.
Go to the cat in the living room and give her the toy rat, now you can play the game with her. Take the decanter and read the newspaper, find each red word in the pictures shown there. Use the scissors to cut the job listing in the newspaper.
Go to the floral stand and give her the job listing. Make bouquets of flowers for the customers and you’ll get paid at the end. Give the money at the ticket booth and take the tickets to get into the Gallery.
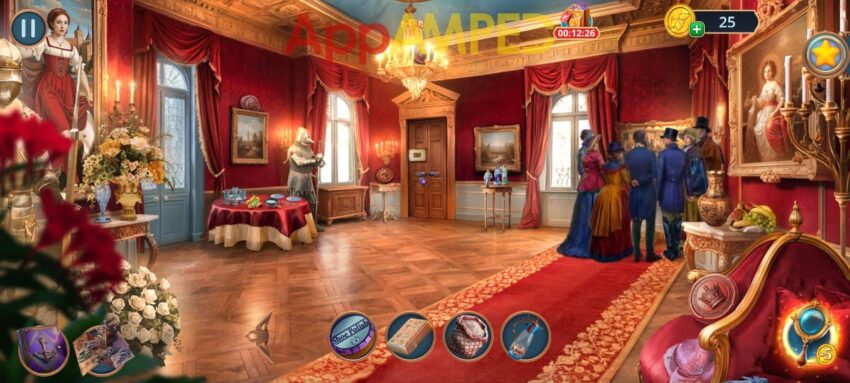
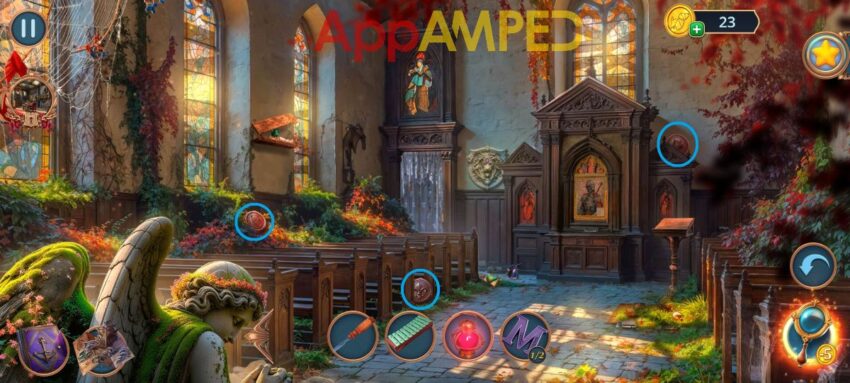
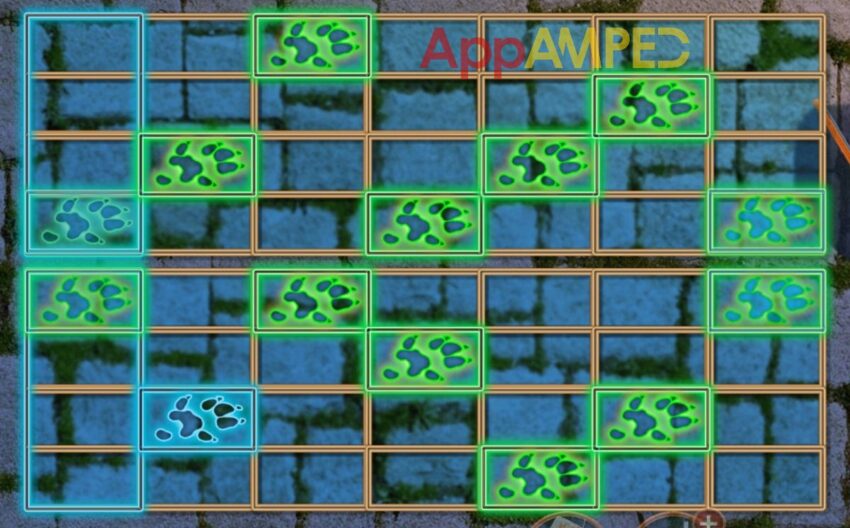
You’ll find 5 seals here:
- On the chair to your right.
- On the chandelier.
- On the table next to the door.
- On the table with the statues.
- On top of the painting on the left.
Go at the table on the left, take the bowl of milk and the paperweight. Give the pamphlet to the people gathered around the painting then look at the paintings to find all the paired items.
- 1st painting: shields and wheels
- 2nd painting: trumpets and bottles
- 3rd painting: golden cups and swords
If you don’t have the money you can choose “You’re overthinking it, mate…”. Emily will give you a hair clip, use it to open the Staff room door. Use the arrow on the left to see what pattern you need then make sure it fits.
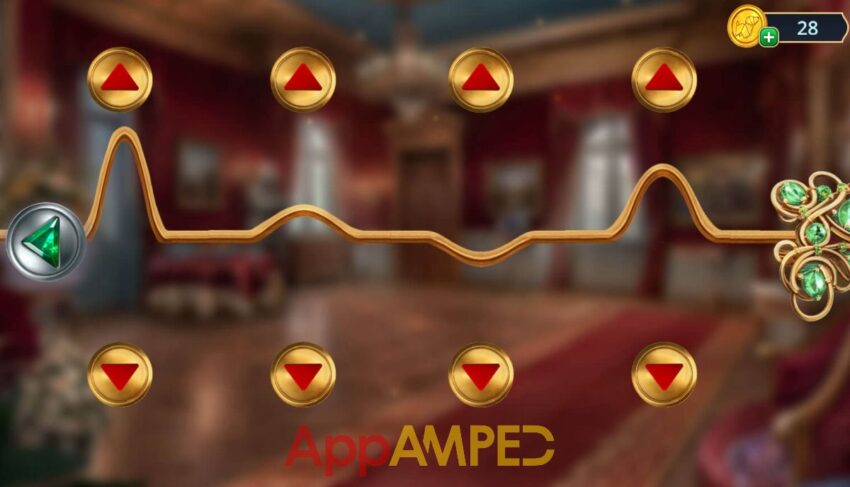
Now you can go inside and look around the place.
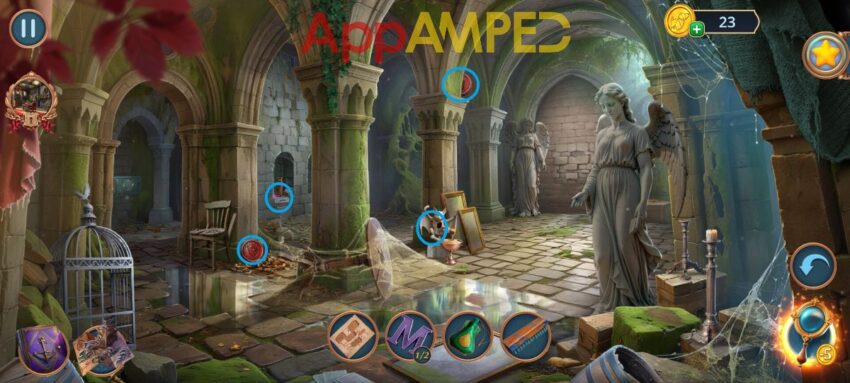
The 4 seals are:
- Basket under the table
- At the window in the corner
- On the rack next to the shelves on the wall
- Next to the barrel
Take the ball on the chest and use the shoe polish on the lock to open it. Select the pairs of identical tools and reach the bottom. Take the kite, the ladle and the tweezers.
Look at the rack next to the shelves and take the fishing rod. Go back to the Gallery and use the tweezers on the item stuck in the table with the statues. Take the cook amulet and use it on the bag hanging on the rack in the Staff room.
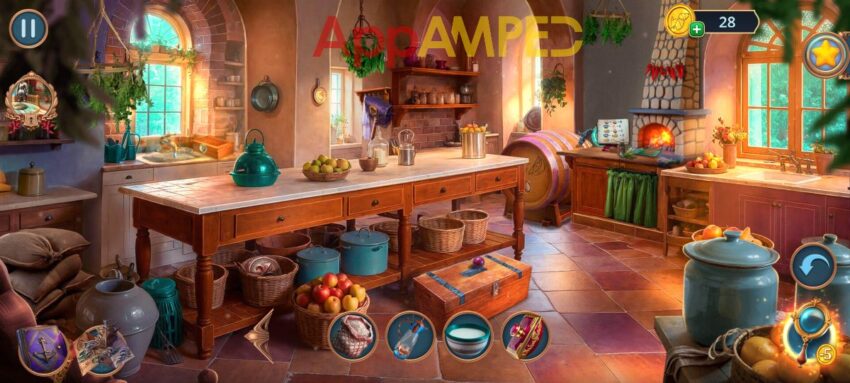
Take the pencil and the luffa from the bag. Go to the sink, use the luffa on the soap to wash and take the plate. Go to the gallery at the table on the left and put some fruits on the plate then take it with you to the Kitchen.
Go to the wood oven and put the milk, the flour, and the fruits on the table then figure out what number is each ingredient:
- Flour = 4
- Fruits = 1
- Milk = 2
- Eggs = 4
- Cream = 3
Take the buffet dishes and the tap. Use the tap on the orange juice barrel then fill your decanter with juice. Go to the Gallery and put these dishes on the table. When the people leave the painting you see a man standing there.
No money to get to talk to him, but your other option is “Maybe you’re just being too critical.” Take a look at the painting and answer the riddles by finding the thing they are talking about:
- With ink I dance, letters take flight, singing names in black or white. What am I? – 1st painting – Feather pen at the horse’s neck.
- White and pure, I stand tall, bringing beauty and a nice smell to the hall. What am i? – 3rd painting – Lilies on the table to the left.
- Half beast, half bird, a guardian true, watching over the old and new. What am I? – 2nd painting – Griffin next to the throne.
- In my teeth, the doorway’s fate, I turn the lock and seal the gate. What am I? – 2nd painting – Key on the wall to the left.
- Once a sign of royal grace, now in pieces, lost in place. What am I? – 1st painting – Crown next to the shield.
- Unfold me wide, and you shall see the paths that lead to land and sea. What am I? – 3rd painting – Map on the ground.
- Once I rang so loud and free, now I’m cracked, but still you see. What am I? – 3rd painting – Bell next to the bed.
- Swift I fly, both true and fast, striking home in shadows cast. What am I? – 2nd painting – Arrow on the ground.
- Carved in stone, I tell a tale, etching history without fail. What am I? – 2nd painting – Stone bird in the bottom right corner.
- Once I’m full, now I’m free, my prisoner’s gone, but what of me? What am I? – 3rd painting – Golden cage in the middle.
- Upon the board, I rule with might, but lose me once, and end the fight. What am I? – 1st painting – King chess piece in the bottom left corner.
- Tightly bound, now torn apart, my words once hidden, now depart. What am I? – 1st painting – Scroll on the ground, next to the fountain.
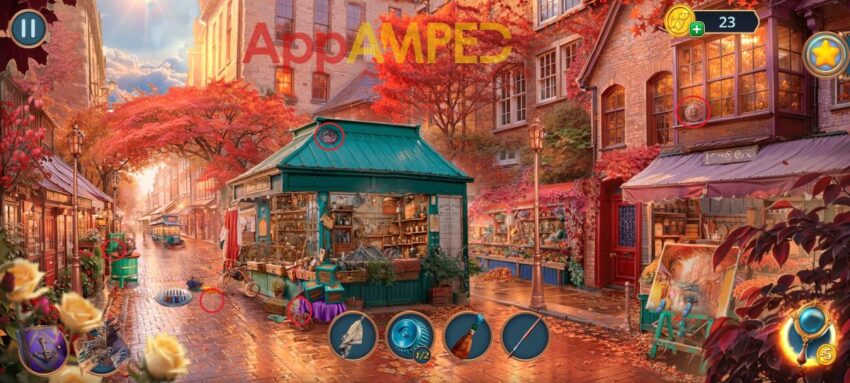
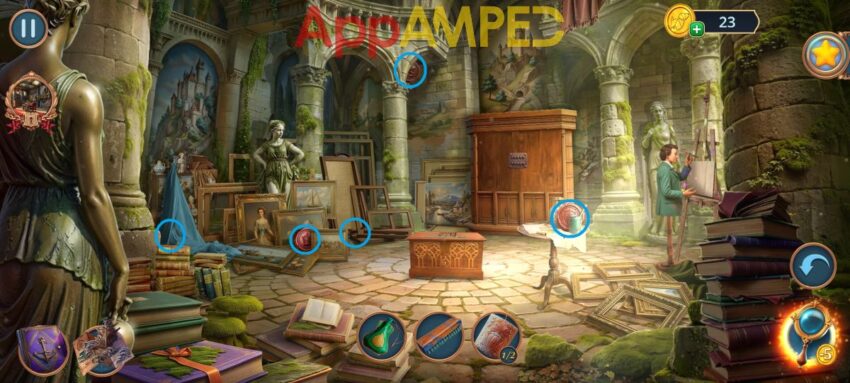
You’re back on the streets and you need to find your way inside the Gallery again.
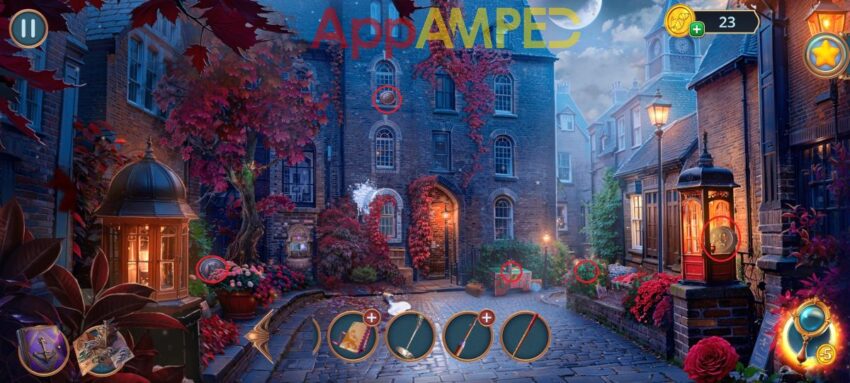
I circled all 5 seals so you know where to find them, though you can’t get to them from the start. Now check out the window on the right and take the empty lantern and the hook. Use the ladle to dig in the ground to find an amulet.
Check out the chest in front and take the kerosene. Look at the window with red vines next to the door and put the ball to hold the window open. Look at the fountain between the tree and the window and use the amulet to open the puzzle.
Inside you’ll find a winding carriage and a chisel. Use that on the chest with the paper weight to open the lock. Take the tracing paper, scraper, and another seal here.
Look at the tree and use the scraper to clean the moss then take the chopsticks. Use them on the kite to fix it and send it in the tree to reach the garden gnome, after you play the mini game.
Put the gnome in the flower to the right and take the fishing line after his hat is up. Fix the fishing rod with the hook and the line and send the fishing rod through the gap in the window to open the lock and get inside.
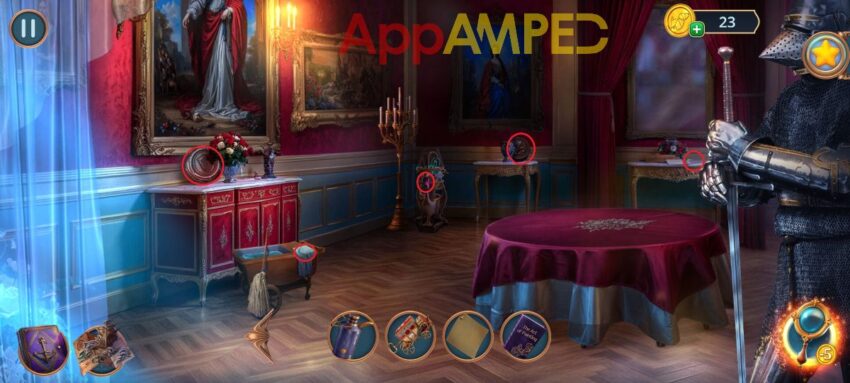
You get an art guide from George after you tell him his idea is a bit stupid. But now you can take a closer look at the painting.
Circled the 5 seals for you. Look on the right under the mirror and use the tracing paper and the pencil to get the code 23561, take the glass as well. Go to the cage in the corner and use the code on the lock and take the scissors.
Use them to cut a wick from the mop. Look at the empty lantern, add the kerosene, the wick and the glass to fix it and get some light for the painting after solving the minigame.
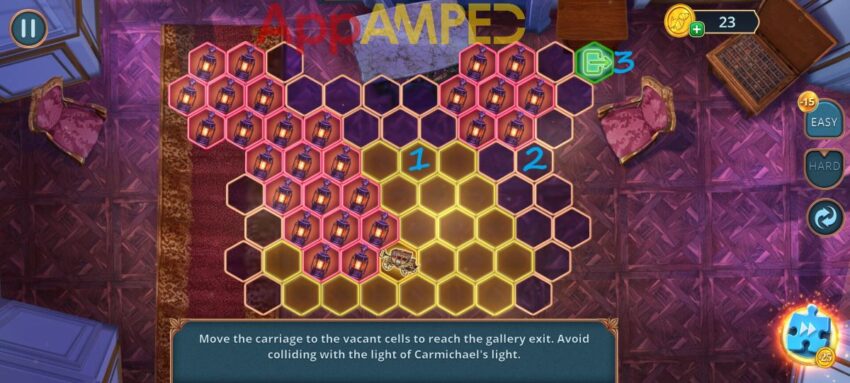
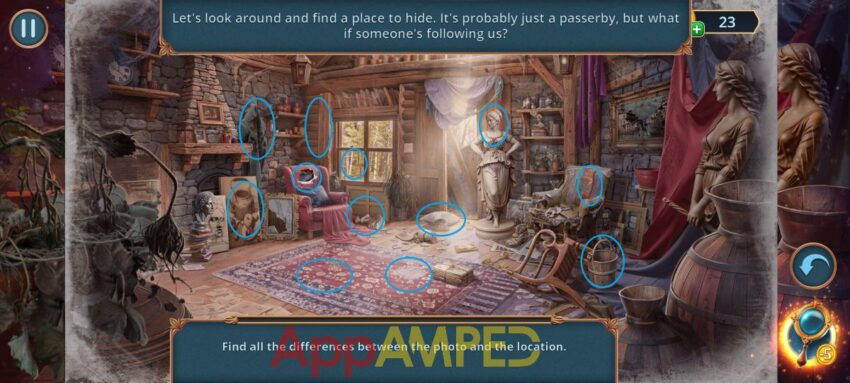
Use the art guide to look at the painting and find 5 differences between the 2. Not much you can do when the man shows but, so just freeze up. You can use the winding carriage to reach the gallery exit.
Take Emily’s bag, open it and take the paper clips and paint sample then look around her room.
Take all the 5 seals from this room and then check out the rat cage closer. Take the comb and look at the desk on the right. Read the note and take the handkerchief.
Use the comb to open the glass case, take the steel knob (1/2) and the old doll. Put the doll in the doll house then arrange all the dolls according to their profession.
You’ll get the olive oil and some nuts. After you talk to George, not sure if the painting is fake or not. Give the hamster the nuts you found and take Emily’s notes. Put the notes on the book in the glass case and use the paper clip to hold them and take the book.
Put the book on the desk, then add the paint sample and solve the puzzle game:
- purple = 4
- blue = 2
- red = 3
- yellow = 1
After you check if the paint is real take the analysis result to George and show him. Run away from your father and find the shop.
After you find the 5 seals look at the painting on the right and take the paint brush. Then go to the green barrel and take the spare wheel. Put the wheel on the cart under the purple rag and take the music tape and wrench.
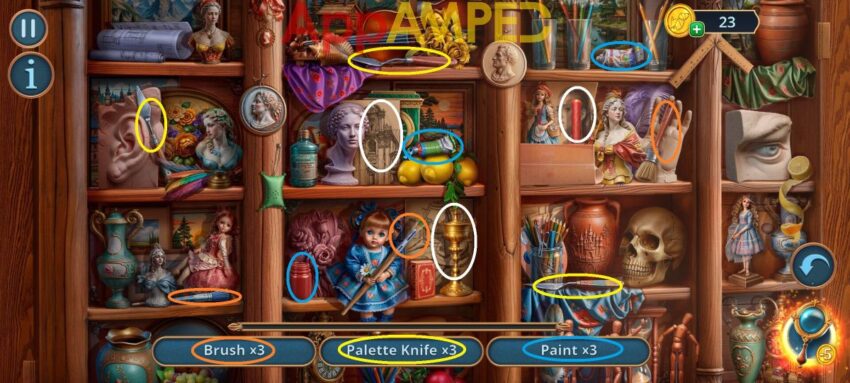
Go to the sewer and use the wrench with the handkerchief to get the holes bigger. Take the soap solution and Finch’s card. Use the card for the shop next to the red door on the right and find the highlighted objects.

You can now enter the shop and talk to Mr. Finch and ask him to take a look at the paint.
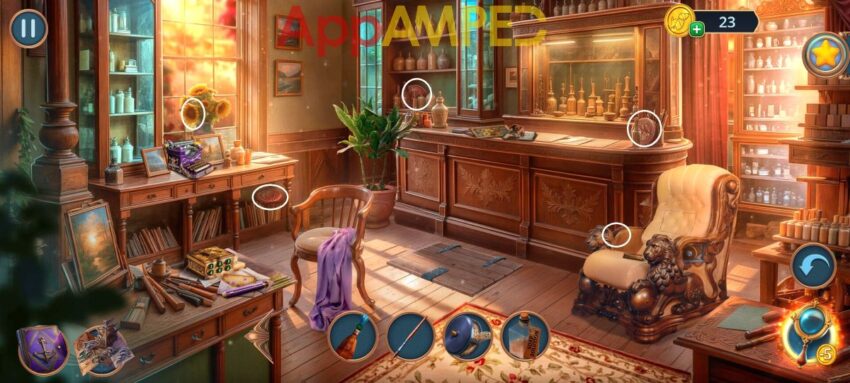
Circled the 5 seals for you and now you can explore the shop. Look at the armchair and take the organ pipe (1/2). Check out the counter and take the brake lever. Look at the table on the left, take the typewriter roller.
Put that on the typewriter and use the olive oil to fix it. Take the button and the steel knob (2/2). Go outside, and check the painting on the right to put the steel knobs on the easel.
After you open the latches you can take the round handle. Go to the green barrel and put the handle on to open it. Take the ink developer and use it inside the shop on the papers with ink splatters sitting on the table.
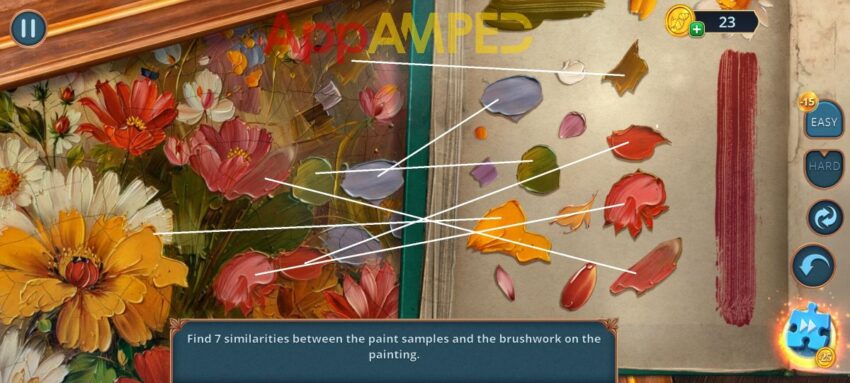
Connect all the blotches with a straight line and you’ll get a code 5143 to open the box and find a magnifying glass. Use that on the painting on the counter and find the 7 identical brushes between the 2.
Finch will give you a fishing rod, and you can use that to get more stuff out of the sewer. Take the bicycle chain and the tweezers. Go to the crate next to the shop, use the tweezers to get the brochure out of the corner.
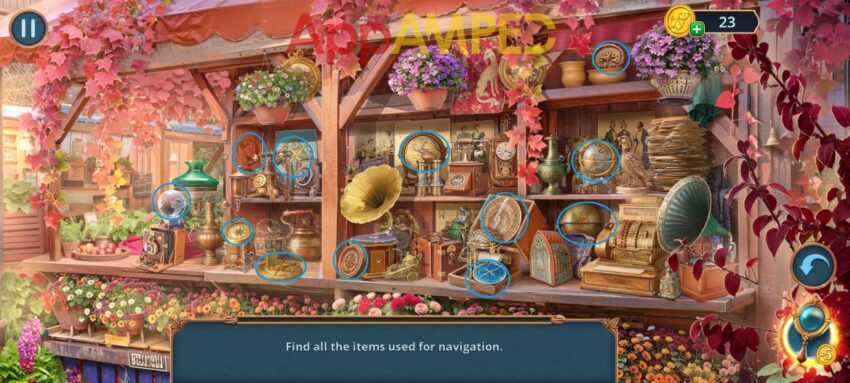
From the streets, show the brochure to the shop to open another hidden object game and find all the items used for navigation.
Go forward down the street to find the cab and get Mr. Finch agenda. There are 3 seals here.
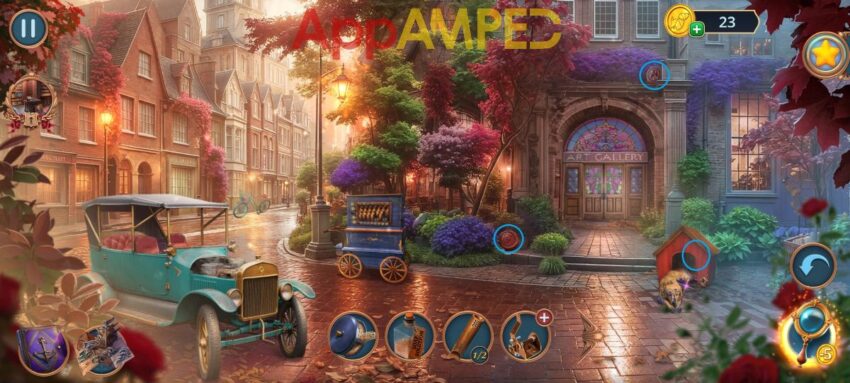
Look at the dog in the cage, take the ballerina and look at the device on the wheels on the street. Put the ballerina here and the musical tape to start the music. Take the pedal and carabiner.
Use the pedal on the brake lever in your inventory then use that on to fix the car. Connect all wires of the same color by swapping the cells.
Take the address and the keys. Go to the bike and take the empty leaflet then go to Finch’s shop, to the typewriter, put the leaflet and the keys then take the grappling hook and gear. Put the gear on the armchair to find the glue and brush.
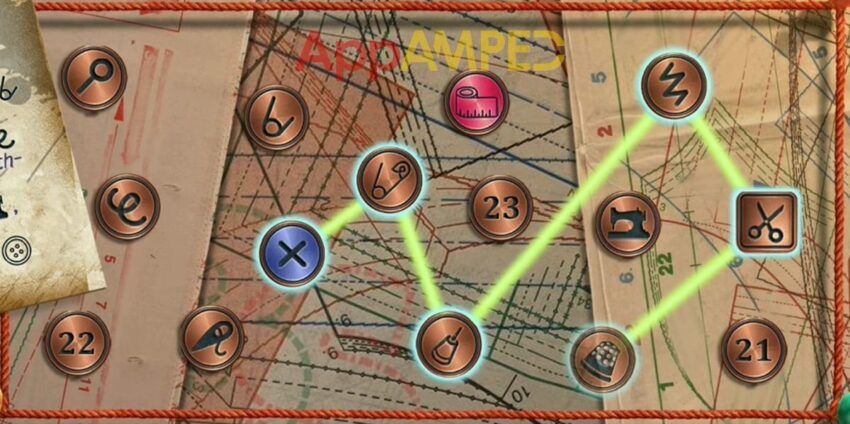
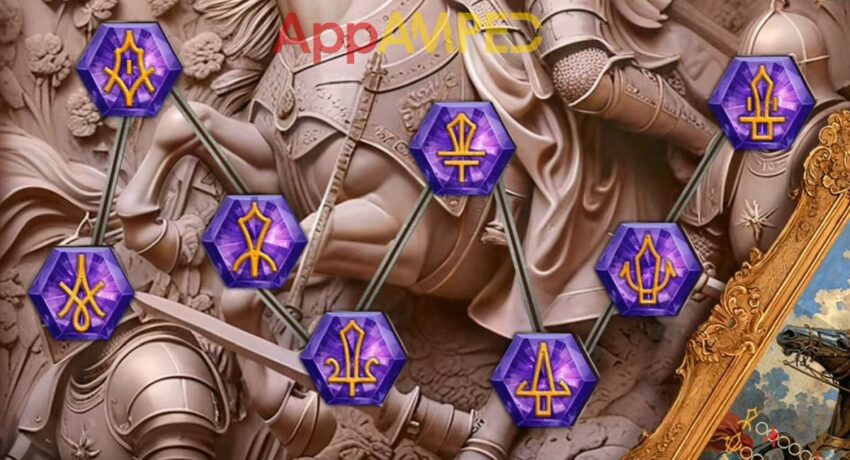
Go to the dog and use the soap and brush to clean him then take the trowel and organ pipe from his cage. Go to the musical machine and put the button and the 2 organ pipes to play the song from the clue. Symbols from top to bottom will be from 1 to 5.
- 4B – 2F – 3D – 1A – 5F – 2G – 1E
Take the trowel and the hook. Go to the street in front of the shop, and to the crate. Use the hook and the carabiner to get the steering wheel and the sewing machine part.
Go to the bike behind the cab, use the steering wheel, the chain, to fix it and the address to get there. Here are the sequences you need to pick to find your way around the maze, from top to bottom: 1 – 4 – 2 – 5 – 6 – 8. And you’ll get to the address.
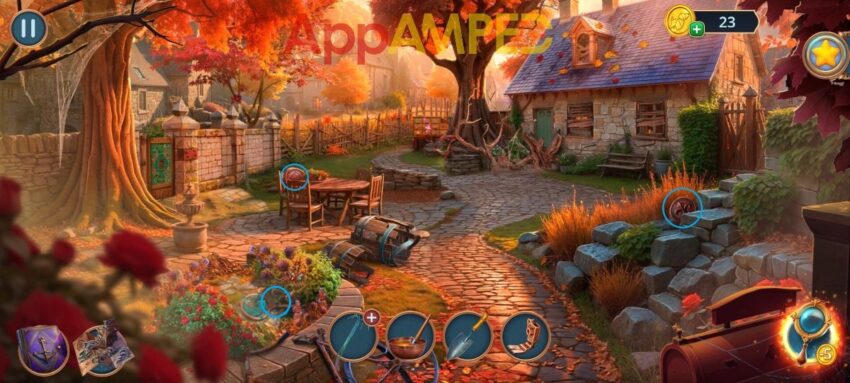
Look at the flowers on the left, after you get the 3 seals here, and take the torn net. Next to the tree in front there’s a cabinet with a coat of arms you can take.
Put that on the gate to the left to open it and take the rope. Attached it to the grappling hook and use that to get on the roof. Aim at the 3 blue targets by sliding the nubs and move your hook to them.
I circled all 5 seals for you and now you can look around. Look at the painting on the right and take the mirror shard. Look at the mirror on the left, take the broken dial, then use the glue and mirror shard to fix it.
Take the torn cable and another sewing machine part. Now go to the sewing machine on the ground and put the machine part on it to fix it, and the broken net. Take the knitting needle and drawer cover and go back outside.
Put the drawer cover on the cupboard next to the tree. Match the items in silver frames with other objects similar to them. Now you’ll get a treasure map that you can use on the ground to the left, where you found the net.
Dig there using the trowel and take the clock hands and the house image. Get inside the house and use the house image in the middle of the room then find all the items shown under.
Underneath the rug there’s a secret door. Open it to go downstairs and look for more clues.
Look at the lift on the left and take the painting knife and use the torn cable on the lift. Look at the old clock and take the pipette. Go to the mannequin up the stairs and use the paint knife to scrape off the paint and find a hot tap.
Use that on the sink to turn it off, take the embroidery and brick model. Go outside and use the brick model and the knitting needle to press on the marks. Place the arrows so they press all the bricks.
You’ll find sheers and a note, now you need to find another painting. Use the sheers on the plant with thorns next to the flowers. Take the bronze numerals and use them on the broken dial with the clock hands.
Go to the clock downstairs and put the dial on it, then match the symbols and numbers like the clue on the right says. Take the clock weight and attach it to the lift at the torn cable and you’ll get solvent.
Use that at the painting upstairs with the pipette to get a mirror drawing of which stones to press and in what order. Go to the mirror and use the drawing and press the stones and take the needle and find the differences:
Take the fabric and use that and the needle on the torn net to fix it. Use the net downstairs in the water to fish out a seam ripper, then use it on the suit up the stairs with the embroidery.
Take the copy of the painting and you’ll be locked in the basement. Turn on the lights first, from your left.
All 4 seals are easy to get to, after that check out the stool in front of the easel and take the bracelet and seashell. Look at the door up the stairs, check the bag and read the note, then take the powder and thread.
Look at the table in the middle, take the decanter and read the recipe. Look at the cupboard in the back, take the bamboo handle and flaxseeds and use the thread and the stick there to make a brush. Use the oil press on the right, flaxseeds and decanter, to get flaxseed oil.
Go to the table, put the flaxseed oil on it, the seashell in the grinder to get the paint. Go to the painting and put the paint and brush on the stool and then find the right order of brushstrokes: 1 – 3 – 7 – 13 – 16 – 23 – 27 – 29 – 46 – 51 – 66 – 72 – 93.
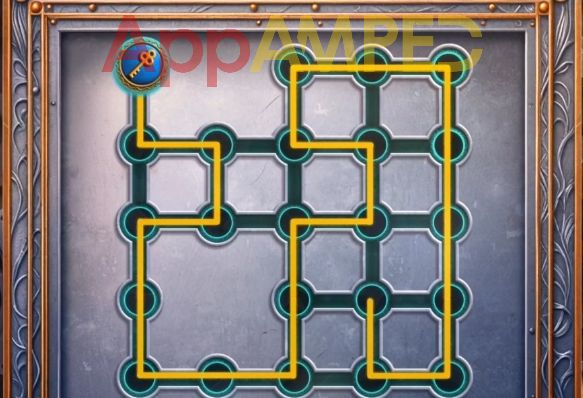
With the pattern you find go to the table and set it there to open a secret compartment. Take the sharpener and keychain. Use the keys to open the glass case by drawing a line across all cells.
Take the glue and solvent, go to the oil press, put the powder and solvent in the glass phial and take the acid with you. Go to the door and use the acid on the hinge to open it and run away.
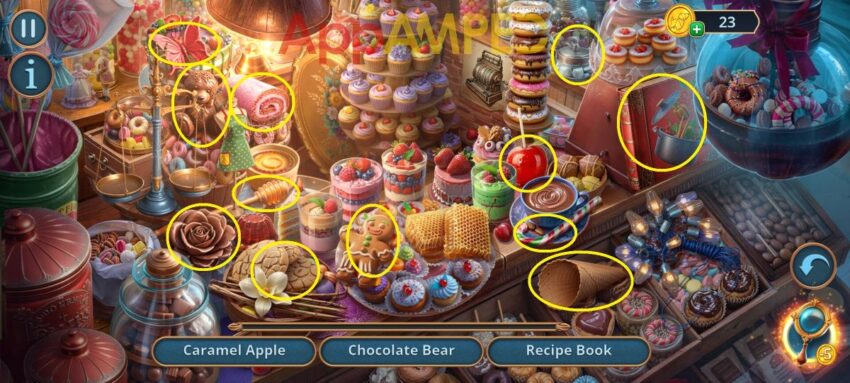
Look at the owl in the middle and take the torn bellows and the bell. Check out the door on the right and put the bracelet and the bell on to open it. Find all the items in the Candy Shop hidden object game.
Get the dessert tongs and use them in the sewer to get the lock pick and then put the handle on that tool to get the corkscrew. Now you can enter the library on the left.
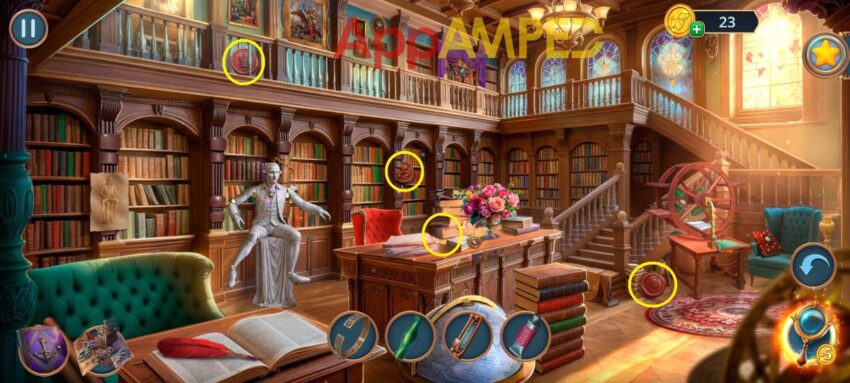
Look on the desk to find a gear (1/2) and take the stone book (1/2). Look upstairs at the purple drapes, use the corkscrew to open the cabinet and take the other stone book (2/2).
Go to the statue and put the books on the balance, you’ll find binoculars and steps. Use the steps upstairs to fix the ladder and find an owl figurine, and take it outside next to the others.
Find the match, either color or symbol, for the big owl. For the symbol there’s an orange a a green one, and 2 blue ones. It will give you another lock pick (2/2). Go inside the library and use these to open the drawer of the desk.
Take the raspberry and check out the book. Use the sharpener on the pencil to draw and see another clue, take the book tag with you. Use that up the ladder and arrange the books as the pictures show.
- green 49 – navy blue 76 – orange III – purple VI
- Red 21 – green 54 – purple 12 – blue X
Read the book, take the bookmark and the drawing. Use the bookmark and the glue to fix the bellows and use that on the leaves next to the bench. Take the glove and the glasses.
Put the glasses on the statue inside the library and fix the statues posture like shown on the drawing next to it. Take the music stick (1/2), the chisel and the gear (2/2). Use the gears on the device on the right, take the glockenspiel and read the book.
Find each red word into the pictures of the book and you’ll receive some coins. Use the coins on the Candy Shop outside. Find each item for each clue and take the blueberry at the end.
Go to the bird next and give the bird your raspberry and your blueberry. Now look around to find your way inside the Chapel.
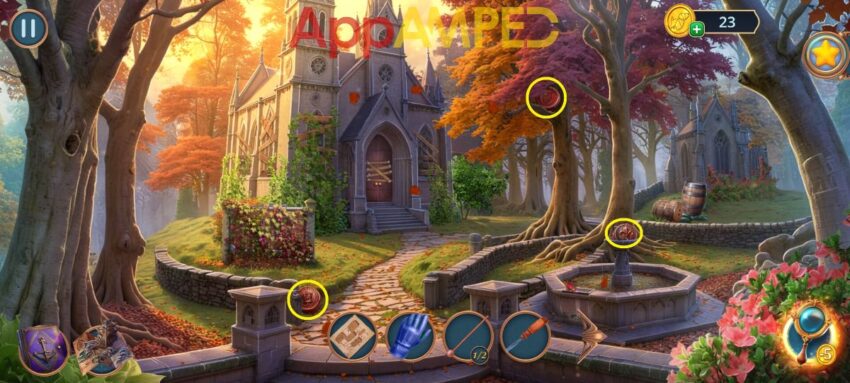
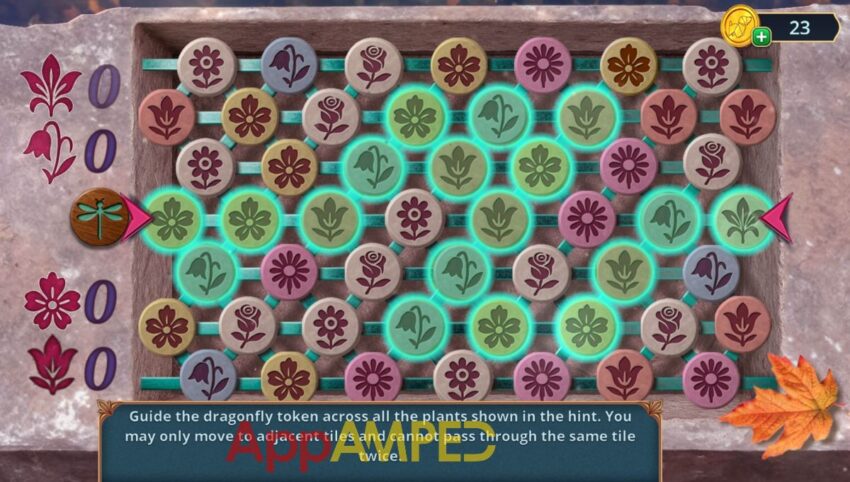
Use the glove to remove the weeds from the sign in front of the Chapel and take the dragonfly token. Look at the fountain and take the lantern and the letter (1/2), then put the dragonfly token here.
Take the comb and go to the door, use that to take out the nails and open the door to enter the Chapel.
Look on the floor next to the rat, take the water and the map, and use the chisel on the wood to make another music stick (2/2). Look at the foot of the lectern under the vegetation and take the brush.
Use the glockenspiel and music sticks to open the trap door. Use the map and the lantern to enter the dungeon. Get out of the catacombs without bumping into rats: 3rd path – 3rd path – 1st path.
Look at the stone wall in front and put the drawing here to know which stones to press. Take the trident and look at the nook in the wall on the left, take the woven cage and the lever (1/2) and use the trident to open the drawer and take a new letter (2/2).
Get outside the Chapel, use the letters on the sign in front, you’ll find another seal, a diadem, and a candle (1/2). Use the diadem on the barrel in the grass and you’ll find another lever (2/2).
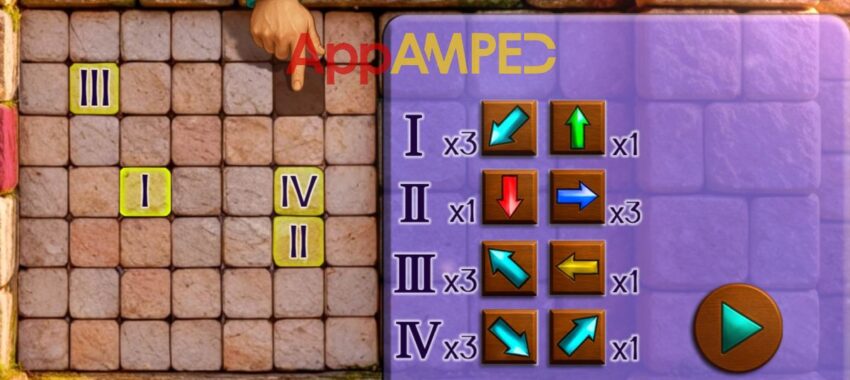
Go back inside the dungeon, use the 2 levers on the stone wall. Move over all the tiles as many times as indicated on them.
You’ll find a secret room. Here your new task is to open the chest and find the painting.
Next to the statue on the left, behind the frames, there’s a mirror. Take the tongs and safe part and use the brush and water to clean the mirror and find the code 726. Put that code into the cupboard and play the hidden object game.
Take the palette and give it to the mannequin painter and take the mural he makes, there’s also another seal behind that. Go to the Chapel and put the mural piece in the corner at the altar. Take the wreath and use it and the woven cage to lure the rat inside.
Take the tuning fork , and the gem. Go to the Secret room in the dungeon and use the gem to open the guitar case, take the awl and the vase drawing. Go back to the dungeon, use the drawing on the vase to set the same pattern.
Take the mouse claw and put it on the stone bat statue to get the hearing aid. Go to the safe on the left, use the safe part and the hearing aid. Rotate the pins so all of them free up the outer rim. Then match the symbols in the back with the ones in the front.
Get the broken cube and the bolts. Use the bolts on the tongs and use them to look through the sand in front of the stone bat. Go outside and use the tongs to get what is tuck under the barrel.
Take the candle (2/2) and go put both in the candle holder in the Secret room next to the guitar case. Take the carabiner and check the cabinet again for more hidden objects.
Take the pearl necklace and put it on the tray, in front of the mirror here. Take the cube parts and use them to fix the cube. Use that on the chest in the middle and solve the puzzle using the clues on the cube.
The order from left to right: 6 – 2 – 9 – 8 – 5 – 1 – 7 – 4 – 3. You now have a painting and some shackles. Use the carabiner and shackles on the self on the left wall in the Chapel. Use the tuning fork on the egg to break it.
Take the helmet amulet and use it where the mouse is in the stone there. You’ll find another seal and a symbol, use the awl to take it out. Check the altar and put the symbol in the missing spot, then put the painting over to know where to put each symbol.
Wrapping up
Here goes another interesting puzzle adventure with a captivating story. IF you want more games like this one you can check out the Artifact Seekers: Pirate Bay walkthrough or maybe the Circus Arena is more up your alley.
Let me know in the comment section below what puzzle adventure games you’re playing next, maybe I can help. And if you want more of this story you can play the Gallery of Shadows Bonus Chapter and have a look at my walkthrough for some help.

Aylin is a content creator and co-founder of App Amped. She was a huge Tomb Raider fan before moving on to more casual titles. She spent way too much time tending for her FarmVille farm as well as playing text-based browser games. Now she plays and writes about mobile games, creating in-depth walkthroughs and useful guides.