
Detective Club 2 – Gallery of Shadows has a bonus chapter that you need to play to get the full story of the game. It too has plenty of puzzles and mysteries that I’m here to help you solve and together we’ll discover every secret.
Assuming you finished Detective Club 2 – Gallery of Shadows the main story, means you’re now here for the Bonus Chapter, so follow my lead and get all the answers you need for the puzzles so you can finish it and see how the story ends.
Gallery of Shadows – Bonus Chapter Walkthrough
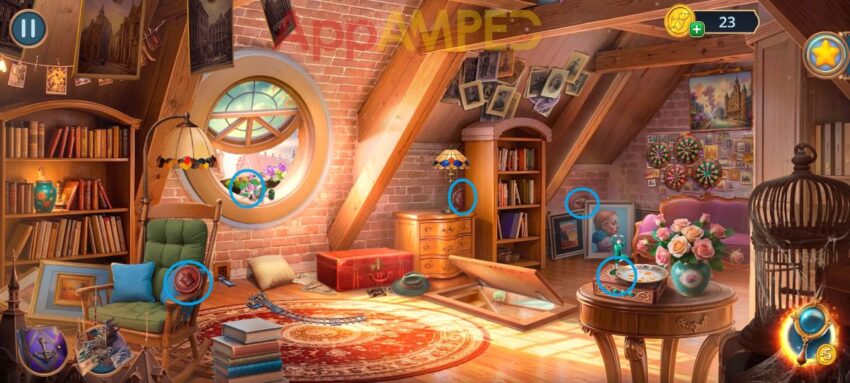
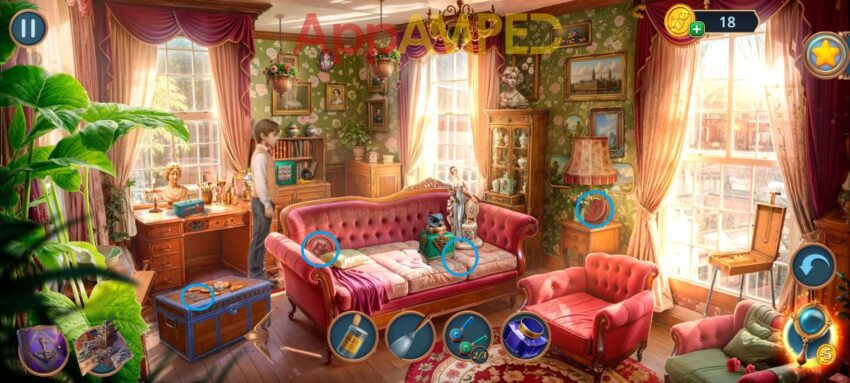
By the window there are some ants and a ballerina figurine. Take that and go to the box on the table. Take the plate (1/2) and the feathers and put the ballerina here to open the box.
Take the rails and another seal, I’ve circled all seals here. Use the rails to fix the toy train and when it pulls up, you’ll find a lock pick wire. Use that on the chest and then find all the hidden objects highlighted here.
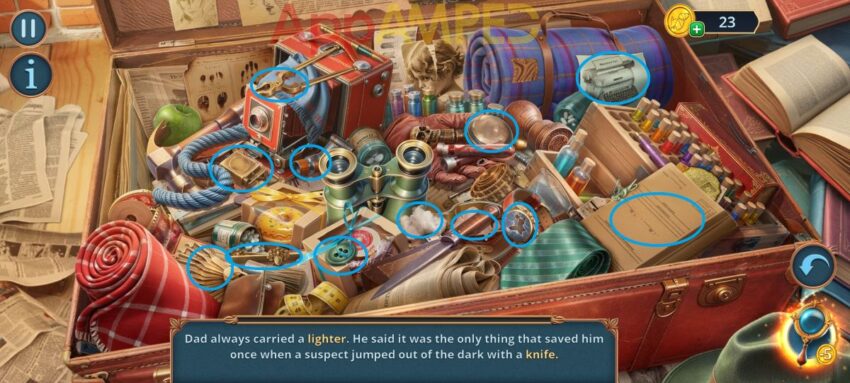
You’ll find father’s journal and now you can go downstairs to the living room.
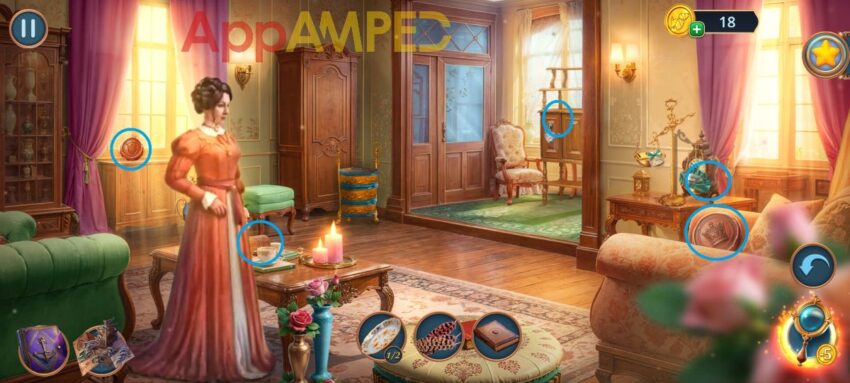
Take the mug hanging from the cupboard by the entrance. Give the journal to the mother. Then look on the table, take a gear and a cork.
Use the gear on the basket in front of the closet, then solve the puzzle by putting the gears in the correct spots. Take the notes, the hat, and the dried flower.
Put the mug on the table, add the dried flower to the water and take the hot tea with you. Go upstairs to the attic, put the hat on the toy soldier in the toy train and take the spear.
On the cork put the feathers and the spear to make a dart. Use that on the targets on the wall. Each symbol needs to go over its match using the sliders. Take the pipette and the candy. Use the candy on the ants at the window to get the plate (2/2).
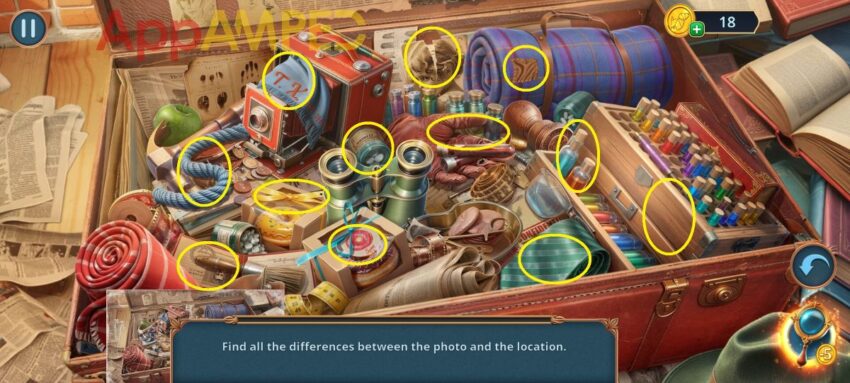
Go to the living room and use the plates on the scale on the right. Take the glue and the candle. Go to the attic and check out the chest again. Find the differences between the photo and the chest.
Take the airplane and use it on the wooden beams on the ceiling to get the handle and putty knife to fall. Go to the living room and use the handle to open the cupboard by the door and get the twine and matches.
Open father’s journal and add these in this order: tea – candle – matches – notes. Tap the lines in this order: 4th – 2nd – 5th – 7th – 6th – 3rd – 1st. Now go outside and find Cecil.
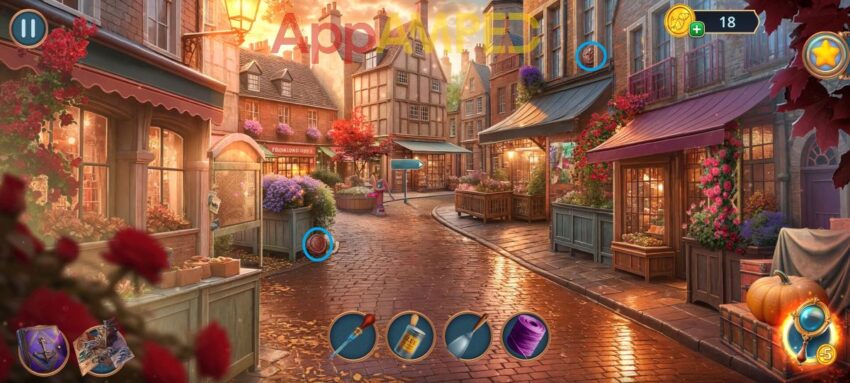
Look at the pink roses on the right and use the twine to tie them up and take the scissors and a seal. At the water fountain in front there’s a lever (1/3), then clean the scissors here by catching all the drops. Move along the street to get to a second part.
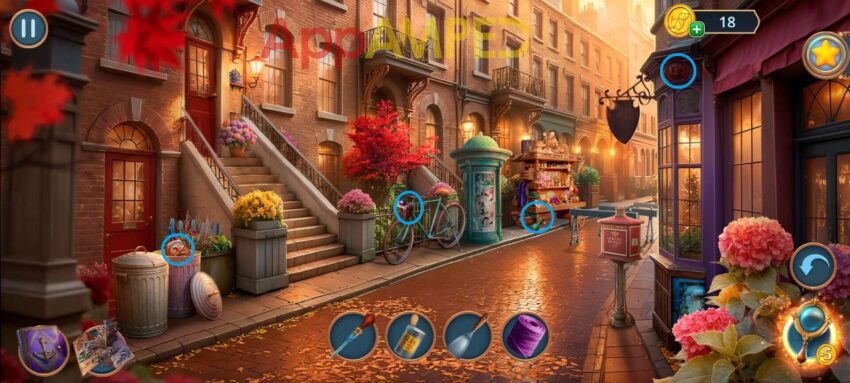
Look at the street shop and get another lever (2/3). Use scissors on the weeds on the left to get the emblem. Check out the bike and get the ink then use the emblem here to open the bag and take the tenant list.
Use the list on the red door to your left. Put the names in order according to your clue:
- Butler
- Turner
- Coxon
- Jenkins
- Finch
- Morris
Enter Cecil’s home and search for the notes.
Look next to Cecil by the safe, use the pipette to get the spilled oil there and the portrait (1/2). Use the oil on the box on the desk behind Cecil. Take the portrait (2/2) and use both on the wall then sort them out according to the clues under.
Take the wheel fragment and look at the chest on the left. Take the talc and use the wheel fragment and glue to put them back together. Take the wheel and go to the streets to put it on the street shop and move it out of the way.
Take the chalice to the water fountain and fill it with water, then use the water and the putty knife on the posters on the right, after the red roses, then take the magnet and the lever.
Go to the second part of the street, on the right, under the shop’s window, there’s a panel where you can put the levers. Solve the pipe puzzle to stop the steam, you can see the solution in my video below.
You’ll find nails and a blank page. Go inside Cecil’s house, to the chest, spill the ink on the symbols then put the blank page to transfer them on it. Take the symbols to the wall where you cleaned the posters and press them in the order shown.
Take the small brush and the seal. Go inside the house, use the talc powder and the brush on the safe next to Cecil. Take the ribbon, keys, and seal. Use the keys on the drawer at the desk.
Sort the keys to match the colors of the chains. Take the screwdriver and the owl eye, use that on the owl on the couch read the note to find the shop name. Go to the first street and look at the map.
Put the note there and find the shop:
- Left feet: 2 left – Right feet: 1 left – Up
- Left feet: 1 left – Right feet: 1 right – Up
- Left feet: 1 right – Right feet: nothing – Up
- Left feet: 2 left – Right feet: nothing – Up
- Left feet: nothing – Right feet: 1 left – Up
- Left feet: 1 left – Right feet: 1 right – Up
- Left feet: nothing – Right feet: 2 left – Down
- Left feet: 1 right – Right feet: nothing – Down
- Left feet: nothing – Right feet: nothing – Down
- Left feet: nothing – Right feet: 1 left – Up
- Left feet: nothing – Right feet: 2 left – Up
- Left feet: 1 left – Right feet: nothing – Up
- Left feet: 1 right – Right feet: nothing – Up
- Left feet: 2 left – Right feet: 1 left – Done

Look at the stairs and take the metal plate and the ruby. Use the ribbon and the magnet to get the mechanical butterfly and the antique coin. Go to the table on the left and put the coin here then find all the Great Britain symbols.

Take the heavy clock and go to the stairs again. Put the nails over the wooden plaques and use the clock to fix the stairs and now you can go up to the 2nd floor.

By the door in the back you’ll find a record and a chisel. Put the ruby between the candles and take the chess piece (1/2) and the butterfly wing.
Look at the mechanical butterfly and fix it with the screwdriver and thew wing, it has to be the mirror image of the left one. Go downstairs, look next to the couch at the metal spider and give it the butterfly.
Take the gramophone needle and go upstairs. Use the record and the needle on the gramophone on the table. Take the mirror part. Look behind the red cloth on the left and put that mirror part on the mirror, then put them in the correct order.

Take the hook and the blueprint. Go downstairs and look at the table on the right with the chess on. Put the blueprint here and the chisel and make yourself a boomerang. Use it to take the chess piece (2/2) above the spider.
Put the chess pieces on the chess table and take the key template. Go to the coin table and answer all the riddles by finding the right item:
- Look at me and find your way, I help explore every day. What am I? – Map – bottom of the book.
- I dip in ink and leave a mark, I write both poems and remarks. What am I? – Feather – on the book
- I bloom in peace and love the light, my petals pure, my color white. What am I? – Lily – Left of the book
- The game can’t end without my fall, I move just one, and that is all. What am I? – King chess piece – bottom right
- I open locks both old and new, if I’m the match, I’ll guide you through. What am I? – Key – right side of the book.
- I’m warm and red and stamped with pride, to keep the secrets locked inside. What am I? – Sigil – left side page of the book.
- You flip me once, then watch me go – I help you see how minutes flow. What am I? – Hourglass – coin on the right side
- My sail is white, my path is blue, I cross the sea to visit you. What am I? – Ship – coin on the right side.
- A singer’s breath, a violin’s cry – I am the sound that soars the sky. What am I? – Musical note – next to the left page of the book.
- I’m made of wood or metal bright, and sing when blown with all your might. What am I? – Flute – bottom.
- I have one eye and help you see, especially what’s fine and wee. What am I? – Monocle – right side.
- I live on doors and call aloud, when visitors arrived unbowed. What am I? – Doorknocker – left side
Take the signet ring and use it to open the book at the foot of the couch. Take the room plan and go upstairs. Look behind the tapestry where the plan is showing you, take the file and use that and the metal plate on the key template.

Take the tiny key and use it on the door in the back. Take the curtain, read the note, then take the metal figurine. Look behind the posters on the column in the front. Put the metal figurine here to get the safe code. Use that at the safe behind the tapestry.
Turn the dials according to the clue and open the safe. Find each red word on each photo. Take the map and find a way to get out of the shop. Use the curtain and the hook on the window to your left. Set the timers to finish the game:

Wrapping up
Ending another thrilling adventure with a good ending for the story is always nice and rewarding. Couldn’t find all the seals, but I suspect there should’ve been at least 5 on each setting.
Let me know if you found seals that I didn’t mention or circled in my photos, I’m sure people will find that information helpful.
You can try more puzzle adventure games like Dad’s Monster House 2 and Artifact Seekers – Pirate Bay, I have walkthroughs for both.

Aylin is a content creator and co-founder of App Amped. She was a huge Tomb Raider fan before moving on to more casual titles. She spent way too much time tending for her FarmVille farm as well as playing text-based browser games. Now she plays and writes about mobile games, creating in-depth walkthroughs and useful guides.