
Join me on a new adventure and follow my walkthrough to escape all the dangers you encounter in this Adventure Escape Cult Mystery.
Use your wits to solve puzzles and break into the cult. Meet other cult members and decide who is friend or foe. Go undercover to investigate the shadowy past of the cult and escape.
Cult Mystery: Chapter 1 Walkthrough
Kate hasn’t heard from Melissa since she started seeing a guy she met online. Is Melissa just distracted by a new romance, or is Kate right to be worried?

In the basket in front of the stairs there’s a rope. Use it, tie it on the branch over the basket to climb the tree and read the note that says LOVE. Go to the door and use that clue to open it: 5683.

Inside the living room, there’s a puzzle piece under the couch. Another puzzle piece is on the table. Take the fish food from the shelf and feed the fish to get the key behind them. Use it to open the door to the bedroom.

Take the puzzle piece on the teddy bear, and the phone charger on the desk. Look at the calendar and remember October 24th. Go to the drawer of the bedside table and enter the code: 1024.
Look at the puzzle and put the 3 puzzle pieces to solve it and open the journal. Remember the pattern on the bottom right corner, almost like a G.
Go back to the living room, use the charger on the phone on the coffee table and enter the pattern to unlock the phone and find the clue of where Melissa is.
Cult Mystery: Chapter 2 Walkthrough
Melissa is meeting her boyfriends at “The Compound”. But why did she leave her phone behind, and what exactly is this place?

Enter The Compound’s security hut on the right.

You’ll find a key on the boxes to the right, use it to open the cupboard and take the wire stripper. Take the ladder by the window and use it to reach the shelf on the right and get the electrical manual.
Take the stethoscope hanging on the left. Go back to the gates and use the stethoscope on the rotating lock:
- rotate clockwise till you get to 18
- counterclockwise to get to 7
- clockwise to 13
Now use the wire stripper and electrical manual to cut the pairs of wires and open the door:
- rhombus + line
- circle + 3 dots
- square + X

Take the 3 vines from the trees and the rock. Then look in the trunk under the bags to get the gloves and car jack, then the spare tire under everything. Use the vines on the cliff next to the broken car to get down to it.

Use the gloves to get the crowbar and use it to open the car’s door and take the wrench. When you go back up you’ll meet some guy asking if you need help.
Use the car jack, wrench, spare tire, and rock to change your flat tire, after you put them in the correct order.

After you ride your car again through the mountain roads you finally reach The Compound walls.

Look at the cameras on the corner A8 and B5 then take the road on the right to reach the truck. Open its right door and get the cheese. The cameras here are called C9 and D7.
Go back to the first road and give the cheese to the mouse to get the keys. Go to the truck and use them to open the back cargo door. Use the 6th and 8th key to open the lock.
To open the safe inside you need the camera codes: 8597. Take the cleaning spray from inside and a coat, then put it on. Take the green cleaning rag and use the cleaning spray on each window.
Remember the dogs’ names: dedication + bird – progress + tree – logic + rainbow. The order in which you need to say those words at the security cabin in front is in the clue on the truck’s number.
Go to the security and tell him: logic – dedication – progress and you’ll enter the cult.
Cult Mystery: Chapter 3 Walkthrough
The Compound requires hooded robes and secret codes to enter. Is it a cult? What is their purpose and where is Melissa?
Go through the first open door for your first test.

Take the sketch from the table, under the elephant, then take the sketch in the frame on the wall in front. There’s a small wooden leg on the couch, and a small wooden arm behind the bookshelf.
Take the small wooden head from the shelf above, and the sketch from the book underneath the head. Now go to the 3 wooden bodies on the table, put the sketches and the wooden pieces to position them as the sketches show you.
You get the logic crystal when you’re done and you can get out and put it on the first table to get to the next test.

Take the corkscrew from the cabinet and use it to open the bottle of wine on the table to get the marble.Go to the pool table and get the balls into the specific holes as the clue on the fireplace:
- red – top left corner
- orange – top middle
- yellow – top right corner
- purple – bottom left corner
- green – bottom middle
- blue – bottom right corner
You’ll unlock the pool cue, use it to get another marble out of the fire. Now look at the table with the cards and figure out which is the next card:
- Q spades
- 3 hearts
- 10 clubs
- 8 diamonds
Go to the wall on the left and enter those cards. Take the last marble and put all 3 in the round black game. Remove the marbles so only 5 remain, then you’ll get the dedication crystal, and after you put it on its table you can move on to the next test.

Take the key from the left wall, and the lab equipment under it. The stack of paper above, and the Bunsen burner on the counter. Use the key to open the cabinet on the right and take the crystal powder.
Put the stack of paper in the printer and add the crystal powder. Look at the compound analysis and go to the tall cabinet to get the right bottles:
- red + white + blue
Now go to the lab equipment on the counter in front of you and the burner and the other lab piece next to all the equipment. Drag them to the correct place.
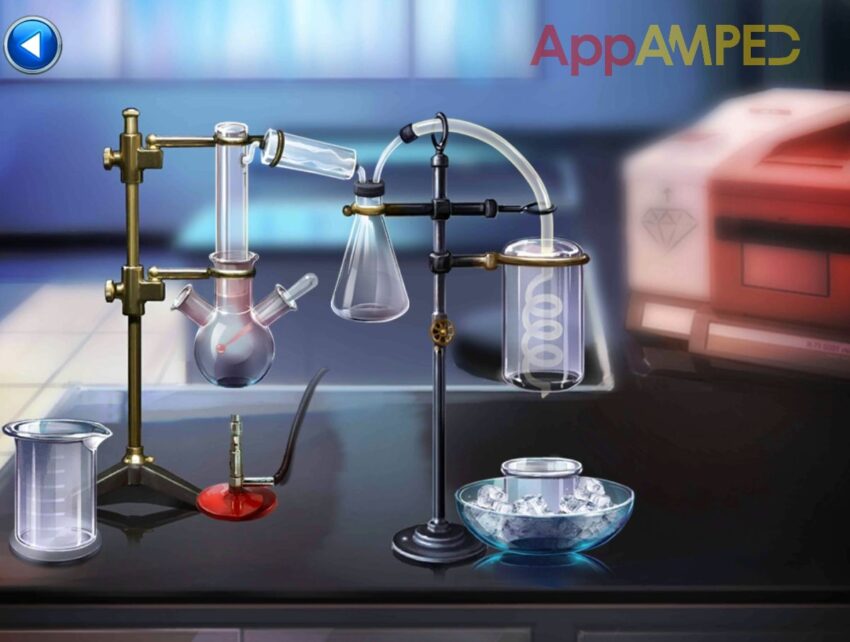
Put the bottles next to the lab equipment and follow the analysis to make the crystal:
- 2 parts red + 1 part white + 2 parts blue
This is how you make the progress crystal and now you can go put it on its table to complete the final test and complete the chapter.
Cult Mystery: Chapter 4 Walkthrough
Kate has been initiated into The Compound and can now snoop around. Is Melissa here? Could the “Artificial General Intelligence” be real?
Now that you’re in, you can start looking for Melissa. Start with the building on the left, where the dorms are.
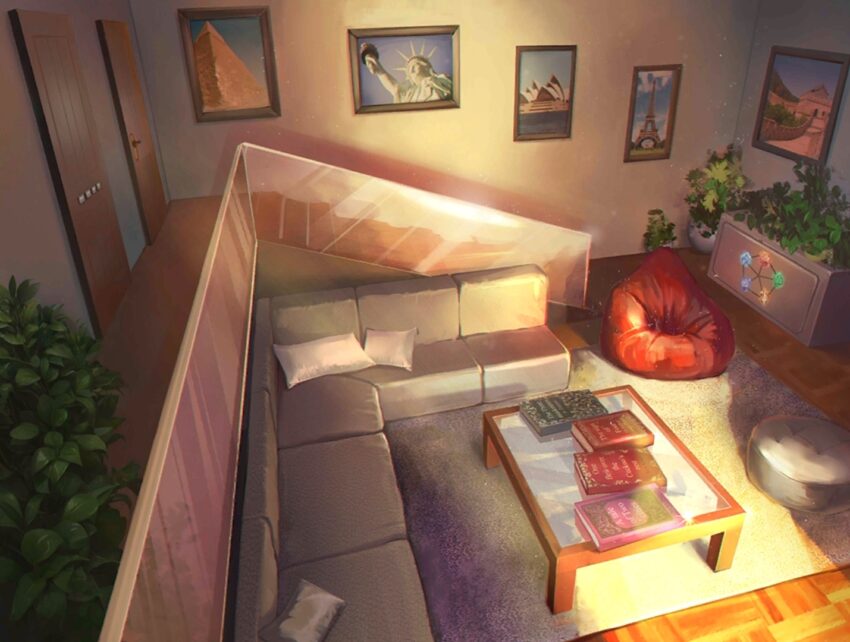
Look at the 4 books on the coffee table in the middle of the living room: A Tale of Two Cities, One Flew Over the Cuckoo’s Nest, The Sign of Four, The Book of Three – 2143. Take a look at the door with the code lock and enter that code to open it.
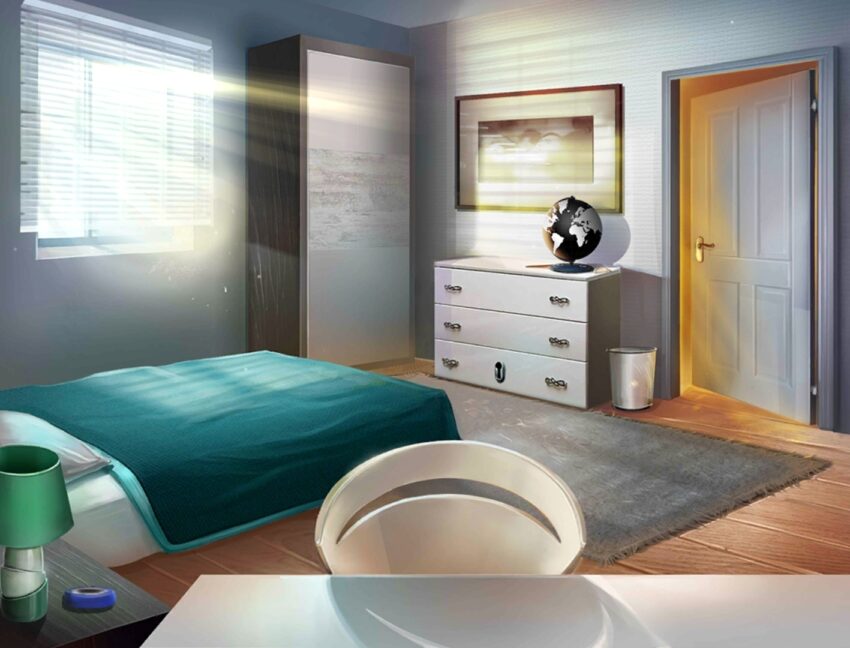
Take the electric tape on the bedside table. There’s a crowbar in the closet, use it to break open the cracked floor. Now go out and to the other unlocked room.

Look in the last drawer and use the electric tape to fix the hair dryer. Look behind the sun shades to find a screwdriver. Look into the bin and read the poem and remember the order:
- water – fire – wind – lightning – earth
Go to the living room at the cupboard under the plants and press the crystals in the order the poem said. You’ll find some batteries inside. Go to the locked room and put the batteries on the globe.
The correct sequence of the continents it’s clued in on the paintings in the living room: Africa – America – Australia – Europe – Asia. Take the key and open the last locked drawer under the globe to find an empty journal.
Use the screwdriver to open the box under the floor board and take the ink. Use it on the empty journal, then use the hair dryer to find the text.
Cult Mystery: Chapter 5 Walkthrough
The situation is even more serious, multiple girls have gone missing! Someone else is also digging around – can Kate find an ally?
Cult Mystery: Chapter 6 Walkthrough
Cult Mystery: Chapter 7 Walkthrough
To be continued…

Aylin is a content creator and co-founder of App Amped. She was a huge Tomb Raider fan before moving on to more casual titles. She spent way too much time tending for her FarmVille farm as well as playing text-based browser games. Now she plays and writes about mobile games, creating in-depth walkthroughs and useful guides.