
This walkthrough for The House of Da Vinci 3 – Chapter 5 will lead you through a new adventure as I show you how to solve the puzzles and mysteries you encounter.
In my last article for The House of Da Vinci 3 Chapter 3 walkthrough you’ve seen how difficult this game can be, but also fun to play when you get a little help.
Follow my next walkthrough in case you need a little help finishing up the puzzles and mysteries that await you.
The House of Da Vinci 3 Chapter 4 Walkthrough – Pope’s Chambers
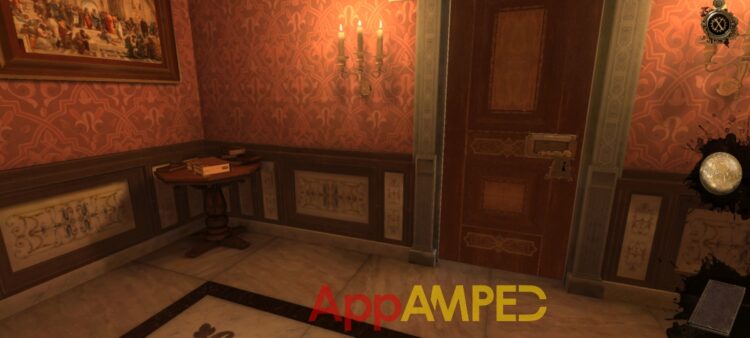
- Take a closer look at the hexagonal table in the corner of the room.
- Open the book and take the bookmark.
- Now go to the door to the right and use the bookmark to unscrew the screw that holds the lock.
- Then insert the bookmark above the lock and use the Oculus to see the mechanical parts.
- Press the two parts that stick out and that prevent the door to open.
- Press the handle and open the door to enter.
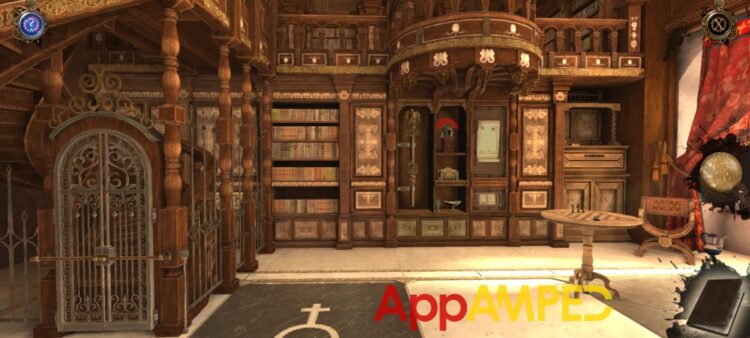
- Go to the chess table and take the stone rosette and go to inventory to press on it.
- Now you can use it on the statue’s chest that sits on the table to your left.
- Turn it and it will open a drawer and take the rider figurine.
- Go to the horse and put the figurine back in its place.
- It will open to reveal a wheel you can turn to the right so the gate opens up.
- Now look at the tiles on the floor. One says C3 and another is F3.
- Pay attention to the statue, the cross on the floor, and the rider on the table.
- Go to the chess table and arrange the three chess pieces like the 3 clues above, having their position in regard to C3 in mind.
- The king is at C4.
- The bishop at D6.
- The knight at F4.
- You can go up the stairs now and to the birdcage in the corner.
- Rotate it to be able to open the gate and take the model tower.
- Go to the model building on the table to your right and put the tower on it.
- Move the two small domes down until the building opens up.
- To solve the puzzle you need to fit the Tetris pieces on the yellow square so it can move down.
- Use the Oculus to see in which order you need to lower the pillars.
- The order is I – II – III – IIII.
- Now you can take the rook chess piece and go downstairs.
- Place the Rook on the chess table at C6.
- Now everything is in place and you will be able to open a secret door in the library right in front of you.
- Check the S.P.Q.R. stick and drag down the piece holding it there.
- Keep your finger pressed on it to move it to the side and be able to go through the tunnel.
- Check out the colorful item next to the door.
- Unscrew the top screw from it and now you can solve the puzzle.
- Use the Oculus to see how to turn the flowers around.

- Each green red, and blue marble needs a clear path to fall into its place at the bottom.
- Now you can enter the new room that opens up.
- Look at the desk on your right and take the letter and the metal key.
- Check the picture at the base of the desk and move the margins in the right order.
- 1. Bottom to the left.
- 2. Left one up.
- 3. Top one to the right.
- 4. Right one down.
- Now you can put your metal key in the shape revealed.
- Take the metal cylinder from inside.
- Tap on it in your inventory and open it up to get a censer base.
- Use your Oculus to look at the desk.
- There’s a mechanical part on the left side that you need to rotate clockwise.
- Open the doors that got unlocked (left, right, and down) and take the metal shrine model.
- Combine the metal shrine with the censer base.
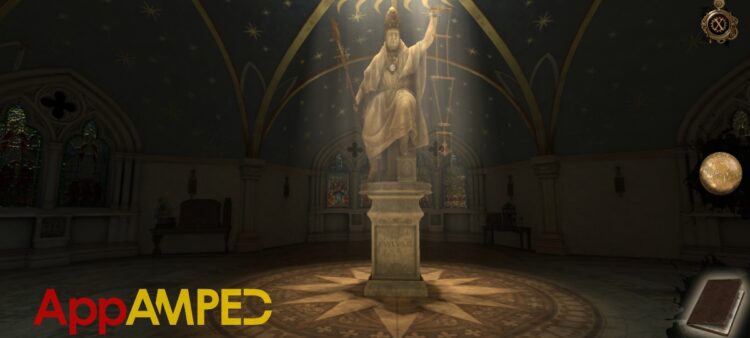
- Go to the statue in the middle and hang the censer to the chain the Pope is holding.
- Go to the side the Pope statue is now facing.
- Check out the table there and turn the metal rod around.
- To move the arrow around you need to pull or rotate the red ball end.
- Grab the sprinkler part that fell.
- Put it on top of the golden decoration next to it.
- Rotate the angel to face you, and put the towers back in their place.
- Now you can take the Relic of St. John from inside.
- Look at the container with the golden lid to the right.
- Move around it to its right and get a closer look at one of the panels.
- Open it up and insert the relic into the device so you can open the golden lid.
- Take the shiny shell and put it in the bottom left corner of the painting above.
- Take the medallion of dawn from behind it.
- Insert the medallion in the sunray in the middle of the stained glass windows to your left.
- A new puzzle opens up closer to the doors.
- Now move to the highlighted area and to the table there.
- And take the ceremonial plate next to the clock.
- Look over at the wooden box next to the clock and tip over the lighter color piece of decoration on it.
- Pull the switch down and go to the little button that opened.
- Turn it to the left and pull down. Then the other one to the right and pull down.
- Rotate the star that pops up.
- Insert the ceremonial plate there so you can open the lid now.
- Turn the braces on the metal hand until you can see the red gem and both pieces match.
- Now you can take the disc from the hand.
- Go to the clock and turn to see the left side where the gear is.
- Put the disc there and start turning the clock arrows clockwise until something happens.
- Open the lid of the item next to the clock and take the medallion of noon from there.
- Go with it in between the stained glass windows and put the medallion there.
- It will open up another puzzle on which you can use the Oculus to solve it.
- Now go to the last part of this room that has been highlighted, and check the table.
- On the right of the red chest, there’s a painting on the table.
- You need to press the buttons above the picture in the right order.
- Left pyramid + Right fish
- Left fish + Right cross
- Left cross + Right pyramid
- Now move the arrow down and take the red stone bust.
- Put the bust on the chest in the top left corner and turn it.
- Go to the statue next to the chest and open the drawer under it.
- Take the stone bowl and the letter.
- Put the stone bowl in the red chest area.
- Now you can get the medallion of dusk from her hand.
- Put it in between the stained glass windows.
- Now you can go and solve the last puzzle that pops up after you push down the handle of one of the cylinders on top of it.
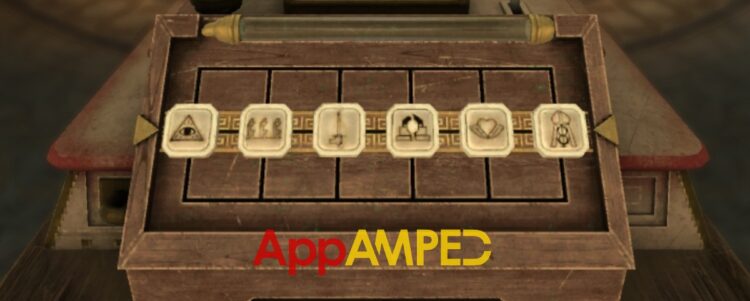
- The clue to solving this puzzle is the titles that are revealed under the stained glass windows.
- From left to right: Pyramid – three shapes – sword – two split pieces – heart – tower
- Go up the stairs to the statue and take the Grandmaster’s amulet.
Wrapping up
Another chapter under our belt with The House of Da Vinci 3 Chapter 4 as we’re done visiting Pope’s Chambers and learning about the story behind it.
Take a look at the video if you need more help solving the hints and clues in this chapter.
See you in my next article for The House of Da Vinci 3 Chapter 5 walkthrough, where I’m going to show you how to solve all the mysteries there as well.

Aylin is a content creator and co-founder of App Amped. She was a huge Tomb Raider fan before moving on to more casual titles. She spent way too much time tending for her FarmVille farm as well as playing text-based browser games. Now she plays and writes about mobile games, creating in-depth walkthroughs and useful guides.
Hi, I am stuck at the last level in the room of the pope (Da Vinci 3). I solved the positioning of all pieces on the board. Same as in the hints and your tutorial. But the game doesn’t want to continue. Did I miss something?