
This next walkthrough for The House of Da Vinci 3 – Chapter 2, it’s something you were all expecting, I’m sure. And here I am with a full guide for you t follow in order to finish this chapter faster.
As you could see in my previous article for The House of Da Vinci 3 Chapter 1 walkthrough, every door, device and action needs some kind of involvement from you, otherwise you can’t move forward.
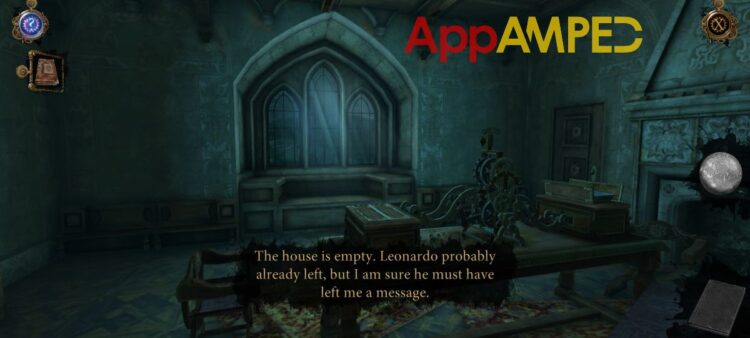
I don’t want to spoil the surprise by talking about the captivating story behind this game, instead I’m just going to go ahead and write this walkthrough for you so it helps you advance and discover the story for yourself.
The House of Da Vinci 3 Chapter 2 Walkthrough – Villa of Luca Pacioli
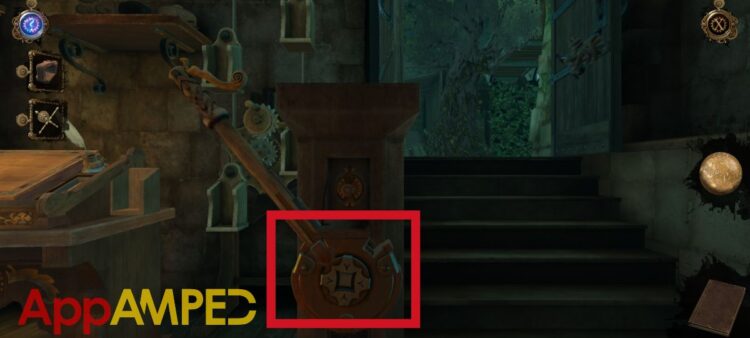
- This Chapter starts in front of a door.
- Double-tap on the lock and rotate the handle until a panel opens up.
- Tap on the Oculus and you can see the mechanism inside so you can rotate until the nub reaches the other side.
- The same thing goes for the next lock puzzle, but you got to be careful as the line needs to not be interrupted.
- You need to go slow to the side, then fast 180 degrees.
- Once you have done that, the third lock puzzle will show up, more difficult than the other two.
- You can take a look at the video below to see how I did it.
- Once you open the door you need to double-tap to go inside and look at the fireplace.
- Look at the dragon’s head, where the smoke and fire come through.
- Swipe the bottom jaw down to open his mouth wider.
- The little door on the fireplace will open.
- Tap the Oculus before zooming in on it. You’ll see that you have to match the same shape on the railing, then swipe the handle above the opening so the head moves towards the same symbol.
- Start rotating the handle so the dragon blows fire into it and lights your way up the stairs.
- To open the door on your left, swipe the doorknob and push it, something is in the way.
- Go inside the office room.
- Check out the mechanism on the table. Put the book in your inventory on the open plate.
- Check the other side and take the letter and the crank.
- Go outside and put the crank to the machinery near the door.
- Swipe to the right and solve the puzzle that opens in front of you.
- Move the red chip down – right – down – right twice – up twice – right – down – left – up – right – down – left – up – right – down – left – up – right – down – left (basically circle that 4 times)
- Continue by moving down – left once – up – right – down – left – up – left – down – right – up – right – down (reaching the end)
- A cart will be released opening the door next to you.
- Give the cart a closer look and swipe down to take the Ironbound disc from it.
- Enter the room that was opened by the cart.
- Check the table with the pile of books and take the letter.
- Look at the desk with the writing quill, and rotate the quill so the I – II – III scribbled in the wood match the ones on the ink pot.
- A secret drawer will open and give you a cart model.
- On the shelf behind the quill desk, there’s another letter.
- Put the cart on the round tall device next to the table and rotate it once.
- Look under the table and take the ornamental lever.
- Put the lever and the Ironbound disc together, and slide the lever into it.
- On the railing next to the stairs there’s a place where you can put your lever on.
- Swipe it to the left and after the cart stops moving, look above the lever to find a round symbol.
- Put the two pieces inside the circle then rotate it till something comes out, and again until you are able to take the cross-shaped key from inside.
- Go to the quill desk and insert the key into the desk and rotate it counter clockwise
- Rotate the gears on the left to show pictures on the paper you just revealed.
- Use the Oculus to put the symbol from both pictures so they match.
- A frame will drop over it when it’s done.
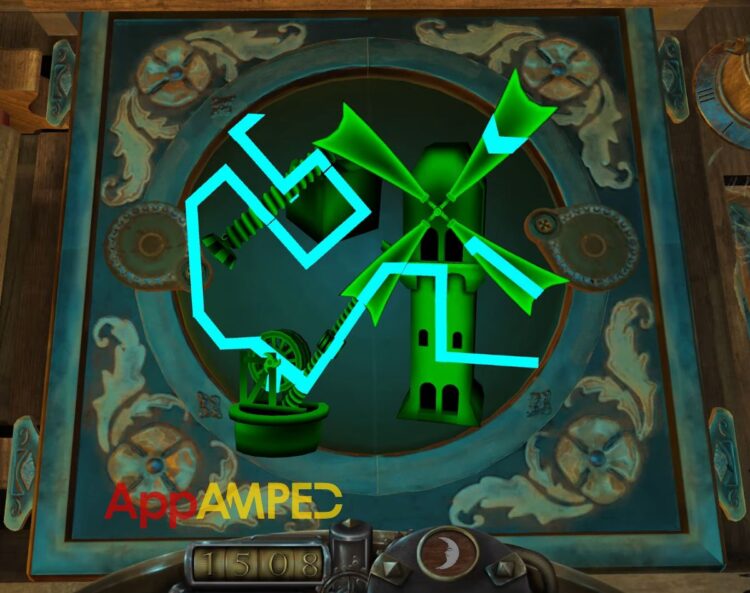
- Rotate each arrow from the frame to fit the lines you can see through Oculus.

- A new hidden drawer will open and give you a belfry model.
- Put it on the table in the middle of the miniature wall model.
- Slide it down and to the back and take the bell model out and the wooden plate from under it.
- Tap on the bell model and start rotating the bell until a small key gets out.
- Use the small key on top of the model cart you put earlier, rotate the key, and swipe down the lever that pops up.
- The cart passes through a circle and it opens, rotate the circle, and a compass will move so now you can open one of the drawers, by rotating the gear on the side of the compass until it unlocks the drawer.
- Inside you’ll find a wooden frame.
- After you take it out, slide the two rectangles to the side and the panel inside the drawer out of the way.
- Rotate the compass inside till the other compass, that opened the first drawer, rotates so the gear is positioned for the other drawer to be opened by it.
- Go to the gear and roll it by swiping to the left.
- Now pull the drawer out and introduce the wooden frame in the spot.
- Rotate the lever till the whole frame goes through and you get a full magazine.
- Now go outside through the newly opened gates into the garden and to the wine containers in the back.
- Check the space to the right and put the wooden plate in that place, rotate it, and then turn the two halves so there’s enough space to take the lion statue out of there.
- Now turn in place to go back to where you came from.
- Put the lion statue on the spot in front of the office door and slide it in place.
- Rotate the statue till the stairs next to it pop out.
- Go up the stairs and take the letter in the spot there and pull down on the lever there.
- You’ll get a mechanical part and go over the bridge and up the stairs again until you reach another machinery.
- You need to unblock the lever by looking to the right of it, there’s a button with some arrows pointing down that you need to slide down.
- Now you can rotate the lever so it opens the other gate in the garden, but that too is blocked by something.
- Get out of this room and down the stairs, and use the Oculus to go in the past to fix the gate.
- Put the wooden frame to the crossbow and the mechanical part on top.
- Pull on that to load the crossbow and aim at all the wine containers around the garden and shoot.
- Then aim under the bell at the gate and it will open, then at the red rope holding the bell.
- Move the lever to your left so the bridge moves out of the way.
- Shoot the red target that you can see now until there are no arrows left.
Note: If you shoot too many random arrows you can take the now empty wooden frame and go back to the future with it, insert the frame in the drawer, and load it up with arrows again. Then go to the past again and shoot the bullseye till you can’t see it anymore.
- Move the bridge back with the lever and reach the tube that the bullseye brought closer.
- Take the ring with ornamental handle from the inside.
- Move over the bridge and further ahead to the door.
- Tap on the ring and rotate it to fix it in the right position.
- Insert the ring in the lock, turn it, and open the door to go inside.
- There’s another letter on the left. Rotate the shelf until you find a wooden folder.
- Check it out and slide down the thing that is holding it tied.
- Unfold it and turn it until you find a sketch of windmill.
- Go back over the bridge and into the future using your Oculus.
- Now go over the bridge, down the stairs, and back inside to the cart model table.
- Look at the desk with the quill and turn the two halves of paper to blank.
- Now put the sketch over and a frame will drop.
- Open the Oculus to see how to rotate the two nubs to match.
- The desk will close up and the drawer to the right will reveal an Archimedes screw model that you can take.
- Go to the table and put the screw model on the cart model.
- Another drawer will open for you and inside it’s a part of windmill model.
- After you take that, release the cart model to roam the rails with the screw model.
- Once it reaches the circle on the rails it will push a piece out of the way, swipe the red button up to make the cart face right and the machinery will put the windmill in place.
- Put the part of the windmill from your inventory on the windmill structure.
- Rearrange the windmill panels and rotate the windmill until the another part raises up.
- Check the new structure and take the round key.
- Now you can go up the stairs to your left.
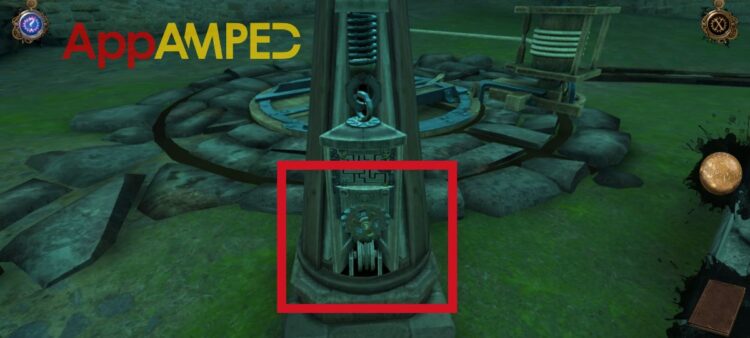
- Enter the key in the box on the wall right in front of you.
- Turn it and open the door, and then take the metal crank.
- Go down the stairs and outside where the wine containers used to be.
- Take the clapper you can see inside the fallen bell.
- Take a closer look at the cart outside and use the clapper on top of the cart, on the flower symbol.
- Rotate counterclockwise to open the shaft.
- Turn the lever inside clockwise until the cart start moving on the rails and reaches the gate you couldn’t open earlier.
- Now you can get on top of the cart and use the metal crank on the gate’s mechanism above.
- Turn it clockwise and solve the puzzle.

- Pull the 4th horizontal handle twice. The middle vertical handle twice. Top vertical handle once, and 2nd horizontal handle once.
- Now you can go up again and turn the lever until the gates opens.
- Then back down to the gate and take the ringed screw.
- Go to the mechanism in the middle of the garden.

- Zoom in until you can get the screw in the hole at the bottom.
- Fully rotate it and drag the hook above to lock on it and drag another piece up.
- Double-tap the gear under and rotate the middle to get the cogwheel.
- Go with it inside behind the desk with the quill, and put the cogwheel in the device there.

- Turn the handle to reach the objects on the rotating shelves.
- You’ll find a hand plane, a handle in metal frame, and a cutter.
- Take a look at the handle and pull it out to get a metal crank.
- Go up the stairs to the locked gate here and cutter to cut the metal chain. Try it 3 times.
- Now you can go inside and pull the handle down and keep it there until the foraging pole reaches the end.
- Take a closer look at the end and unscrew the cross-shaped handle tool.
- Go back to the garden to the foraging pole that went through the gate you opened recently.
- Look under the pole, on the cart and put the cross-shaped tool there and turn.

- Go back to the small part and solve the puzzle above by using the arrows to move the nub around, till it reaches each corner and opens it (an arrow will show) and the door will be open.

- Take the ornament on the door and attach it to the hand plane.
- Turn it to position it right and then pull it apart to get the handle.
- Go back inside and put that handle on the lever on the stair rail.
- Turn it to pull the lever out.
- Go back to the garden and use the metal crank in the middle of the big machine.

- Put the lever on the cone device pull and turn to make the foraging pole turn.
- Look on the cart under the pole and put the cross-shaped tool there and turn it so the pole moves.
- Now you can turn the metal crank so the pole is lifted and hits the windmill making a massive weight fall to the ground.
- Go up to the bridge that faces the top of the windmill and use the Oculus to go back in time.
- Go through over the bridge and inside the windmill and on the other exit.
- Put the massive weight in place so it pulls down the windmill panels.
- Now you can go up on the plank, grab the lever in front and push it by keeping your finger there.
- Now that the windmill is functional you can take the lifts down, as the passage is blocked.
- Now that you’re down, you need to go up again to where the water is pouring from the windmill, next to the bridge.
- Pull the lever so the bottom of the box closes and it fills in with water.
- Go over the bridge and to the cross on top and turn the sun on the left counterclockwise.
- And the circle in the middle clockwise so the bottom opens and you can take a letter and a part of bronze chalice.
- Go back over the bridge and pull the lever so the water falls out of the box.
- Go down and inside the office room.
- Put the chalice over the opened box on the table and take back the Chronicle from the other box so you can finish Chapter 2.
Wrapping up…
This next video of The House of Da Vinci Chapter 2 might help you see what I did to finish it.
The House of Da Vinci Chapter 2 was filled with interesting puzzles and mysteries, and I bet you’re glad I was here to give you a hand.
I’m looking forward to playing the next one and writing the article for The House of Da Vinci Chapter 3 walkthrough for you.
Next time we’ll see each other we’ll discover even more mysteries and fun games to play.

Aylin is a content creator and co-founder of App Amped. She was a huge Tomb Raider fan before moving on to more casual titles. She spent way too much time tending for her FarmVille farm as well as playing text-based browser games. Now she plays and writes about mobile games, creating in-depth walkthroughs and useful guides.