

Welcome to Lost Lands X Chapter 2 – Back in Time Walkthrough! In this chapter, we’ll take an exciting leap through time to uncover new mysteries.
We will solve challenging puzzles and guide Folnur away from making a terrible mistake as you’ve seen in Lost Lands X Chapter 1 – The Manor Walkthrough.
The stakes are higher, and every clue you find will bring you closer to saving the Lost Lands from disaster. Grab your thinking cap and let’s dive into the adventure.
This walkthrough will guide you step-by-step through the puzzles and hidden secrets ahead, so you can focus on enjoying the journey. Let’s head back in time and see what mysteries await.
Lost Lands X Walkthrough Chapter 2 – Back in Time

You can’t yet save the donkey from the thorns he’s stuck in, so all you can do here is move ahead on the path and hope to find something that can help you.

Check out the cart on the bridge to find a drunk man sleeping. There’s a piece of paper on the ground under his feet, an announcement excerpt. Now check out the bridge to the left and put the announcement on the wooden sign and read what it says.
Now you can head over to the fair and work out the task of the missing pontoon as you enjoy the festivities.

Talk to the lady at the entrance and she’ll give you the key for the Greenhouse, to find different flowers to make your own wreath. She’ll also need some bay leaves as payment.
Go back to the crossroads and use the key to enter the Greenhouse, but first you need to solve the puzzle. Rearrange the grids so that all the cells are filled with flowers.
The puzzles are different for each player, but I can give you an important hint that will save you a lot of time. Notice how the blue markers are for the small flowers in the front and the red markers are for the big flowers on the back.
Now count the first row of small flowers (lets say it is 5) and find a red marker that has the left over flowers (so 4 in our case) and drag it up on the first row. Now arrange the blue markers so they fit in the holes of the red marker so there are no spaces with two flowers inside and no holes left.
Then the rest should fall into place smoothly and you’ll be able to get inside and find a hidden objects mini games of finding 20 flowers.

Open the crate with the key in the boot and use the scissors inside to cut the thorns and find two flowers. Pull down the blue drape to find more flowers.
The bush to your left has 3 flowers and a water faucet that needs a valve, and a hose, both are there, so turn it on to get some water on the desk.
Go to the desk and open the drawer on the left. Put some seeds in one pot and the other seeds in the other pot. Look at the notes on the desk and open the right drawer.
Put the green substance in the flask, pour the flask in the water can, and use the can to water the pots to get two more flowers.
Tap on the basket of flowers and make two wreaths, all with different types of flowers.

Go outside and to the forest where the donkey is trapped. Get some bay leaves in the basket from the bush to your right. Now go to the fair and show the halfling the wreaths, then give her the bay leaves to get 6 passes.
Talk to the halfling at the pumpkin stand. He’ll need some a pumpkin of the same size to the one he broke, take the pumpkin with you.
Now talk to the halfling on the left that needs 2 pigs. Take the scissors at his feet and go to the donkey to cut the thorns. Check out the pumpkins nearby and put the pumpkin next to them to compare sizes. Use the scissors to cut the one on the right that matches 99.9%.
Go back to the fair and give the halfling at the pumpkin stand the pumpkin you found and he’ll give you a dog whistle. Give him a bay leaf to play the game and place all the pumpkins in the bucket.
After you’re done he’ll give you your prize of candies. Go to the donkey and use the candies to lure him to you. Go to the cart and put the donkey on it and use the candies to get the donkey to the pig owner.
Give him 2 bay leaves to play his game of pig sorting and you’ll win a scythe.
Go to the back of the fair to the lady that offers a romantic attraction. Show her the candies and pay 2 leaves to enter and see the lake.

Talk to the people in the middle of the lake about giving you the pontoon. They will give it to you for some aromatic water. Go talk to the little guy about the aromatic water.
He’ll need the ingredients to help you make the aromatic water and will give you the perfume recipe. Check his cart and take the staff, then go by the water on the right and use the staff to get a lotus flower.
On the vineyard to the right there’s a sign to where you can find truffle mushrooms, but also right in front of it there’s a wheat ear.
Go to the pig owner and ask for a pig to help you find the truffles. Let the pif loose in the vineyard and he’ll dig them out for you.
Go to the forest where you first started and get some pumpkin seeds from the smashed pumpkin. Then go to the greenhouse and look at the plants in front of you to find the melissa flowers.
Look by the bridge where the cart broke down and you’ll find a bottle with alcohol. Put all the ingredients on the perfume recipe to get the set.
Go back to Joko and put the ingredient set on the table and follow the recipe on the table:
- Pour water from the jug in the pot on the stove.
- Put the grate on top of the pot.
- Ingredients over the grate.
- Cover them.
- Add the hose from the pot to the little barrel.
- Pour some in the glass.
- Release the water from the glass to get the oil.
- Pour alcohol into the big glass.
- Add water to it.
- Add the oil to it afterwards.
- Stir with the spoon.
- Pour the content into the perfume bottle.
You can take the perfume with you and go see if you can take the pontoon. Go back to the fair and use the donkey with the cart to get it. Use candies to motivate the donkey.
Use the hammer to open the back of the cart, use the lever on the top to position the crane over the pontoon, then the lever at the bottom to get the rope to it. Tie it tight and pull it into the cart.
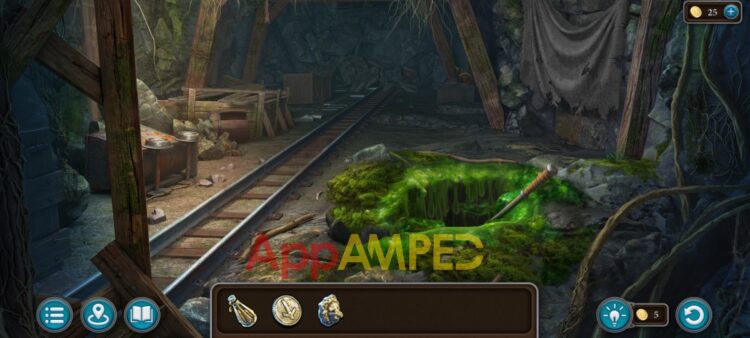
Use the candies to lure the donkey to complete the missing pontoon task. Now that the pontoon is complete you can cross over to the mine.

Check out the mine’s elevator and you’ll be given a task of finding the hiding place in the field. Use your scythe to cut the grass on the right and find the hiding spot.
The fields will be different for each player and you can always start over even if you hit some rocks or tree stumps. Just remember where they are and try to avoid them so you can find a clear path to the hidden place.
You’ll need something to carry everything, so go back to the elevator and take the wheelbarrow on the side. Go to the hiding place and collect the items shown on the bottom.

You will need to remove a few stuff to find everything on the list. Under the tarp you’ll find a stick that will help you remove a big piece from a column, and underneath you’ll find a nipper tool that you can use the cut the chain of the chest buried in the ground.
Inside you’ll find the anvil and the ingot. The mace is in the wooden wall of the hole. And under everything else you will find the statue buried in the ground. Use the shovel to dig it out.
Go to the elevator and send the full wheelbarrow down into the shaft. Put the gear back in place so you can go down into the mines where you’ll be taken by a train and sent over the edge into the abyss helping you reach Maaron’s hut.

Check the pile of wood planks on the right and remove them. Move the bones too and take the t-shaped rod underneath.
Under the tree root on the left there’s a h-shaped rod. Notice the brick in the fence to the right, take it out and take the gate key.
Use it on the door and solve the puzzle by removing the locks from all the chips. Press the arrows to move the dividers and rotate the chips to move them to an empty spot.
Go through the gate to see Maaron and talk to him.

You need to check out a few things around here so you know what to look for. The stone gate needs a rune, the sawmill needs a blade, and the door needs to dry as it is freshly painted.
Go to the stained glass on the side of the house. Take out all the glass pieces and get out of the garden to the part where the mushrooms are to find a pointed bone.
Go and use it on the stained glass frame to take it out and be able to go inside the house through the window.

Check out the rune machine over the fireplace and take the z-shaped rod. Clean up the sad from the hatch on the floor.
Go to the door on the left and look at the doll hanging there to find an x-shaped rod, then open it wider.
Go outside to the red painted door. Pout alcohol into the pot on the right, put the paintbrush in the alcohol then use the rag on the left to wipe it clean and then take it with you.
Go inside again and use the paintbrush to remove the sand from the hatch entirely. Now use the 4 rods on the holes of the hatch and open it to solve the puzzle.
Use the arrows to move the yellow cubes and place them in the niches with the same symbols, each puzzle is different for each player. I think this one was the most difficult puzzle I’ve encountered so far.
Take the blank rune stone and the key from inside. Go to the fireplace and use the key to open the cache above it to find the cutters. Put the blank rune stone by the rune machine and look around the room.
Take a log from the floor and go through the door on the left to find a circular blade. Go outside and use that to fix the saw, secure it with the nub then start cutting the log into some 5 wooden blanks to test the rune machine.
Go inside and test each one. Stop when you find the wizard hat symbol and use the rune stone to make the rune on it. It should be the 4th rune carving device. Take it with you and go outside to the stone portal and use it to pass through.

Use the dog whistle to call for Folnur’s dog. Check out the dog’s house and take the magnet from the door. Go to the barn and look for the key in the haystack with the magnet.
Remove the other items from the magnet and take only the key and iron kyoll. Use the key to enter the house to look for Folnur.
Check out the table and under the fruits to find a winding key. On the counter to the left there’s a recipe for porridge for the dog.
Check out the window and find under the manuscript a mechanical horse. Go to the door on the right and put the horse and the winding key on the locking mechanism to open the door.
Solve the puzzle by clicking on the chips to light them all up. I’ll post my video and a picture with the steps so you can solve it faster.
You can go inside Folnur’s office now while Maaron is going to make some research to help you in your search for Folnur.

Put the paper (1) on the desk next to the other half. Pull on the purple book to the right to open a drawer and take the scissors (10). Use them to cut the ivy around the portrait.
Open that to find (5) then put the compass (7) on the book. Use the drawing as a hint for where to put the colored lines of the compass and you’ll find (4) inside the book.

Put the ornament (2) on the shield on the wall so you can take the spear (8). Use the spear (8) to open the window and find the magnifying glass (9). Use that on the drawing (1) on the desk. and remember the small symbols on the bottom right side.
- Upside down A – a fork waving its hand – a backwards P – e regular P
Open the top part of the desk and put the pieces 3, 4, 5, 6 on the golden device and select the symbols on the drawing to open it and find a locked box.

To open the box you need to place the shields so that all the numbers at the top are activated. The puzzle is different for each player, but just make sure you match the number of shields on each column to the number at the top.
You’ll find a letter and a key, and Maaron is going to give you a see-remember stone. You need to feed the dog to get his memories. So find what is needed for the porridge.
Take the cauldron from the stove and go outside to the barn. Take the bag of grain, then use the cauldron on the well to get some water.
Go back to Maroon’s hut, outside his fence and take some bones from where the mushrooms are. Now go to Folnur’s kitchen, put the water on the stove, light the fire with Maaron’s spell.

- Boil the water.
- Put the bones inside.
- Grind the grain in the grinder.
- Add that to the water.
- Use a spoon to stir.
Take the porridge and go outside to put it in the dog’s bowl. Use the whistle to call for him again. Go to the dog that’s eating and use the stone on him to see where Folnur went.
Look into the well and use the magnet to get the arrows Folnur threw inside. Go into the barn where ballista is and use the arrows to shoot into the chains that hold the door.
Now to open the back door you need to solve another puzzle. Use the key to start it and use the arrows to move the gems to the indicated spots. Another puzzle that will be different from player to player so unfortunately I can’t help you with it.

Check out the cart with the sand, its wheels are broken. Look at the fire pit and notice the note from B. Get Folnur’s glasses and go to the dam to talk to the beaver. He’ll give you a key for the toolbox.

Use the key on the wooden box to the right. Take the hatchet then look at the ramp on the left and take it with you to the forest where the cart is.
Put the ramp in front of the cart and use the hatchet to free the bags. It won’t budge as they are too heavy, so go to Maaron’s hut and to the room on the left to get the grease.
Go back to the forest and put the grease next to the ramp. To use it you need to go to the toolbox and get the trowel to spread the grease on the ramp. Now guide the pallet to the end of the path and keep it on the ramp.
I have to admit, this is one of my least favorite mini-games as I’m not very good with coordination and moving the pallet down the ramp got me anxious and I messed up A LOT. But… I got there in the end…
Take the pickaxe from the toolbox and roll the log underneath. Then go to the forest and use the hatchet to cut the tree that is on the side if the road.
Use the hatchet on the tree you cut to make it round and smooth. Take the carpenter’s drawknife from the tool box and finish the log. There’s another log next to the toolbox.
Use both logs to move the sand bags in position. Take the key to complete the next task. Open the box to the right and find all the items on the list.

The spanner and blacksmith tongs are inside the box, the rest you’ll find around. When you’re done with that and get a lift to the dam, your new task is to fix it.

Look at the sketch on the right and remember the signals, then under bottom right corner of the poster to find a key.
Check out the table to find another manuscript and look at the box to start on the puzzle. Make the flaps completely cover the notch: right flap (bottom one) – left flap – bottom flap – right flap (top one) – top flap
You’ll find a set of syringes inside. Now go to the rope ladder and use the key to open the chain. Now you can go up and down as you please.
Go to Maaron’s hut and take the colored glass case by the window. Go to the pond here, use the pickaxe to break the diamond on the edge in front of you. Now use the flags with the colored glass and the diamond to cut pieces for the flags.
Use candies for the flags, then Folnur’s glasses to melt the candies, then glue the glass to the flags. Go back to the dam, on the ground and use the flags to distribute the bags so that you can fix the break.
The bag shapes come different from player to player. Another puzzle you need to solve on your own, it will take you a few tries, but the pieces are meant to fit I promise.
Now you can check out the base of the dam to see what caused the explosion. Check out the secret door and solve the puzzle. Just press the runes in the right order like shown on the letter from B.
The beaver will go through the tunnel to see if you can pass. You need to go to Maaron’s home to make a potion of underwater breathing.
In Maaron’s hut there’s a recipe for that on the table, take his potion book with you. You’ll need:
- Water
- Toad algae
- Bay leaf (which you have)
- Firebugs
- Juniper root
- Juniper branch
- Juniper leaves
- Juniper berries
Take the empty bottle on the table. There’s a Juniper tree on the dam. The water must be from the dam. Go get some firebugs from outside Maaron’s garden, under the root. Toad algae is found at the pond in his yard.
Now go to the dam and fill the bottle with water from the cave. Go up the dam and check out the Juniper tree at the end. You can’t break the branch, so check out the wood saw to your left.
Saw the Juniper branch and the Juniper root. Put all the ingredients in Maaron’s potion book and go back to his place to make the potion.
Put the potion kit on the table and follow the recipe.
- Put some of the weights on the scale, then put the Juniper branch on.
- Take the amount needed from the scale and put it in the squeezer.
- Use the saw to fut some toad algae and add that to the squeezer as well.
- Add water to the pot and the juice from the squeezer.
- Use the saw to cut some root pieces and use the scale again to see how much root to put in.
- Add that to the pot and add some berries as well.
- Use the saw to cut the branch and extract the core
- Put the firebugs and the bay leaf on the tiny stove then smash them into powder when they are done.
- Add the powder to the pot then put it on the flame to boil.
- Use a branch stick to stir then put the funnel on the bottle.
- Put the cloth over the funnel and use the ladle to put potion in the bottle and do the spell.

Go to the dam and use the potion to swim into the cave. Here you’ll find Folnur doing some kind of ritual.

Look on the ritual table under the parchment and take the element, the lion’s head and another manuscript.
Go to the door up the stairs and use the element on it to start the puzzle. Clear the entire area by finding identical symbols and removing them.
After you finish the puzzle you’ll be able to open the door. On the other side of the gate you’ll find Kiana. She was the one shooting arrows.

Look at the stone gate on the right. You’ll need to find the rune stone that fits. Go back to the cave. The water left the tunnel so you can go back to the dam.
Go into Maaron’s house and check the niche in the floor. Take the blank stone and use the rune maker on the fireplace to make a pumpkin rune (the second cutter).
Go back to those gates and put the pumpkin rune stone in. Go through the portal to find the mines. Go to the elevator and push the lever to get the items down into the mine. Now get into the elevator to get down into the mines.
Remove the cloth on the right wall and solve the puzzle. Move the circles with pictures onto a background that fits the meaning.
Use the halfling water to scare off the bugs over Folnur’s hammer, use the cloth you removed from the wall to try and wipe the hammer clean.
Go to the halfling valley at the fair and take the basket from the left. Check the shop on the right, put a coin in and take the sewing kit.
Go check out the pig in the vineyard by the lake and read the sign again. It says the juice from the grapes is used to clean the cockroach slime. Gather some grapes in the basket.
Go to the mines and use the grapes on the hammer to clean it and take it. Go to Folnur’s kitchen and use the lion’s head on the chest and take the dynamite box and the fur skin.
Go to the funicular that leads to the mountain and use the hammer to open the gate. Look for the gears to fix it.

One of them is inside a roll of parchment, another is hidden inside a vase that you need to break. To open the crate you need the code from the parchment: 375
To get the one on the lamp you’ll need to cut the chain with the pliers you can find on the left on the wooden fence. The rest are scattered all around under objects or hidden away.
Put the gears on the mechanism and solve this next puzzle to make it work. Engage all gears so that the numbers on their faces match. Gears that align will not rotate if they don’t match in size. Follow my video walkthrough below to solve the puzzle.
After you fix the funicular it’s time to dress warmly. Use the sewing kit on the fur and make fur clothes, then put them on before going on the funicular.

Check out the wooden pile on the right and take the ice gripper (1/4) underneath. Look at the dinosaur case further ahead and take the rope, the iron arrow and the flint arrow.
There’s a stilt cane (1/4) on the path up ahead and another ice gripper (2/4). Under the wooden planks to your left you’ll find another stilt cane (2/4).
Go to the rock pile on the left, take the stilt cane (3/4) and use the hammer to unclog the chimney. Put dynamite inside the chimney and use the two arrows to light it up.
The entrance of the cave under the chimney will open up and you’ll find a last stilt cane (4/4), two ice grippers (4/4) and a manuscript about the a mythical beast.
Go to the canyon in the cave where the ritual was. Use the flames here to melt the frost on your rope. Tie the rope together and take it with you.
Go to the mountain and use the ice grippers, the stilt canes, and the rope, on the road that leads up to the top. You’ll be stuck somewhere before reaching the top. Use the dynamite and the arrows to make your way through.
After the avalanche passes you’ll need to find your way out of there. There’s a shovel under the statue to your right, open it up to use it on the snow.
Remove the snow and build an arch of stones in the highlighted area to dig a tunnel. The stacked stones prevent the snow from collapsing. Each puzzle is different each time you refresh it, so keep shoveling till you get your rock arch and get to the top..

Wipe the snow from the platform in the middle and use the hammer to unfroze the key then take it with you. Go to the house and use it to open the lock, but as it won’t open, you’ll use the hammer to get inside.

Look at the Ritual book on the table and notice the symbols marked on the wood. Talk to Maaron further and start your new task for the ritual.
Take the hammer and break the floor with it and look inside to find the wooden block and a tombstone. Go outside to the wooden idol in the snow, and put its face back on.
Take the ritual cup, go to the canyon up on the dam, check out the table and take the syringes from there.
Now go to Folnur’s kitchen, check the ashtray in the window and take the other ritual cup. Go outside and use the syringe on the dog to get some blood.
Go to the halfling’s valley, enter the green house, and use Kiana’s bow to shoot the ritual cup so you can reach it.
Now go outside and use the syringe on the donkey to get some blood from him. Go to the lake in the Halfling fair and take some blood from the pig sleeping there.
Go to Maaron’s garden and catch the chicken to get some blood. Move the characters and catch the chicken by cornering it like I did in the video below.
Drag a line into the sand to keep the chicken calm, then draw some blood from her. Go to the Ritual cave and insert the 3 skull cups on the right side to get the 4th ritual cup.
Go on top of the mountain and set the 4 cups in their place on the platform in front of the house.
- Put the eagle blood in the top right cup.
- The boar blood in the bottom right cup.
- Wolf blood in the bottom left cup.
- And the horse blood in the top left cup.
Take the bull skull and go inside the house. Put it in the hole of the floor and press the symbols in the order of the symbols on the desk. Take a photo of it as each player has a different code. A staircase leading down will open up and you can go through.
Find all the items shown at the bottom, to get a ritual knife at the end.

Open the chest with the key (1) to find another mask (7) inside. Check out the book on the ritual table to know how to solve the puzzle of thee box on the table to the left. Move the plates to the correct position.

Use the axe (5) to get the sun (4) stuck in the wall. After you put the 2 moons (2-3) and sun (4) on the shield, you’ll find the mask (6).
Put all the masks on the ritual table. Activate the skulls in the correct order from the book: 4-2-1-3-5. Take the ritual dagger to be able to perform the ritual.
Go outside where you put the cups and blood and use the dagger to dip in all the cups. Perform the magic spell to make contact with the other world. Make sure the rays connect with all the purple lights and soon you’ll go to an after life place.

To be continued…
In the meantime you can check out more puzzle adventure games like 3D Escape Room – Mystic Manor or Nobodies – Silent Blood.

Aylin is a content creator and co-founder of App Amped. She was a huge Tomb Raider fan before moving on to more casual titles. She spent way too much time tending for her FarmVille farm as well as playing text-based browser games. Now she plays and writes about mobile games, creating in-depth walkthroughs and useful guides.