

Here’s a new walkthrough for this exciting puzzle adventure game, Nobodies Silent Blood, with all the operations solved for you.
The year is 2010. The intelligence agency is cracking down on a wave of criminal activity funded by cryptocurrency technology. Follow the money and dismantle the network, bit by bit.
Nobodies Silent Blood – Operation Groundwater Walkthrough
The tutorial is pretty straightforward and it will tell you what you need to do to finish the first operation.
Nobodies Silent Blood – Operation Last Rites Walkthrough

You start right in front of the Crematory. And you can find a wooden block on the ground and a pin next to the barrel.
You can press the arrow to move over to the scene on the alley behind the Crematory.

Take the hacksaw from the ground and the dead body. Pick up the green hose from the garbage. Use the hacksaw to cut off the wooden block.
Go back to the front and use the wooden wedge on the door and then put the pin in to be able to go inside and explore.

Take the bucket and the documents on the floor. Use the hacksaw to open the second crematory door and get a belt (collectible item). Use the hacksaw to cut off a hose segment.
Go outside, fill the bucket with water from the water tap. Go to the back alley and put the bucket of water over the fire to heat it up. Use the hose segment in the hot water to expand it. And put the documents over the fire to light them up.
Put the long hose in the garbage where you found it, and the hacksaw on the ground. Go inside the crematory and put the dead body on the table and push it inside.
The expanded hose goes on the pipe, where it’s missing. Now turn on the gas and light it up with the fire from the documents. Close the doors and wait, then put the bucket back on the ground (you can empty it in the sewer in the back alley) near the crematory, and turn off the gas.
Take the hose segment to throw it in the garbage in the back alley. You can now press the exit icon on the top left corner to finish the operation and move to the next one.
Follow my video walkthrough below to see how I did it:
Nobodies Silent Blood – Operation Spillway Walkthrough

Take the dead branch next to the body, but do not take the body. Go left to reach the Dam Security.

Take the hacksaw from the truck, and the wire from the ground. Go back to the dead body, use the hacksaw to get the hive.
Go to the security and unleash the hive on him. Go to the truck and use the wire to open the door. Open the glove box and take the lighter.
Go to the hive and put the branch on the ground and use the lighter to light it up. Now you can go past the bees and enter the security room.

Stop the water by pulling on the two levers. Take the shovel and go to the dead body. Make a hole with the shovel where the water was, and throw the dead body inside, then cover it with the dirt.
Go back up and put the lighter in the glove box and close it, close the door with the wire then put it back on the ground where you found it, then put the hacksaw in the back of the truck.
Go inside and put the shovel back and start the water again from the two levers. Go outside, take the dead branch and throw it by the tree where you found the dead body and now you can exit the operation, it was a success.
Follow my video walkthrough below to see how I did it:
Nobodies Silent Blood – Operation Airlift Walkthrough

Take the oil can and spill it on the plane’s wheel, then go inside the plane.

Open the yellow drawer and take the strap. Go through the door and take the copilot’s coat, then talk to the captain and tell him about the oil stain.
Take the ID off the chair, the clipboard, and the phone. Look at the ID with the magnifying glass in your inventory and note down his birthday 5974.
Use the magnifying glass on the phone and enter that password. Look at the messages with Vivian. Press the chat box to talk with her:
- c u tonight babe? wife thinks I’m working 😉
Delete the messages (yours and hers) before you put the phone back on the chair so it starts calling and the captain leaves. Now use the magnifying glass to look at the clipboard to see what to do in the right order:
- Use the radio and tell them you are ready to leave: L345 ready to runaway.
- Confirm closed door: go outside, put the strap on the door and close it.
- Reset altitude selector: the yellow buttons, it should indicate 0.
- Engage engines x2: press the L and R red buttons.
- Accelerate: pull the lever.
Now press the BD button to let the cargo go, and lower the altitude to 10,000. Before you go out of the cabin leave the clipboard on the chair, open the door and go out holding onto the strap to reach the cargo.
Take the flare from the red medical box, and the parachute. Use the flare to start a fire on the box next to the blue tarp. Use the parachute to jump off the plane.
Follow my video walkthrough below to see how I did it:
Nobodies Silent Blood – Operation Manifest Walkthrough

Take the rotten fish, then follow the yellow arrow.

Give the cat the rotten fish and take the cat. Go inside the red container and check it out.

Take an RC car, a cardboard cutout, and the barrel. Open the toolbox from the shelf and take the laser pointer.
Go to your inventory and put the cardboard cutout on the RC car. Go outside and look inside the green container and send the cat inside.
Use the laser pointer to make the cat push the red button. Now that the door is open you can go inside to find the body.

Open the cabinet of the desk and take the hazard sticker. Take the dead body and open the closet to take the paint. Go outside to the guard and use the RC car with the cardboard to lure the guard away. Now you can go on the ship.

The flag on the ship looks African and the locked container has the 9417 number on. Go to the green container, use the dead body to turn on the laptop, find the the Djibouti (an African Country) file and scroll down to find the container.
The container number has the pin 8163. Go to the ship, open your inventory and paint the barrel put the sticker on and the dead body inside. Put all of this on the device that puts a lid on barrels, next to the ramp used to go on the ship.
Use GWL to seal it (the initials on the computer), take the barrel to the container on the ship, and close the container
Go put the paint in the closet in the green container, and lock the laptop by clicking the arrow to the left until you exit all files, then close the laptop entirely. Now use the laser pointer to make the cat push the red button again to close the container.
You can put the laser pointer back in the toolbox. Now your mission is done and you can exit the level to move to the next one.
Follow my video walkthrough below to see how I did it:
Nobodies Silent Blood – Operation Zinfandel Walkthrough

Take the hose from the wheelbarrow, the bucket next to the cuverie (barn where wine is made), the ladder next to it as well, and a silage bag. Now you can go inside the Vineyard house.

Take the dead body and the brochure on the table. Open the closet by the door and take the pipe wrench, the pruning shears, and the large jug. Look at the clock and open it. Move the arrow around so you can take the gear inside.
Now you can exit this place and go inside the cuverie/barn.

Take the yeast bag and the oil from the shelf. Put the gear on the grape crushing machine and go outside. Put the ladder on the side of the house to reach the roof and turn off the water from the yellow valve using oil on it to make it move.
Use the pipe wrench to get the red water pump, then put the hose on the pump. Also put the dead body inside the silage bag.
Go back down and take the ladder again, then go to the left where the grapevines are.

Use the shears to take some grapes and a branch. Then go to the barn and put the grapes in the grape crushing machine. Put the bucket underneath and crush the grapes to get some juice.
Use the ladder on the big tank in the middle to reach up and spill the grape juice in there. Add the yeast to the fermentation tank and put the large jug under the tap then when it’s done take the jug wine.
Put the branch on the grape press by the locked door, then dump the wine jug inside to press the wine. Take back the branch, the ladder, and the gear, then put the oil back on the shelf.
Look at the locked door and insert the code NASH (the name of the vineyard) to open it up and reach the oak barrels.

Open the first barrel, it will empty when you open the door. Close the door and put the pump from the old wine barrel tap to the now empty barrel and move the wine.
Open the old barrel, that now is empty and put the dead body in a bag inside this barrel. Close the door and start pumping the wine back in the old barrel.
Take back the pump, and put the wine jug in the now empty barrel, with new wine. It will take a few hours to make more wine to fill the new wine barrel.
Now go outside, but reset the padlock of the room where the barrels are it has to say ABCD. Now go outside and use the ladder to climb back on the roof and put back the pump and turn the water tap back on.
Go down and take the ladder and put it back where you found it initially. Then put the bucket near the ladder and the hose in the wheelbarrow. Move to the left where the grapevines are and leave the branch there.
Go inside the house and put back the sheers, the pipe wrench, and the jug, in the closet. Put the gear back inside the clock, and the brochure on the table. Now you finished the mission and you can leave.
Follow my video walkthrough below to see how I did it:
Nobodies Silent Blood – Operation Tee Time Walkthrough

Leave the dead body under the car and go inside the Lucky Holes mini golf place.

Now you can go inside the cafe and look around.

Take sugar packets from the table on the left, and a golf club from the man sitting at the table. Now go to the Kinder Garten to get more stuff.

Take the paints on the table, and the jar from the ground. Put the sugar in the jar. Now go outside and check out the golf courses behind the mascot.

Take the golf ball in the grass and put the sugar jar to the right of the path to catch some ants. Go with the ants jar to the mascot and wait for her to leave.
Go to the phone booth and take the coin. Look through the Yellow pages and remember the number of the exterminator: 335-5897. Insert the coin and call that number and someone will come for the ants.
Now go forward and to the left to the Mill golf course.

Use the golf ball and the golf club to get it into the door of the mill. When you succeed, you can take the voucher.
Go inside the Cafe and give the voucher to the barista to give you one chocolate bar. Go to the Kinder Garten and give the chocolate bar to the bully.
Go out and back inside to get the stress ball off the ground. Now go back to the golf courses towards hole number 7.

Talk with the parent and ask about the tornado, then when they look towards the sky, you can swap the golf ball with the stress ball.
Now that they left, go back and to employees building. Take the the grinder and the epoxy jar on the boxes to the right.
Use the grinder to open up the locker doors in front and find a collectible item, pants. Now go to the parking lot, where you started and grab the pesticide sprayer from the back of the exterminator truck.
Go to the costume and spray it so there are no more ants on it, take the mascot and the novelty golf ball. Go back to the parking lot and take the dead body. Put it inside the novelty ball and put the pesticide spray back in the truck and close the door.
Go to Dino golf course and use the grinder to cut off a piece. Take the body out of the novelty ball then put the dead body inside.
Put the cut piece back inside, use the epoxy to glue it back and the paint to color the cut green (blue and yellow).
Now take the costume and ball, the grinder and the epoxy back to the locker room. The golf club to the cafe’, in the man’s bag, and paints and jar back to the Kinder Garten. Now you can leave because the job is finished.
Nobodies Silent Blood – Operation Slalom Walkthrough

Take the rock near the First Aid tent, then enter the storage area.

Take the pickaxe, the blower, the bags of salt on top of the shelves, and the screwdriver near the exit door, but do not take the body. Go outside and up to the chairlifts.

Take one of the chairlifts and go up with it at the first check point.

Take the green slope sign then take the chairlift up once more.

Take the black slope sign and put the green slope sign in its place. After the skier gets injured, you can take the green sign back and go to the electric panel in front.

Take the wire coil from the ground and use the blower on the top of the device, and someone will come to investigate.
Take a look at the open electric panel, tamper with the lock, and take the latch using the screwdriver. Go back to the chairlifts and take the rout at the bottom, towards the cave.

Put the rock under the big rock ready to fall, and go back to the electric panel to take the battery. Now go to the Aid tent and take the stretcher, then use the pickaxe to get a wooden plank from the bench.
Go all the way to the cave, use the wooden plank on the rock you put there and make the big rock fall to create an avalanche. Take the wooden plank back and go down to the first chairlift checkpoint.
Use the wire on the yellow snow maker, and it will coil around the pipe. Now use the battery to heat up the pipe.
Use the salt to melt a portion of the snow, then the pickaxe to dig a bigger hole in the ground. Go take the dead body put her on the stretcher and use the chairlift to take it to the hole you dug up.
Take the body and put it in the hole, cover it using the pickaxe then use the snow maker to cover it with snow.
Take all the items back to where you got them from. The wire, the battery, and the latch to the electric panel at the top.
The black slope sign back to the top of the chairlifts, then go down to the snow maker and put the green slope sign here.
Go back to the bottom and put the stretcher in the aid tent and the plank on the bench. Then go into the storage area and leave all the items back in their places to finish your mission.
Nobodies Silent Blood – Operation Food Chain Walkthrough

Grab the shears from the bush tree then go inside the Toilet building.

Pick up the shaving cream from the sink and go back outside. Take the path straight ahead, with the giraffes on the right.

Take the pendant and the string from the garbage bin, then take the path that leads to the monkeys.
Grab the stick on the ground, then use the pendant on the food machine. Tap on one of the monkeys and she’ll steal the flashlight from the custodian.
Go back to the fountain and put together the stick and the string, then tie the shears on it. Now go back to the starting point and go on the path that leads to the bear.

Use the shears on stick to get a banana from the tree. Use the shaving cream on the bear’s mouth. Now go back to the fountain and enter the Veterinary.
Talk to hear about the foam on the bear’s mouth. She’ll go check it out and take the syringe and fill it with antibiotics from the green liquid on the left.
You can go and check the bear yourself, then go to the monkeys and give the banana for the flashlight.
Turn back and go towards the bats section and use the flashlight to scare them away. When you go back to the fountain now you’ll see the door next to the bats path open, so go inside.
Open the freezer door and infuse the antibiotics into the meat. Close the freezer door and get out.
Go back and wait for the night to come. Go to the bathroom and take the body from the first bathroom stall. Close the door and put back the shaving cream next to the sink. When you exit the Toilet undo the shears and put it back in the bush.
Go to the lion cages and throw them the body. Now go to the fountain and put the string back in the dumpster, and to the Monkeys to put the stick on the ground and the flashlight as well. Now your mission is complete!
Nobodies Silent Blood – Operation Mulligan Walkthrough

Asked the owner I have a few questions for my report and note the last 4 digits of his social security number: 5390. Back away after he answers to go to the pirate ship.

Take the golf club next to the Jackpot sign. Go back to the owner and hit him with the golf club, then take his keys. Go to the pirate ship, then take right to the office building.

Take the bag with the golf balls, use the keys to open the door on the right and go inside. Take the hand truck, the ball dispenser, the pipe wrench, and the drill.
Go back outside and use the keys to open the electric panel outside, and the door on the left. After going inside the room on the left enter the social security code for the alarm 5390.
Open the top green drawer on the right and take the padlock and read the yellow note on the side of the document cabinet: tiger – windmill – waterfall
Look at the blue map on the wall above the safe and note the numbers of each location on the note: tiger – 5, windmill – 1, waterfall – 6
Open the safe with this code 50-10-60, take the money and carry the safe with the hand truck. Use the pipe wrench to open the fan and take the blades.
Go outside to the electric panel and turn on (green light) the button number 3. Then go to the pirate ship to play some golf.
Put the balls into the ball dispenser and add them to the golf course, and make it start. After a little while the treasure chest will open up.
Go to the dead bodies and take the one found inside the dinosaur. Go to the beach, left side from the pirate ship, fix the golf club with the wrench, then put together the golf club and the drill.

Now add the blades to it to make a boat motor that you should add to the boat. Put the woman’s body inside the safe, and that inside the boat.
Go with the boat and drop the safe in the water. When you come back take the ball dispenser back from the pirate ship. Take the treasure chest with the hand truck, go to the owner’s body and take it.
Put it inside the treasure chest, put the padlock on the chest and go to the boat again. Put the chest with the body inside the boat and throw it in the water.
When you come back take the boat motor and pull all the parts apart using the wrench. Go to the pirate ship and give all the money in the donation box, and put the golf club back, then go to the office building to the left room.
Put the fan blade back and reactivate the alarm, then go to the right room and put the ball dispenser, the hand truck, the wrench and the drill back in their place.
Turn off the pirate from the electric panel and close all the doors and electric panel with the keys. Now go throw away the keys in the water near the boat and the mission is done.
Check out my full video walkthrough for Silent Blood – Operation Mulligan below:
Nobodies Silent Blood – Operation Campfire Walkthrough

Leave the body and go back the trail where you’ll meet a policeman. Nothing much to do here, so backup again to the crossroad.

Take the paint from next to the Electro market. Go to the left from here, on the alley that leads to the scrapyard.

Open the scooter’s seat and take the battery, take the jug from the left, and the tarp. Go back to the cross road and go on the right road toward Camping Fawley.

Take the dumpster and the hose behind it. Take the shirt on the clothes line then take the road to the right to where a man and a woman are sitting. Because you have the shirt on you’ll be able to take the microwave on the fridge.
Go put the shirt back on the cloth line and take the right again, then move behind to the camping vehicles. Take the antena from the trailer and go towards the trees behind to reach the pool.
Drop the paint into the pool then go back to camping front office cabin. Tell the lady about the paint in the pool.
When she’s gone you can take the screwdriver from under the bench. Use it on the microwave to get the magnetron.
Go to the couple that’s reading and tell them Is that your camper van over there? It smells like rotten eggs.
Go to the Electro market and talk to the cleric I’m in the market for a radio signal jammer. And remember his name Michael Poole.
Go to the camping front office cabin and look through her computer. Enter the url address: theagency.com
- The ID: 1080
- 4-digit PIN: 1234
- Enter the cleric’s name and search: Michael Poole
- Open his file and press Clear Record
That’s it, now you can go back to talk to him and give him the battery, the antena, and the magnetron and he’ll build a signal jammer for you.
Go back to the couple and tell the man about the smell again. Use the signal jammer on the trailer then wait by the pool.
Go back to the trailer, use the hose and the jug to get some gasoline, then enter the trailer. Look under the stove and take the propane tank. Open the drawer above the stove and take the wrench.
Get out and take the hose and the signal jammer with you as well, leave no trace. Go to the scrapyard. Use the wrench to get the engine from the red grass trimmer.
Go to the dead body location, take the body and put it in the dumpster. Put the dumpster on the field, put the propane tank inside the dumpster and add the engine next to it.
Now use the wrench to get the windpump rotor and add it to the engine in the dumpster. Add the tarp over the dumpster and use the hot air balloon to go to the volcano by tapping the balloon.
After getting back, take everything with you so you put them back in place. Windpump rotor on the pillar, paint next to the Electro market, hose next to the front office cabin, dumpster in front of it. Go inside and put the screwdriver under the bench and log out from the agency website on the computer here.
Go to the camp and use the wrench to undo the signal jammer into the pieces. Put the magnetron back into the microwave, and then put it back on the fridge.
Go to the trailer and put back the antenna on top, go inside and put the propane tank under the stove, and the wrench above it, close all doors.
Go to the scrapyard and put back the tarp, jug, engine, and battery and you can safely finish the game.
Check out my full video walkthrough for Silent Blood – Operation Campfire below:
Nobodies Silent Blood – Operation Turnstile Walkthrough

Go down the stairs to the metro platform.

Take the metro card then go back up. Go to the left, towards the Lays ad and use the card on the Excard recharge to get some money.

Go to the right to the shop and buy some explosive balls with the money.

Go back to the starting point and use the metro card to enter the door right in front. Take the heater under the desk, the ID badge on the desk, the rag from the floor, then open the cupboard on the right and take the wrench.
Go back outside and set the heater in the plug next to the construction area, then go there to talk with the workers.

Take the screwdriver, hacksaw, and yellow paint after they leave.Use the wrench to get the scaffold bars.
Get out, take the heater back, then go to the metro platform again, down the stairs and to the toilet up ahead.

Open the free toilet cabin and get the rag in the toilet bowl. After the man leaves take the belt and his coat hanging from the cabin.
Go back to the metro platform and look at the metal panel on the ground near the tracks. Use the hacksaw to cut a slit into the hexscrew, then use the screwdriver to open it.
Wait for the train to stop in the station and use the firecrackers to the front cabin so they will empty the train. Tie the yellow paint with the belt to the front of the train. Now go down to the train tracks.

The yellow paint will go through the left side of the tracks, follow it to the Depot and discover the body.

Take the paint and belt back, then the garage creeper on the ground and the piston on the table. There’s a pendant switch hanging from the roof. Lastly, take the dead body.
Now, look in your inventory and put the coat on the body, and the scaffolds bars to make the body sit upright then put it on the garage creeper to be able to move it out of here.
Go back to the platform and insert the piston into the hole under the metal panel you opened. Connect the switch to the piston, then put the body on the metal panel. Press the switch when the train is coming so they think he jumped in front of it.
Take the piston and switch back to the Depot, garage creeper too. Go to the toilet and put the belt on the floor next to the toilet seat. Get out and leave the metro card by the stairs.
Go back up the stairs and enter the office right in front of the stairs. Put the wrench back, the heater and the ID badge. Enter the construction area and put the hacksaw and screwdriver on the floor, then put the paint next to the cement.
Now you can finish the job leaving no trace. And you can check out my full video walkthrough for Silent Blood – Operation Turnstile below:
Nobodies Silent Blood – Operation Labwork Walkthrough

Tap on the poster by the reception desk to find the phone number and note it down: 119-1024. Next go through the corridor in the hallway.

Take the soda can from the garbage bin and go down the stairs to the morgue.

Get the skull x-ray and open the first green cabinet to find a nails jar. Now go outside and and up the stairs and try to enter the room in the middle on the left.

Slip the x-ray through the crack to get the latch open and get inside the office. Take the scissors, the camera from the desk, and the first book on the middle shelf on the left. Now exit the office, go downstairs, to the class room on the left.

Use the camera to zoom in on the key and take a picture of the key at maximum zoom in. Now go back to the office and use the printer to get print out the photo.
Use the scissors on the photo to cut the key shape. Then put the key shape on the soda can then use the scissors to cut the aluminum key.
Use the key to get into the other office. Look at the photo on the desk and remember the name of his son: Joseph. Take the syringe from the desk, and the matchbox on top of the book shelf, then use the phone to dial the number at the reception desk: 119-1024
Tell them you’re calling In regard to Dr. Walker’s son and tell them the name Joseph.
Go down to the classroom of Dr. Walker and take the burner and the plastic skeleton before you go out. Go to the 2nd floor and enter the storageroom. Take the rag, the paint on the shelf, and the vacuum. Now go back down to the lab room on the right side.

Put the rag on the air hole on the beetle tank. Use the vacuum to get a bag of beetles.
Use the scissors on the matchbox to get the powder, and use it on the padlock next to the beetle tank, use the burner to open the lock. Take the jar of venom and fill the syringe with it then put it back in its place.
Use the burner on the fire alarm on the ceiling. Wait for the alarm to evacuate the building. Take the rag back before you leave and close the cupboard. Go to the office, put the camera back on the desk and get the body.
Now go to the morgue and melt the plastic skeleton with the burner. Put the x-ray back on the screen. Put the body on the table and use the syringe with venom on him. Use the beetles on the body then take the skeleton.
Paint the skeleton with white paint and add some nails, then go put the skeleton in the classroom. Put the burner back on the desk.
Go to the dead man’s office and put the book and the scissors back. Then to the other office put the syringe on the desk. Then go to the storage room and put back the rag, the vacuum, and the paint back on the shelf.
Get out and use the key to close the door, then go to the first floor and throw the melted plastic, aluminum key, and the broken padlock to the garbage bin to finish the mission. Enter the lab room and close the cabinet there.
You can check out my full video walkthrough for Silent Blood – Operation Labwork below:
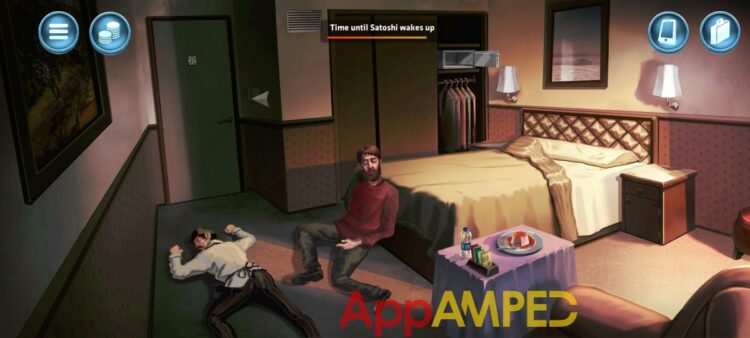
Nobodies Silent Blood – Operation Crossroads Walkthrough – Spare Satoshi

If you decide to Spare Satoshi you’ll need to find a way to help him cross the border. Go out into the hallway and take a cup from the water dispenser then go to the lobby.

Take the newspaper from the table, the tape from the reception desk and talk to the guest sitting on the armchair. Ask him What do you think of the hotel? and remember the room number he tells you: 33
Next tell him You hear about the thief in the hotel? That will make him leave to his room. Follow him to the hallway and use the tape on the roll of his room.
Go to the lobby and back to the door, now you can open it and see what’s inside. Take the knife then look at the safe box in the closet. Go to the reception and tell her I lost the combination to my room safe. She mentions a backup combination for blocked safe: the same number over and over.
Go to the safe and try 9999. Take the passport and close the safe before leaving. Go to the lobby then outside (bottom arrow). Take the bottom street (bottom arrow) to the restaurant.

Take the chalk by the sign, then grab a menu from the entrance of the restaurant and then use the newspaper to kill a fly, then take the fly with you before entering the restaurant.
Take the cup of coffee from the empty table and put the fly inside and show it to the barista so she gives you a fresh cup of coffee. After she leaves take a cheese wheel from the shelf.
Now that you’re outside walk inside the hair salon. Use the knife on the chalk to get some dust. Put the chalk dust on the hair drier so she has to wash the client’s head.
Now that they are distracted, take the razor and the hair dye from the table, and the apron hanging on the cabinet.
You can go outside and look at your inventory. Pour water from the cup on the menu then give it to the lady waiting at the table outside. After she leaves, take her glasses.
Enter the Optical shop and show him the glasses you stole. He’ll let you exchange them for any other and you’ll pick up some colored lenses.
Go back to the hotel to talk to Satoshi. Show him the passport and try to match his appearance to the one in the photo. Shave his beard with the razor, the dye his hair and give him the contact lenses.
Use the knife to cut the cheese and give it to Satoshi. Now go out into the lobby, and take the stairs to the basement. Get a trash bag from the dispenser on the wall. Now go back to the room and take the assassin’s body then put it in the trash bag.
Go to the basement and throw the bag with the body into the trash, then turn on the machine to make the body go away.
Go to the lobby and leave the newspaper on the table, then go to room 33 and put the knife back next to the plate. Next go into the street and to the hair salon to put the razor and the apron back. Now go to Satoshi and tell him he’s free.
You can check out my full video walkthrough for Silent Blood – Operation Crossroads – Spare Satoshi below:
Nobodies Silent Blood – Operation Crossroads Walkthrough – Eliminate Satoshi
You’ll need to hurry. Go out into the lobby and then out into the street. Take the left path then enter the park through the gates to reach the fountain.
In the grass to your left you’ll find a rock you’ll need. Go back to the hotel room where Satoshi is and use the rock to kill him. Take the oil pack on the table next to the food and you can exit the room and move to the lobby now.

Take the lighter from the table and go outside. Take the right street and go through the fence. Take the crate from the right, the cigarette from the ground, the bucket from next to the garbage, and a trash bag from there.
Go back to the lobby and talk to the guy there and ask him Why is he working in the lobby? From this you’ll learn his room number 25.
Go outside and put the crate on the left side of the building so you can reach the window and get inside.
From here take the jar of nails, the mallet, the pliers, and the cement. Open the electric panel and look inside. Switch off all the nubs except 2.5 and 3.2 then go back to Satoshi’s room.
Light the cigarette with the lighter and blow the smoke towards the air vent to annoy the guy’s girlfriend.
Now go to the lobby to witness the argument. Take the key from the checkout panel and use the pliers to open the emergency glass and take the hose.
Go out, the right path to the fence and use the pliers to get part of the fence with you. Go inside the car park and talk to the guy in the car. He’ll be upset you’re waking him up. Give him the key you took from the hotel.
Now that he left take his roof bag with you and go to the fountain next. Open the water panel on the right and use the oil pack to turn off the water and drain the fountain.
Get out into the alley in front of the City Hall and dump all the trash on the streets. Use the fence and the nails to make caltrops then use those on the street.
Go inside the City Hall and talk to the clerk about the trash in the street. When the garbage truck drives to the mess the tires will blow up from the caltrops, so take those so they can’t find them.
Connect the hose to the truck then go back to Satoshi’s room. Put his body into the roof bag and take him outside to the fountain. Use the mallet to make a hole into the fountain and put Satoshi inside.
Take the bucket and fill it with sand from the playground. Put cement inside the bucket, fill the fountain again with the hose from the garbage truck, then get some water into the bucket.
Go back to the room and take the other body into the roof bag. Go to the fountain with it, drain the water again (do not do it before this or they’ll find the body) and put the body next to Satoshi.
Fill the fountain with water, close the water panel, and put the rock back into the grass. Go to the garbage truck and take the hose. Go to the hotel, and through the window outside.
Put the mallet and pliers on the table. Turn the switches back on. Get out and take the crate, go to the car park and put the bucket back next to the garbage and the roof bag on the red car. The crate goes next to the other cars and the caltrops to the garbage.
Go to the lobby and put the hose back and the lighter on the table. Go to the room and put the oil pack on the table. Now you can exit the game successfully.
You can check out my full video walkthrough for Silent Blood – Operation Crossroads – Eliminate Satoshi below:
Wrapping up
Here we are at the end of this game, no matter the choice you made in the end you’ll be able to finish it with flying colors.
I hope you enjoyed it as much as I did and if you have any questions don’t hesitate to ask me in the comment section below.
If you like this mystery puzzle games you might want to check out my Peek a Phone Walkthrough, a game I highly recommend.

Aylin is a content creator and co-founder of App Amped. She was a huge Tomb Raider fan before moving on to more casual titles. She spent way too much time tending for her FarmVille farm as well as playing text-based browser games. Now she plays and writes about mobile games, creating in-depth walkthroughs and useful guides.
Hi, I am playing the game now and is now stuck at Operation Food Chain. Do you have the rest of the walkthrough? It says to be continued…
It has been so helpful for me so far! Thank you!
Hi,
I’ll try and keep going with all the levels ahead. I don’t have many readers so I didn’t think there was a point in playing more.
I’m stuck on operation Camp fire. I need the ID and code for the agency website. Please continue with the walk-through
Hi,
Thank you for checking out my walkthrough! I managed to play a bit more and got the ID and Code you needed. Hope that helps! I’ll finish the rest soon!