
Another walkthrough for another spooky chapter of Escape Room – The Mist. Chapter 2 is called Ivy and here you’ll learn more about her.
In the first walkthrough for Escape Room – The Mist Chapter 1, I guided you through all the puzzles and mini-games and you made it out safely.
This time you’ll move from room to room in a new way that will keep you hooked to learn more about the story with me.
Escape Room: The Mist Chapter 2 Walkthrough
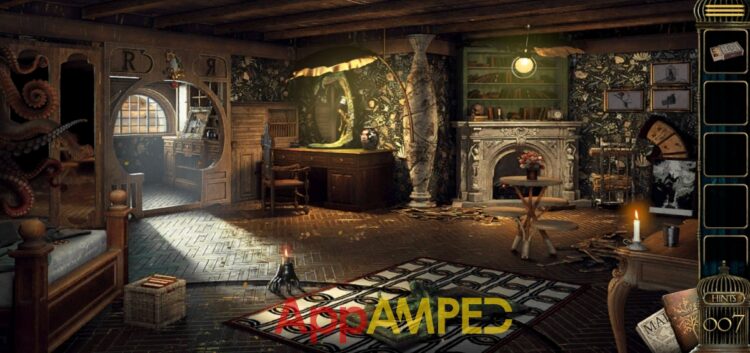
- On the chair to the left, there are some scissors you can take.
- On top of the fireplace, next to the clock, there’s a matchbox.
- On the desk, there’s a vase you need to tap till it falls so you can find a key inside.
- Go to the cabinet by the window and use the key to open the drawer.
- Take the statue from inside.
- Put the statue on the clock sitting on the fireplace.
- It will remove the octopus tentacles and free a way toward a closet.
- Open it and take the flowered light from inside.
- Take it to the desk and put it next to the other one by the mirror.
- Now you can go through the mirror in another room.
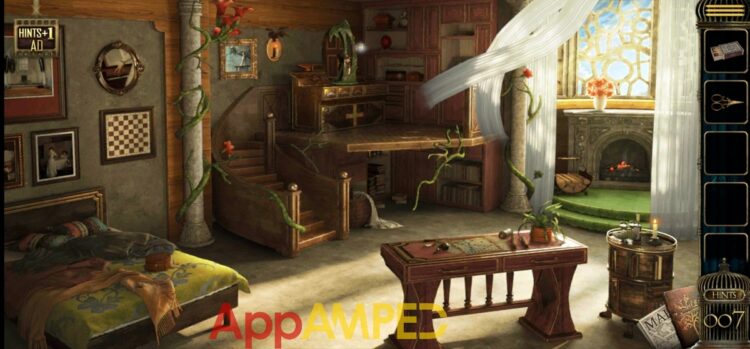
- Check the table and take the Goggles.
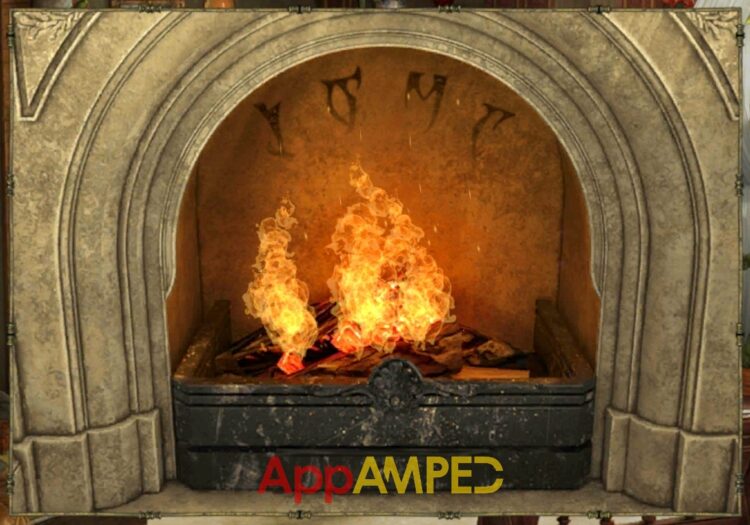
- Look at the fireplace and use the matches to light the wood there and see the symbols.
- Use these symbols on the box in the closet in the other room.
- Once you go into the other room and enter those symbols, you’ll find an engraved badge and a key.
- Use the key on the music box on the bed in the Mirror Room.
- You’ll find part of a diary inside.
- Check the drawers above the desk in the corner.
- There’s a box you can put the engraved badge on to open it.
- You’ll find another flowered light and a wooden block (1/2)
- Put the flowered light on the mirror next to the other two and go through the new area opened.
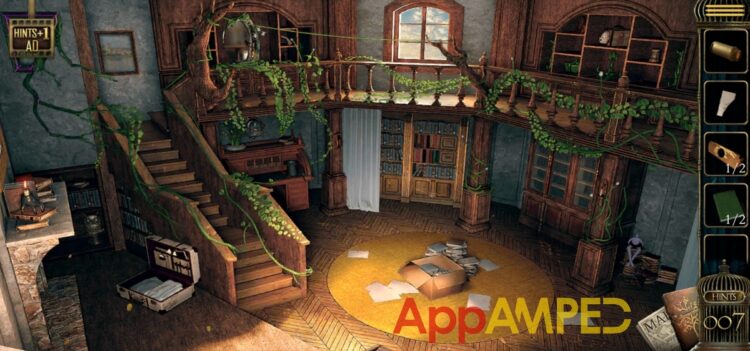
- In the cardboard box, you’ll find a book (1/2)
- Use the scissors to open up the white suitcase.
- Take the other wooden block (2/2), and the vinyl disc.
- Take a closer look at the desk under the stairs.
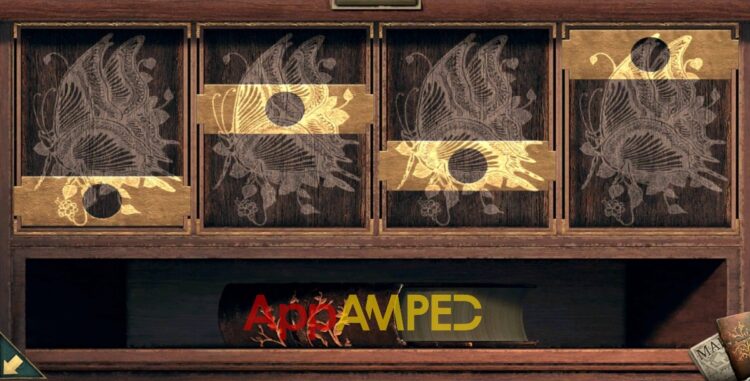
- put your wooden blocks here.
- To solve this butterfly mini-game you need to match the blocks to where the right part of the butterfly, so they match.
- It will open and you’ll find a notebook.
- You can glue the piece of diary in the missing page of the notebook.
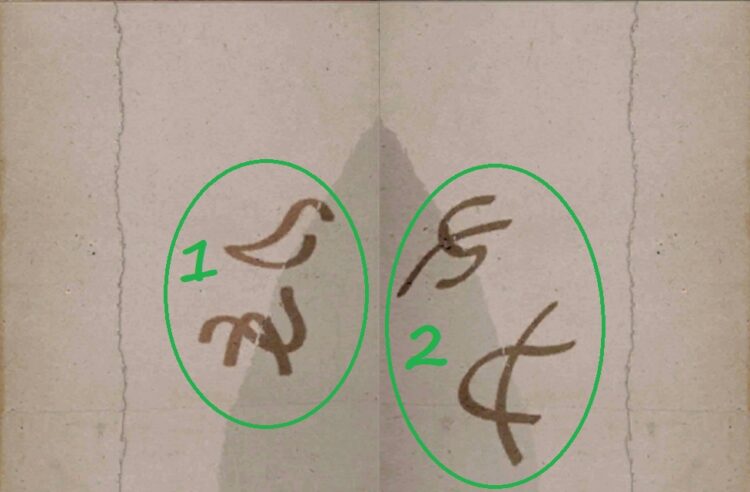
- You’ll need the symbol that appears on the box of the tallest shelf to the right of the window.
- Firstly: Turn the first arrow to the wing-like symbol and the bottom arrow to the A-like symbol.
- Secondly: Turn the first arrow to the E-like symbol and the second to the fallen A-like symbol.
- Grab the feather from inside and go to the bedroom through the mirror.
- Put the vinyl disc in the music box on the bed.
- When the music stops a chess board will fall off the wall to reveal a safe box.
- Check the map on the table and use the feather to solve the mini-game.
- Tap each dot in this order: 5A – 1B – 1F – 1J – 2I – 4H – F5 – 2G – 4H – 3E – 4B – 5A – 2C – 4B – 5F – 4D – 2C – 1B – 2G – 2I – 1F
- Once it’s done they will leave three symbols behind:
- One at A5
- Second D3
- Third G2
- Go to the safe box on the wall and put those in the order shown by the symbols above: A52GD3
- Take the painting and the slides from the inside.
- Go to the first room and put the painting on the wall in the missing spot next to the fireplace.
- Put the items in the pictures in the right order:
- Take the dagger out of the first photo and put it in the hand in the last one.
- Take the flowers on the branch and put them on the vase above.
- Put the parrot in the cage and the word KILL will appear.
- Go into the third room and tap the bookshelves behind the white curtain under the window.
- Enter the letters KILL on the right to open the secret box.
- Take another flowered light to put at the mirror and go through to see the fourth room.
- Check out the device on top of the piano and use the slides and the goggles for it.
- You need to put the images on the wall in the right order.

- After the girl stops playing you’ll find a book (2/2) on the chair in front of the piano.
- Go back to the room where you last wrote KILL.
- Look at the bookshelves next to the desk and put your books here.
- To solve this book mini-game you need to put the top row in the same order as the row below.
- Another secret box will open and give you a flowered light.
- Go put it at the mirror frame and go through it to find the 5th room.
- Check the desk next to the window and grab the weight.
- Open the closet behind the couch to see the writing “only death can end everything”
- Go back to the room with the piano and check the cabinet next to the window.
- put the weight on the other side.
- A new writing will be revealed: devil 1950
- Go back to the last room you discovered and look at the two clocks on the last shelf of the bookshelf.
- Turn the clock arrow (of the one that has devil written on it) to say 19.50
- The hour arrow to VII (7, but closer to 8), and the minutes’ arrow to X (10)
- Take the key from inside and go to the desk here to use it to open the drawer.
- Take the lantern from inside and tap on it to get the apple.
- Take the apple to the painting with the hand and put it there.
- It will turn again and you can see a wooden hand that you can tap on till it throws the dagger at you.
And this is how Chapter 2 – Ivy of Escape Room: The Mist ends.
Wrapping up
Congrats on finishing another chapter with me on Escape Room – The Mist. I’m positive you’re enjoying it as much as I am, otherwise, you wouldn’t be here.
Hopefully, we’ll meet each other in my next walkthrough for Escape Room – The Mist Chapter 3, with new clues and mini-games to solve.

Aylin is a content creator and co-founder of App Amped. She was a huge Tomb Raider fan before moving on to more casual titles. She spent way too much time tending for her FarmVille farm as well as playing text-based browser games. Now she plays and writes about mobile games, creating in-depth walkthroughs and useful guides.