

Here is the walkthrough for Can You Escape the 100 Room 17 for Level 7 and Level 8, with all the answers you need to solve the puzzles.
The puzzles are engaging and fun, but sometimes you might have trouble finding the right answer. Check out the walkthrough below to see how to solve all and find the keys.
Can You Escape the 100 Room 17 Level 7 Walkthrough
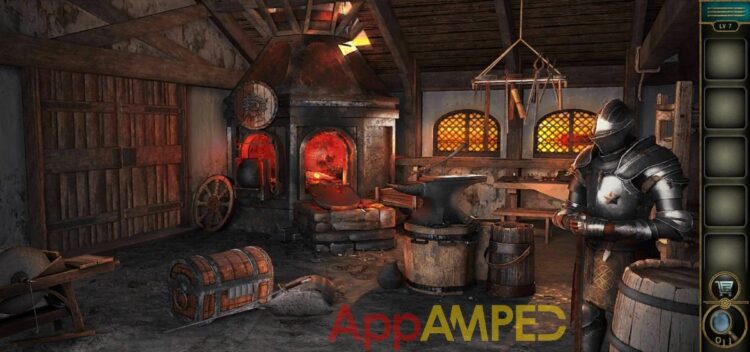
- There’s a star on the knight’s chest.
- A crooked sword next to the chest on the ground.
- Hanging from the ceiling there are some tools and you can get a drawing from there, tongs, and a hammer.
- Use the tongs to get the unfinished button from the fire.
- Put it on the anvil and use the hammer to finish it.
- Then take the hot button and get it in the water.
- On the oven, to the side, there’s a shield, where you can put your button.
- Solve the mini-game by moving the knight using the arrows on the side to get it to the other side.
- Down – down – right – up – down – left – up – right – right – down
- You’ll find a clue paper you can use to find the right symbols on the chest.
- 1 is a star
- 2 is a trapezoid
- 3 is a rhombus
- 4 is 1/4 circle
- Take the scissors out and cut the bag next to the chest to get some coals.
- Put more coals into the fire and add the crooked sword.
- Then press the fire-blower to make the fire stronger.
- Take out the sword and put it on the anvil.
- Straighten it with the hammer and put it in the water.
- Put the sword in the knight’s hands and take the key.
- Use it to move to the next level.
Can You Escape the 100 Room 17 Level 8 Walkthrough
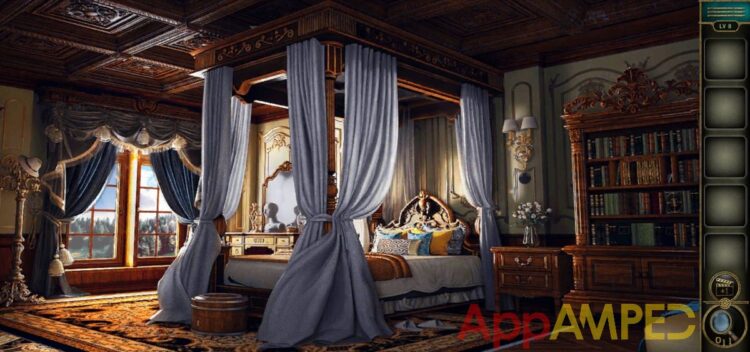
- Next to the slippers by the bed, there’s an iron wire.
- Use it to open the box in front of the bed.
- Take the control knob and the book from inside.
- Put the control knob under the lights next to the bed and turn it on, you’ll see 4F shadow and a piece of puzzle (1/4).
- Take a look at the bookshelf on the right and put the book in the missing spot.
- Switch the books around to correspond with the pictures above them:
- Note – Feather
- Bee – Flower
- Rabbit – Carrot
- Man – Woman
- Boat wheel – Lighthouse
- Take the telescopic stick and the puzzle piece (2/4)
- Check above the bed and use the telescopic stick to get another puzzle piece (3/4)
- Also, notice the 2C on the side.
- At the window, there’s a 3H.
- Take a look at the make-up desk, and use the star earing on the mannequin’s head to get a star.
- In the mirror, you can see another clue 1B.
- To open the drawer here use all the letters in the right order: BCHF
- Get the rope and the last puzzle piece (4/4)
- Take the puzzle pieces to the box in front of the bed.
- Move the colors by using the arrows and turn all the pieces blue, then all the pieces green.
- The Blue arrow jumps every two pieces: 1-3-5-1
- The Green arrow jumps every three pieces: 1-4-1
- Get the necklace and put it on the mannequin’s neck.
- Take the diamond and put it at the window next to the others.
- Tie the rope on the hook and finish the level by getting out the window.
Wrapping up
More walkthroughs await you for Can You Escape the 100 Room 17 game, where I can help you solve all the puzzles you encounter.
Come back for more clues and walkthroughs for the next levels. The puzzles are new and fun to play.
Other articles to check:
- Escape Game Lost Hospital Walkthrough Chapter 1
- Can You Escape the 100 Room 17 Walkthrough: Level 1 – Level 2
- Can You Escape the 100 Room 17 Walkthrough: Level 3 – Level 4
- Can You Escape the 100 Room 17 Walkthrough: Level 5 – Level 6
- Can You Escape the 100 Room 17 Walkthrough: Level 9 – Level 10

Aylin is a content creator and co-founder of App Amped. She was a huge Tomb Raider fan before moving on to more casual titles. She spent way too much time tending for her FarmVille farm as well as playing text-based browser games. Now she plays and writes about mobile games, creating in-depth walkthroughs and useful guides.