
Here we are again with Legacy 4 Tomb Secrets chapter 2 walkthrough. It has all the answers and solutions you need to solve this from top to bottom so you can advance to the next chapter.
As you could see in my last walkthrough for chapter 1 of Legacy 4 – Tomb of Secrets, some of the puzzles require some extra steps in order to get solved.
But you don’t have to worry as I made sure to guide you step-by-step through the whole labyrinth of games and puzzles and solve them all so you won’t have too much trouble with them.
Legacy 4 Tomb of Secrets Chapter 2 Walkthrough
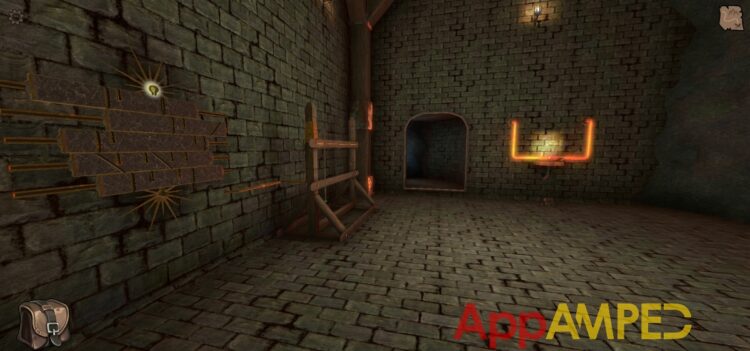
- Now that you’ve gone through the tunnel behind the fancy door, you need to solve the puzzle on the left.
- Align the spaces so the light falls to the bottom one without meeting any end of the road.
- To the right of this puzzle, there’s an arrow you can take.
- On the right of the tunnel (or left depends how you) there’s a narrow tunnel through the cave.
- Put the arrow in the arrow launcher and aim at the middle of the eye on the other side.
- Go inside the cart and drag the sphere so the beam faces the other way and the cart starts moving.
Note: If you don’t manage on your first shot, don’t worry just go back to Main Menu and into the game again and the cart will magically reappear.
- On the other side, you’ll find a new room through a tunnel.
- Above the doors, there’s a light that has a lid.
- Remember the pattern: * – * — *
- Go to the bridge and enter that pattern and pull on the lever.
- Stairs are coming to the bridge area that you can use to go down.
- Go read the letter to the left.
- Then go to the giant skeleton head and remember the pattern of the holes on its snout.
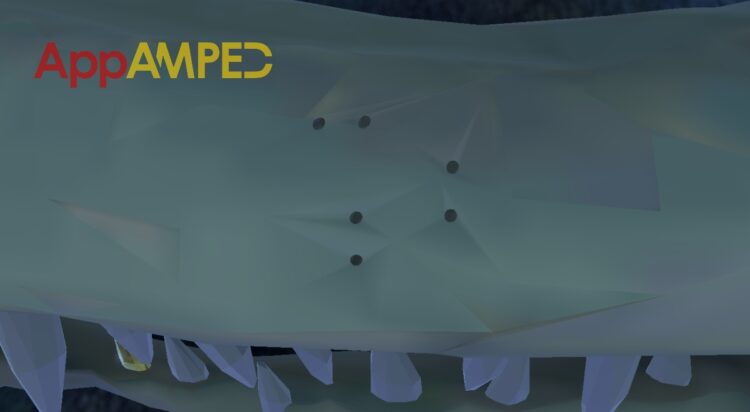
Note: You can take pictures of details like this that you want to remember later.
- Go to the panel by the water and push the following buttons:
- Row 1: 1 and 2
- Row 2: 4
- Row 3: 2 and 4
- Row 4: 2
- A bridge will start moving toward you.
- Go to the arrow shooter and aim at the moving discs to stop them from moving, and let go to match the same sequence as the other two moving discs.
- The symbols above the door change, and if the discs are in sync they will all show the chain symbol at the same time and open the door.
- After you go through the tunnel you can move in the middle, turn around and look up.
- The pattern of the vines through the squares on the walls is what you must enter on the panel in front of you.
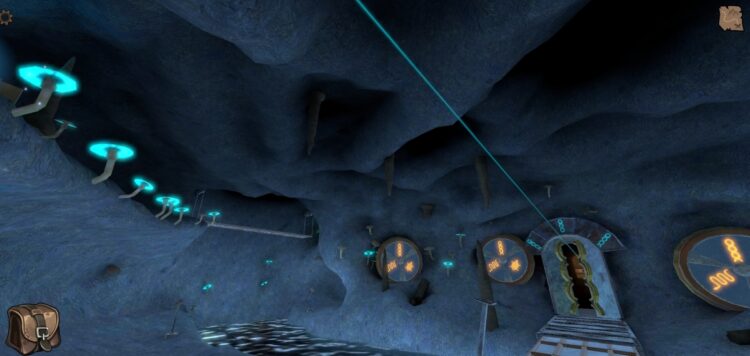
- 4 beams will show up and you need to go to the disc on the left (as you look toward the exit) and move the shortest beam to go through the tunnel on the other side.
- Follow the beam and take the omega key under the orange crystal.
- Use the omega key where you found the letter on your right.
- Go over to the arrow launcher.
- Aim the beam somewhere above the highest glowing mushroom on the left wall.
- Now you can go over the bridge to find a flower key.
- Go back down, go to the beam launcher to take back the beam (make sure the bridge is down) and aim it at the first mushroom, under the previous one.
- Go to the other side of the bridge and press the up button.
- Now you can go over the bridge in another little cave that has a tunnel.
- You probably didn’t pay attention to the stalactite and stalagmite, or the golden teeth of the skeleton head in the other room, so here they are for this next puzzle.
- Stalactites and Stalagmites:
- Use this image for the pattern on the left side and make them look like this.
- Now use the teeth image for the pattern on the right.
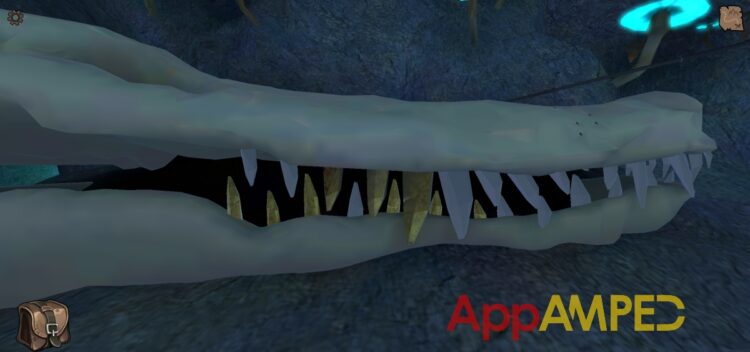
- This is how they should look in the end.
- Go to the hatch and pick up the rock.
- Then go to room 13 via maps and drop the rock in the round hole.
- Go back to room 16 and press the arrow up, wait for it to stop, then press the square button.
- In room 15 you have the clue on the wall.
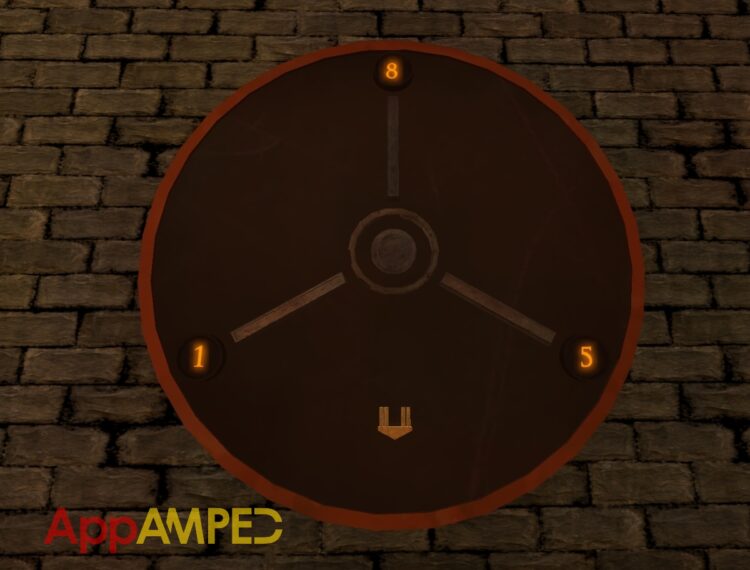
- So now go to room 13 to the middle of it.
- And as you face the snake by the panel in front of you, pull the handle up once.
- Move to the right and pull the handle up 8 times.
- Again to the right and pull it 5 times.
- Now you can go through the doors that opened.
- Take the tunnel to the left, behind the barrel.
- Go down the stairs and to the table in the corner.
- Grab the piece of a lantern from the table and the empty bottles.
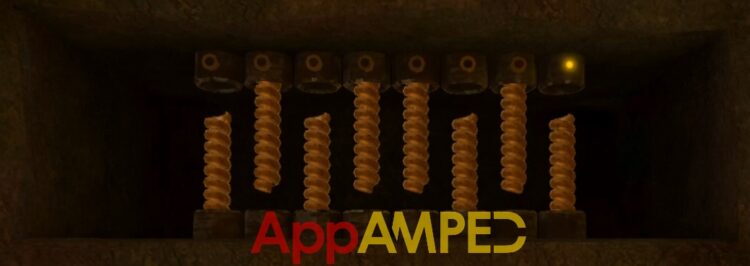
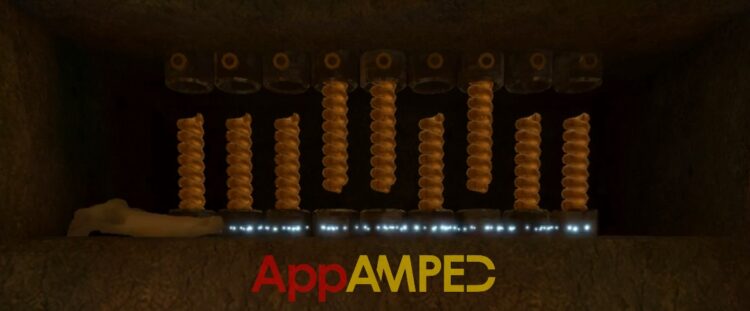
- Now go to room 11 and put the lantern by the glowing pipes.
- Looking at the horoscope sign on the disc you can see that there are some marks that you need to align like this.
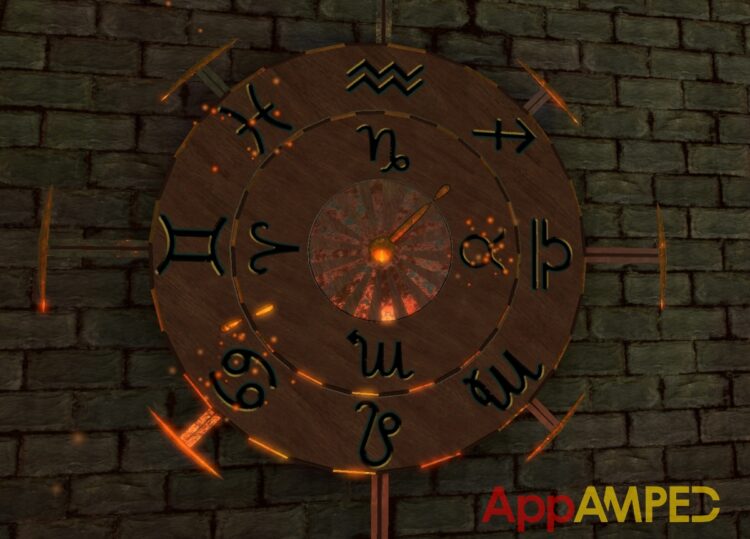
- Now only the Cancer, Gemini, and Taurus are glowing.
- Go to Room 12 and enter those symbols into the panel by the bridge.
- Cross the bridge and take the Ankh key.
- Remember that symbol above the key.
- Go to Room 17 and through the tunnel that goes to the blue crystal and the moon symbol.
- To your right, in the corner, there’s a place where you can put your Ankh key.
- You can go up the stair that lowered and to the panel to solve the puzzle.

- Use the camera to zoom in and see the numbers that are behind the circles that just lowered from your puzzle solving.
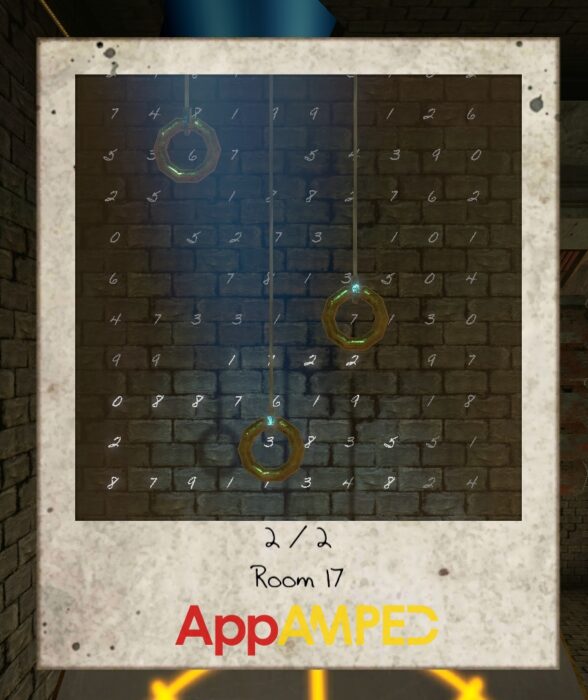
- The numbers 637 are visible.
- Go over the bridge and grab a few pebbles, read the letter,, and go back to the room where the barrel and the sun symbol are.
- Go to the sun and insert the numbers 637.
- Take the Aquarius key and move to the room with a blue crystal with the moon symbol.
- There’s a panel next to the pool of water where you should put the Aquarius key on.
- Go through the tunnel behind the barrel and go down the stairs.
- The numbers 931 are written in the corner where the electricity is fizzling.
- Go up the stairs and write that number at the electricity symbol at the top of the stairs.
- Take the hand drill and use it on the barrel to poke a hole in.
- Now go to the room with the cat statues and push the button of the one with glowing red eyes.
- Next push the button of the one across the first.
- Then the one in the opposite corner and then the one across.
- Go over to the cart and push the arrow pointing forward.
- When it reaches the end look up and press the left arrow so the cart will turn to the right once.
- Now push the forward arrow once.
- Go to the panel on the right and press the button.
- Go back to the cart and press the arrow pointing backward.
- Look up and press the left arrow once, then the backward arrow of the cart to go to the electricity zone.
- Topple over the cart by pressing the arrow to the right.
- Go back and refill the cart again.
- Now when you move the cart back go through the tunnel where the barrel was, but forward.
- Topple the cart over on the other side.
- Go down the stairs and take the hexagonal lid.
- Next to the corner table, there’s another puzzle you need to solve.
- Put the hexagonal frame on and press the I button once.
- Drag the bar over to the smelter frame and press the arrow pointing down to take it with you.
- Go to where the frame was and put it back on.
- Pull the lever and this machinery will make you a metal rod.
- Go with it across from this and use it as a lever and pull down.
- Take the net that comes up, go up the stairs, and use the net right where the water is flowing through.
- Go to the pool of water where the Aquarius key was.
- Use the pebbles and throw them at the eel. Try to aim at it.
- Go back to where you set up the net and take the electric eel.
- Go and put it in the bowl where the electricity was showing you numbers on the wall.
- Remember the numbers 17:3 and fill and empty with mysterious fluid.
- Go to the room where the eel was, in the pool, and put some mysterious fluid inside the sphere.
- Move the sphere to lighten up the numbers and circles on the wall.
- You’ll notice the numbers 894 are circled by the shadows.
- Go to the moon here and insert 894 to open up the box.
- Take the grinding gear from inside.
- Go up the stairs and to the pipe on the right.
- Put the grinding gear here.
- Now go take the cart and bring it back here.
- Set the numbers on the panel you used to fill the cart, to 17:3 and press the button to fill it.
- Take the cart back to the smeltering machine and empty the content there.
- Go down and take the smelter frame and set it on the panel where you put the metal bar first.
- Now make the symbol you’ve seen here.

- With this new frame go to the smelter to make it.
- Take the cast metal item and go to room 12 and across the bridge.
- Put the cast metal item in its spot.
- Go to Room 3 and take the orange diamond and read the letter.
- Go to Room 4 and put the orange diamond in the door.
Wrapping up
And we’re done with another walkthrough for Legacy 4 – Tomb of Secrets chapter 2. We discovered lots of mysteries and solved tons of puzzles.
Meet me back here for my next walkthrough for chapter 3 of Legacy 4 – Tomb of Secrets, with more solutions and answers to all your problems.