

Join me on this Broken Vow walkthrough and explore with me a haunting, lost mystery adventure filled with hidden object games. Solve crimes and difficult challenges, find objects, and encounter unexpected criminal investigation moments.
Explore cursed halls, reveal forgotten memories, solve detective hidden object games puzzles, and discover the truth behind Count Graven, Lydia’s tragic fate, and the restless spirits trapped within the manor.
Broken Vow – Chapter 1 Walkthrough
You need to complete each task given to you to get all the stars and discover the mysteries hidden in this house.
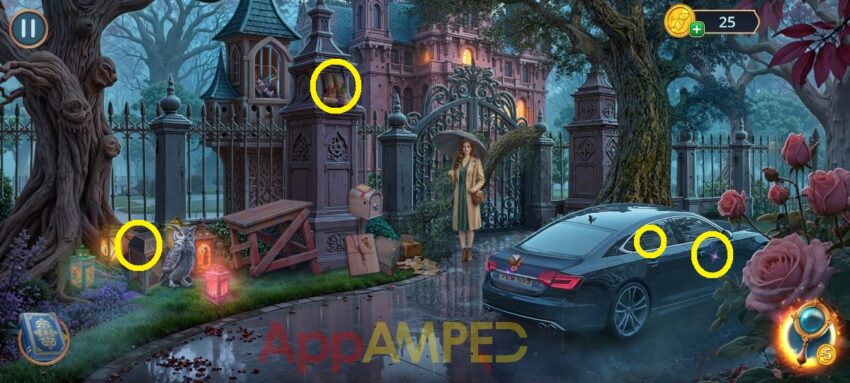
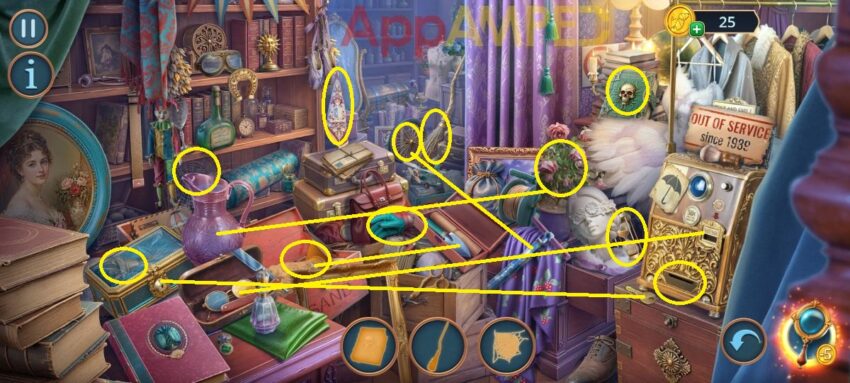
Note for collectibles: There are 10 scrolls on this scene that I’ve circled for you.
Look at the trunk of the car and take the wheel and maple leaf. Look at the car door, take the key, use it to open the door, and look inside. Take the thumbtack box off the board and use it to collect the thumbtacks and get the glue, and notebook.
Take the phone from the suitcase and use the notebook to find the code to open the suitcase: 4613. Read the letter inside, take the driver’s license, and key chain.
Use the key chain to open the glove compartment, take the vampire teeth, and now use them to get the car keys in the driver’s seat. Go outside and use the keys to open the car trunk then find the hidden objects in there.
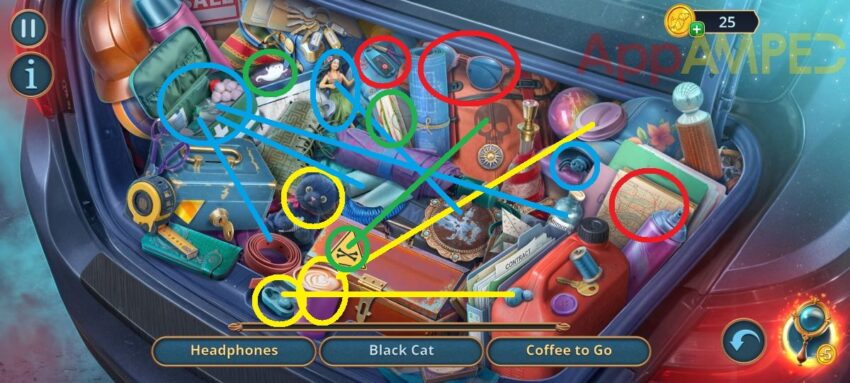
At the end, you’ll get the tow cable that you need to tie on the fallen tree branch and the car to clear up the gate and enter the mansion. You can thank him for the hospitality to earn 2 stars.
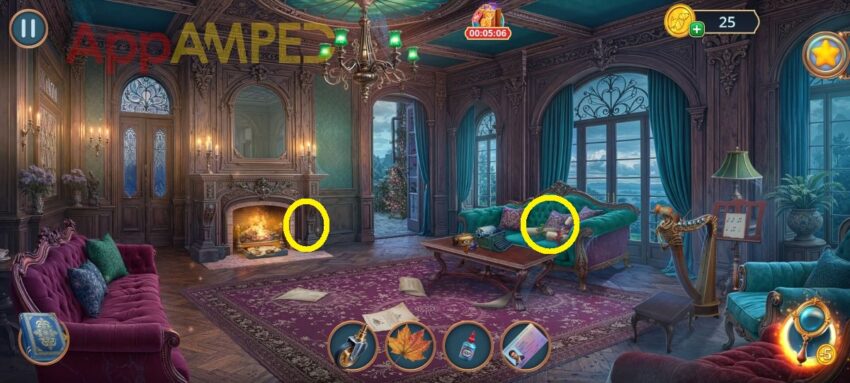
Note for collectibles: There are 5 scrolls on this scene that I’ve circled for you.
Take the bulb and sprayer from the table, then take the tassel. Look at the harp and take the leaky jug, then fix it with the glue. Go out to the balcony, use the tassel to tie the roses and take the skull.
Use the jug to get some water from the broken pipe. Open the valves at the right moment to release water through the pipes. Choose the correct sequence so that the water reaches the end of each pipe at the same time:
- Red – 1 second – green – 1 second – turquoise – 2 seconds – orange
Go pour the water on the fire to get the burnt document, then get ready for the next task and go after the boy.
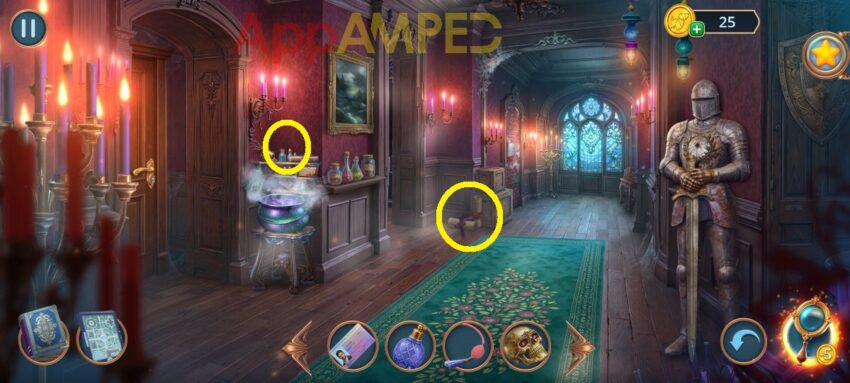
Note for collectibles: There are 4 scrolls on this scene that I’ve circled for you.
Check out the cauldron and read the framed recipe, then take the string (1/3) and the firewood (1/2). Go to the crates further down the hallway, use the ID card to open the cabinet, and find a dry flower.
Go back to the living room, use the skull on the harp, and take the cherry from its mouth. Go back to the cauldron, put the leaf, the perfume, the dry flower, and the cherry in it to make the potion.
Take the hairpin from the edge of the cauldron. Look at the first door on the left, put the burnt document under the door, and use the hairpin to get the key so you can open the door and find all the items.
You’ll find a candelabrum, and can look up at the spider web in the hallway and use that to release the chest. Take the portrait (1/2), the string (2/3), and look at the picture.
Talk to the butler and tell him about the boy, then tell him you want to put the documents in order. Now you can go upstairs to the Count’s Study room and explore further.
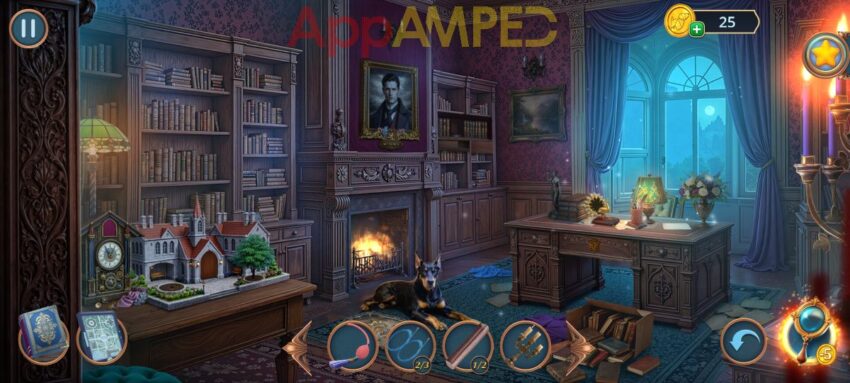
Go to the house model on the left, take the frame part (1/2) and the tie. Check out the dog and clean his tray with the tie to get the feathers. Go to the desk and put the feathers on the peacock to get the comb.
You can go back to the hallway and enter through the second door on your left into the Guest Room. You can explore here to find more clues.
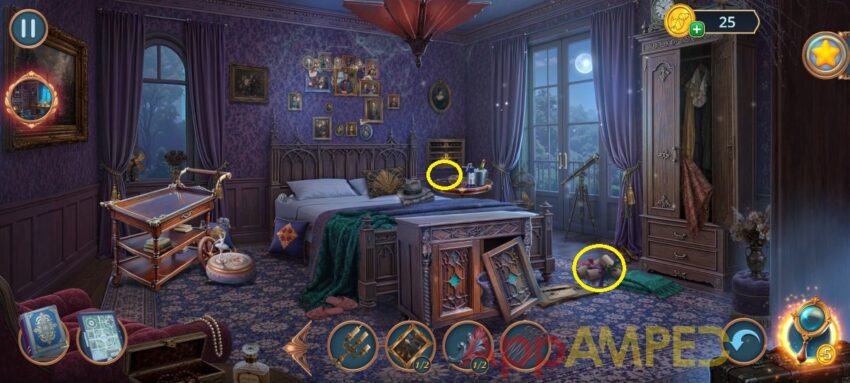
Note for collectibles: There are 5 scrolls on this scene that I’ve circled for you.
Go to the trolley, put the wheel on it to move it, and look under the carpet. You’ll find a wing nut. Look at the cabinet at the foot of the bed and take the corset.
Check out the table near the bed, take the liquid nitrogen, and use the wing nut to open the panel on the wall to find the last string (3/3).
Now go to the living room at the harp and put the strings on it. Memorize the notes of the melody and play them in the correct order.

You’ll find a heavy figurine and a paper clip. Go outside to the car, use the paper clip to open the red wallet on the driver’s seat, and take the cable. Put the phone on the dashboard, put the cable on to charge it, then take it back.
Go to the owl next to the lamps, set the phone to ring to scare the bird away, and get the lipstick. Use the lipstick on the painting under the mailbox.
Now go inside to the living room, to the box on the coffee table, and put the symbol you just saw as a code for it. Take the gauntlet and go to the fireplace to get the firewood out.
Use the wood on the corset to make a support. Go outside and use the support on the wooden scaffolding to reach up and get the flag. Now use that on the mailbox and take the ribbon. Check out the car trunk again and find all the prints to get the jack.
Use the jack to pry open the bars above the mailbox and get the cufflinks. Go to the bedroom and place the figurine, ribbon, and cufflinks next to the cabinet at the foot of the bed to open the door. Take the bracelet (1/2) and shield.
Now use the candles to get a star mold from the bottom of the cabinet. Put the star mold on the wall behind the ballerina box and take the other portrait (2/2).
If you have enough money, you can go check the hallway and earn some stars; otherwise, say you’re tired. You can watch videos to get free coins. I’m going with the no-star option this time.
Look at the wall above the bed and put the paintings there, then find the highlighted words for each text below the paintings.
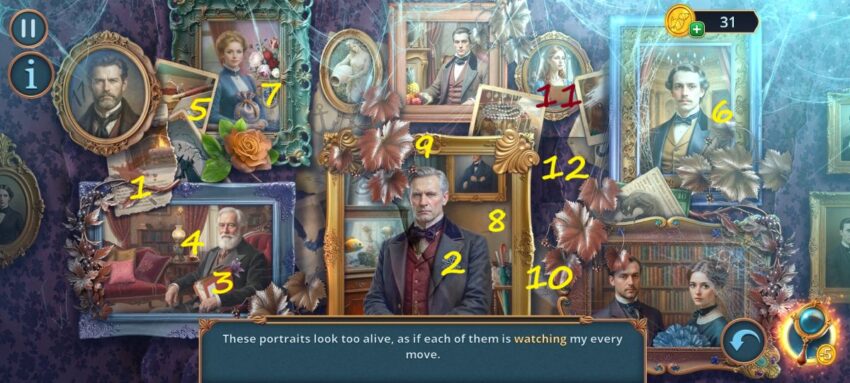
You’ll find a brooch that you can use on the champagne on the bedside table to get the cork. Go out into the hallway, put the shield over the cauldron, put the cork in the hole, and use the sprayer to get some oil.
Then grab the lantern drawing from the shelf. Now use the oil on the armor to the right to get the sword handle. Go outside to the car, use the handle on the side of the driver’s seat to pull the seat back to find a paper knife.
Check out the lamps, use the lantern drawing and the paper knife on the lantern, then take the cast iron and the other bracelet (2/2). Use the hair comb on the crate next to the mailbox to find a screwdriver inside.
Go back to the bedroom and look at the portraits to put the items back in their place. You’ll get a wind-up mouse at the end.
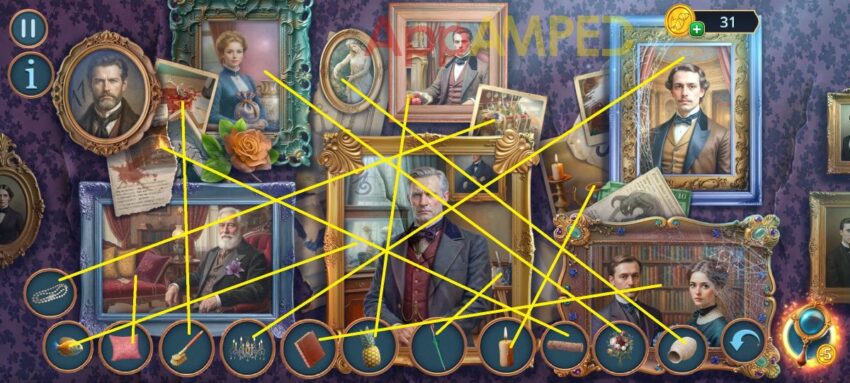
Go put the mouse in the hole in the wall next to the bed to find a ballerina. Put the ballerina on the music box on the floor, then position her like the other ballerina. You’ll get a knight’s crest.
Go out to the hallway and put the crest on the chest of the knight to find the shackles. Go to the office and use the screwdriver on the clock next to the mini house to find a cookie. Give that to the dog to find the last frame part (2/2).
Use the parts on the frame of the painting above the fireplace, and you’ll find a typewriter platen. Go to the living room and put the platen on the typewriter; that will give you a mini tree.
Go back to the office room and put the tree in front of the mansion model. Now arrange the mansion’s room correctly.
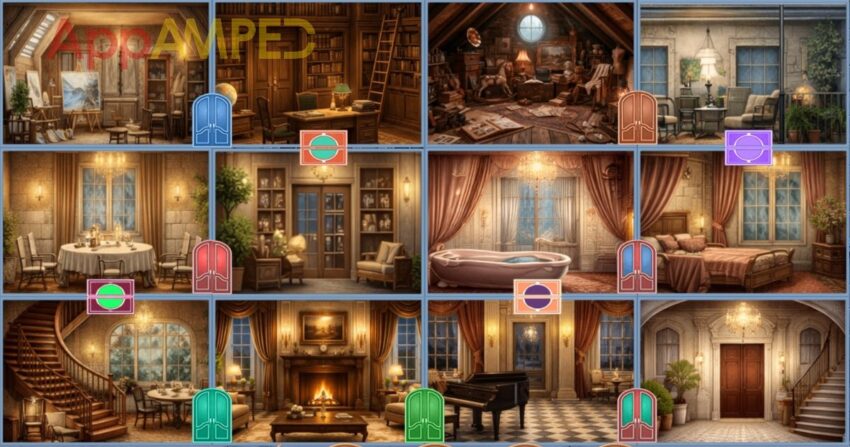
That will give you a book nook that you can put on the bookshelf next to the fireplace. Take the key and use it on the drawer of the desk, then read the note inside.
Go into the hallway and use the shackles on the beam on the ceiling to get the feather duster and a drawing. Now you can enter the room on the left and find all the items requested for each profession.
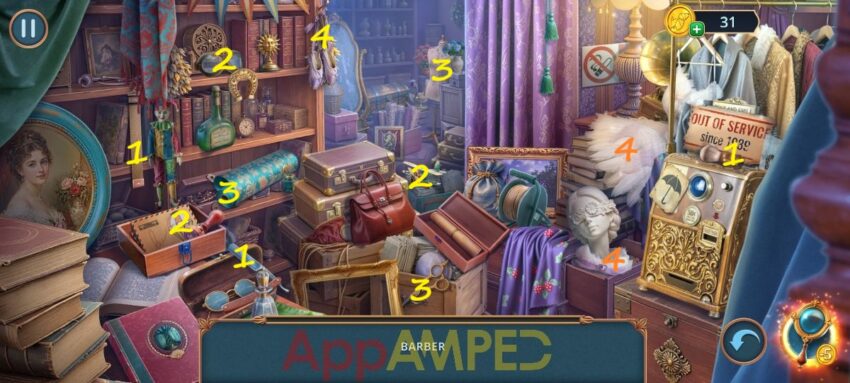
Talk to the boy, and you’ll get a crumpled paper. Open the paper to get the password.
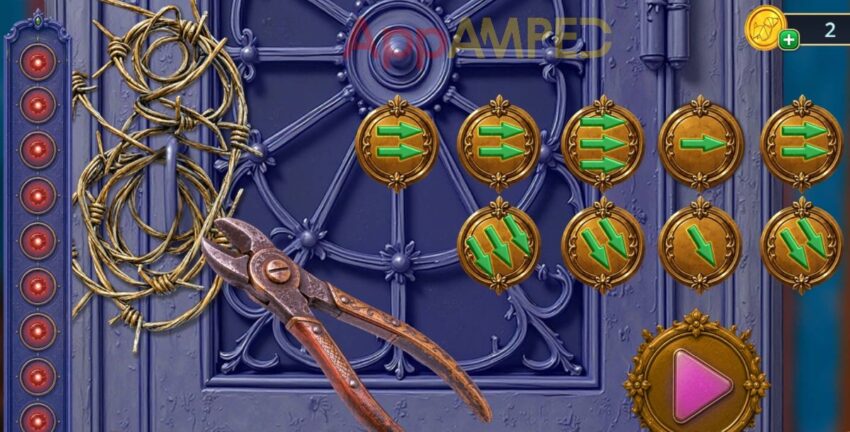
Go to the panel on the wall behind the boy and put the paper with the password there. Now place arrows in the cells in the right places.
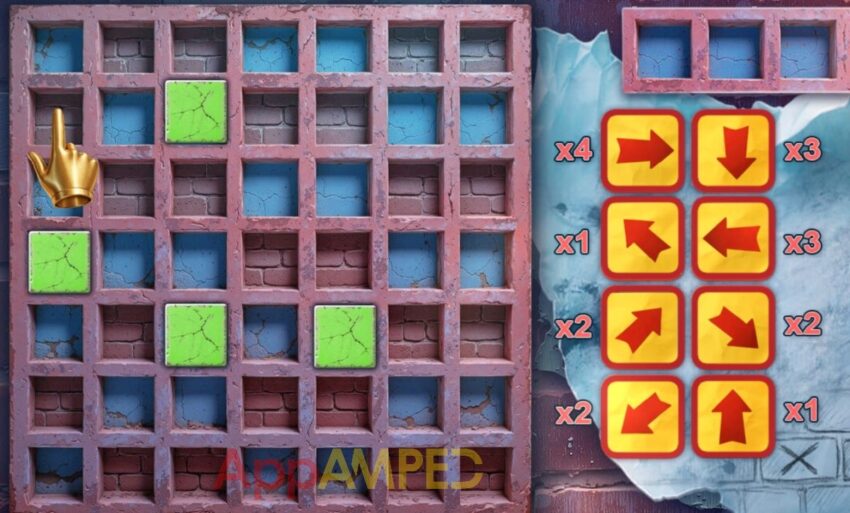
Use the phone to get some light and find the lever to turn on the lights. You will find your way to the stairs.
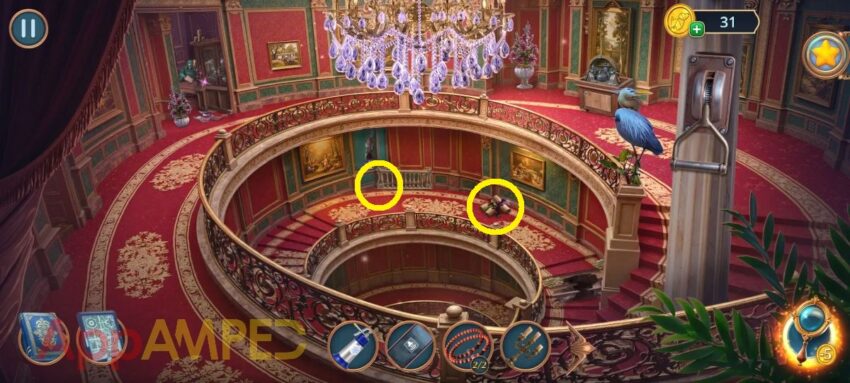
Note for collectibles: There are a few scrolls on this scene that I’ve circled for you.
Go to the skeleton dressed in green on the left and read the note. Take the witch’s hat and put the candleholder in the other hand. Take the saw and look at the witches in front of the crane.
Use the iron to open the cupboard door underneath and take the broom. Go to the bat sitting in the hole in the wall and use the saw to cut the broken railing. Use the bracelets and the broom on the railing to make a ladder.
Now put the ladder over the hole in the stairs to get downstairs and search the reception room for more clues.
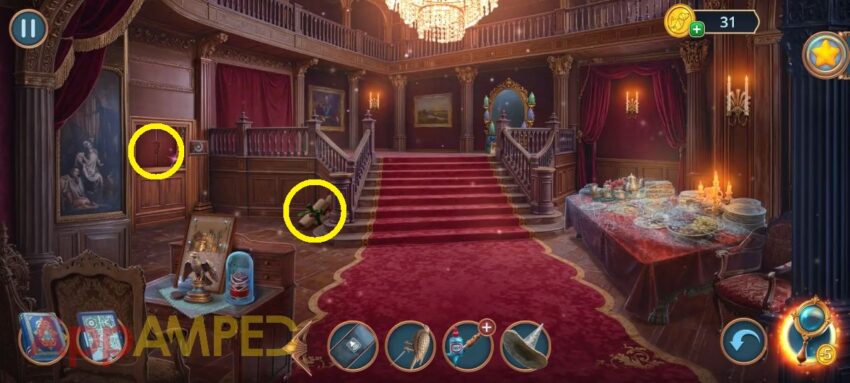
Note for collectibles: There are a few scrolls on this scene that I’ve circled for you.
Take the eagle figurine and jar from the table on the left. Up the stairs, in front of the mirror, take the blueprint (1/2) and raven panel. Use the raven and the glue on the feather duster to fix it.
Now use the duster on the web-filled table on the right to clean it and search through to find all the items needed to get a photo. Look at the broken mirror and use the phone to take a photo of the witches.
Go to the stairs where the witches are and put the photo here to get a wire cutter. Put the hat on the witch’s head. Go to the skeleton, use the wire cutter on the cabinet to open it, and take another blueprint (2/2), a marker, and half an apple.
Give the apple to the bat and guide it through the maze:
- down – right x 2 – up – right x 2 – up – right – up – right – down – right
Take the napkin and hot thermos. Go downstairs to the table on the left. Use the liquid nitrogen on the glass dome, then put the hot thermos over it to get the figurine instructions. Check the right table again and find the differences.
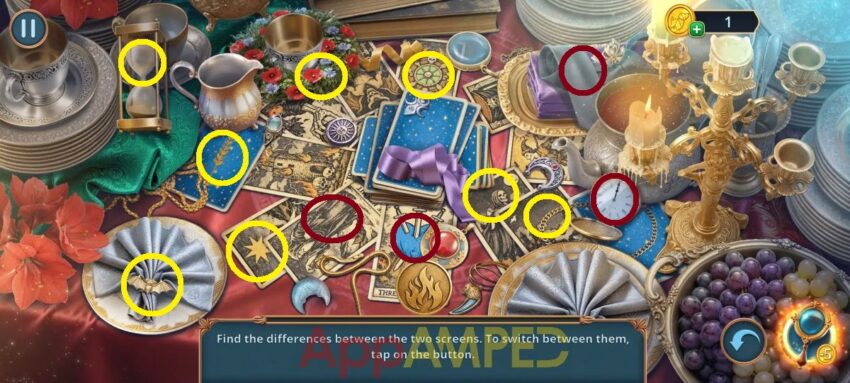
You’ll find a signet ring that you can use on the panel on the left, where you’ll find a board and a glass eye. Put the eye, the napkin, and the marker on the figurine instructions to make a ghost.
Go put that at the bottom of the broken mirror. Place the ghosts so that the chains don’t intersect, then get the magic ball. You can put that on the witch’s staff, then open the cauldron and take the sealed tube, the nail clippers, and the bow tie.
Go to the reception room and use the bow tie on the chains on the panel to your left. Rotate the circles to get the pins to reach the center. Take the monocle and open the tube with it and the brooch.
Take the silver pin, then put the blueprints on the board on the table and fix them with the pin. Navigate the house without falling into traps:
- 1 – 5 – 3 – 4 – 6 – 2
Ask the boy where Jarrett took her. You’ll find a garden drawing and move to Chapter 2.
Broken Vow – Chapter 2 Walkthrough
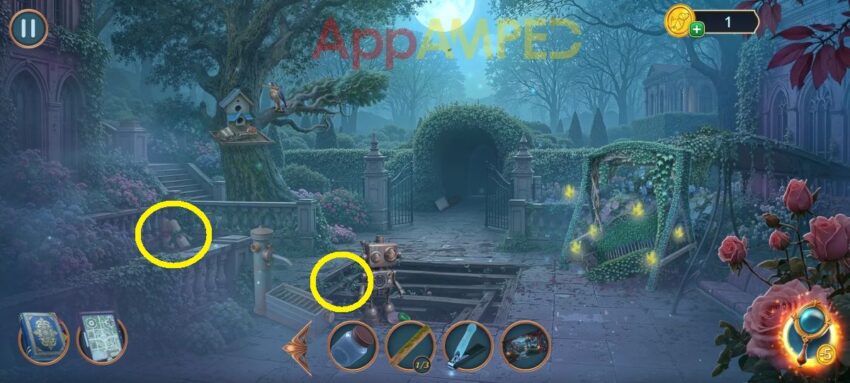
Note for collectibles: There are a few scrolls on this scene that I’ve circled for you.
Look at the robot, take the gemstone (1/2), and jar lid. Look at the swing and use the jar and jar lid to get some lit butterflies. Use that to get some light under the canopy to find a note, a wheel part, and a scarf.
Use the scarf on the bird’s nest in the tree to find a labyrinth map, then use it to go through the labyrinth under the arch:
- up x 2 – right x 3 – down – right – down x 2 – right – down – right – up – right
You’ll find the Maze Garden and make sure the garden picture is a match with it.
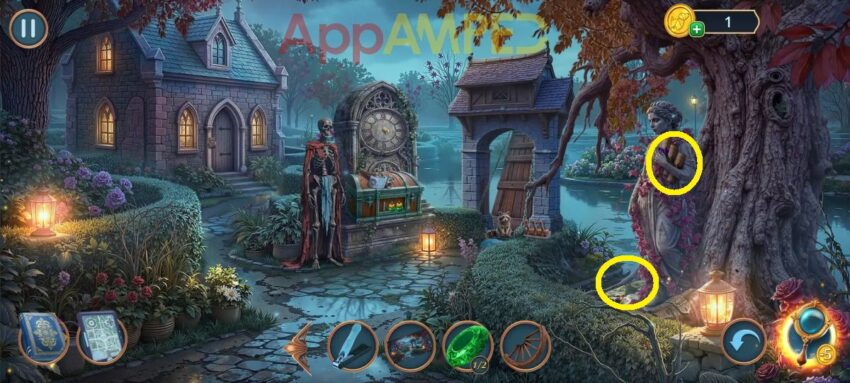
Note for collectibles: There are a few scrolls on this scene that I’ve circled for you.
Check out the skeleton, read the note beside it, and take the spear tip. Look at the statue’s feet, then use the eagle and the spear tip to break the rock, then take the saucer and the gemstone (2/2).
Back to the skeleton to put the gemstones on the chest next to it. Rearrange the stones.
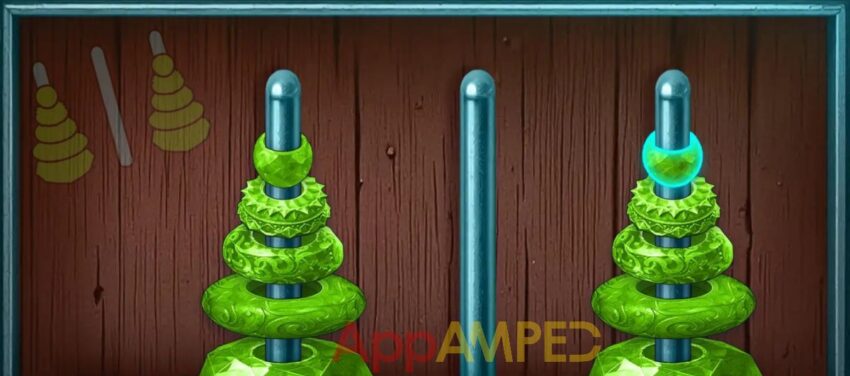
Take the ribbon and the strawberry, then go to the raccoon and give it the strawberry. You’ll find hand cream after he leaves. Now check out the house and put hand cream on the lock to open the door.
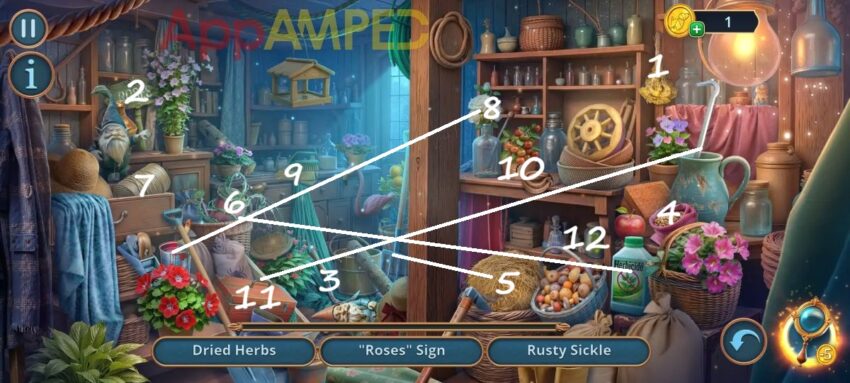
You’ll get the clock hands that you can use on the clock next to the skeleton to move in the past and explore the old maze garden.
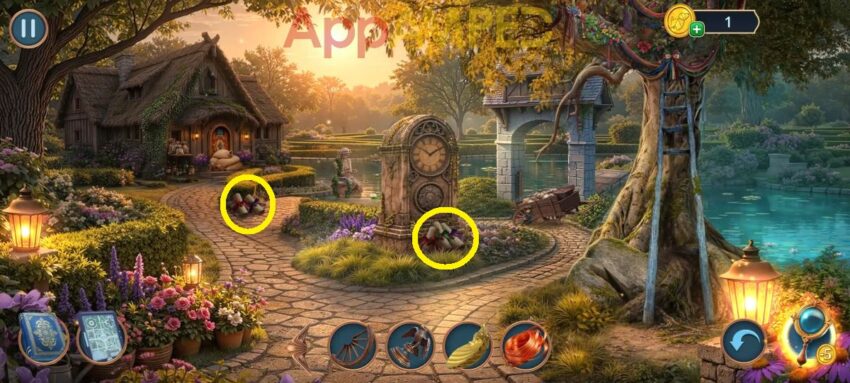
Note for collectibles: There are a few scrolls on this scene that I’ve circled for you.
Check out the broken cart, read the note, take the rope, and the stone butterfly. Go to the house, use the nail clip and remove the bags, take the board and stone butterfly (2/2). Now go to the statue by the pond, put the butterflies in her hands, and solve the puzzle.
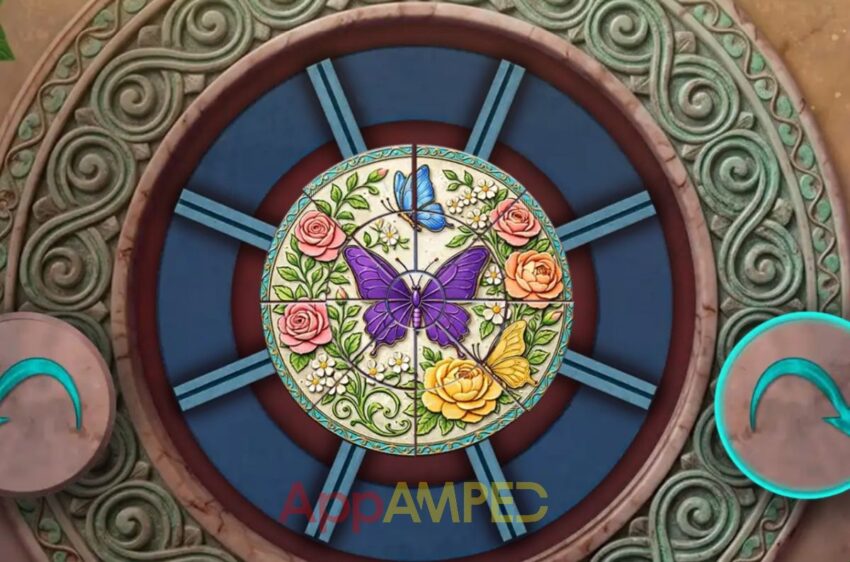
Take the ink and the magnet. Use the magnet on the cracked rock under the tree to get the knocker. Then go put that on the door and assemble it correctly to open the door and meet Margaret.
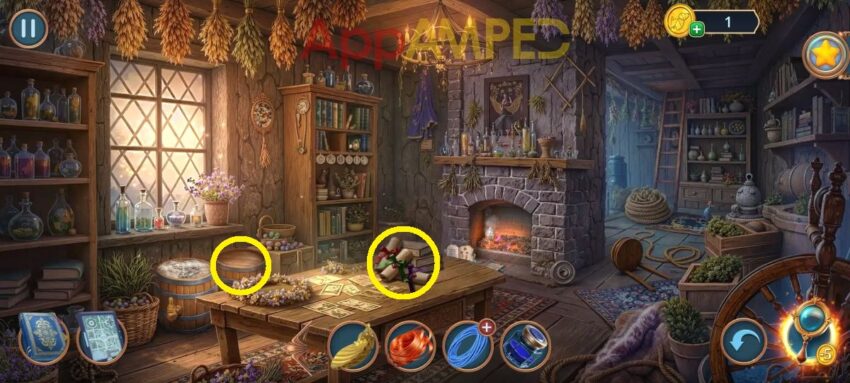
Note for collectibles: There are a few scrolls on this scene that I’ve circled for you.
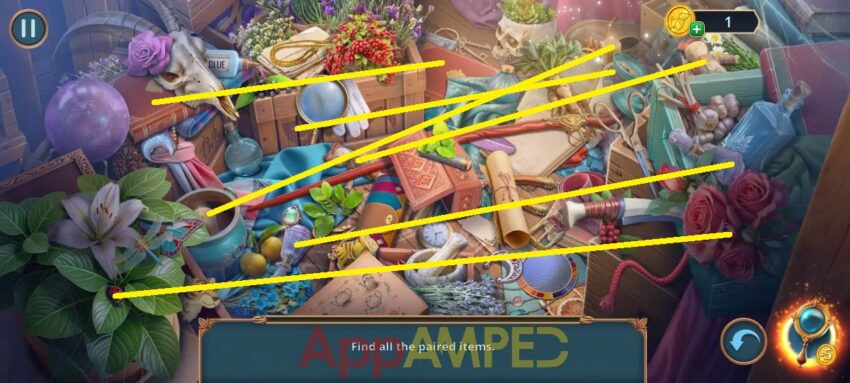
Go to the ladder and use the eagle to get the nails and open the door. Now pair the items in the attic.
You will find some herbs here. Use them to clean the webs on the barrel, take the iron and the key. Use the key to open the lock on the book on the bookshelf, then open it:
- right 20 – left 30 – right 50 – left 80 – right 40 – left 70
Take the suction cup and the napkin. Check out the fireplace and read the note. Take the metal part and look in the book to learn about the silent root potion. Use the napkin and the ribbon on the metal part to make a net.
Go outside to use it on the pond to find a board, a sponge, and a lasso. Go to the tree and put the boards and nails, then use the eagle to fix the ladder to go up the tree to find all the items.
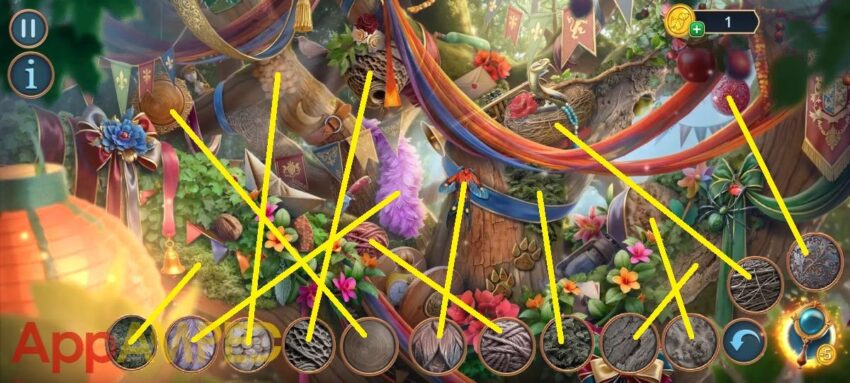
You’ll find a belt. Use it on the cart with the half wheel to move it to get to the Old Fountain Walkway.
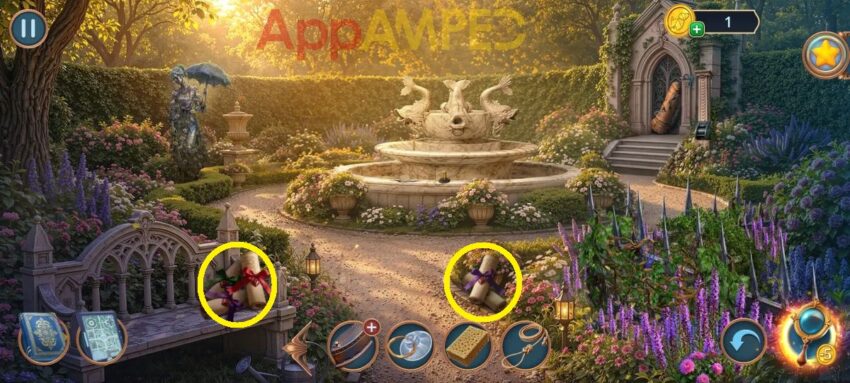
Note for collectibles: There are a few scrolls on this scene that I’ve circled for you.
Look at the fence on the right, take the clothespin, then go to the fountain, read the guest list, and use the clothespin to get the coin from the edge. Go to the statue and use the coin to open the screw to get the handle.
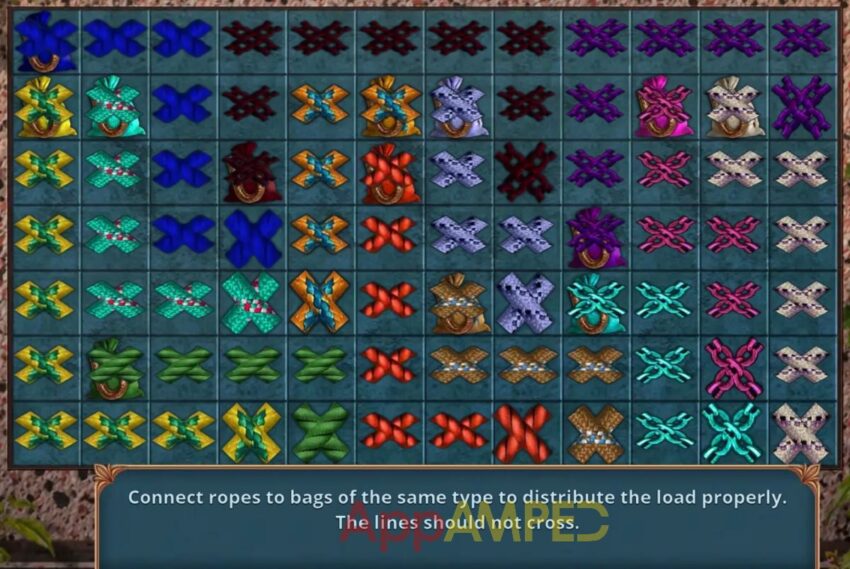
Put the handle on the rope and use the hook you made to lift the column under the archway. Connect the ropes with the bags so the lines don’t intersect.
Go through to find the Old Von Graven Crypt and explore it to get more clues.
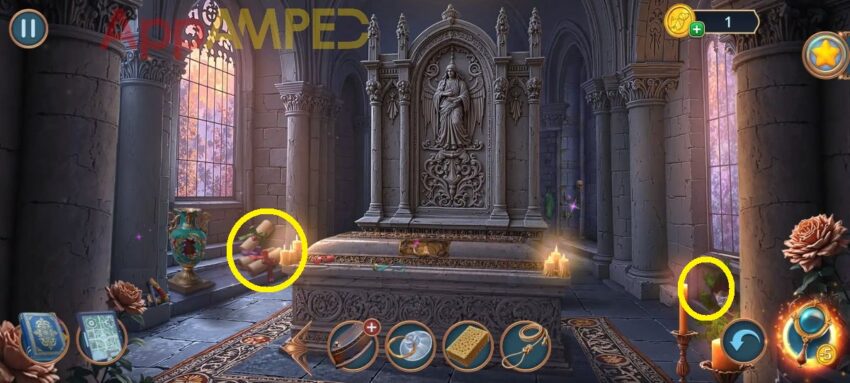
Note for collectibles: There are a few scrolls on this scene that I’ve circled for you.
Check out the vase on the left, take the broken knife, and the symbol (1/2). Look at the mouse on the right, use the shell to remove the moss, and find another symbol (2/2). Go to the grave, put the 2 symbols on the bird to open it and collect the flowers.
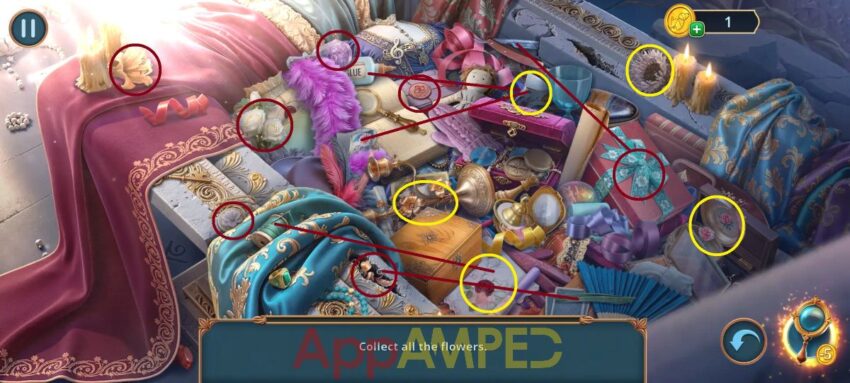
You’ll find a diadem, use it on the column next to the vase on the left to find the oil, and the ring. Use the ring on the right side to cut the bottle in the wall and use the suction cup to take the glass out. Read the note, take the screw (1/2) and pendant (1/2).
Now you can choose to go to the Row through the secret door.
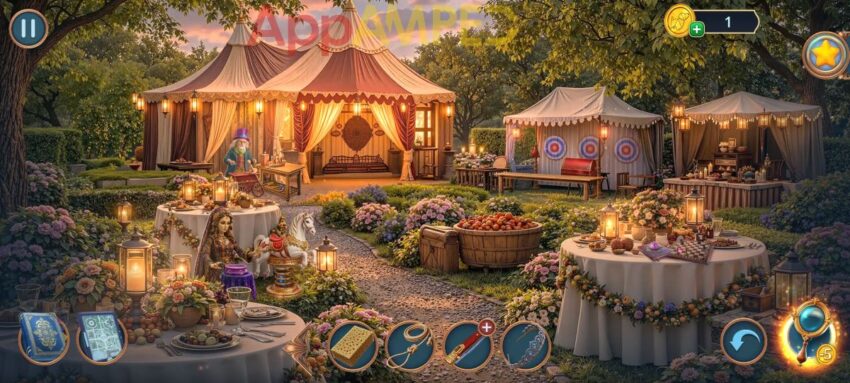
Check out the old man by the tent, take the sword. Go to the tent with the targets and use the sword to get the bag, then take the crystal ball from it. Go to the fortune teller on the left and put the crystal ball here.
Take the carving instructions and go back to the old man, then put them there on the table to make a chess piece. Go put that on the chess board on the table to your right.
You’ll find a salt crystal. Go back to the future in the Maze Garden, check out the house again, and look for the items in the pictures. You’ll get a cufflink.
Use that at the feet of the lady statue to open the bag, take the button and stencil from here. Go to the levers by the wooden gate and put the stencil here, the sponge, and the ink.
Place the elements so that they match the stencil pattern in the correct order. Now you can go over the bridge to reach the Old Dead Tree.
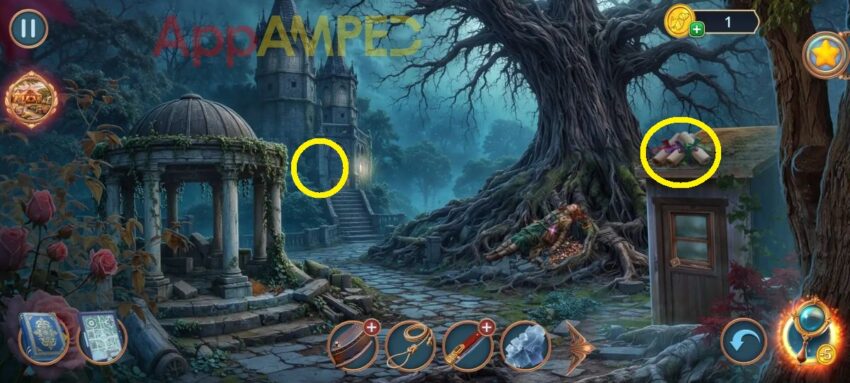
Note for collectibles: There are a few scrolls on this scene that I’ve circled for you.
Go look at Samantha and take her hair. Check out the hut on the right and look at the photo. Look at the castle in the back; use the lasso to get the scoop and the forceps.
Go to the pavilion on the left, use the scoop to get the dirt out, and find a button. Put the button on the broken knife.
Go to the Old Fountain Walkway and use the knife on the fence to the right to cut the weeds and take the coin. Use the coin on the nub on the edge of the fountain to start the water and get the handle and the pendant (2/2).
Drop the salt crystal in the water to get a throwing knife. Put the pendant on the necklace of the statue, then arrange the pieces so they form a circle, and you’ll find another handle.
Go to the terrace, use the last handle on the water pump, and get the glove. Check out the bird in the tree and use the glove to lure the falcon by choosing 3 sectors of the same color.
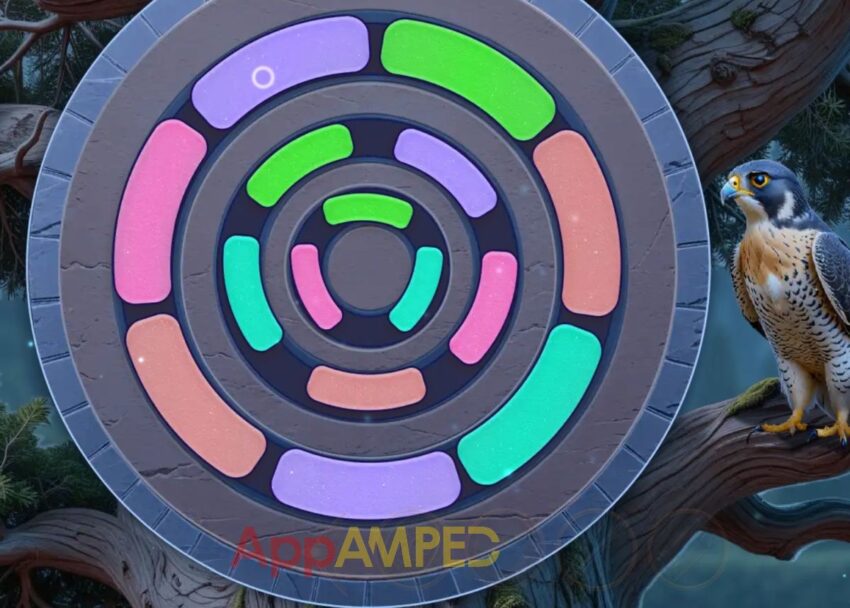
You’ll get the sugar tongs and go to Healer’s Hideout, then use them to get the metal smoker. Look at the bookshelf and put the metal smoker on the shelf. You will find threads, and you can go check out the attic again.
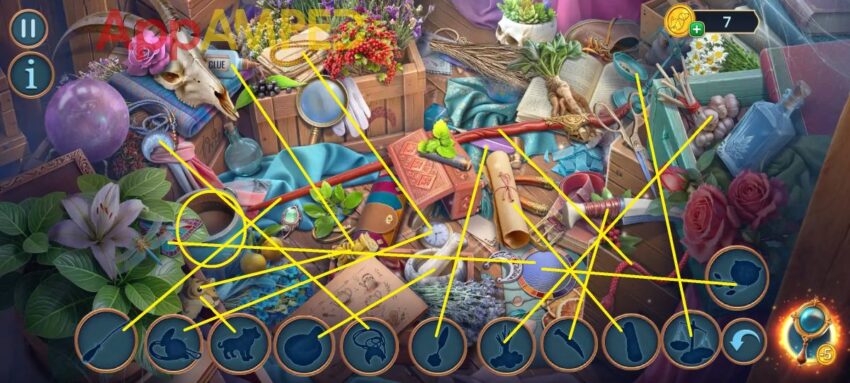
You will find bay leaves. Go to the fireplace and put the bay leaves, the hair, and the thread to make the potion.
Go to the Old Festival Row and use the throwing knife on the target. Repeat the symbols for each dart.
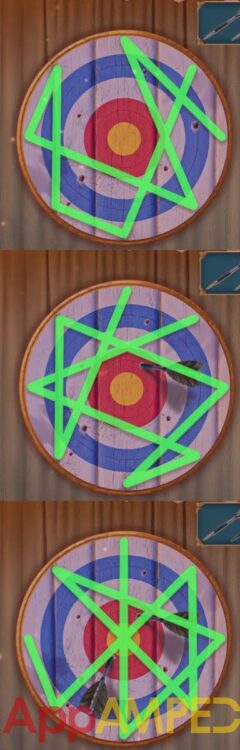
Take the street organ and give it to the old man. Take the hat from him. Go to the old Dead Tree and check on Samantha, then give her the potion. Count the symbols and enter the code 42324.
You’ll get a broken ball. Go to the scorpion under the pavilion and put the hat over it to get the spreader. Look at the roots of the tree and get the stick. Look at the window of the hut and use the stick to open the window.
Take the broken ship and the shard. Go to the Old Festival Row and use the spreader on the spring next to the fortune teller to reach the magic butterfly. Go put the butterfly on the rose lock on the table to the right.
Read the letter and go back to the crypt to check the grave and find the differences between the two screens, and you’ll find a lock.
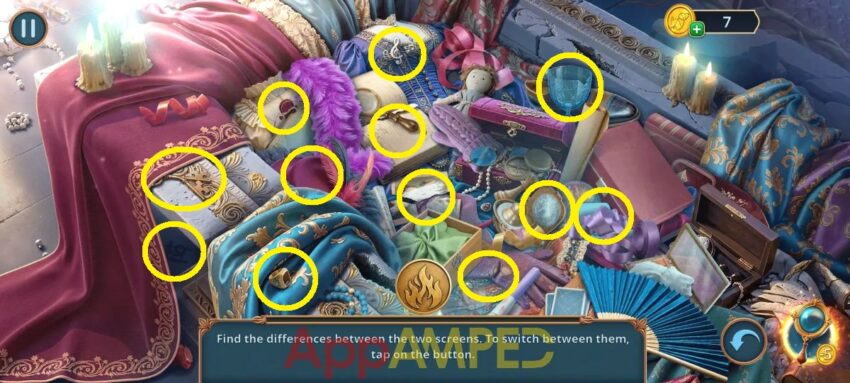
Go to the Terrace and use the lock on the swing to reach the mushroom treat. Now go to the Crypt and give the mushroom to the mouse. You’ll find a skull (1/3) and a vase hint. Use the hint on the vase to the left and assemble it.
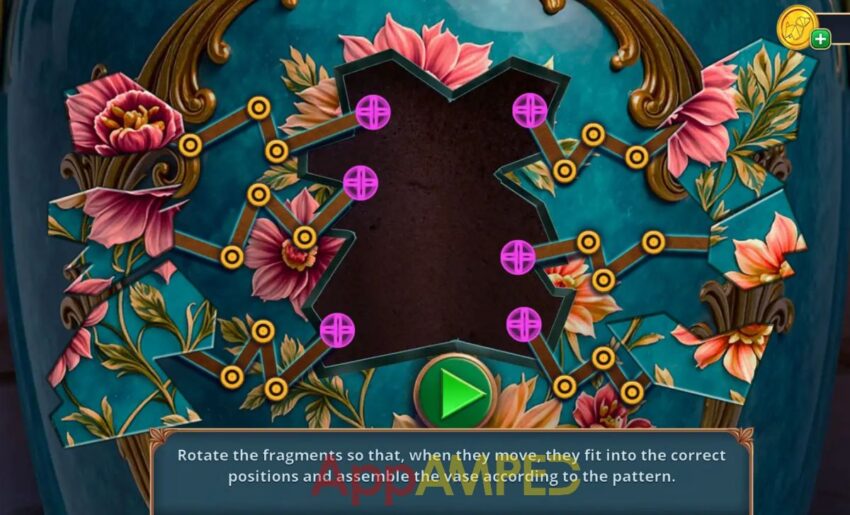
You’ll find a fur rug. Go outside to the old fountain and put the rug over the spiked fence to reach the glue. Use the glue and the shard to fix the broken crystal ball.
Margaret will tell you the code 1854 that you can use on the barrel in the Healer’s Hideout. Move the token using the arrows to reach the green spot.
- left – down x 2 – left x 2 – down x 2 – right – left – right x 2 – up x 2 – right x 3 – up – down – up – down – right x 2 – up x 2 – left x 2 – down – up x 3 – right – left x 2 – up – left – down – right – up – left – down – right – left x 3 – right – left x 3 – right – left – down x 2 – left – right – up x 2 – down x 3
Take the spur and the screw (2/2). Use the screws and the handle to fix the iron. Go to the fireplace and fill the iron with coals.
Go to the Terrace and use the iron on the amber at the birdhouse to get the mechanical heart. Use that on the robot here, then put some oil so he can move. Take the mast wind and use it to help broken ship.
Go to the Old Dead Tree and put the ship on the board in the hut. Move it through all the red points.
- Red boat: up x 2 – right – down x 4 – right x 3 – up x 4 – left – down x 3 – left – up x 3
- Blue boat: right – up x 2 – left – up x 2 – right – down – right – down x 3 – right x 2 – up – left – up – right – up – left – up – left
Take the cigar case and the soldering iron. Use it on the gates of the palace to open it and find the rake. Use the rake on the weeds at the root of the tree to find another skull (2/3).
Go to the Old Maze Garden and check out the tree and answer all the riddles by finding the items answering them:
- 1. I write without a voice, yet stories I tell. – feather
- 2. I hang on a branch and fall when I’m ripe. – apple
- 3. I measure time, but I never move. – hourglass
- 4. No beginning, no end, yet I am complete. – ring
- 5. I make sound without a voice when air passes through me. – trumpet
- 6. I hold what flows, yet I do not drink. – bottle
- 7. I tick away your moments but never rest. – clock
- 8. I burn without flame when filled and lit. – lamp
- 9. I grow on a tree, sweet and green, shaped like a drop. – pear
- 10. I hide a secret inside a hard shell. – walnut
- 11. I ring without a tongue when wind moves me. – bell
- 12. I sit on branches but never fly. – bird
You’ll get a valve. Use it at the Healer’s Hideout on the barrel to find the last skull (3/3). Go put all the 3 skulls in the crypt on the hooks on the right. Select the fragments to complete the one in the middle.
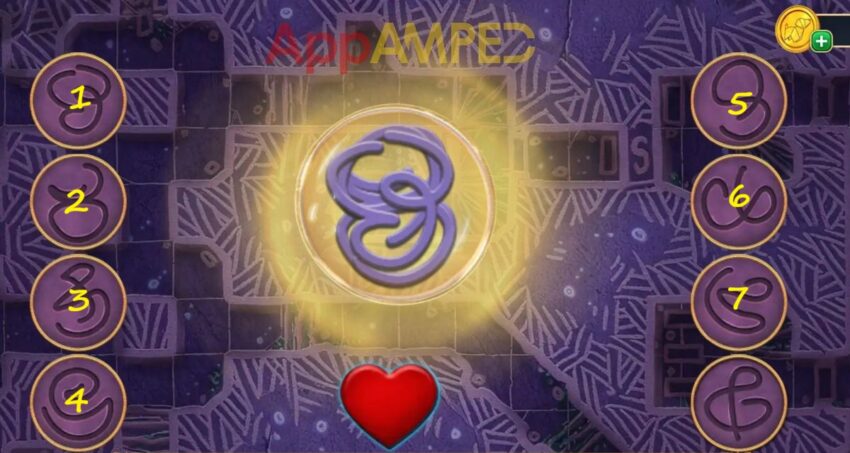
- 1+2+5
- 3+6+7
- 2+3+5
- 3+6+8
- 1+4+7
Broken Vow – Chapter 3 Walkthrough
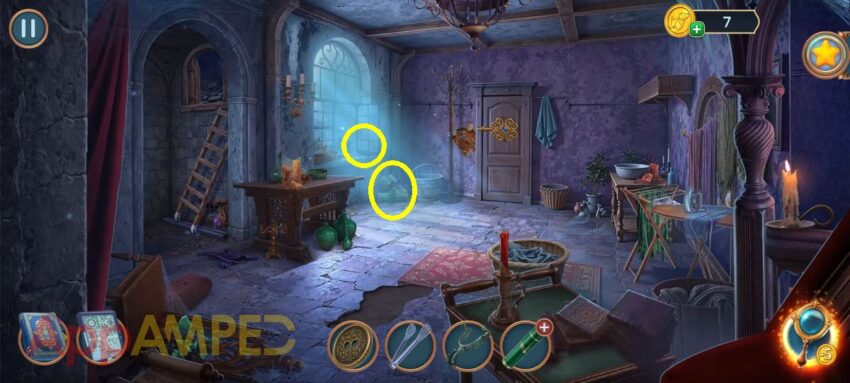
Note for collectibles: There are a few scrolls on this scene that I’ve circled for you.
Look at the bottom of the ladder, take the pendant lace and the tape. Use the forceps to get the iron cone from behind the grill. Next to the door in the front, there’s a flint and steel in the wall.
In its place, put the iron cone and use the spur to take out the brick to find a wheel and pliers there. Check out the ironing board on the right and use the pliers to remove the nail holding the covers. Find all the items needed.
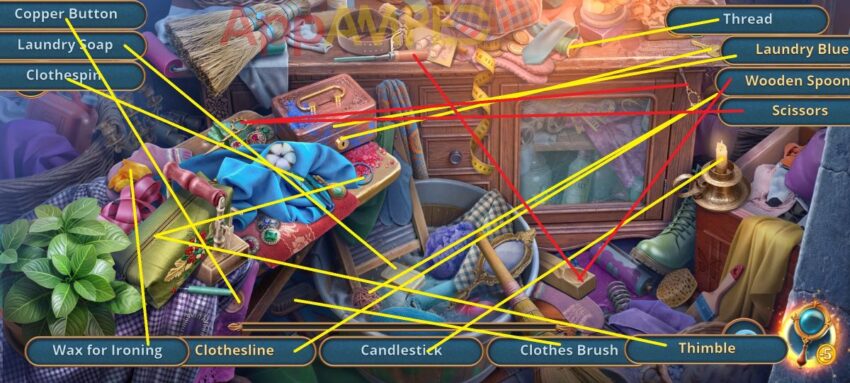
You’ll find a spinning top. Go to the ladder, use the wheel and the spinning top to fix it then tap the buttons in the correct order to position the ladder directly under the hatch:
- +15 -10 +5
Go through the secret passage into the Secret room and explore.
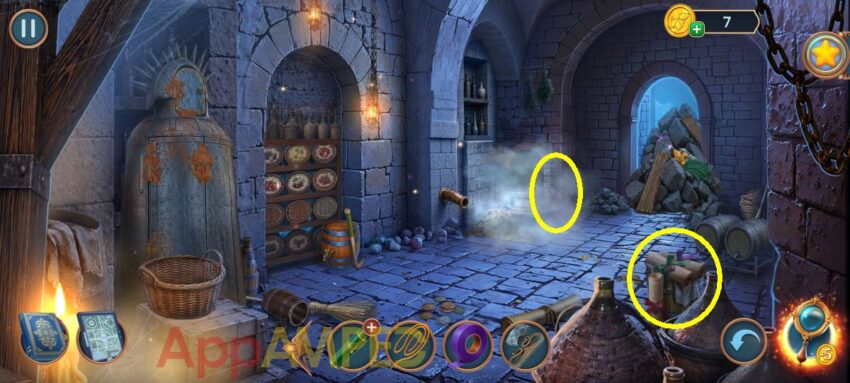
Note for collectibles: There are a few scrolls on this scene that I’ve circled for you.
Look at the barrel and take the cricket bat. Check out the rocks in the door and take the curtain holder and the gold pattern (1/2). Use the cricket bat to move a rock to find a barrel tap.
Put that on the barrel and use the button to open it. You’ll find a saltpeter behind. Put the saltpeter and the pendant lace on the cigar case. Put the explosive on the rocks and light it with the flint and steel to clear the way to the Count’s Study.
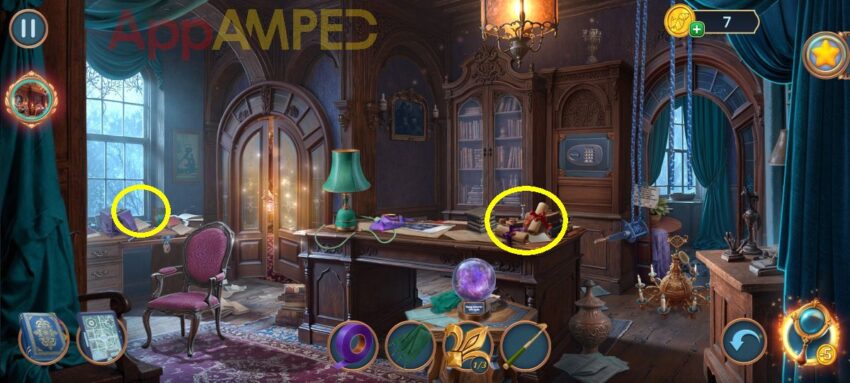
Note for collectibles: There are a few scrolls on this scene that I’ve circled for you.
Go to the right window, read the recipe, and you’ll need lemon, salt, and milk. Take the scissors and the hairbrush. Use the curtain holders on the chain to lift that item, and search the table to find the place for each object below. Take the lamp button.
Look on the desk in front, take the tie, the wine tag (1/3), and use tape to fix the cable. Use the lamp button to turn it on and get the key. Use the key on the lock for the desk on the left.
Take the rattle and go to the Secret room. Use the tie and the rattle to stop the steam. You’ll find a wine tag (2/3), a gold pattern (2/3), and anti-rust foam. Use it on the tomb to the right to open it and get another wine tag (3/3).
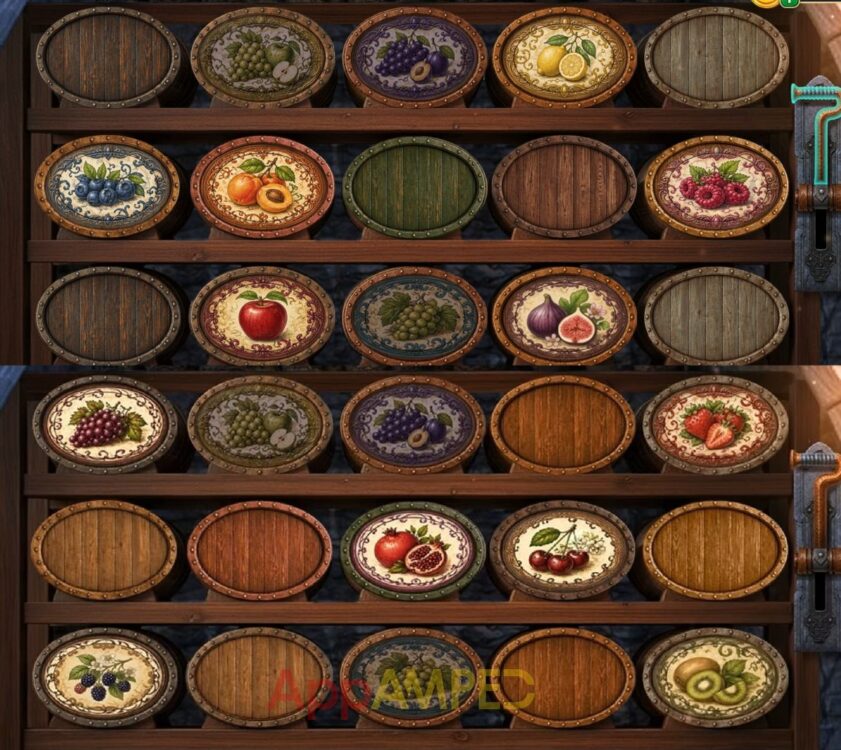
Put the wine tags on the barrels here and label them according to their contents.
Through this secret door, you’ll find the old library.
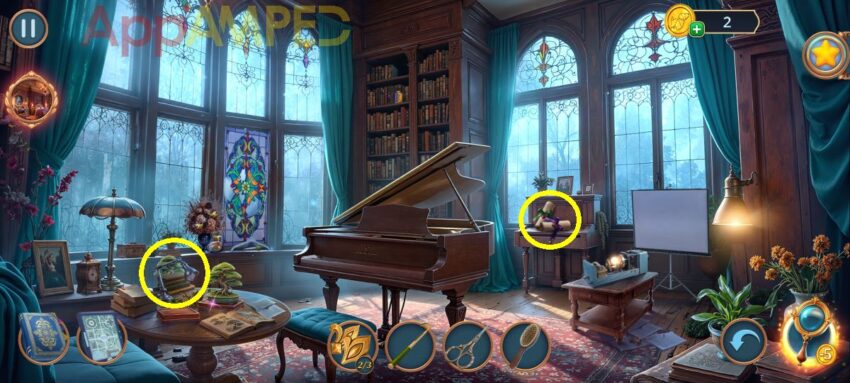
Note for collectibles: There are a few scrolls on this scene that I’ve circled for you.
Look at the stained glass, take the pipette and hanger. Add the cricket bat to the hanger to make a long hook, and use it to reach the top shelf of the bookcase and get the film slide.
Put the film slide on the film device to the right and find the differences between the 2 screens.
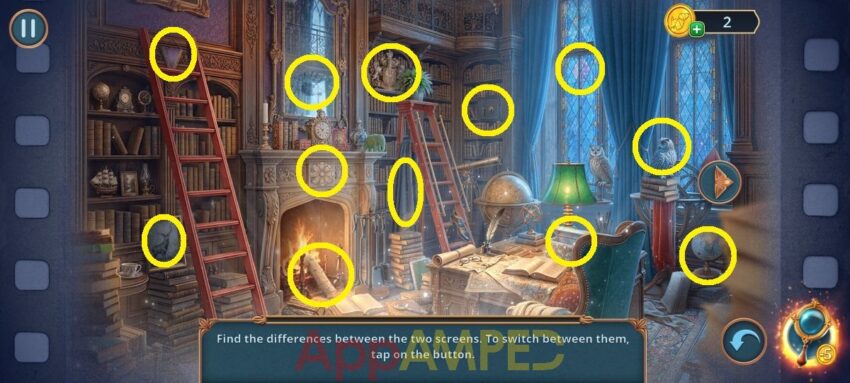
You’ll get a box of chocolate. Offer them to the wasps by the stained glass, and take the morbid coin (1/2) and the deep shell.
Go to the servant’s entrance at the window. Use the shell to dig in the pot and take the golden pattern (3/3). Go to the door here and put the golden patterns here, then enter to find Jamie in the butler’s room.
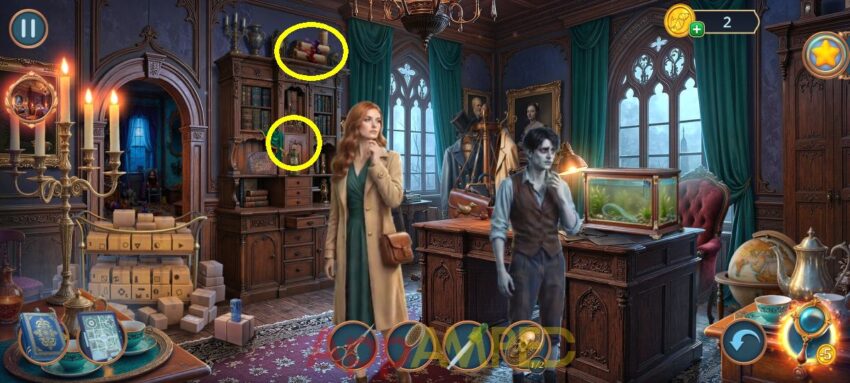
Note for collectibles: There are a few scrolls on this scene that I’ve circled for you.
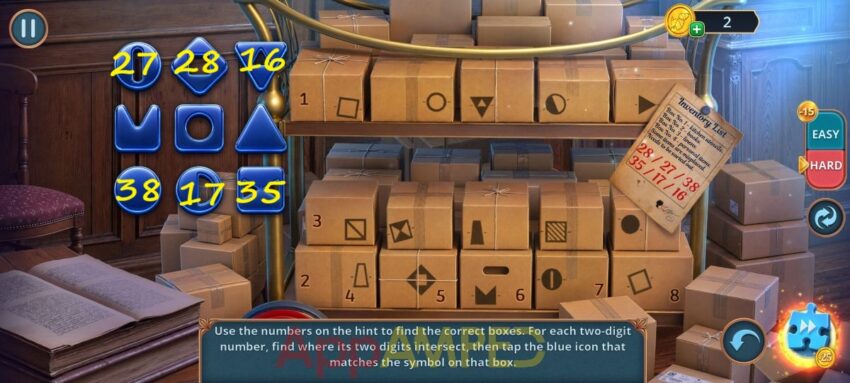
Take the aquarium filter from the boxes to the left, then use the scissors to cut the rope and take the glasses. Go to the bookshelf and take the oil lamp. Use the glasses to open the cupboard to find the supply records.
Put the supply records on the boxes. Use the numbers on the hint to find the correct boxes. For each two-digit number, find where its two digits intersect, then tap the blue icon that matches the symbol on that box.
You can now enter the servant’s quarters and explore.
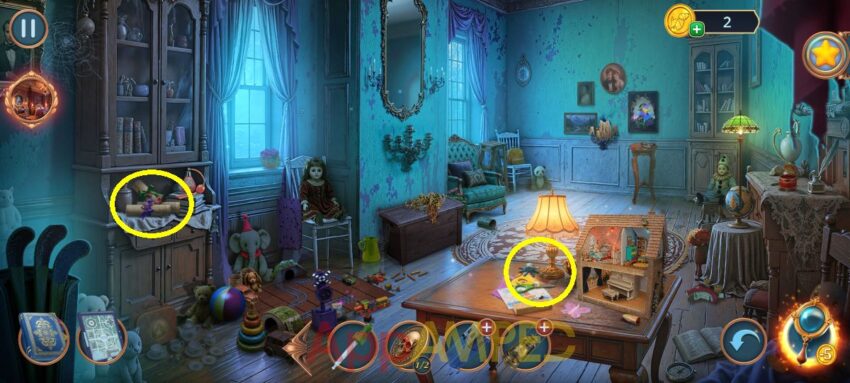
Note for collectibles: There are a few scrolls on this scene that I’ve circled for you.
Look at the table in front and take the lamp lever. Look at the toys on the floor and take the restoring solution. Check out the paintings on the wall, take the joint from the candles, then use the brush to scrub the wax to reach the magnet.
Go to the chest and use the magnet to look through the metal toys, then find all the items before you find the wood cutter. Go to the table and use the wood cutter on the piece of wood to make a handle for the brush.
Go to the paintings in the back, use the restoring solution and brush to recreate the picture.
You can go through the portal in the servant’s old room and explore.
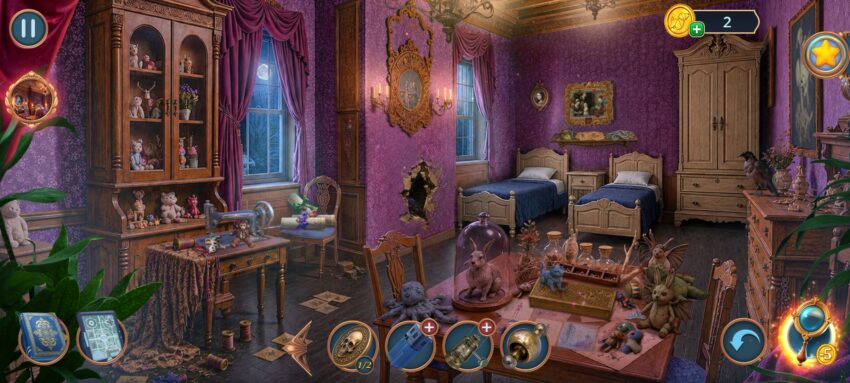
Note for collectibles: There are a few scrolls on this scene that I’ve circled for you.
Look at the sewing machine and take the broken cat. Take a look at the shelf above the beds and get the tube. Use the pipette to get some paint oil from the can here. Use that and the lever on the oil lamp to make it work.
Use the lamp to see inside the hole in the wall. Get the berries and the sewing machine valve. Go put it on the sewing machine to lift the needle, take the stained glass (1/4), and the morbid coin (2/2). Go to Count’s Old Bedroom.
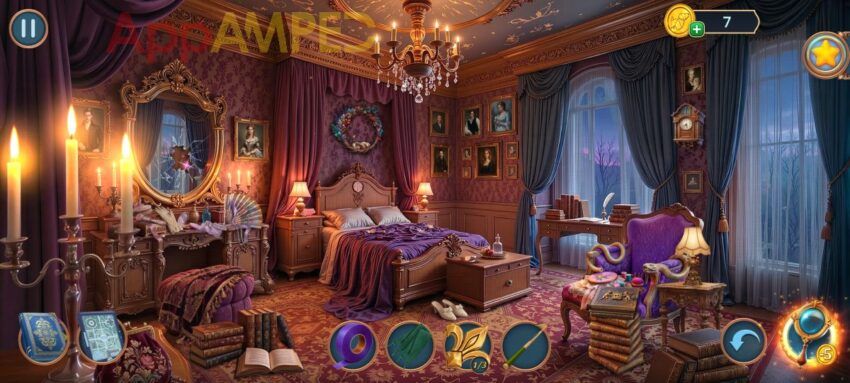
Look at the chair on the left, take the tatting shuttle (1/2), and clock weights. Put the weights on the clock between the windows, and take the tatting shuttle (2/2) and the eucalyptus leaves.
Check out the wreath above the bed to get the tatting thread. Now put the tatting shuttles and the thread at the broken window to get the lace glove. Go to servant’s old room and use the glove to get the mirror shard from the hole in the wall.
Get back to the broken mirror in the count’s old bedroom and put the shard inside the mirror to find a rattlesnake tail. Put the tail back on the chair with the snake to get Lydia’s pocket watch.
Put the watch on the clock on the wall to get the glue. Go to the servant’s room at the sewing machine and use the glue on the red gems to fix the heart amulet. Back to Count’s bedroom on the chair, to put the heart on the album and take Lydia’s photo.
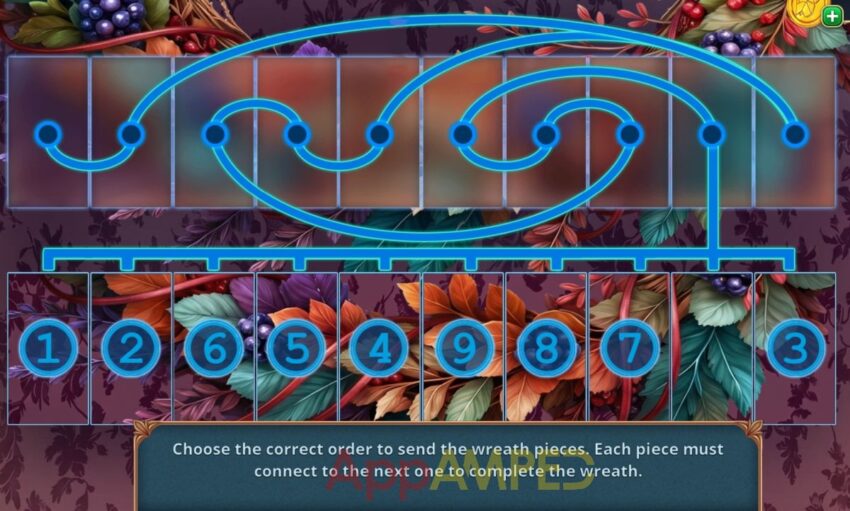
Above the bed, put the photo, the berries, and the eucalyptus leaves on the wreath. Choose the correct order to send the wreath pieces.
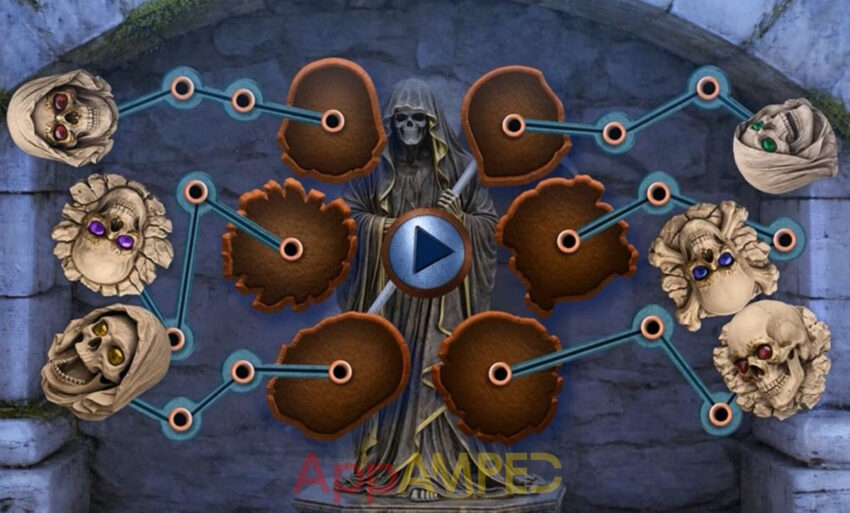
Go to the secret passage and put the 2 coins on the skeleton’s eyes, then take the bust of death and lemon. Put the bust of death on the stone table in the back. Choose the correct order to send the lock shards into place.
- 1st rotate once
- 2nd rotate 3 times
- 3rd rotate once
- 4th rotate once
- 5th rotate twice
- 6th rotate once
Take the stained glass (2/4) and figurine paw. Use that and the joint on the cat figurine. Go to the Servant’s room on the table in front and put the fixed cat on the box. You’ll get milk, an amulet (1/2), and a frame part.
Put the frame part on the painting frame on the wall. Move the crystals along the frame so their beams connect to the large blue crystal. It’s enough if you find the perfect 2 to connect the beam to the crystal. I think it was the dark blue 1st and the purple 2nd.
You’ll find another stained glass (3/4) and a twig. Go to the butler’s room and use the twig on the bird amulet that decorates the bag in the hanger. Take the toy part and a sponge. Put the sponge and the tube on the aquarium filter to fix it.
Add that to the aquarium and take the coral. Go to count’s study, look in the back at the window, then put the lemon, the coral, and the milk on the table to discover a new hidden object game. You’ll get an ink developer at the end.
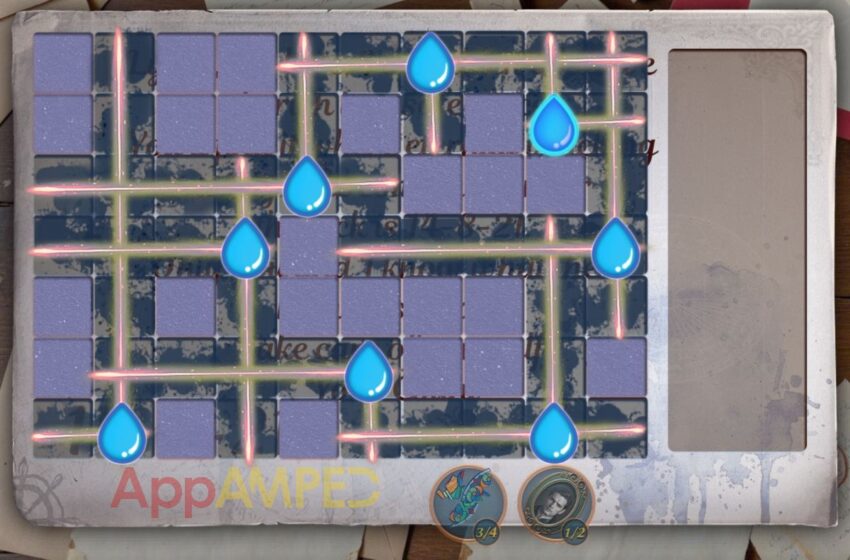
Look on the desk and use the ink developer on the paper here. Develop the text. Place the drops so that they cover all areas of the sheet.
Take the safe code and use it on the safe in the back. Take the wine bottle and stained glass (4/4). Go to the old library and put the stained glass pieces on the stained window to the left. Assemble the stained glass window.
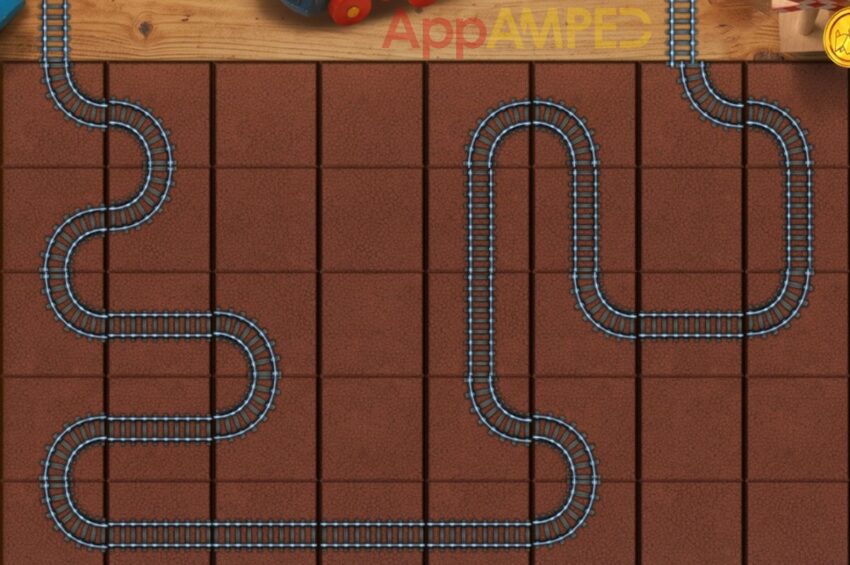
Take the chain and the fake tree. Put the tree on the support on the table next to the other tree. Take the coat pattern and railroad parts. Go to the servant’s quarters, look at the toys on the ground, fix the tracks with the railroad parts, and assemble the train set.
Take the submarine and screwdriver. Go to the butler’s room at the aquarium and use the submarine to scare the fish and get a ripper. Go to the coat hanger, put the coat pattern on the coat, then use the ripper to get the origami and the amulet from inside.
Look at the bookshelf here and put the two amulets on the board. Set up the family tree.
Take the hairpin and read the letter, then take the scissors. Use the scissors on Jamie to restore his voice. He’ll give you a golden needle and threads.
Go to the servant’s room, at the sewing machine, and use the needle and thread to sew the monkey, then take it. Go to the toy station table and put the toy part, the monkey, and the screwdriver. Assemble the mind-up monkey according to the blueprint.
Put the monkey now fixed inside the hole in the wall to get a reflector. Go to the servant’s quarter and put the reflector on the train toy on the floor. Take the grip and the wedding veil.
Check out the monster chest and use the grip to open it and look inside. Find the items that answer the riddles:
- What always goes, but never leaves the house? – watch
- What gets wet when it dries? – towel
- What has eyes but cannot see? – potato
- What has needles but doesn’t sew? – hedgehog
- What can be seen with closed eyes? – pillow
- What do you own, but others use more often? – card
- What goes up and down the hill, but stays in the same place? – map
- What doesn’t burn in fire or sink in water? – ice
- What can you break without even touching it? – heart
- What can be broken only once and never be fixed again? – egg
- What can show the future and reveal the hidden stories of fate? – tarot card
- What can stand rooted in the ground, grow leaves and fruit, and give air and fresh air? – tree
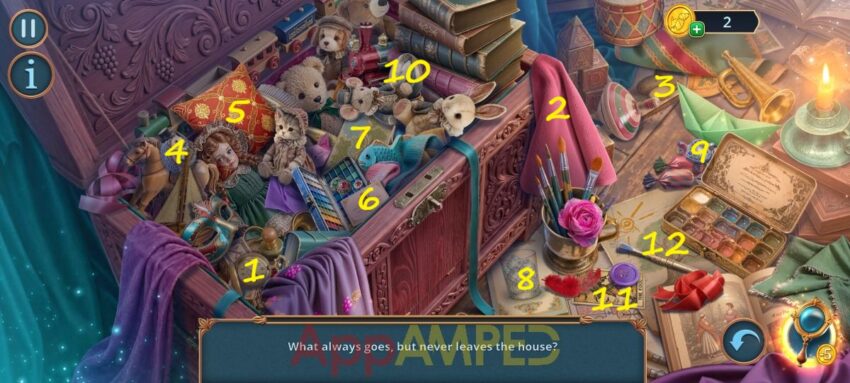
Take the pianist doll and put it on the dollhouse to get the melody. Go to the old library at the piano and put the melody here. Memorize the notes of the melody and play them in the correct order:
- 2 – 7 – 3 – 6 – 4 – 5 – 1
Take the curler and the lightbulb. Put the lightbulb on the projector and find the items in the photo.
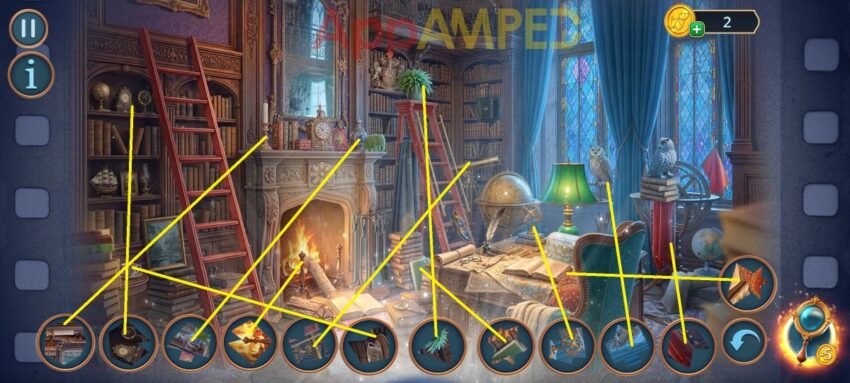
You’ll find an extension cord. Go to the servant’s entrance, put the extension cord on the iron board, and take the newspaper. Use it to make an origami by following the diagram. Right – R, Left – L, Up – U, Down – D.
- R – D x2 – R x2 – D x2 – L – R – L x2 – U x2 – L x3 – D – L – U – R – D – U – D – L x2 – R – L – U x3 – R x2 – D – U x3 – R x2 – L – R – L – R x3 – L – R x3 – L – R – D x2 – U x2 – D x2 – R – L – D
Give the paper mouse to the cat in the window. Take the rose, the rope, and the suction cup. Use the suction cup on the glass case behind the iron and find all the items needed.
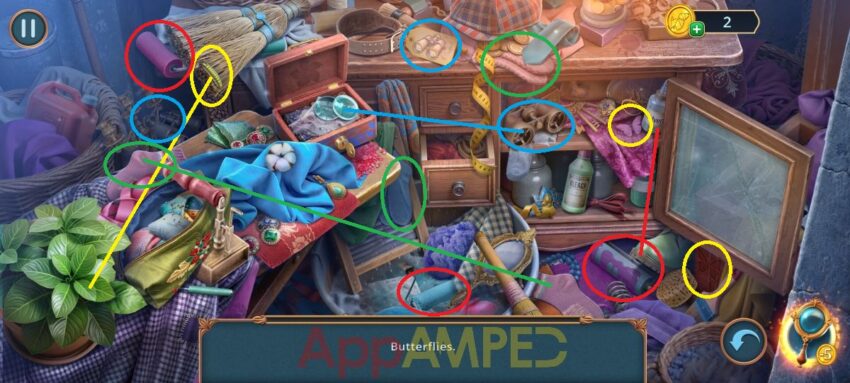
Take the engraver and go to the count’s study. Use the engraver on the stone at the workbench to make a ring. Put the ring, the rose, the hairpin, and the wedding veil on the fortune-teller globe. Complete the image to finish Chapter 3.
Broken Vow – Chapter 4 Walkthrough
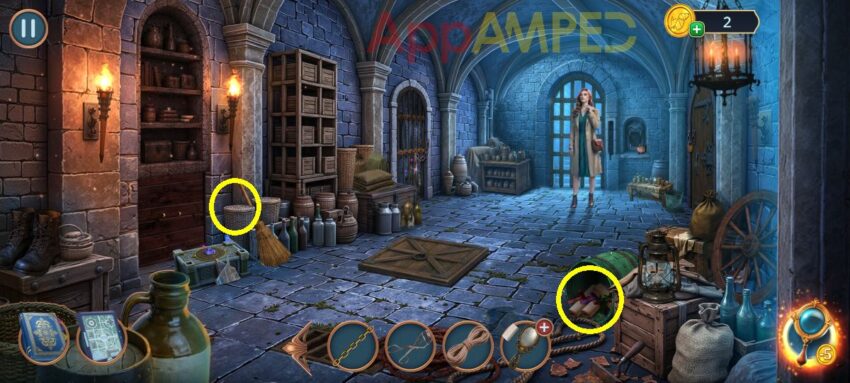
Note for collectibles: There are a few scrolls on this scene that I’ve circled for you.
At the start of the chapter, you’ll find a magic mirror. The note on the mirror says, “Give me an item that nature itself has left its mark”. On the left, next to the chest, there are some tile shards for you.
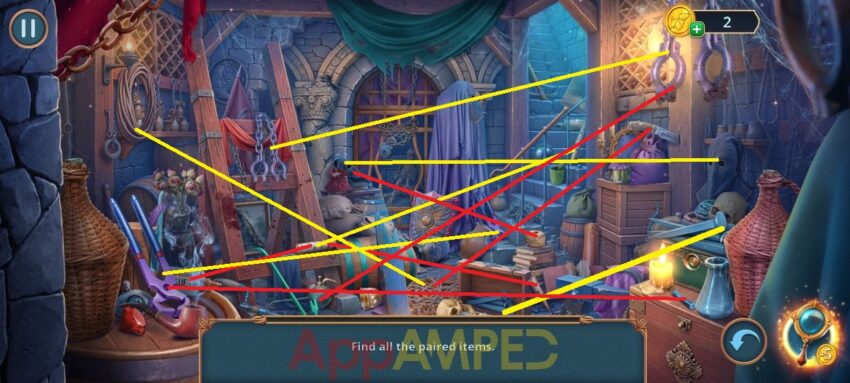
Look at the teeth behind her, take the pig figurine, and use it to open the wine bottle to get the key. Check out the door on the right, use the key to open the lock, and find all the paired items. The red line is fixing some of the items; the yellow line pairs them.
You’ll find a file. Go to the prison door and use the file to cut the chain. Take the bone, then follow the tracks to open the trapdoor to the wine cellar.
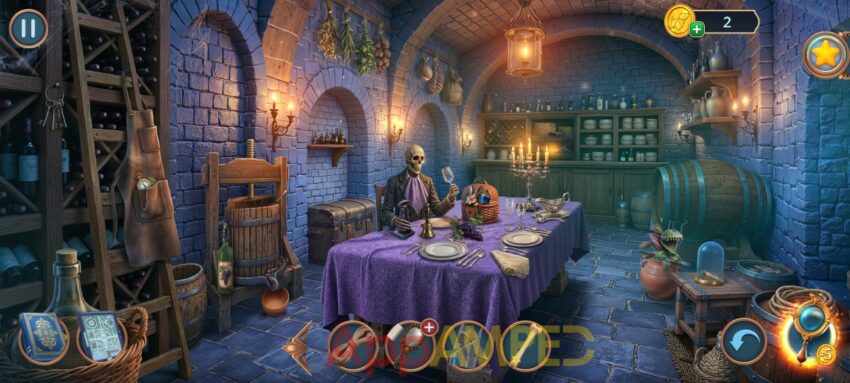
Go to the table and take the grapes and the Parmesan knife. Look at the shelves in the back, take the spice pouch, then use the knife to get some cheese. Check out the hungry plant on the right, give it the cheese to get the handle.
Go to the wine presser on the left, use the handle to lift it, take the spice scoop, and put the grapes here. Get out of the cellar and go to the gates in the back.
Put the chain to connect to the one in the wall, then put the bone in the mouth to open the gate and go through to explore the sanctuary.
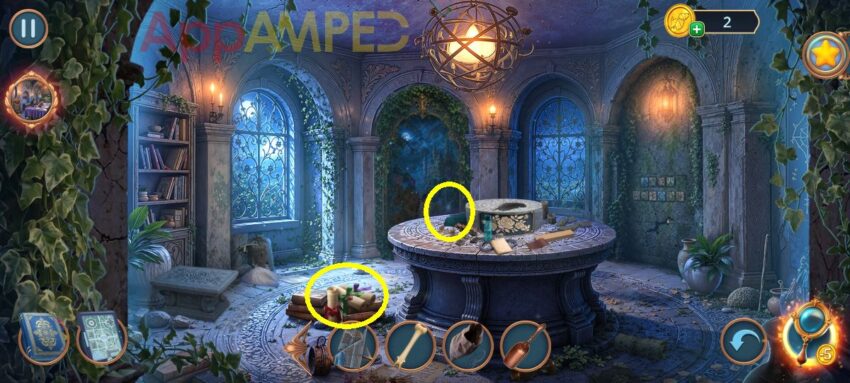
Note for collectibles: There are a few scrolls on this scene that I’ve circled for you.
Check out the window on the left, use the scoop and the bag to get some bone dust. Look on the altar and read the note, then take the shackles and micellar water. Go to the wall with the tiles and use the curler to get the cotton from the wall.
Check out the painting between the windows and use the micellar water and the cotton to clean it, then find the shadows needed.
You’ll find a magic agate that you can use on the magic mirror. After talking to Margaret, take the handle. Go to the column next to the left window and put the handle on the pickaxe.
Use the pickaxe on the wall with the tiles. Find pairs with similar crack shapes to destroy the wall. You can go through the wall to the Secret Passages.
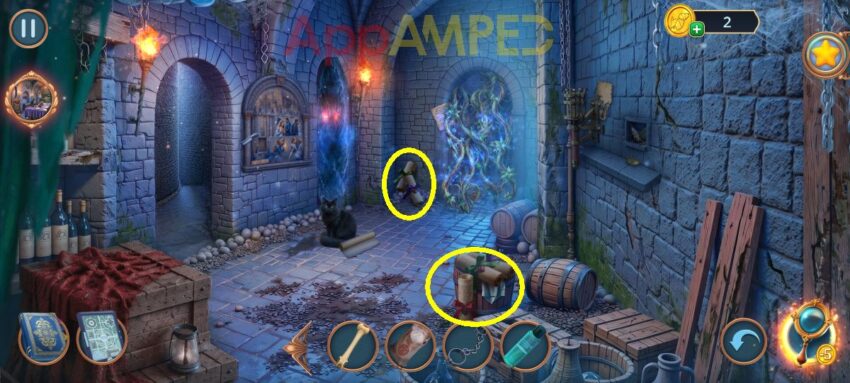
Note for collectibles: There are a few scrolls on this scene that I’ve circled for you.
Take the blueprint from the cat. Look at the painting on the wall and use the rope to get the razor. Put the tiles here and the micellar water. Look at the weeds and use the razor to cut them, then read the note.
Take the gear and the flint and steel on the ground. Use the flint and steel on the torch to the right, take the toy moth, and go give it to the cat. Now find each item for each hint:
- King = Crown + Throne
- Dice = Bone + Cup
- Carnival costume = Mask + Feather
- Hourglass = Clock + Sand
- Flashlight = Battery + Lamp
- Campfire = Fire + Log
Take the dry plaster and check the painting next to the cat again. Put the dry plaster next to the micellar water. Use the hint to select the numbered mural segments in the correct order.
- 5 3 1 6 8 2 10 4 9 7
Now you can go up the stairs through the door into Lydia’s bedroom.
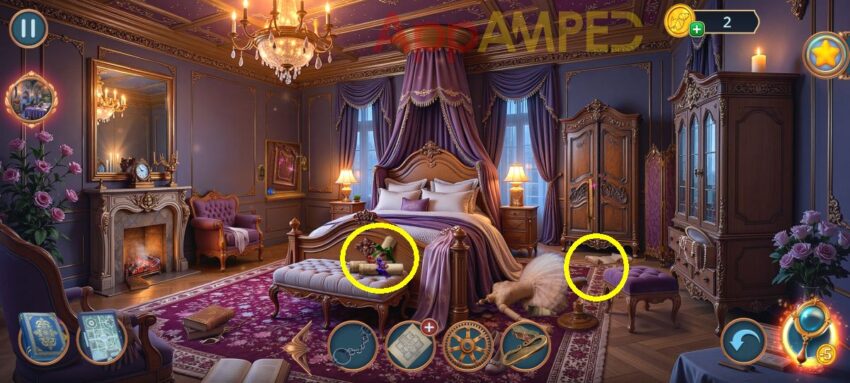
Note for collectibles: There are a few scrolls on this scene that I’ve circled for you.
Take the belt from the closet. Look at the mannequin on the floor and take the torn photograph. Go to the fireplace and take the diary. Look at the door on the wall, use the shackles to pull the lever to get the stand fixture.
Go back to the mannequin and zoom in on the broken stand, then use the stand fixture to fix it and get the rose. Go back to the basement and give the rose to the statue in the cell to get a decoder.
Put that on the diary. Drag the bars and assemble them into a single stencil to reveal the hidden text. Take the photo piece (1/3) and the tiara.
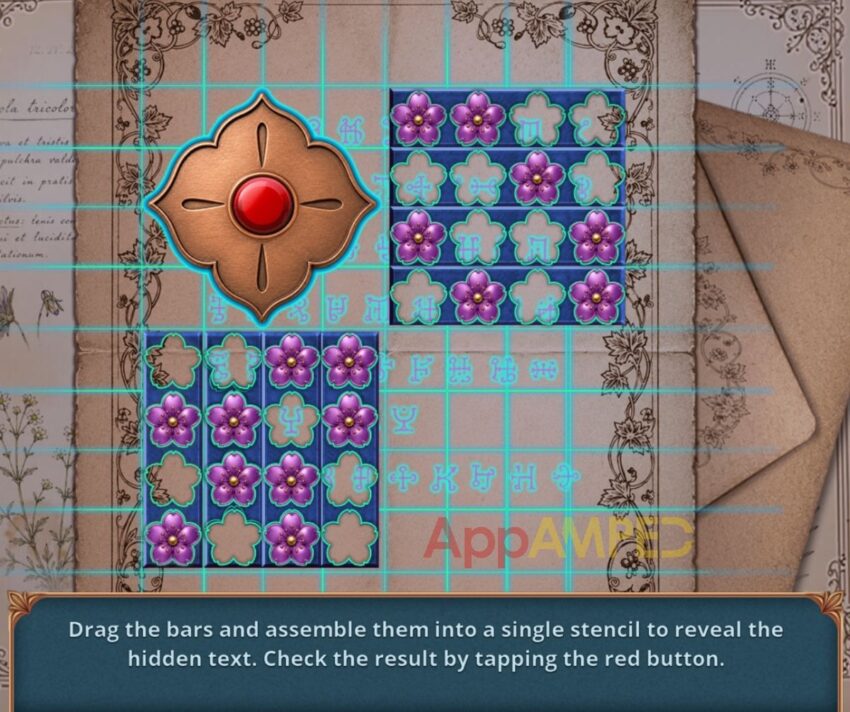
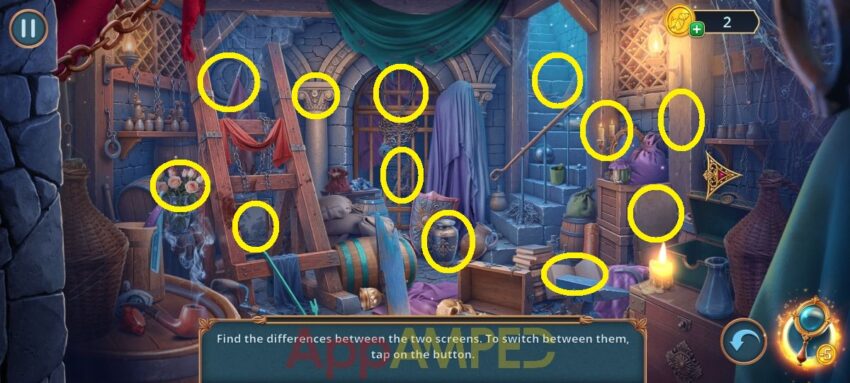
Take the photo piece (1/3) and the tiara. Check out the shelves behind the chest and use the tiara to open the wooden piece. Take the lamp and put it on the hook of the door on the right then find the differences between the two screens.
Take the time capsule, then go to the secret passage at the shelf on the right, put the cocoon in the time capsule, and take the butterfly. Go to the arch before the passages and use the butterfly to find your way.
- 2nd path – when both tokens are on the far left and right.
- 3rd path – when the top token starts moving from right to left, and the other is on the left.
- 1st path – when the bottom token moves from left to right and just passes the footprints.
You’ll find the abandoned room and can explore further.
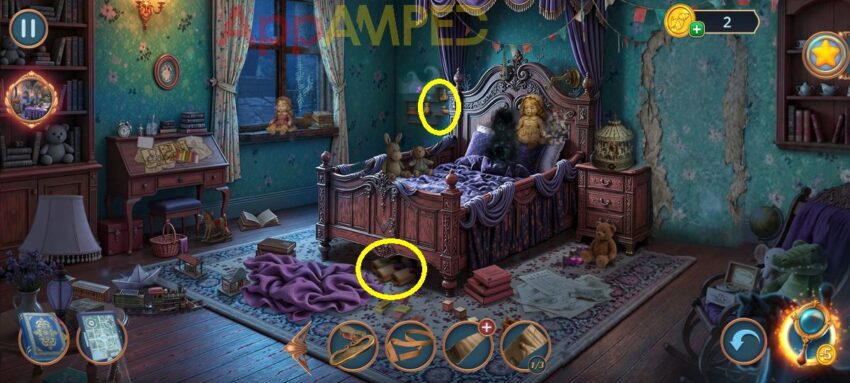
Note for collectibles: There are a few scrolls on this scene that I’ve circled for you.
Look at the window and take the doll (1/2) and the solvent. Check out the bed, put the gear on the merry-go-round lamp, and take the ship. Go to shelves next to the bed and put the ship here, you’ll get a dart (1/3) and a wax crayon.
Put the wax crayon next to the others on the desk, then color the drawings using opposite colors.
- red -> green
- yellow -> purple
- blue -> orange
Put the colored drawing in the room to compare and find the door to the abandoned closet.
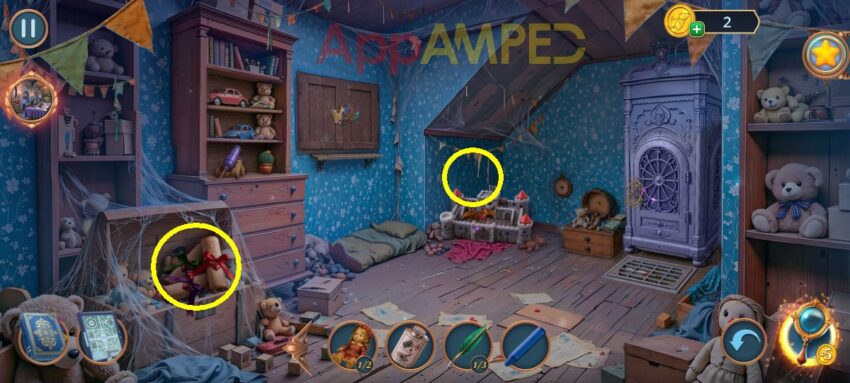
Note for collectibles: There are a few scrolls on this scene that I’ve circled for you.
Go to the closet in the back, use the belt and the bone to open the grate, then take the flour, the dart (2/3), and the apron. Look at the cupboard on the wall, use the solvent and apron to clean the doors, then take the photo piece (2/3) and the fresco piece.
Go to the sanctuary to use the fresco piece on the wall painting, then find all the cropped images in the painting. Take the parchment and put it on the floral stone on the left, then use the wax crayon to draw the print.
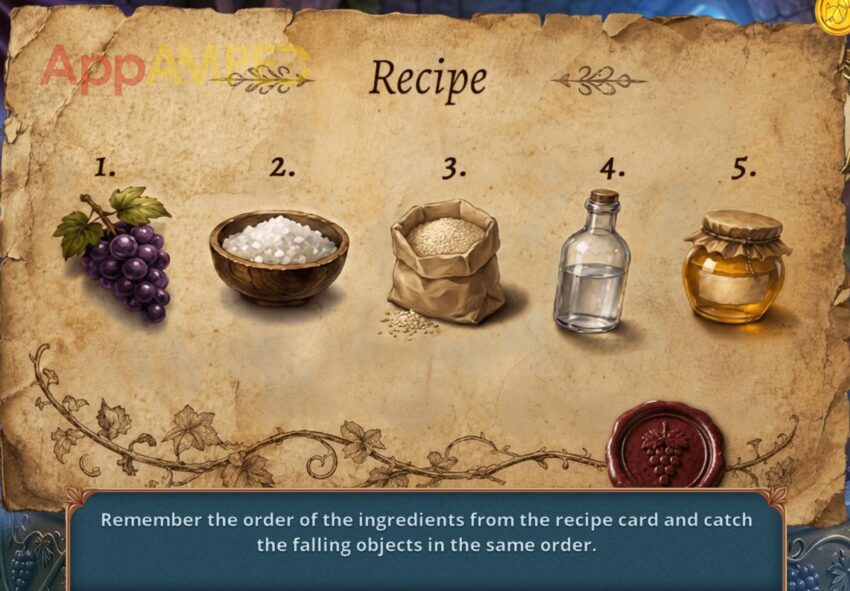
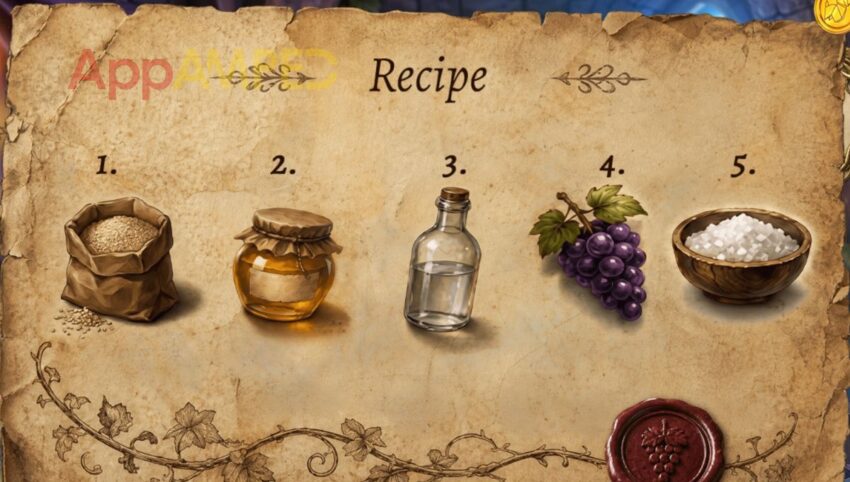
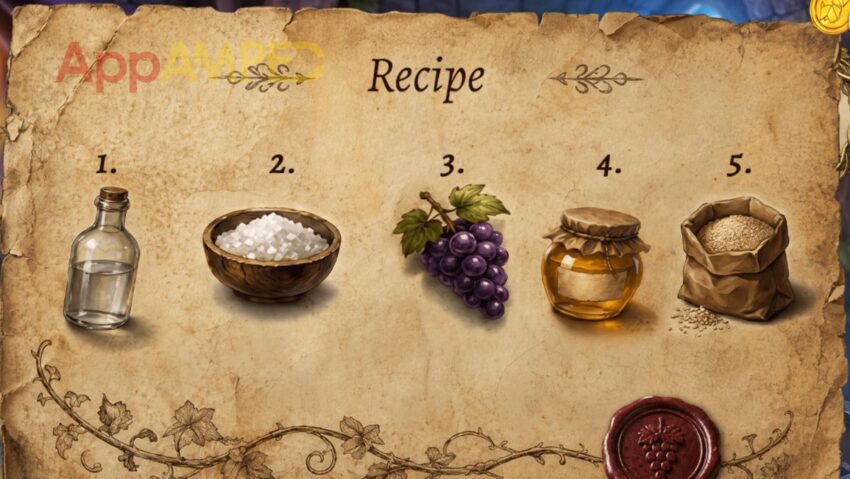
Put the drawing on the altar, take the cap, and go to the wine cellar at the wine presser where you put the grapes. Put the bone dust in as well. Remember the order of the ingredients from the recipe card and catch them in the same order.
First recipe:
Second recipe:
Third recipe:
Take the wine bottle and pour it into the wine glass the skeleton is holding, and put some cheese on his plate; then take the lady figurine. Go to the sanctuary and put the figurine on the altar next to the man to get the diamond.
Go back to the wine cellar and to the glass dome with the carrot inside. Use the diamond to cut off the glass and take the carrot amulet. Give that to the rabbit on the basket to get the freezing spray.
Use the spray on the fire-breathing lizards on the shelf to get to the book and read it. Go to Lydia’s room and use the bonnet to get the belt buckle out of the fire. Use the buckle on the closet in the back to open it, and find all the materials to find the castle tower.
Go to the abandoned closet at the toy castle and put the tower on to find gelatin, tracing paper, and cutters. Use the cutters on the wires used to keep the closet closed. Find the correct sequence of turns and press play.
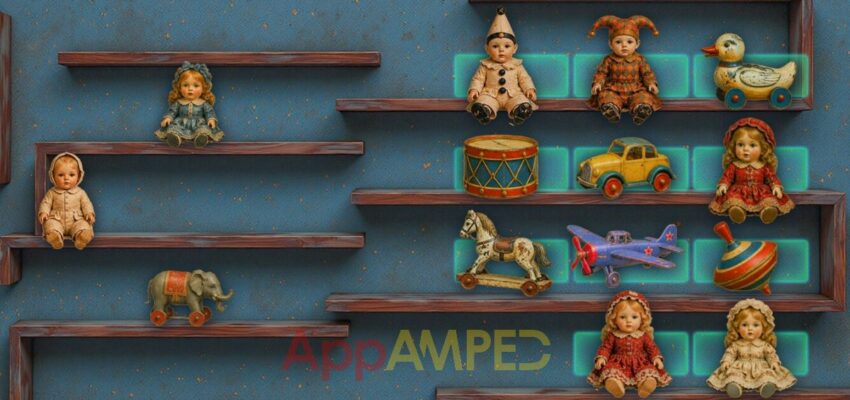
You’ll find a dream catcher. Go to the abandoned room and hang the dream catcher above the bed to get the second doll (2/2). Put both dolls on the shelf next to the ship. Make toy groups until only one toy remains.
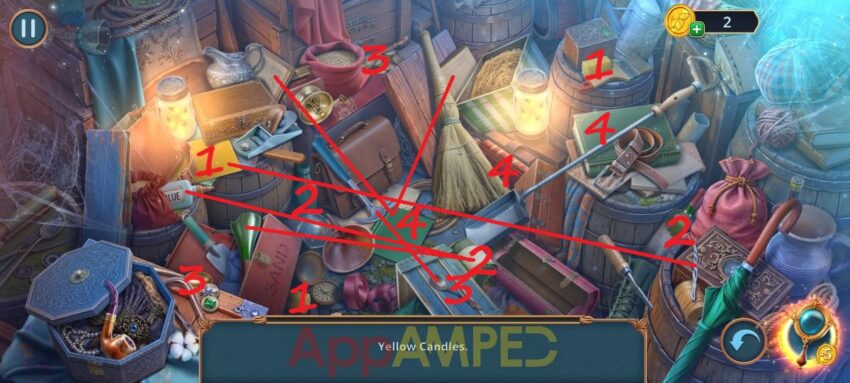
Take the drive coil and the pet brush. Go to the Secret Passage and use the pet brush on the cat then look through the items for all the objects needed.
Take the carving kit, then go to the sanctuary and put it on the altar to make a drawing ruler. Open the Mansion Blueprint, use the ruler and the tracing paper, then drag the pieces onto the blueprint to restore it and get the ball.
Go to the abandoned closet and put the ball on the shelf with the toys, in the cannon. Use the flint and steel to fire it. You’ll get a photo piece (3/3) and a knight toy. Go to the toy castle and put the knight there. You’ll get a hook, a crystal (1/2), and a dart (3/3).
On the panel on the left wall there’s a board where you can use the darts. Launch them in the correct order so that they reach the desired positions on the target: 4 – 2 – 3 – 5 – 1. Take the chess piece and glycerine. Go to the abandoned bedroom, go to the desk, and put the glycerine, gelatin, and flour together to make glue.
Open the thorn photograph, add the glue and photo pieces to get the wedding photo. Go to Lydia’s old room, inside the closet, and put the wedding photo here; then put the items shown below in the right place.
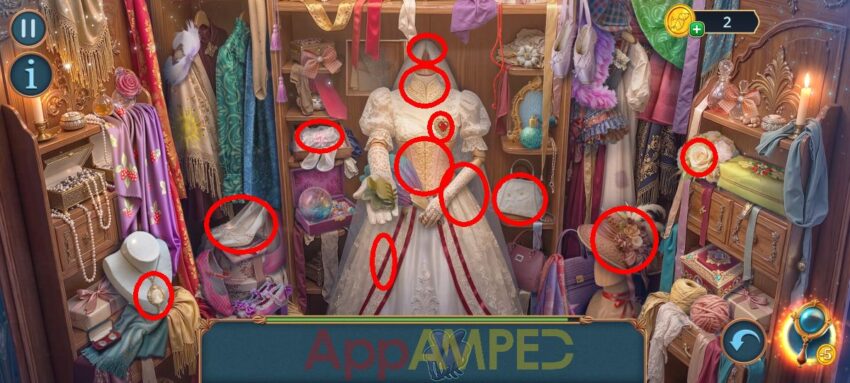
Take the hair clip, then go to the abandoned closet and use it to get the control button from the cactus on the shelf. Go back to Lydia’s bedroom, at the door in the wall, put the drive coil and the button there.
Assemble a working diagram of the elevator mechanism.
After the new development, you’ll find a soul catcher and be able to explore the Count’s Study.
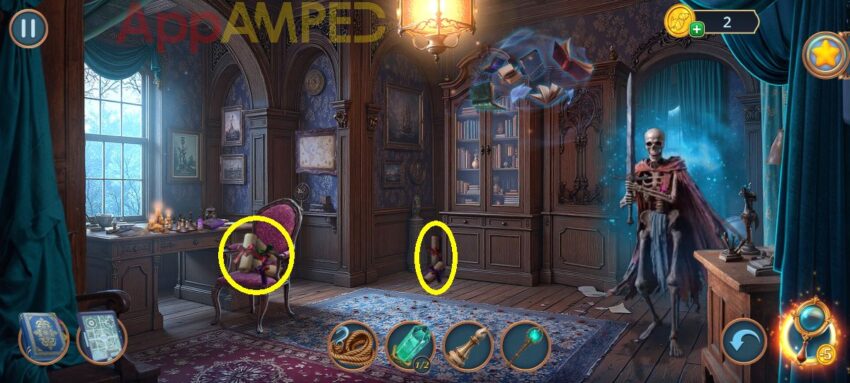
Note for collectibles: There are a few scrolls on this scene that I’ve circled for you.
Look at the floating items and use the hook to get a suction pistol and a compass. Go to the framed map on the wall, hang the compass on the frame to find a comb.
Check out the desk and take the crystal (2/2), then use the comb to clean the melted wax to find a note and incense. Use the incense on the skeleton.
- left x3 – down – right – down x 2
Take the tray behind and go to Lydia’s bedroom. Use the tray to look up the chimney in the fireplace, and then use the pistol to get the head. Put it on the mannequin and find the shadow that matches each pose.
Take the chess piece. Go to the count’s study, at his desk, put the two chess pieces here, then take the hot air balloon. Go to the map and put the hot air balloon on it. You’ll find a small mirror.
Go to the basement and put the crystals on the chest, then add the mirror, and you’ll find a henna inside. Go to the abandoned bedroom at the window and use the henna on the glass. The ghost will give you a key.
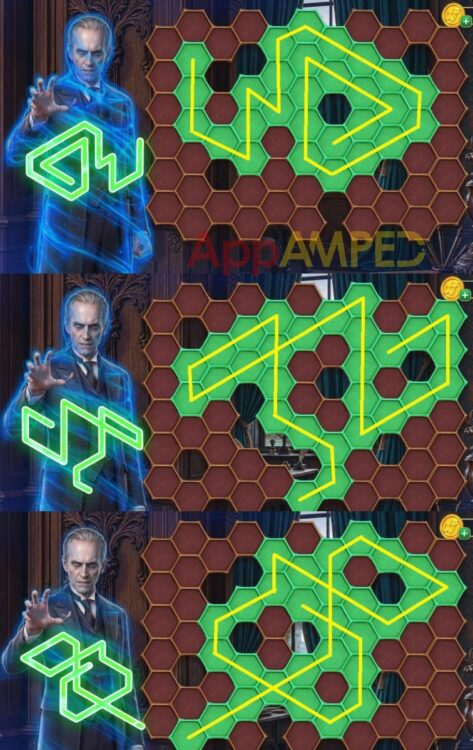
Go to the count’s study at the flying books and use the key to open the book. Read the note and take the soul flask. Use the soul catcher and the soul flask on the spirits around the skeleton. Use her soul to fight the evil.
Wrapping up
A great end to a thrilling story. Fighting evil while doing puzzles and mini-games will always be my favorite way to spend my time. If this was a helpful walkthrough, I’m glad I was able to assist your journey.
You can find more puzzle adventure game walkthroughs on here. If you’re looking for more games like this one, you can always try Artifact Seekers – Poltergeist House or Icebound Secrets 4: House of Memories.

Aylin is a content creator and co-founder of App Amped. She was a huge Tomb Raider fan before moving on to more casual titles. She spent way too much time tending for her FarmVille farm as well as playing text-based browser games. Now she plays and writes about mobile games, creating in-depth walkthroughs and useful guides.
Wheres the full walkthrough of broken vows
Shame only half the game is coverd
Working on the 3rd Chapter right now. I had to cover a more urgent game, but I’m back. Sorry for the long wait!